Transfer Funds
An ARK transfer allows a user to broadcast a transaction to the network and send ARK coins from one ARK wallet to another. As such, this transaction type provides the utility of store-of-value and value transfer. It also contains a special data field of 255 bytes known as the VendorField which allows for the storage of raw data, code, or plain text on the blockchain. The Memo (also known as a VendorField for ARK) is both public and immutable and serves a function within ARK SmartBridge Technology. The following information will explain how to:
- Initiate a Transaction
- Enter Transaction Details
- Review the Transaction
- Authenticate the Transaction, and
- Complete the Transaction
Watch this helpful tutorial video on How to Transfer Funds in ARKVault
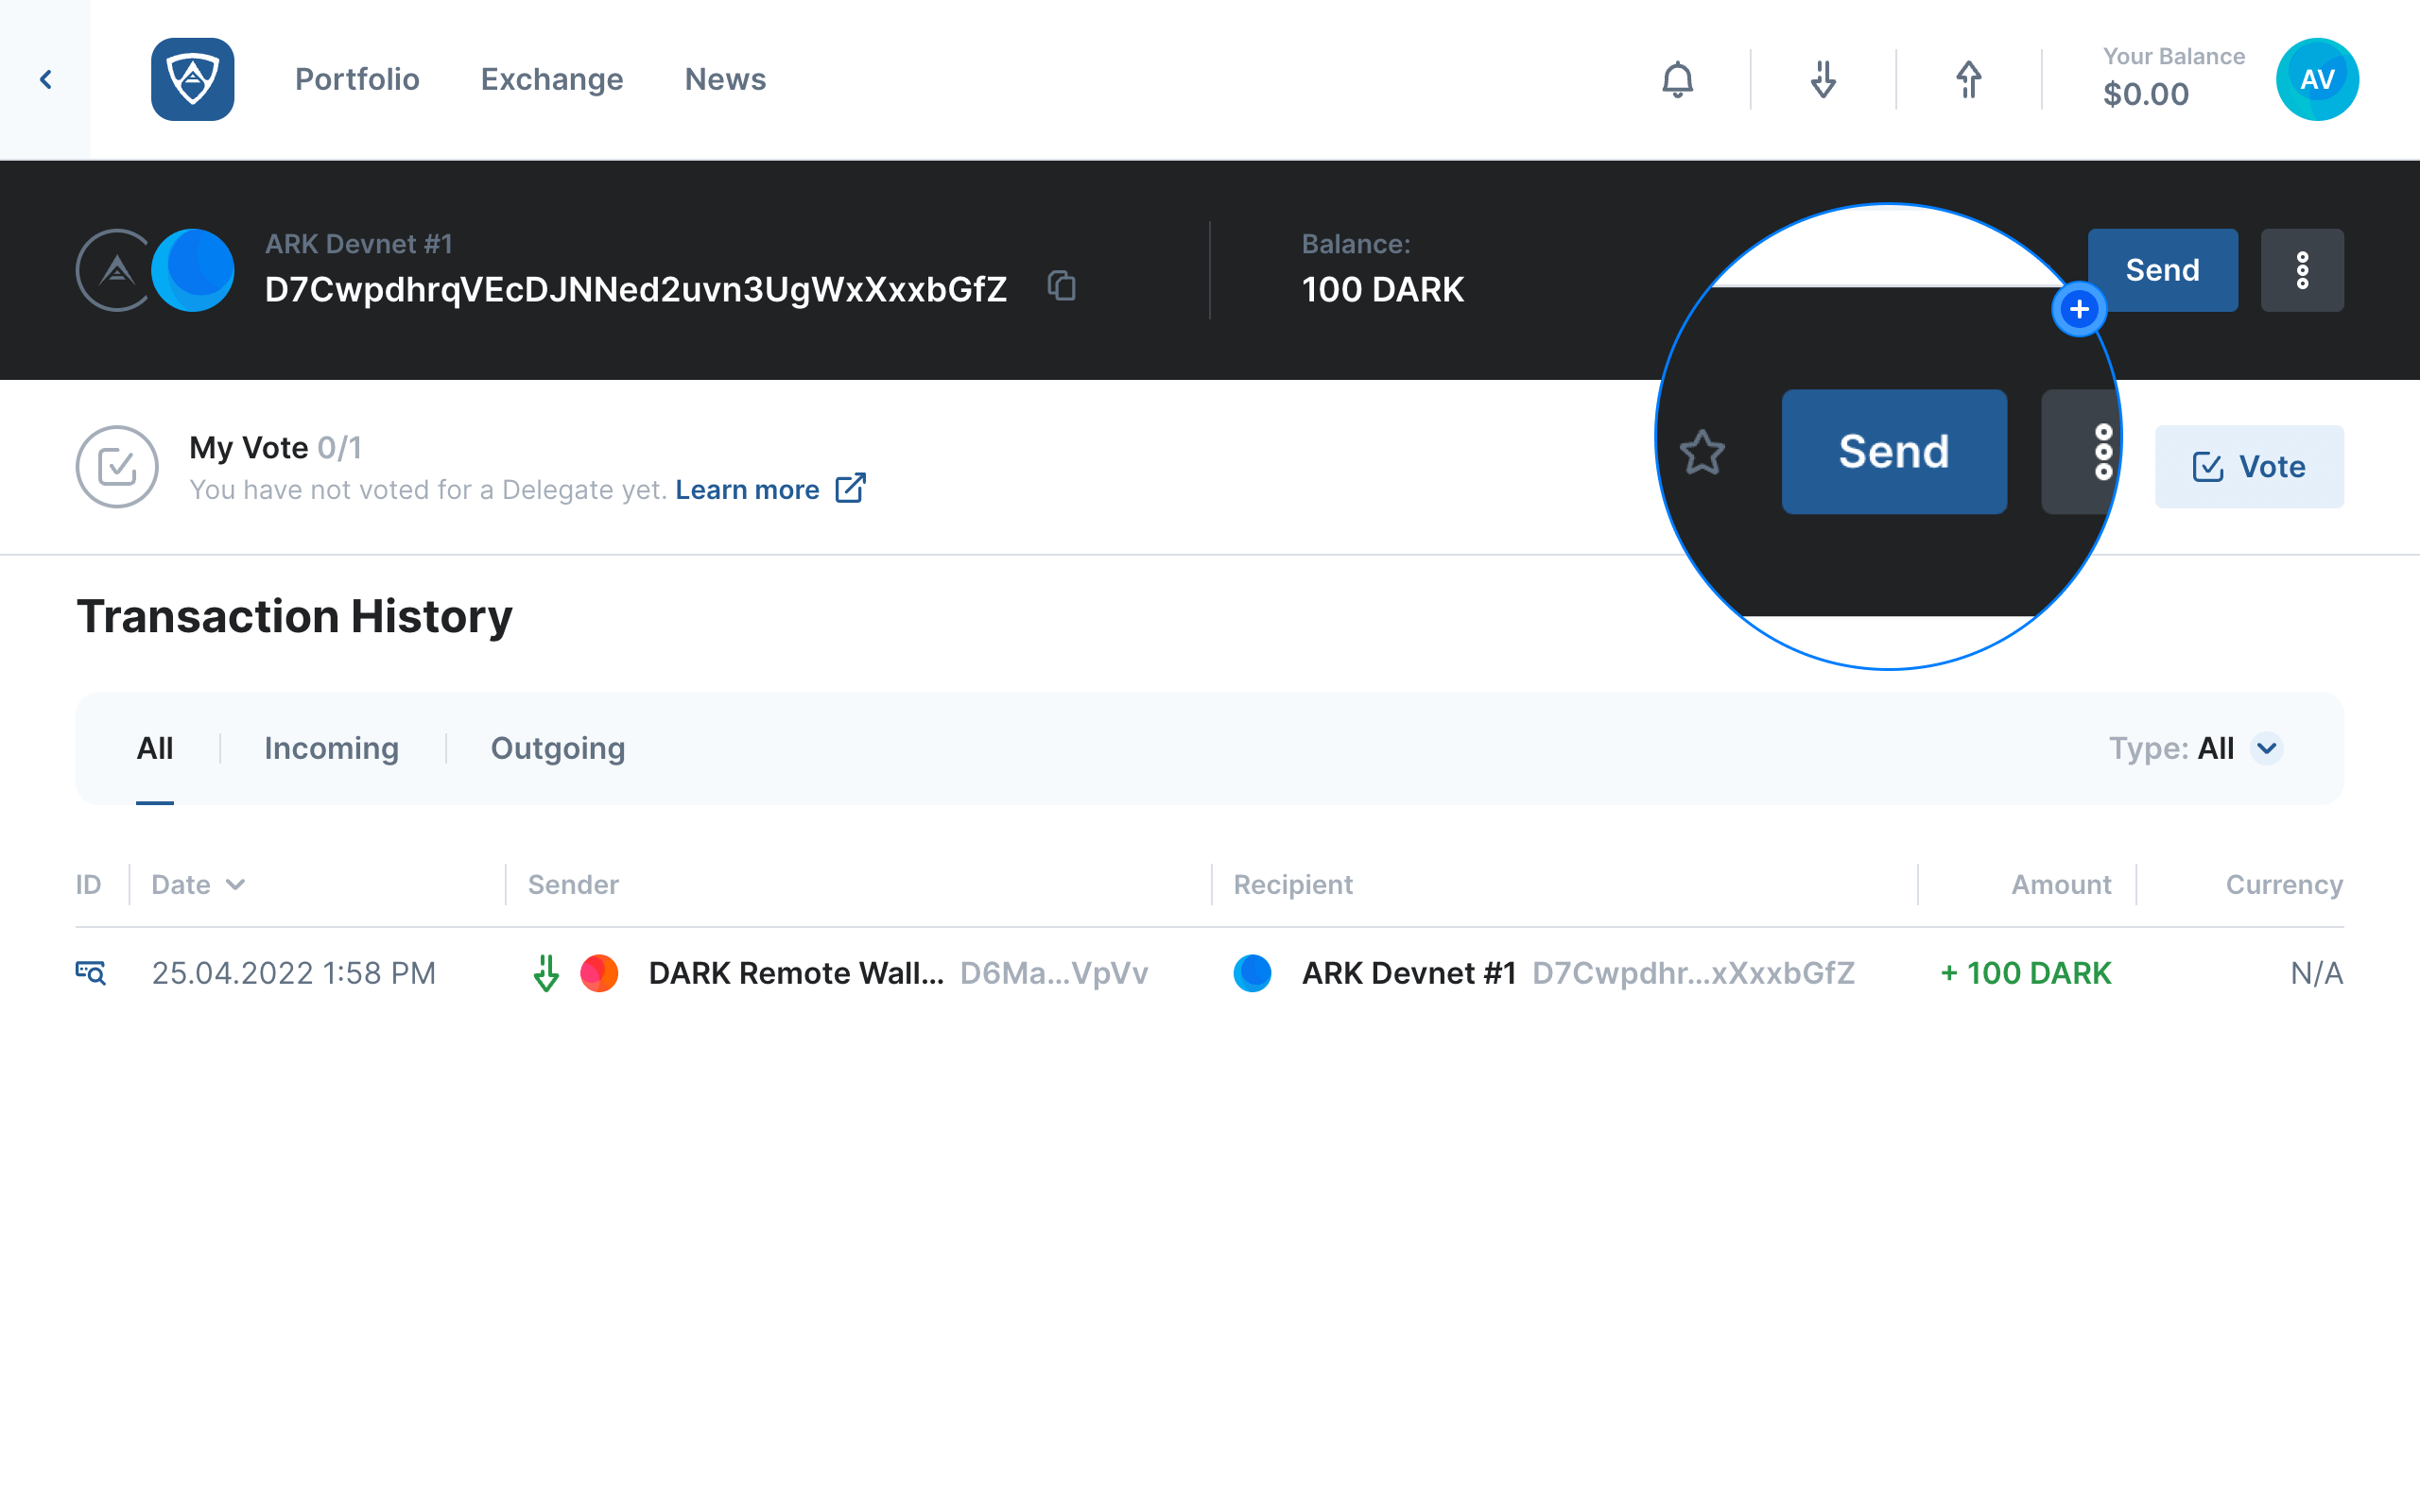
Initiate a Transaction
While viewing the wallet from which you wish to transfer funds, click the Send button located in the upper right corner of ARKVault.
Enter Transaction Details
The Send page will appear. Here you will enter in details and/or select options in order to successfully transfer funds to one or more recipients.
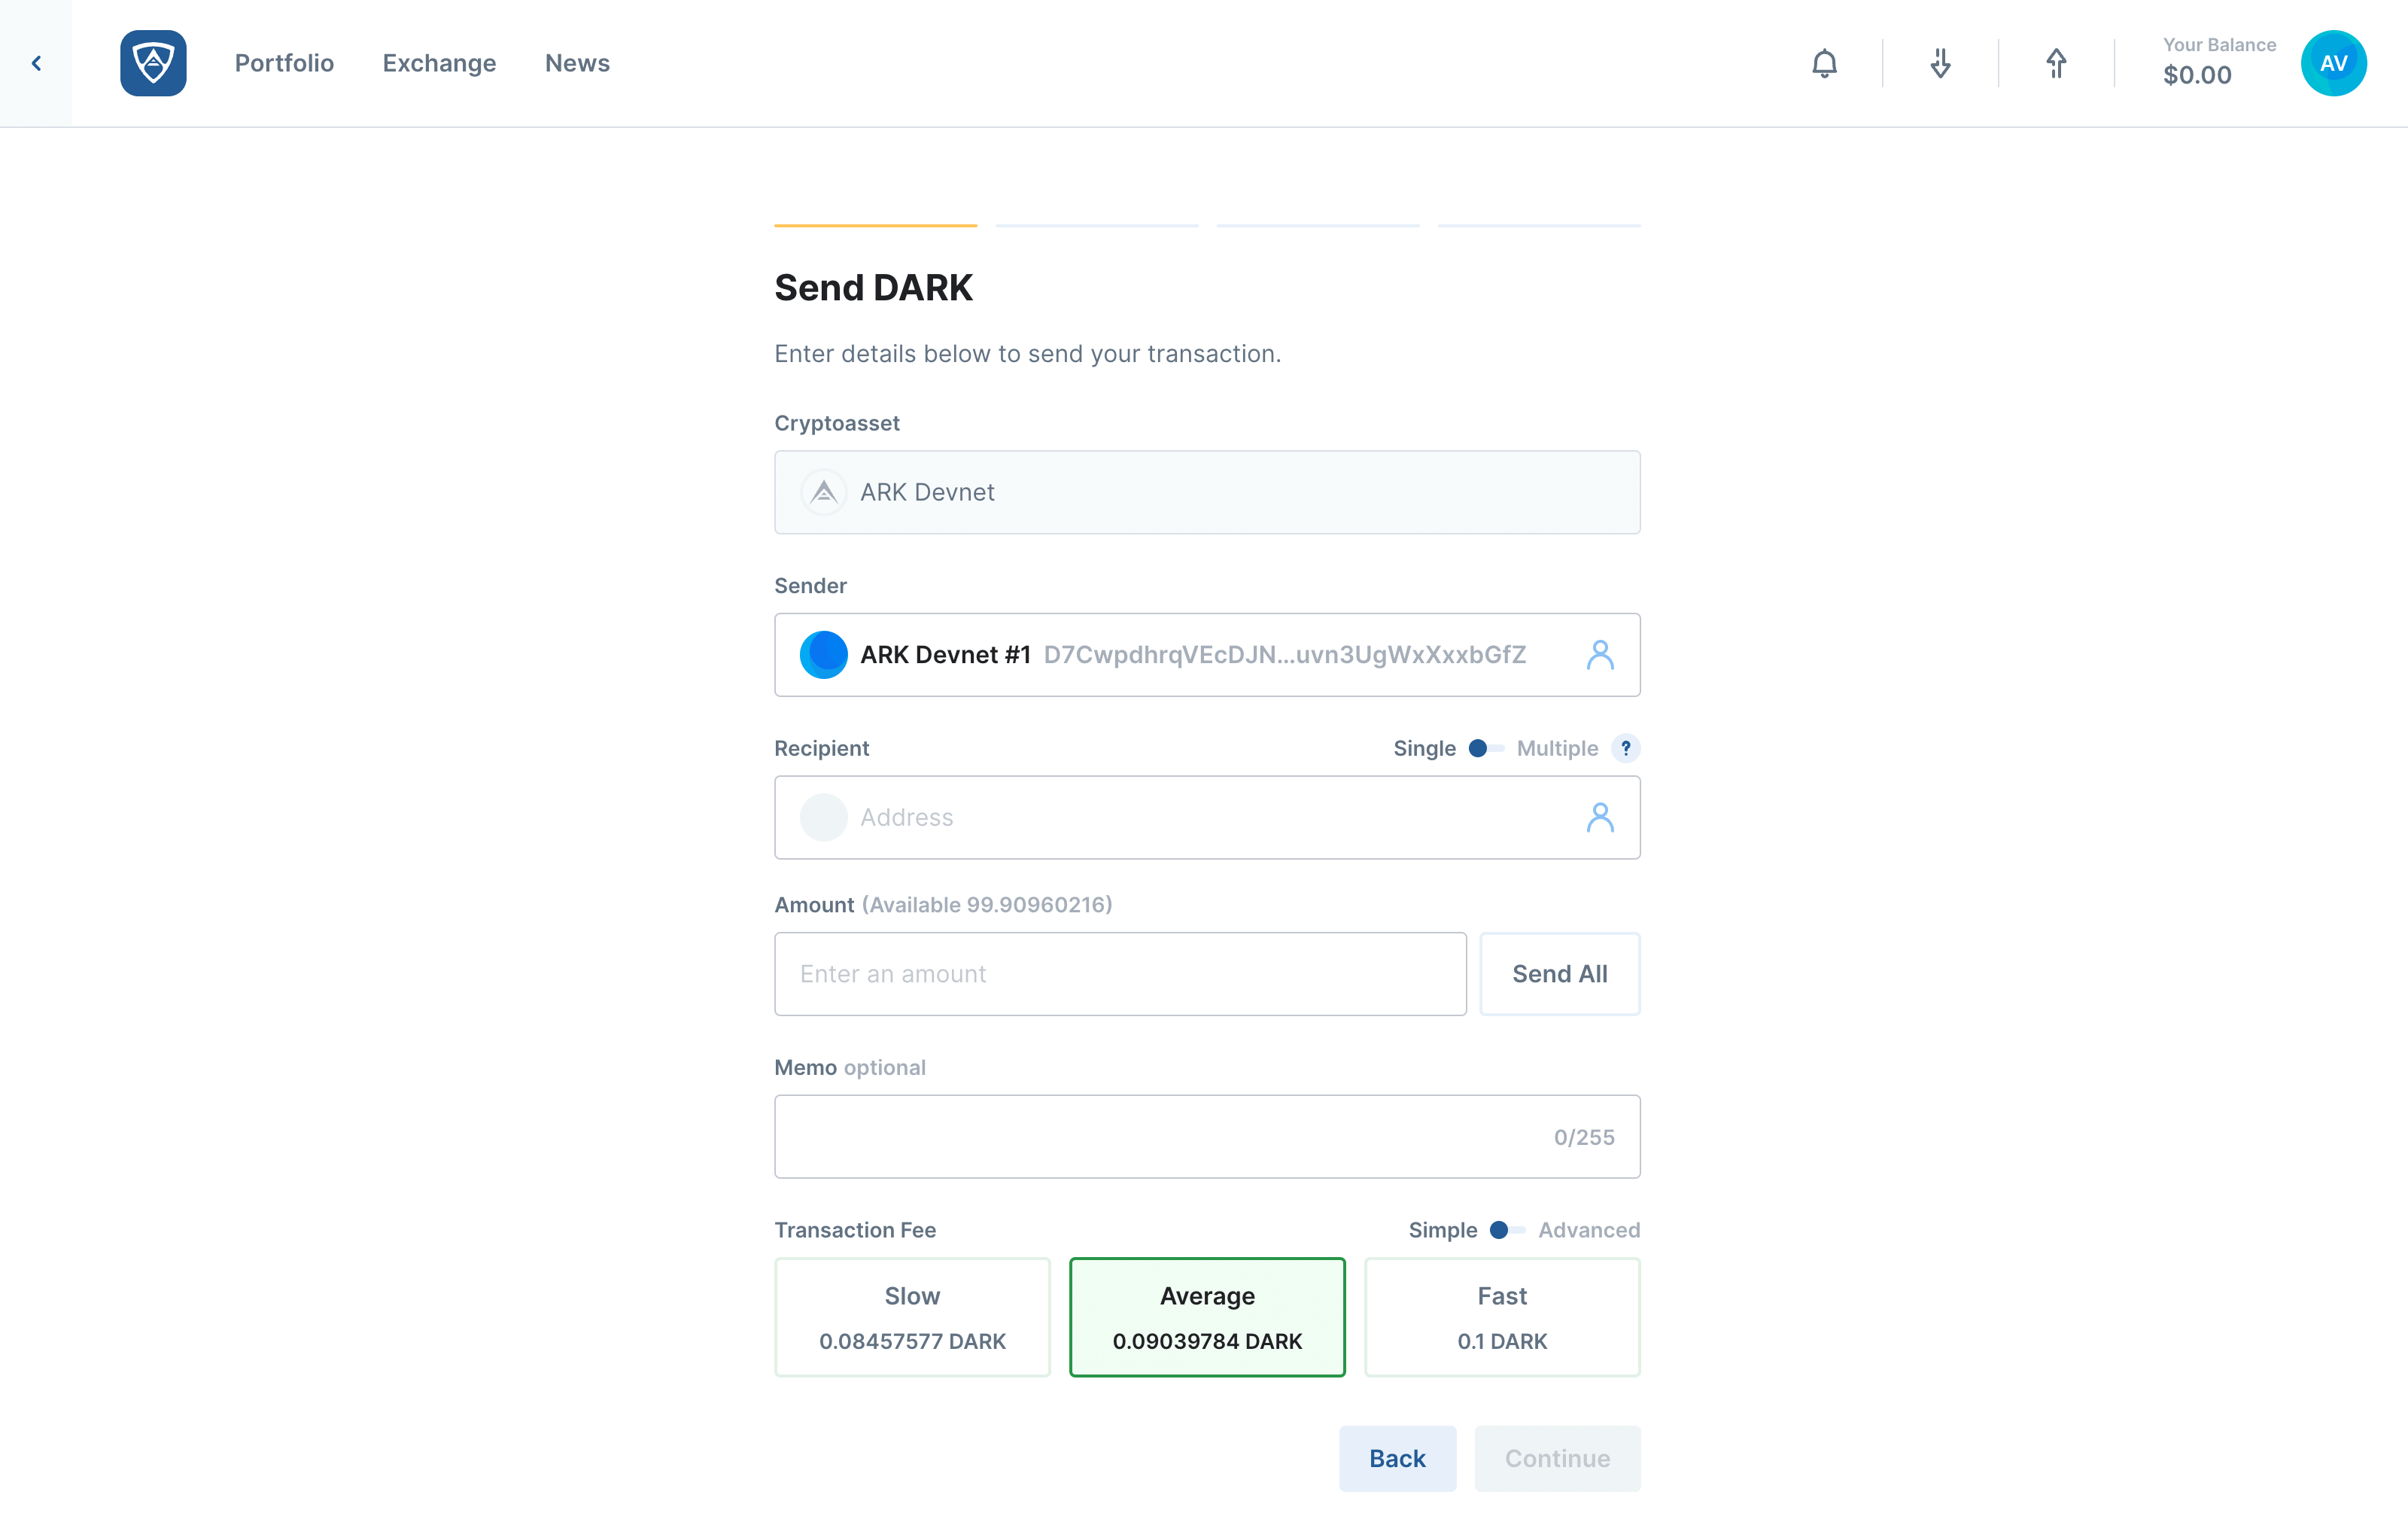
Recipient:
- The destination address to which you wish to transfer funds
- Ensure that you enter or select the correct recipient address as sending to an incorrect address typically means a loss of funds
- You may send to either a single recipient or select up to 64 different recipients
Help
To find out how to transfer funds to multiple recipients, visit the Multi-Payment page.
Amount - The total amount of ARK you wish to transfer.
Memo:
- This is also known as the VendorField
- It is an optional field that permits up to 255 characters
- You may enter a public message here if you so wish
Fee:
- This is the cost of transferring funds and is rewarded to the Delegate who forges your transaction
- You may select a Slow, Average or Fast fee. Alternatively, you may switch to Advanced and enter a custom amount if desired
Help
Learn more about ARK transaction fees by visiting the Fees page.
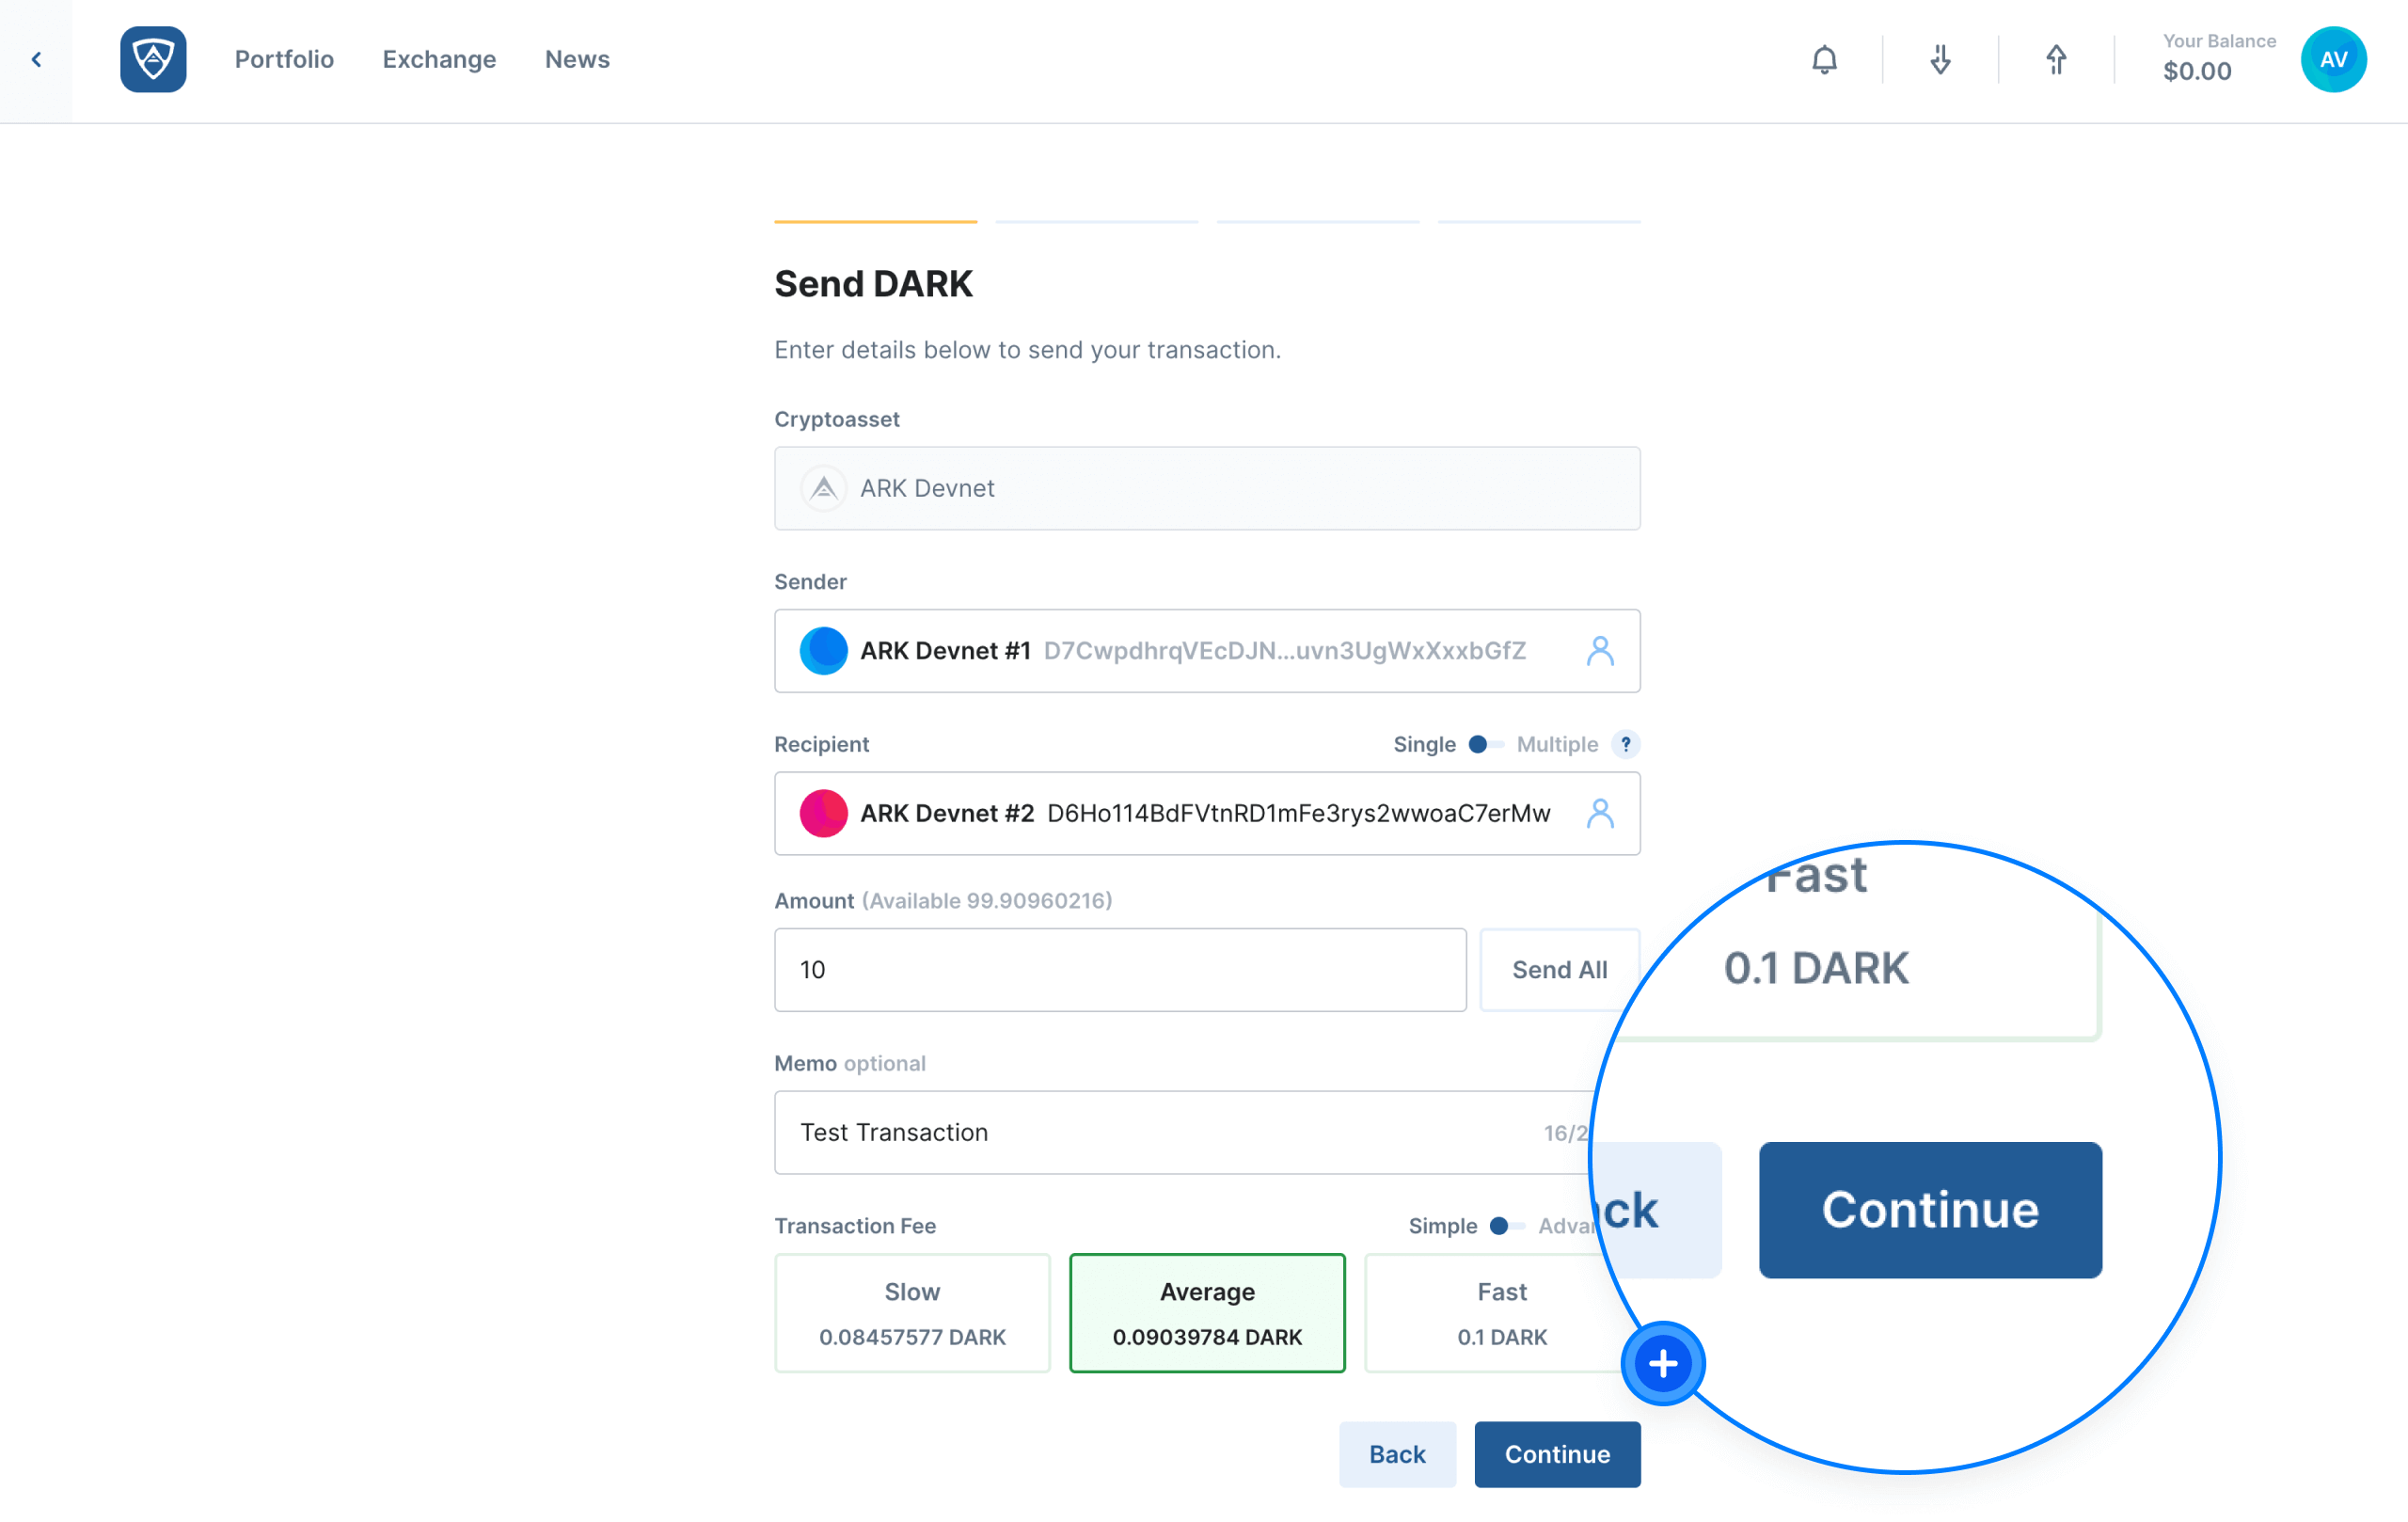
Once you have entered all the necessary details, click the Continue button to proceed. Alternatively, if you still need time to review some details before proceeding, click the Back button.
Review the Transaction
The Transaction Review screen will then appear. Check all the details and ensure that everything is correct. If all is in order, click the Continue button to proceed. Alternatively, if you need to make adjustments, click the Back button.
![]()
Authenticate the Transaction
The Authenticate screen will then appear. You will need to sign the transaction using your wallet’s credentials, such as a mnemonic recovery phrase or encryption password for example. Upon entering the required credentials, click the Send button to finalize the transaction. Alternatively, if you need to make adjustments, click the Back button.
![]()
Complete the Transaction
The Transaction Sent screen will appear confirming that your transaction completed successfully. You may then review the details of the transaction before continuing or ending your session.
![]()