Profile Settings - Networks
You can select which networks you would like to include or exclude in ARKVault as well as enable or disable Custom Networks via the ‘Manage Networks’ page. The following information will outline how to:
- Manage Networks
- Add a Custom Network
- Edit a Custom Network
- View Network Information, and
- Remove a Custom Network
Access ‘Manage Networks’ Settings
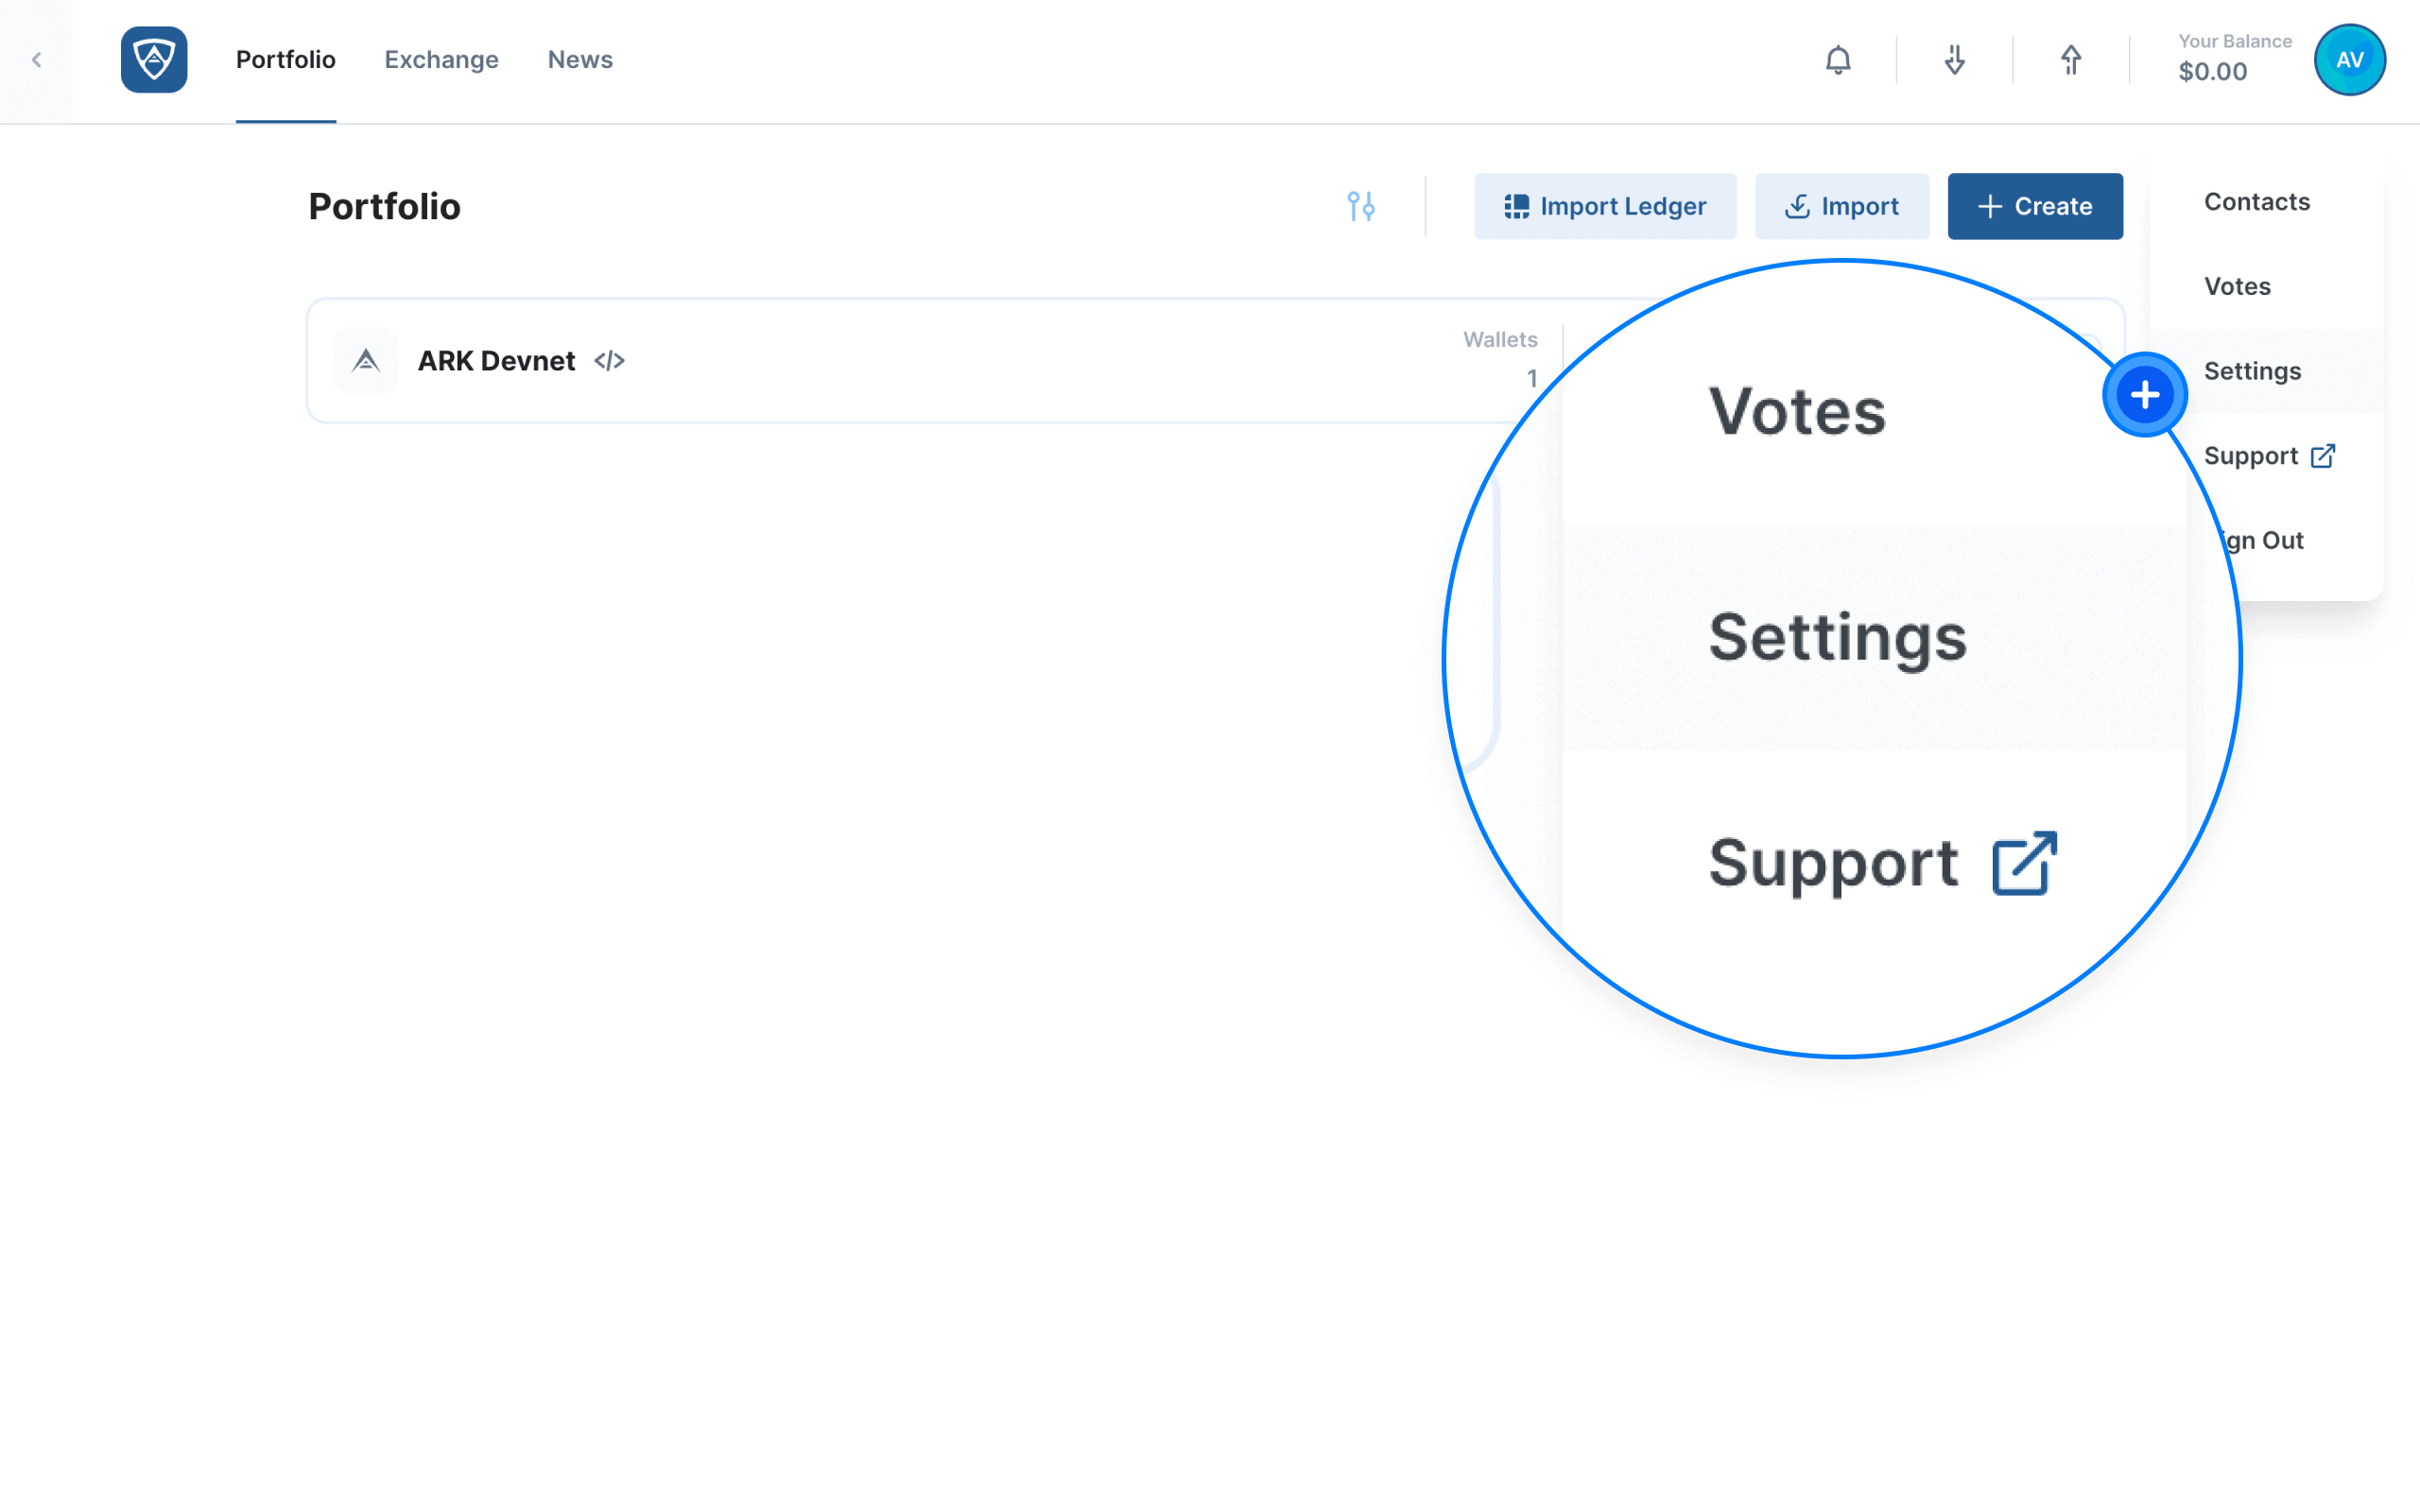
Click on the profile icon located in the upper right corner of the page and select Settings from the dropdown menu. The Profile Settings page will appear momentarily under the General tab.
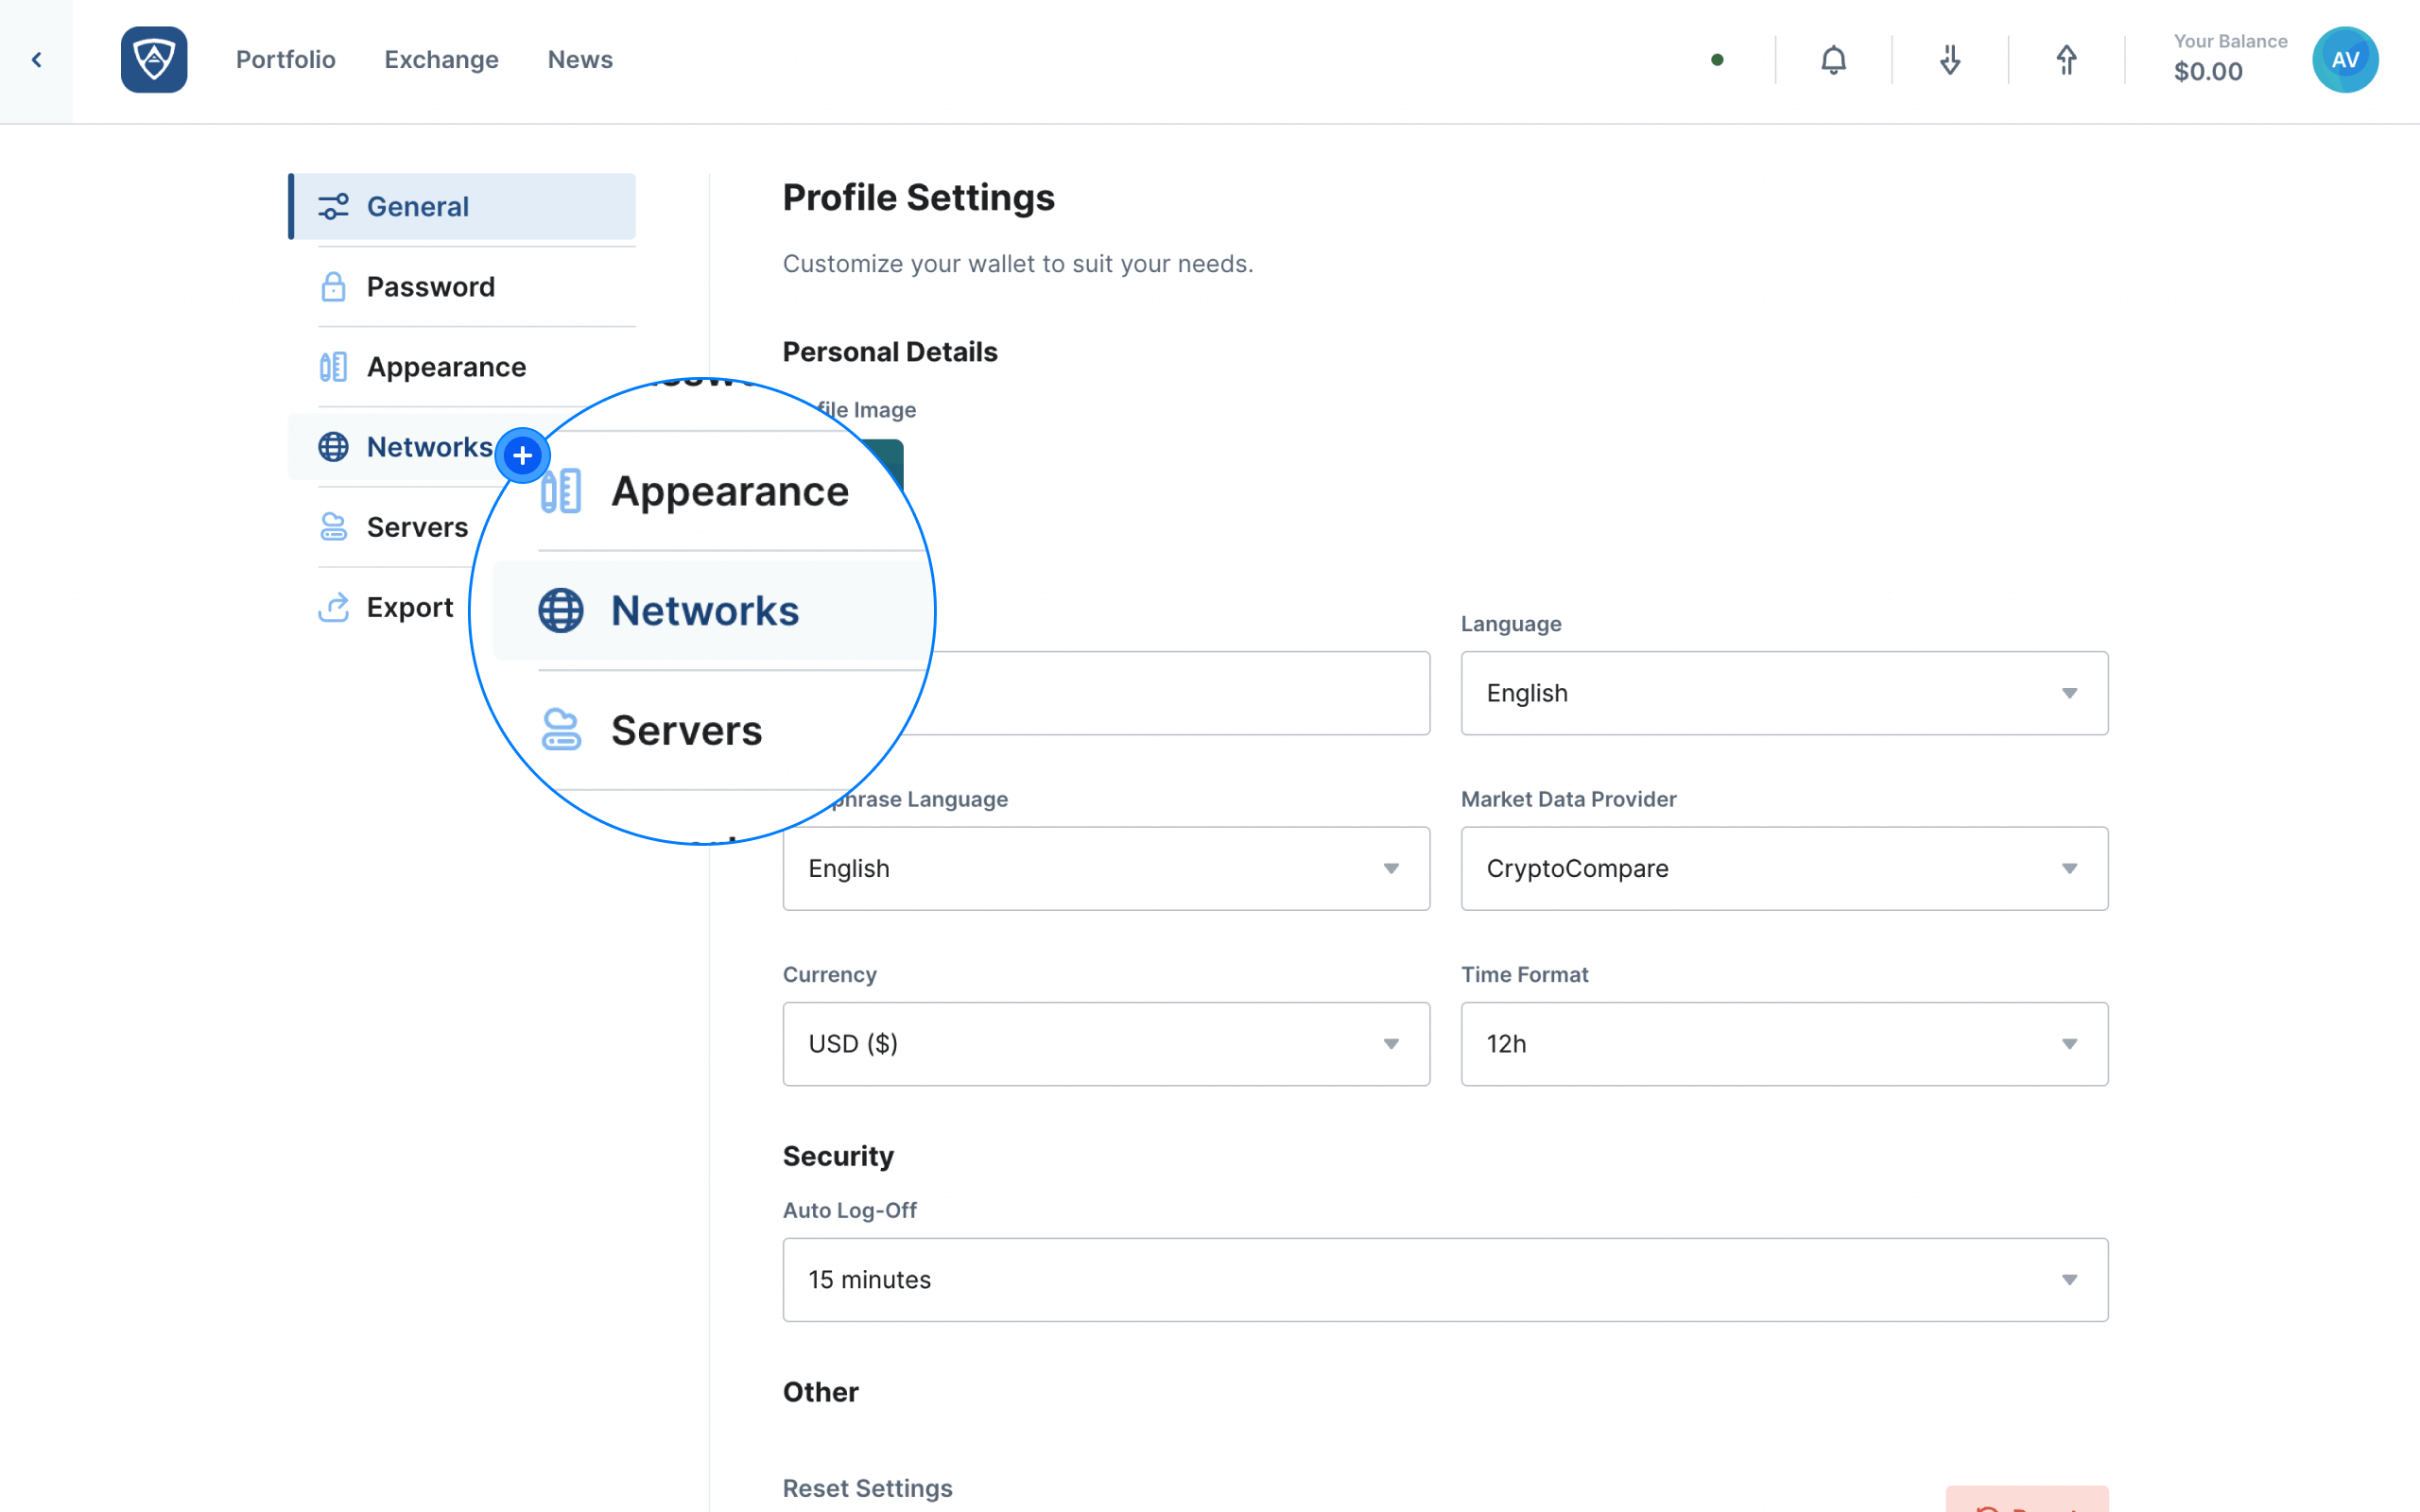
Click the Networks tab in the menu located on the left-hand side of the page and wait for the Manage Networks page to load.
Manage Networks
Watch this helpful tutorial video on How to Manage Networks in ARKVault
The Manage Networks page consists of two separate sections, namely:
- Default Networks, and
- Custom Networks
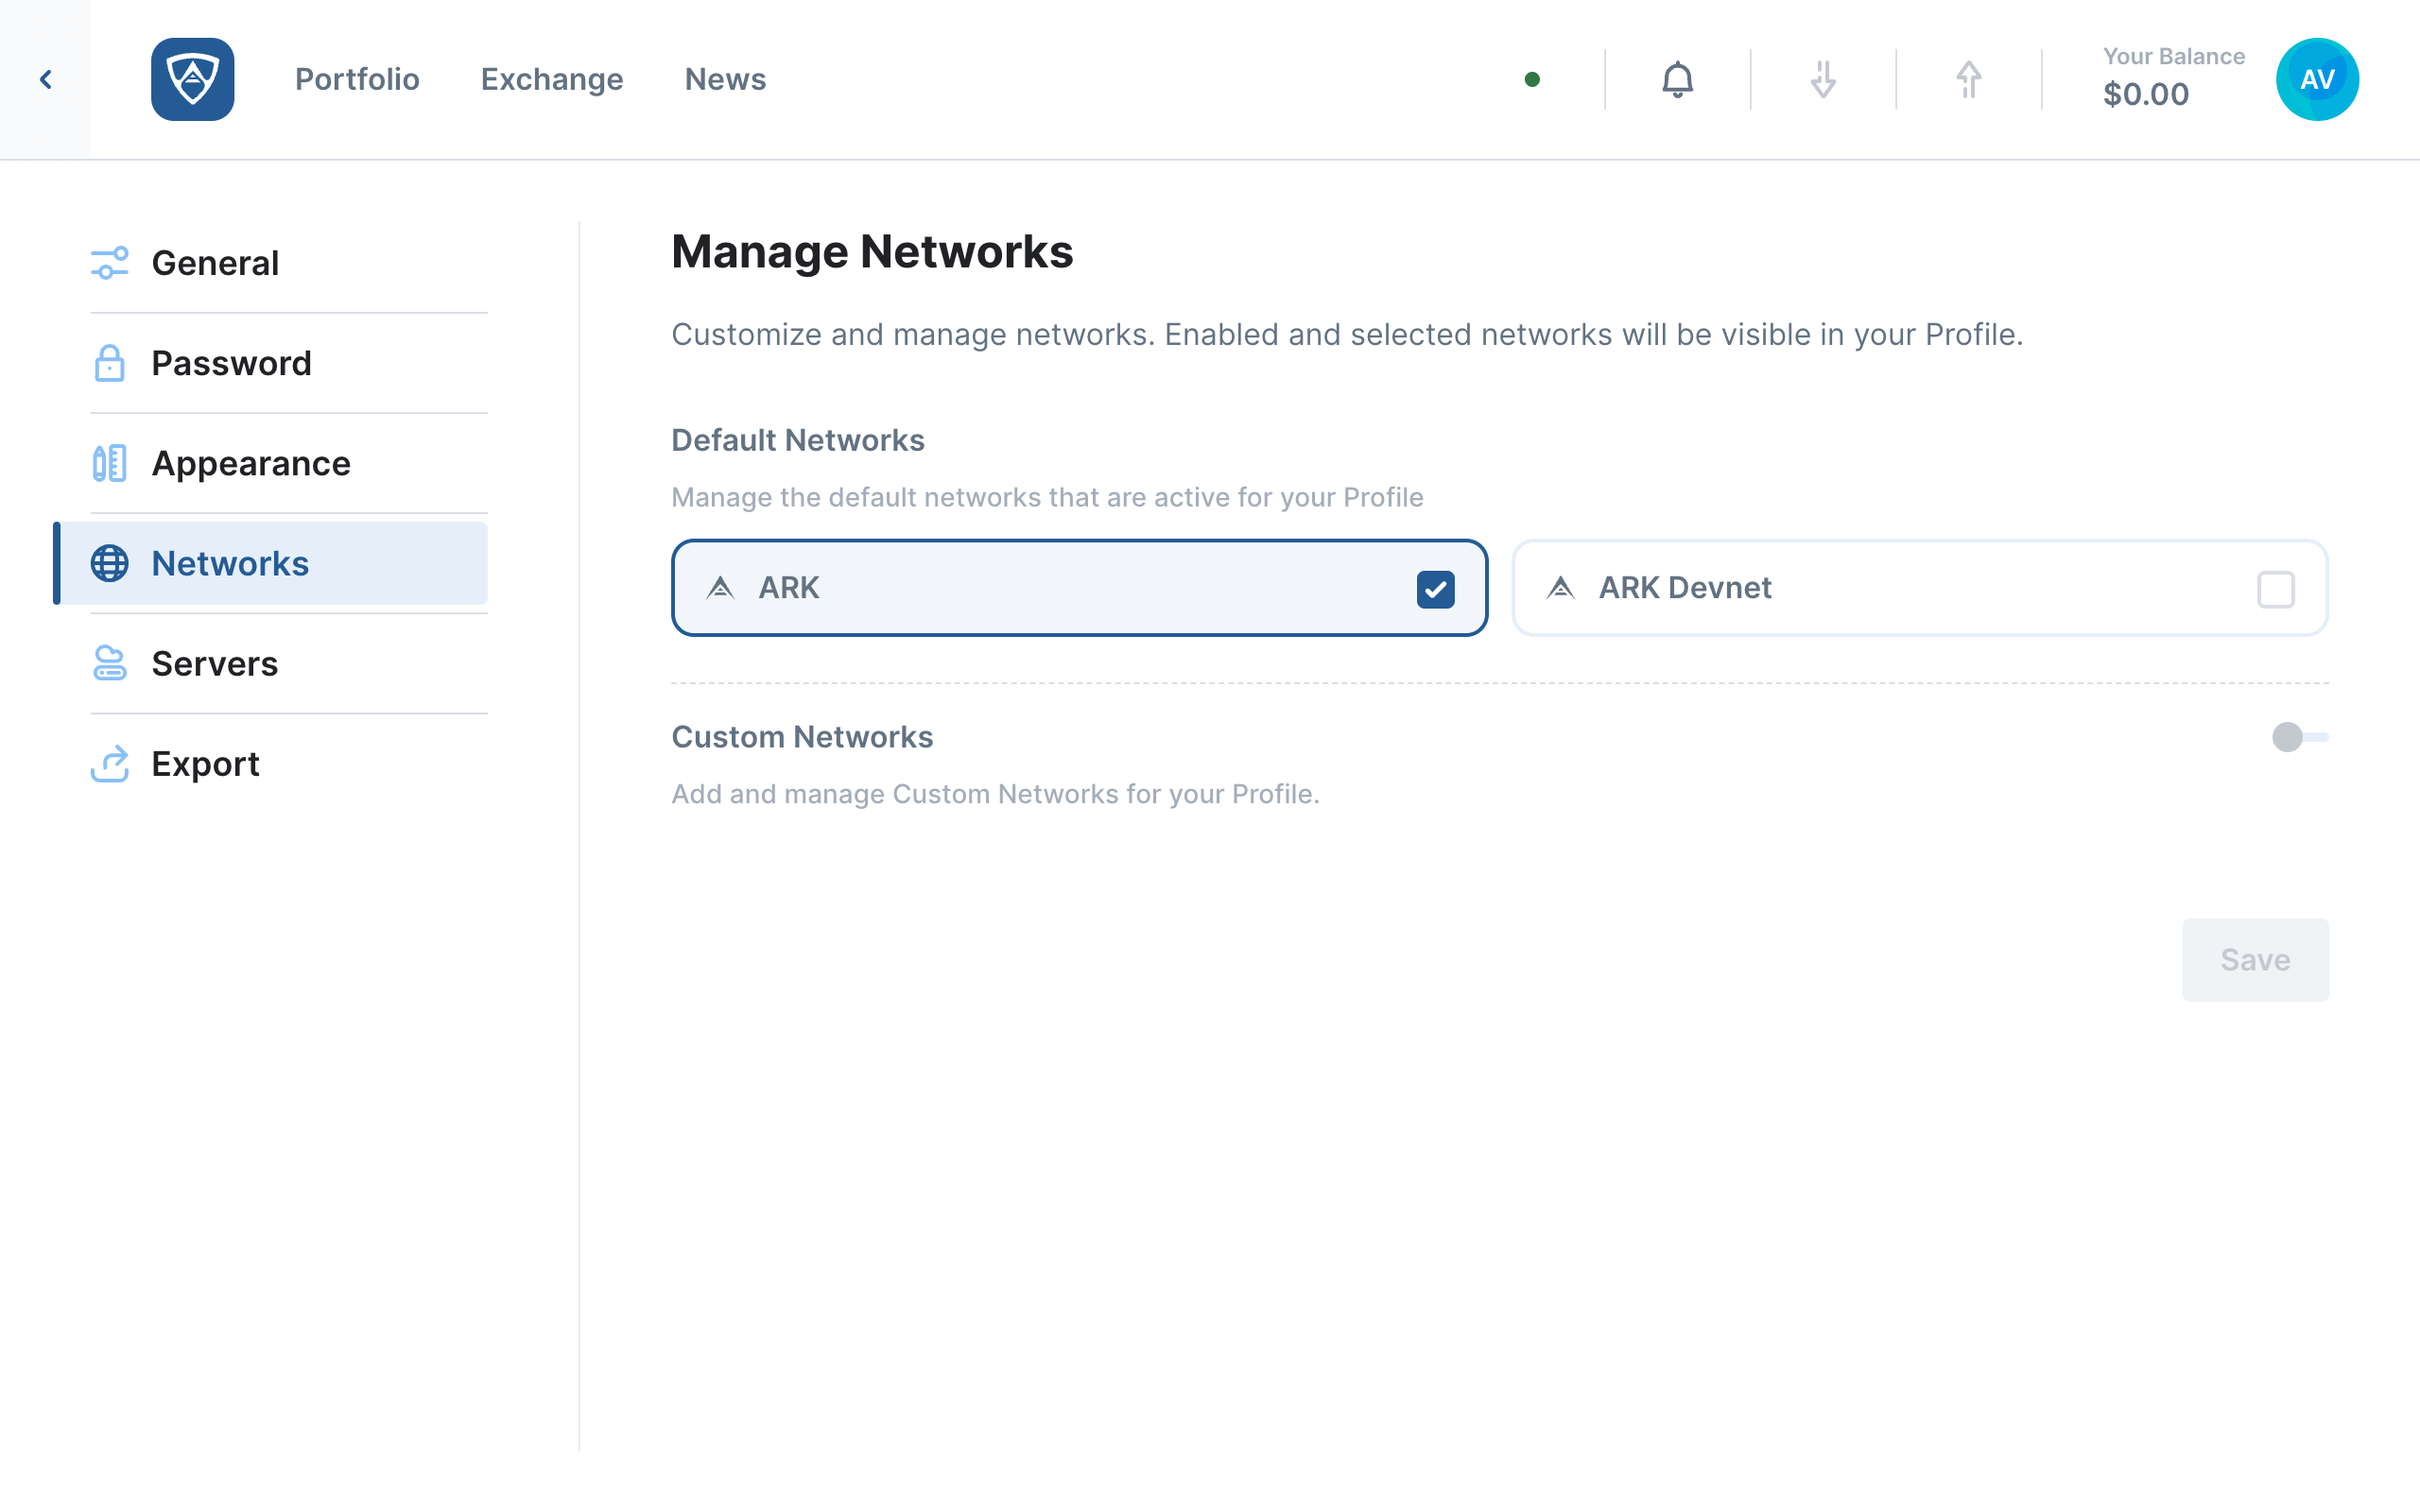
Default Networks - This section allows you to enable or disable the default networks that ARKVault makes use of. You may select the following networks:
- ARK
- ARK Devnet
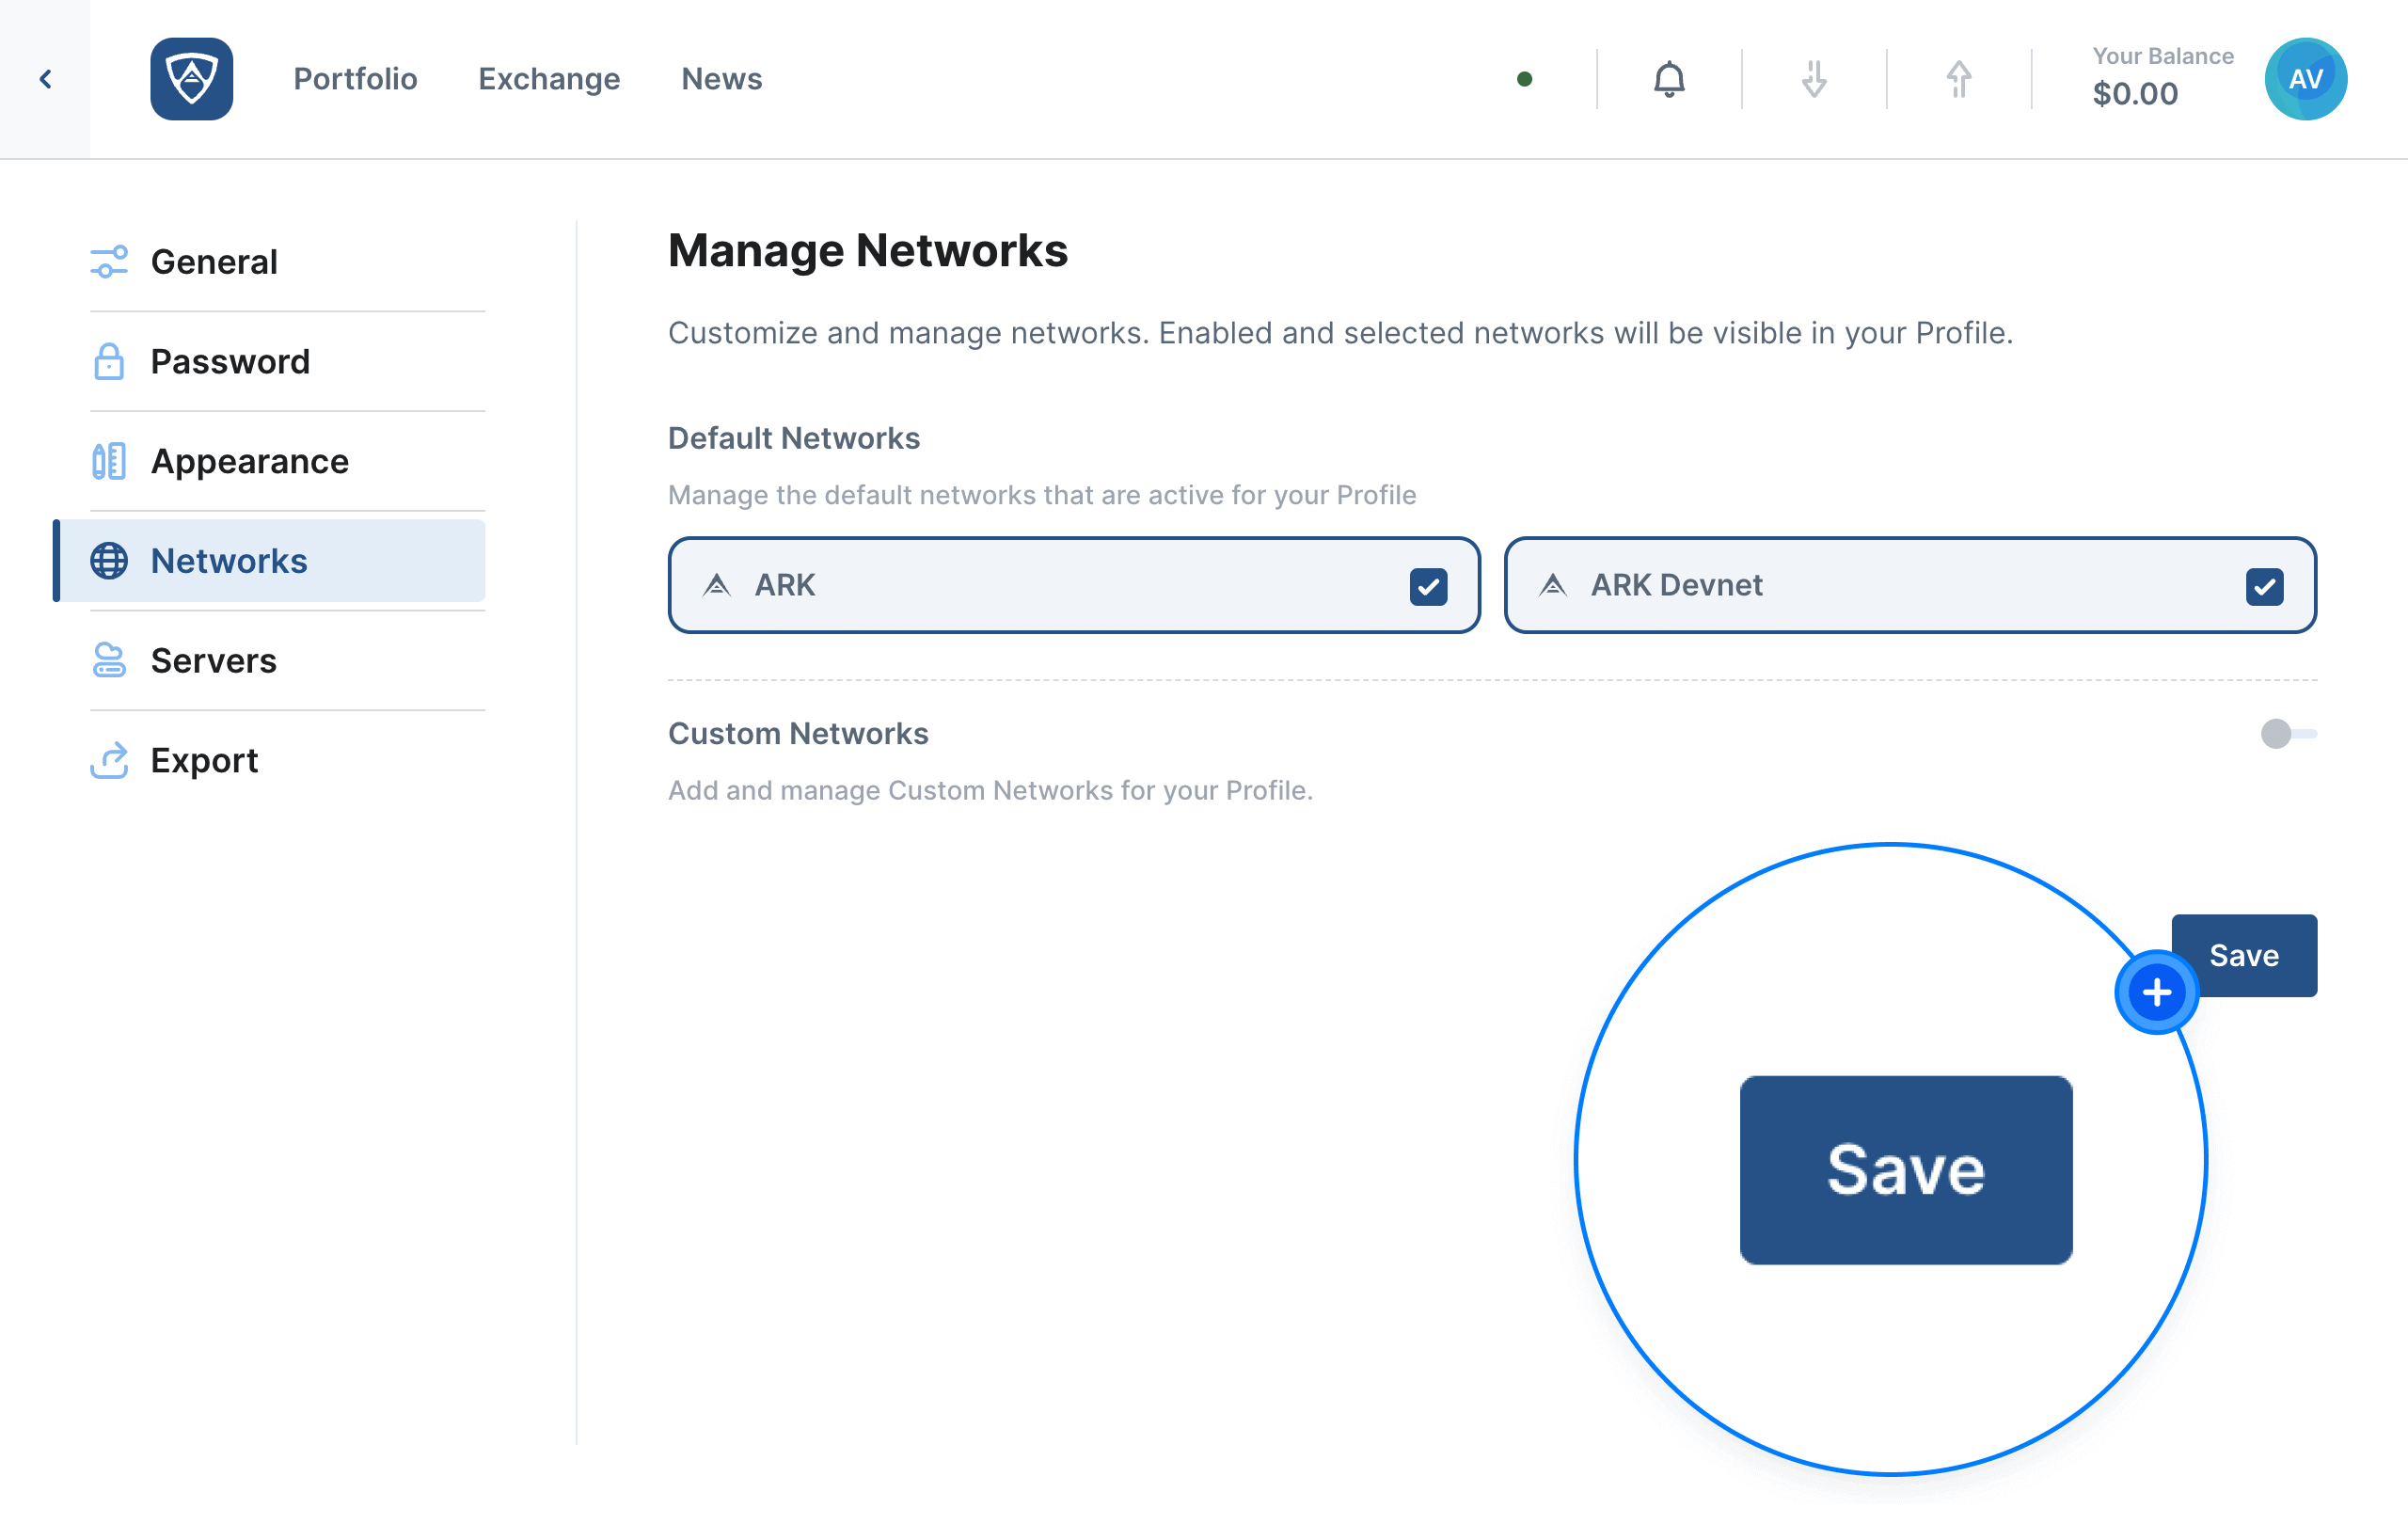
Note that ARK Devnet is disabled by default. If you wish to enable it within ARKVault, click the white checkbox immediately to the right of the network name. When ready, click the Save buton to enable ARK Devnet.
Attention
ARKVault requires that at least one default network is enabled at all times. This is to ensure that transactions can take place and no errors arise in the event that a network is unavailable.
Add a Custom Network
Watch this helpful tutorial video on How to Add a Custom Network in ARKVault
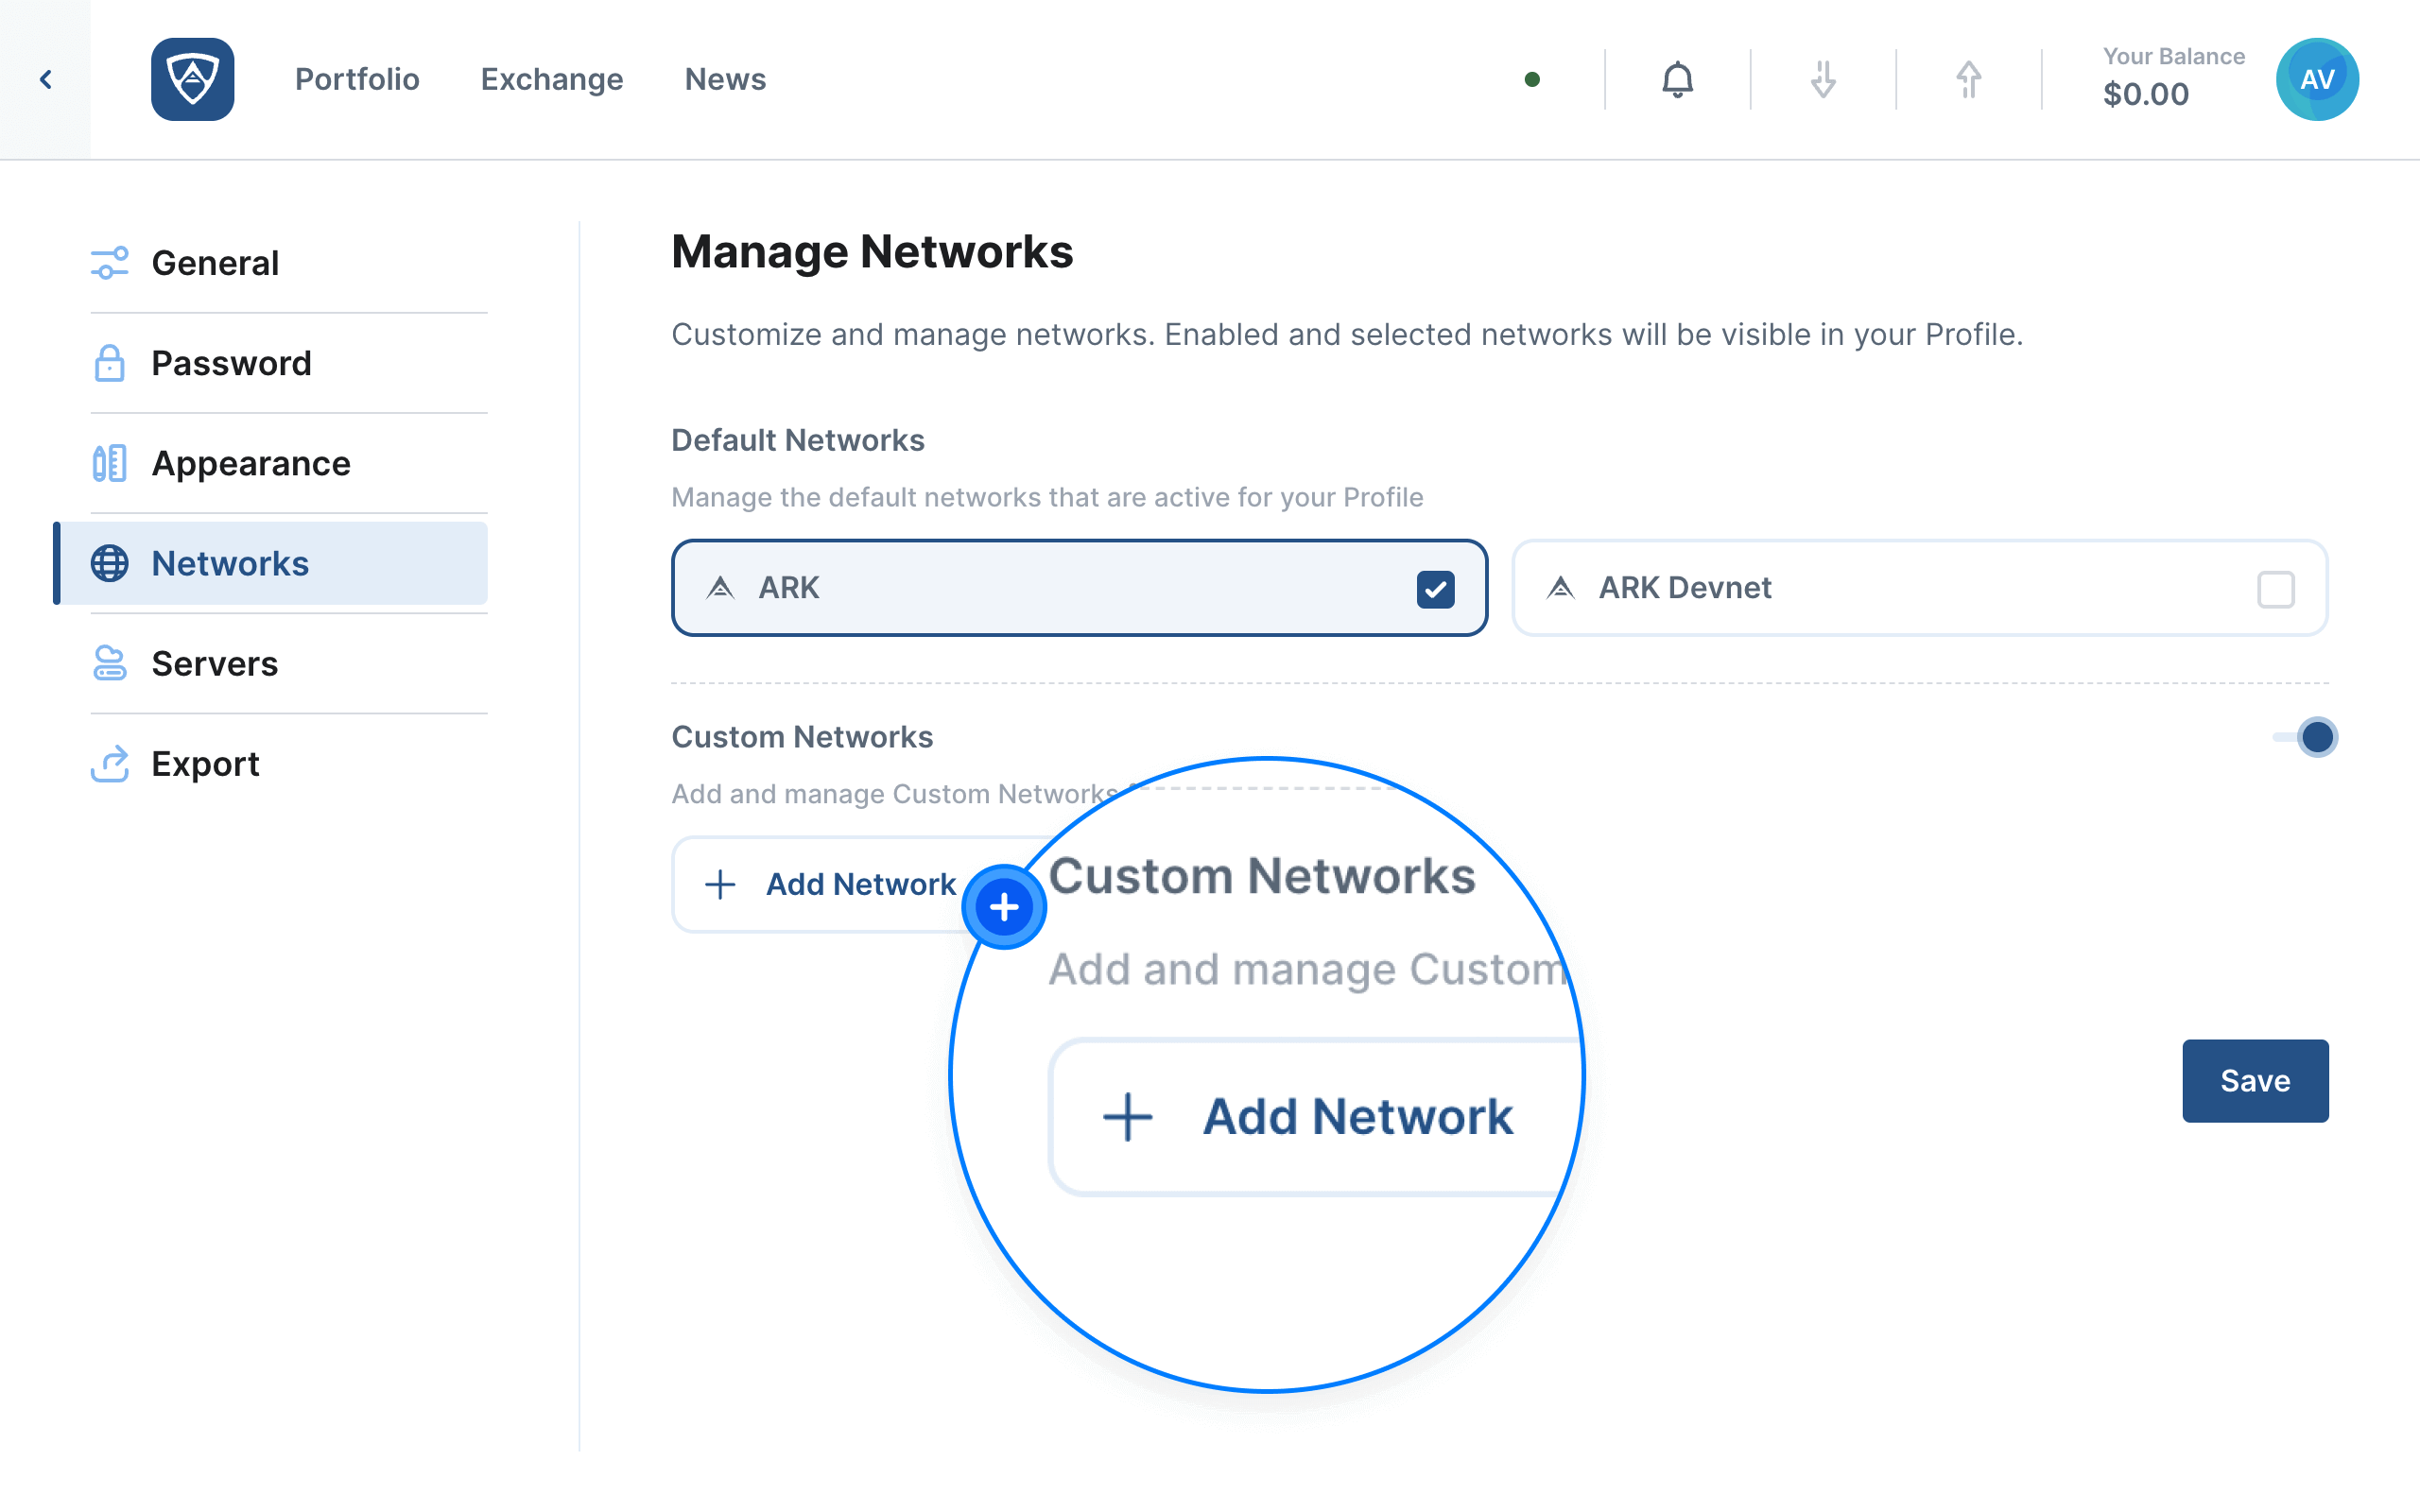
When this section is enabled, you may choose to add your own custom network to ARKVault. Click on the Add Network button to begin the process.
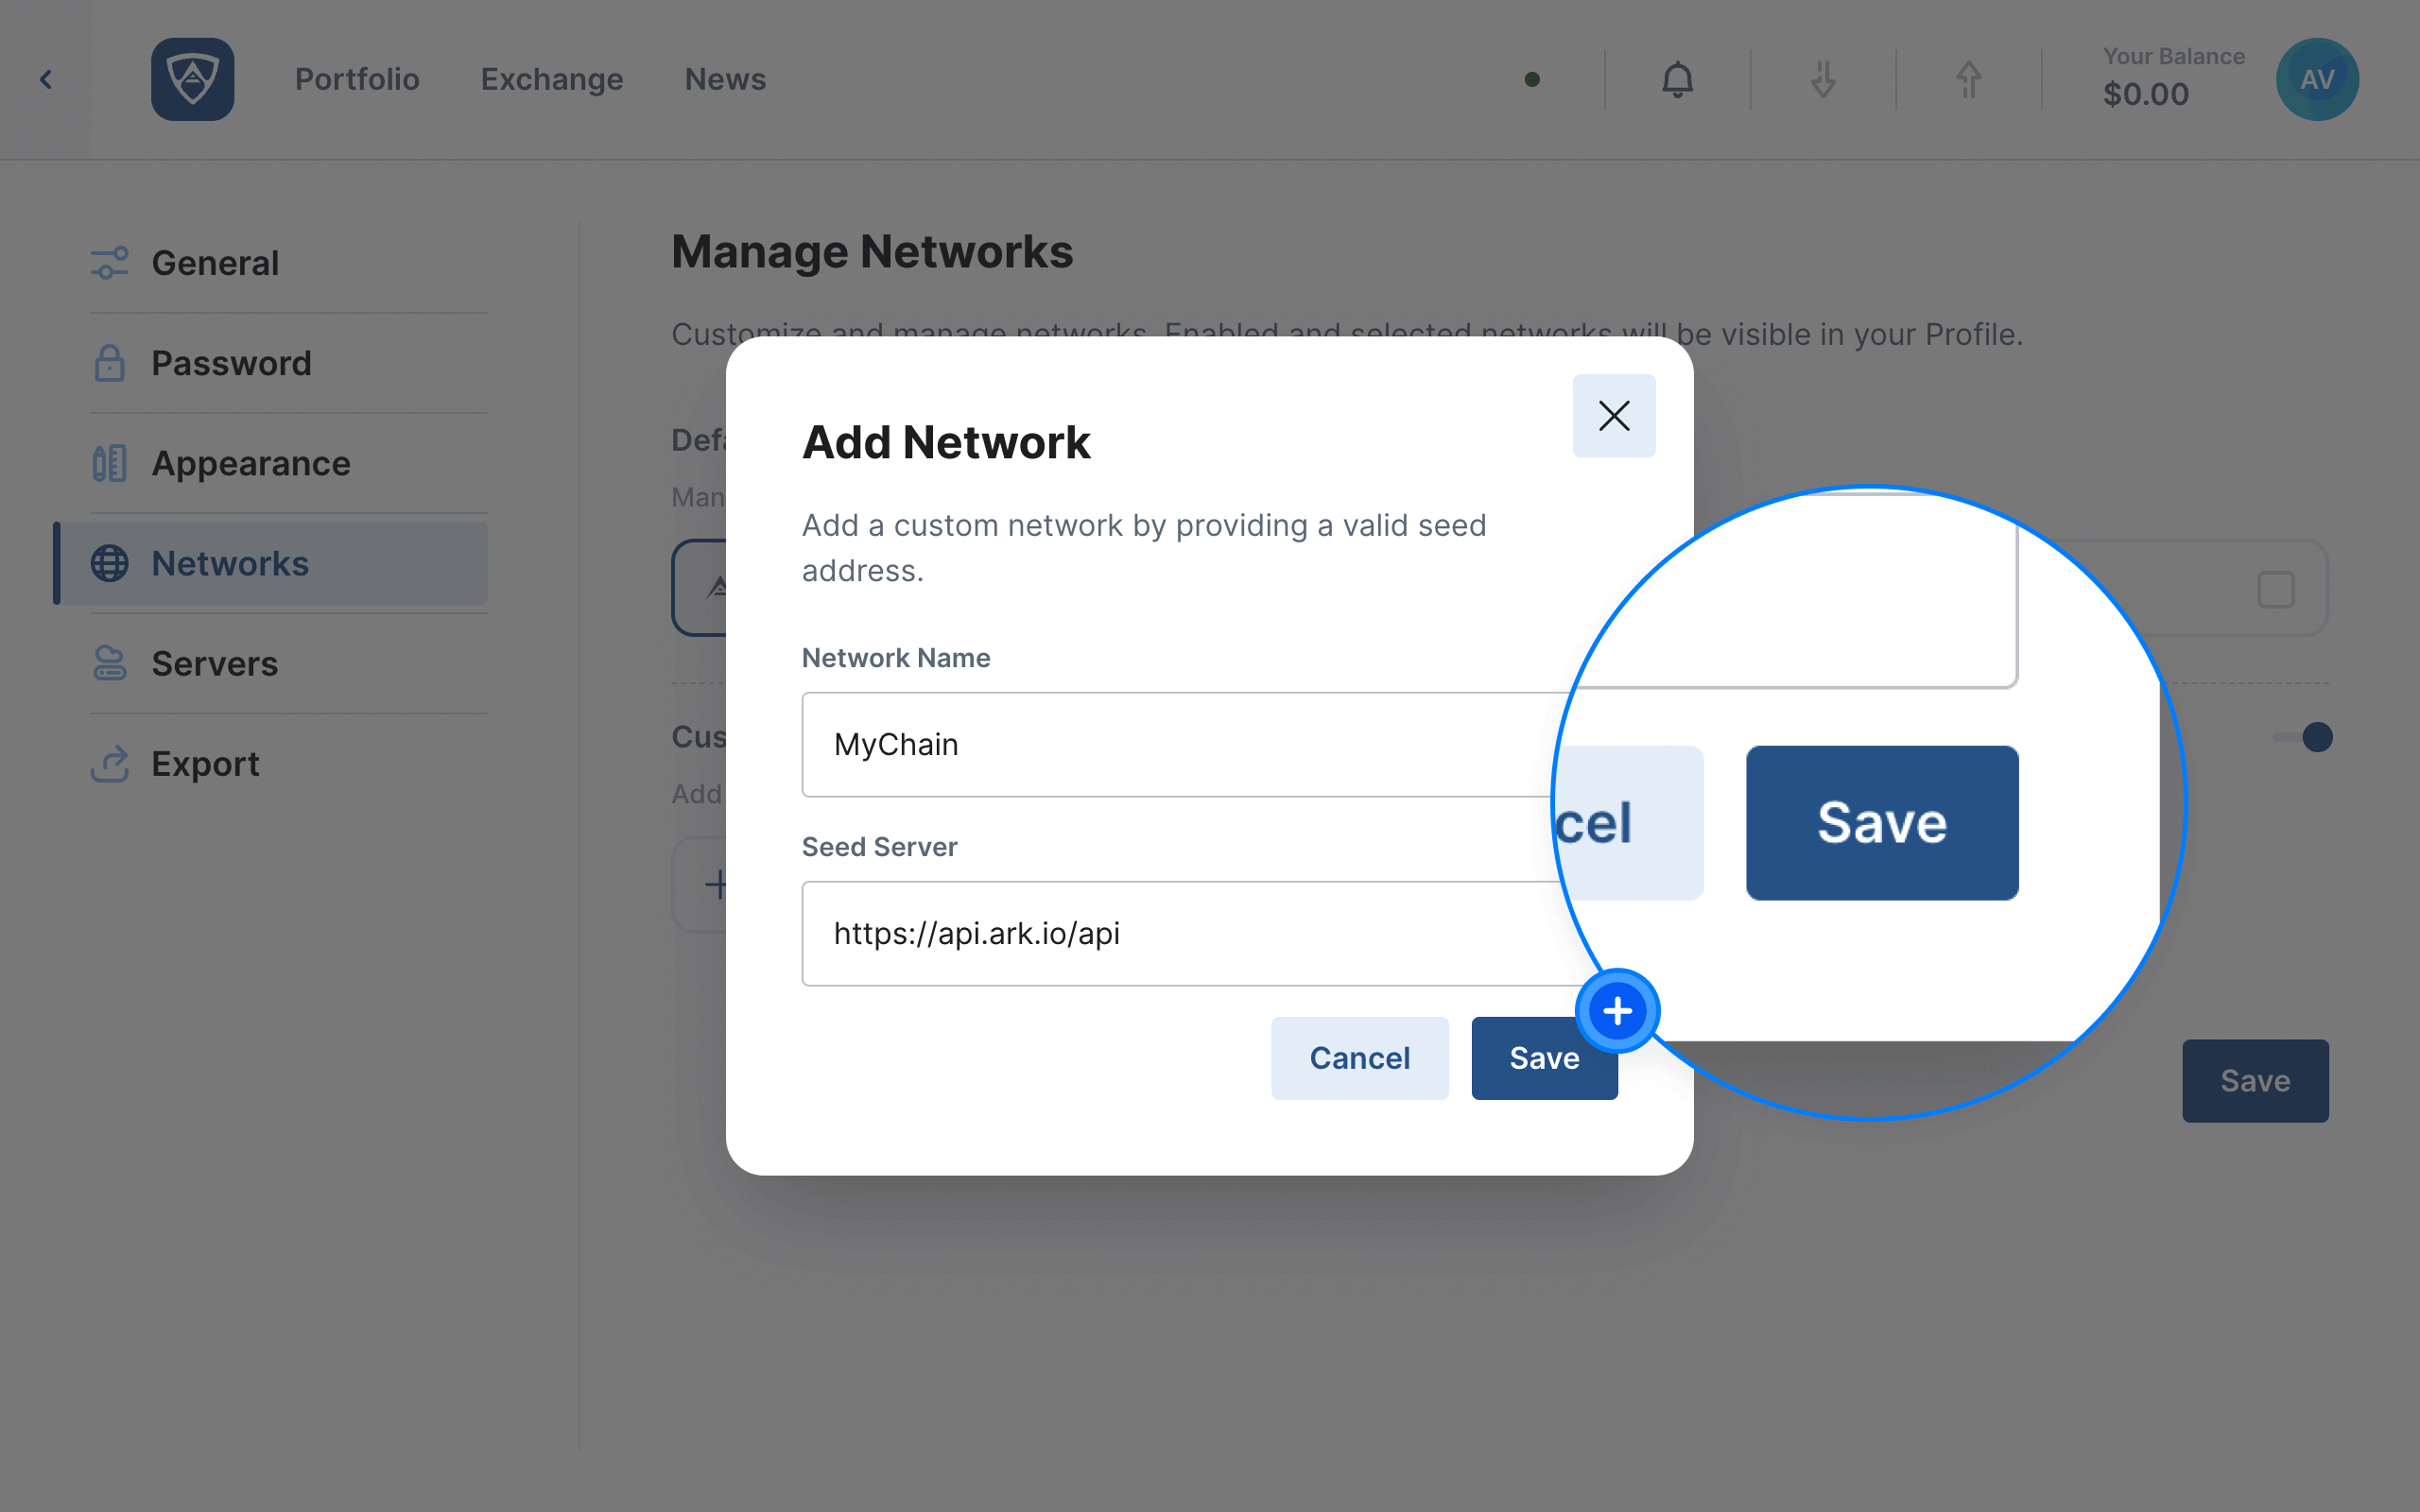
The Add Network modal will appear prompting you to enter in a name for your network as well as the address of the seed server for the network.
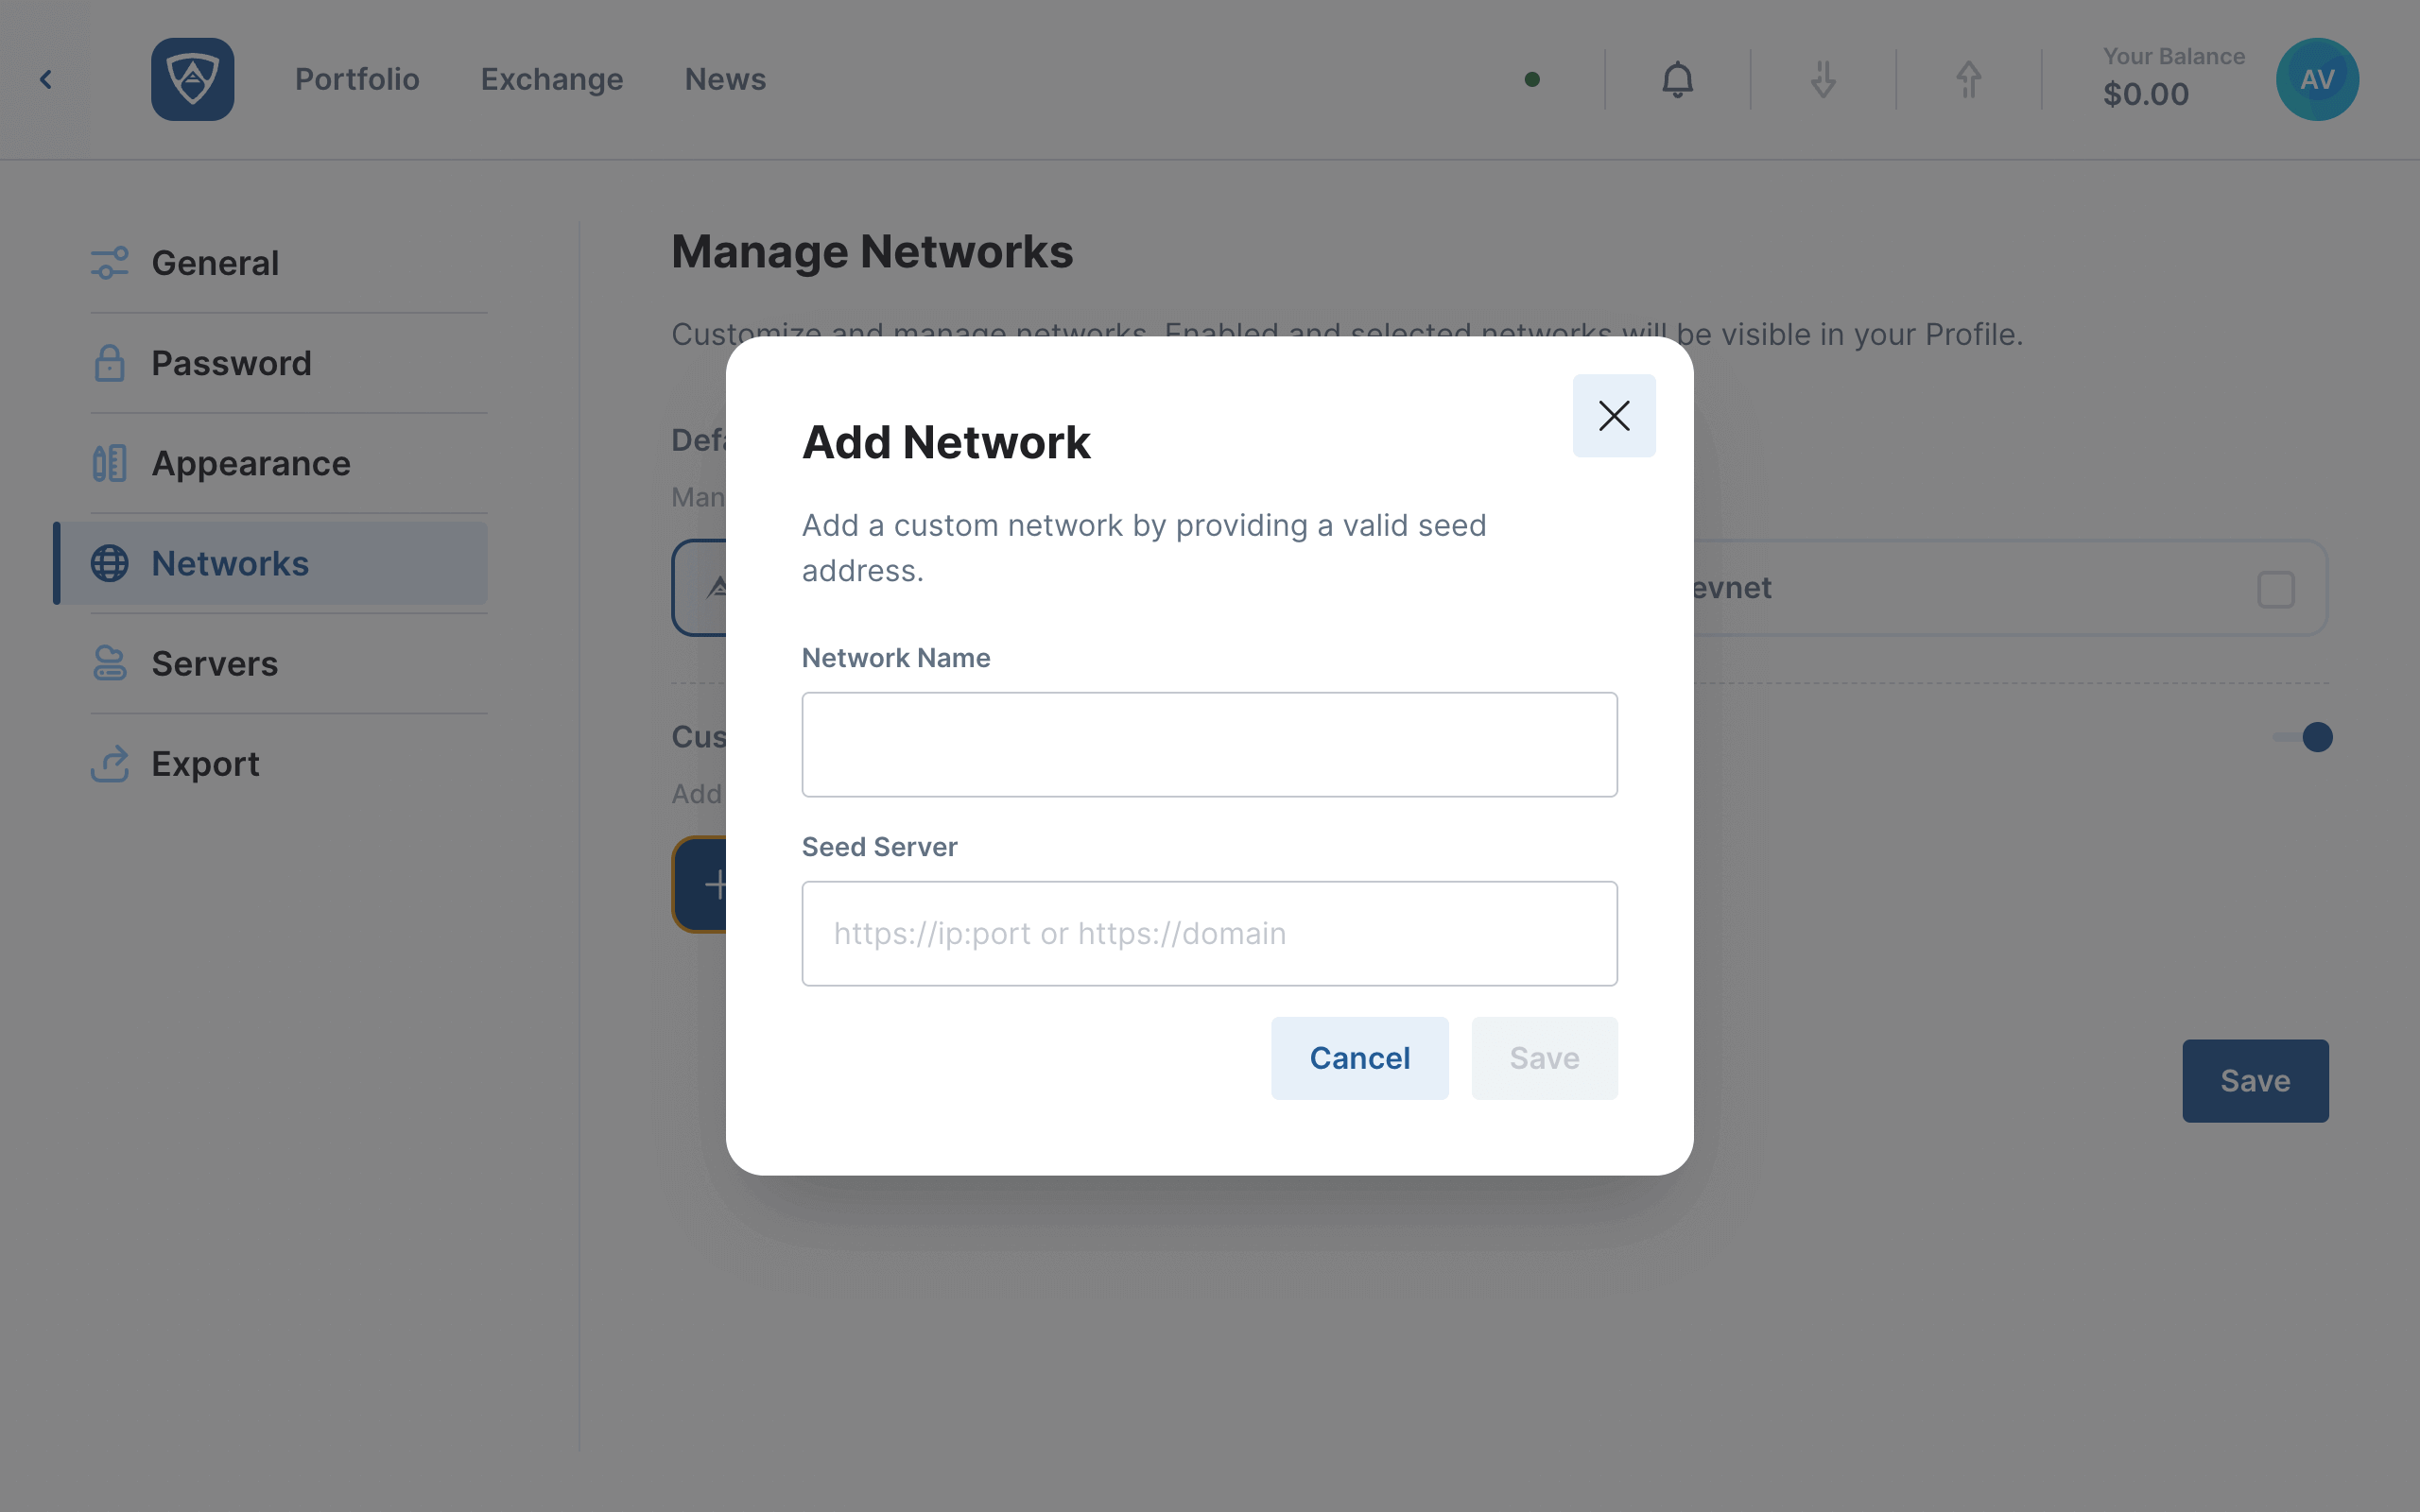
Upon entering the required details, click the Save button to confirm your choice. Alternatively, if you do not wish to proceed, click the Cancel button.
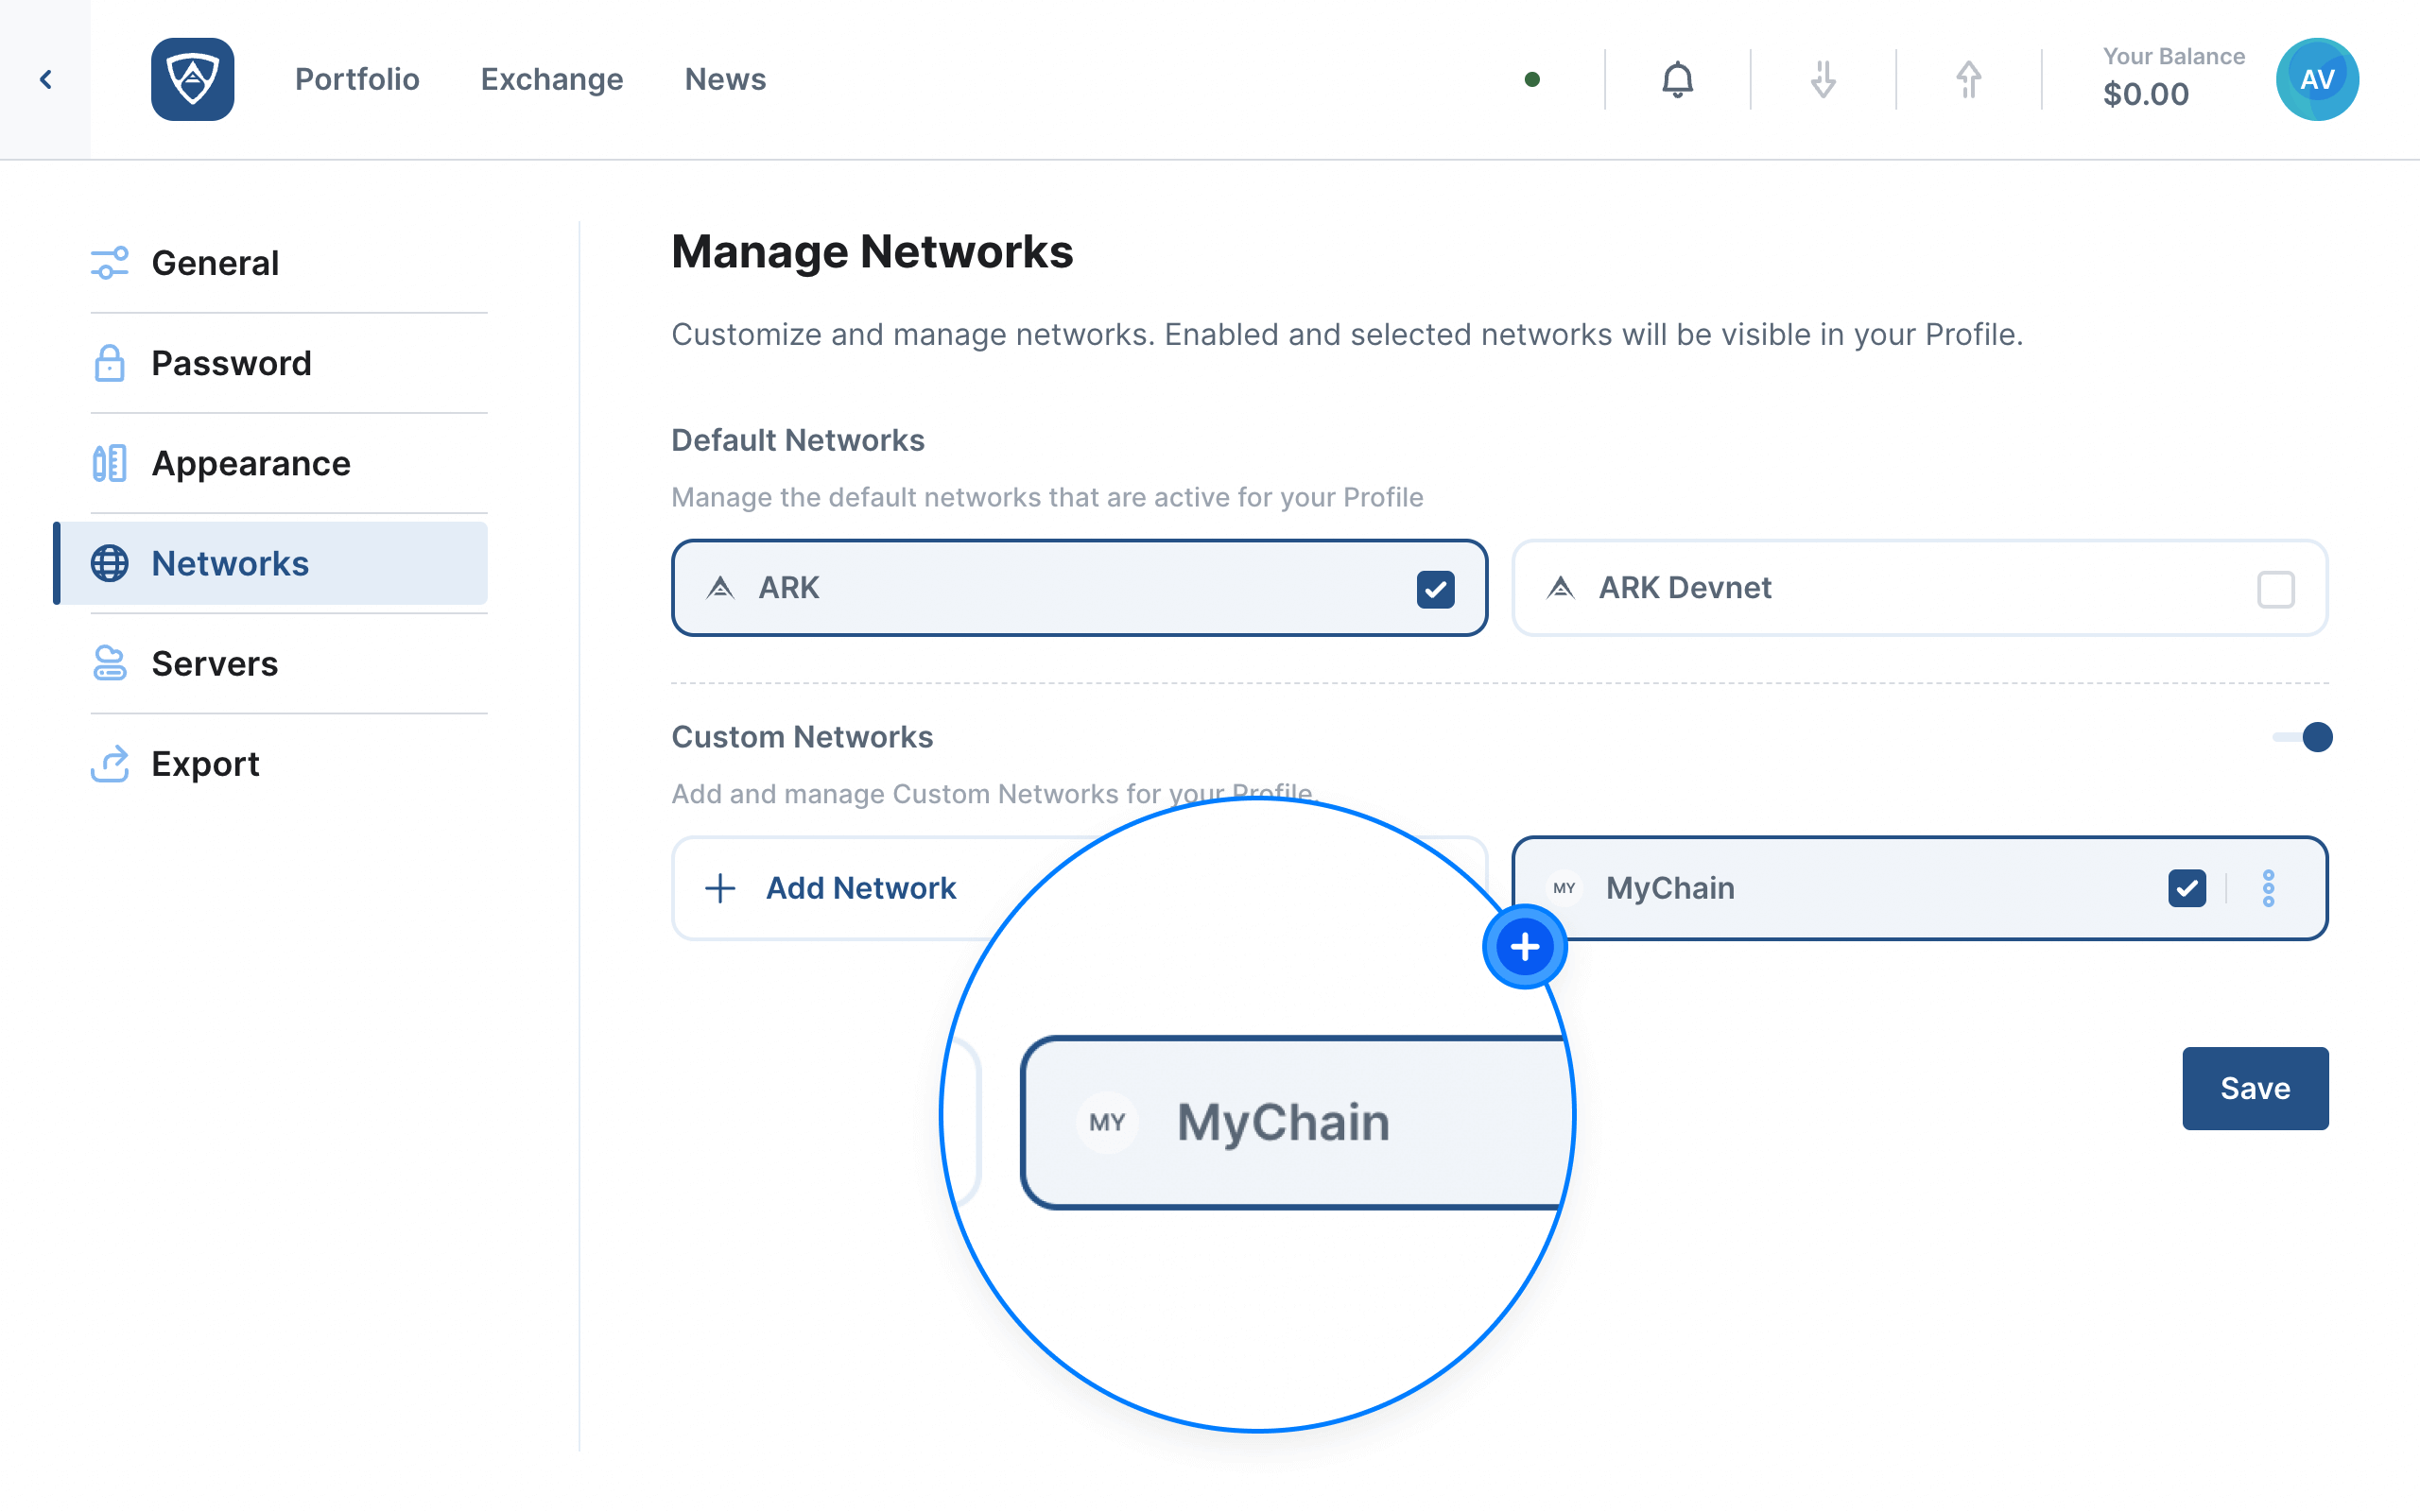
If successful, your custom network should appear under the Custom Networks section.
Edit a Custom Network
Watch this helpful tutorial video on How to Edit a Custom Network in ARKVault
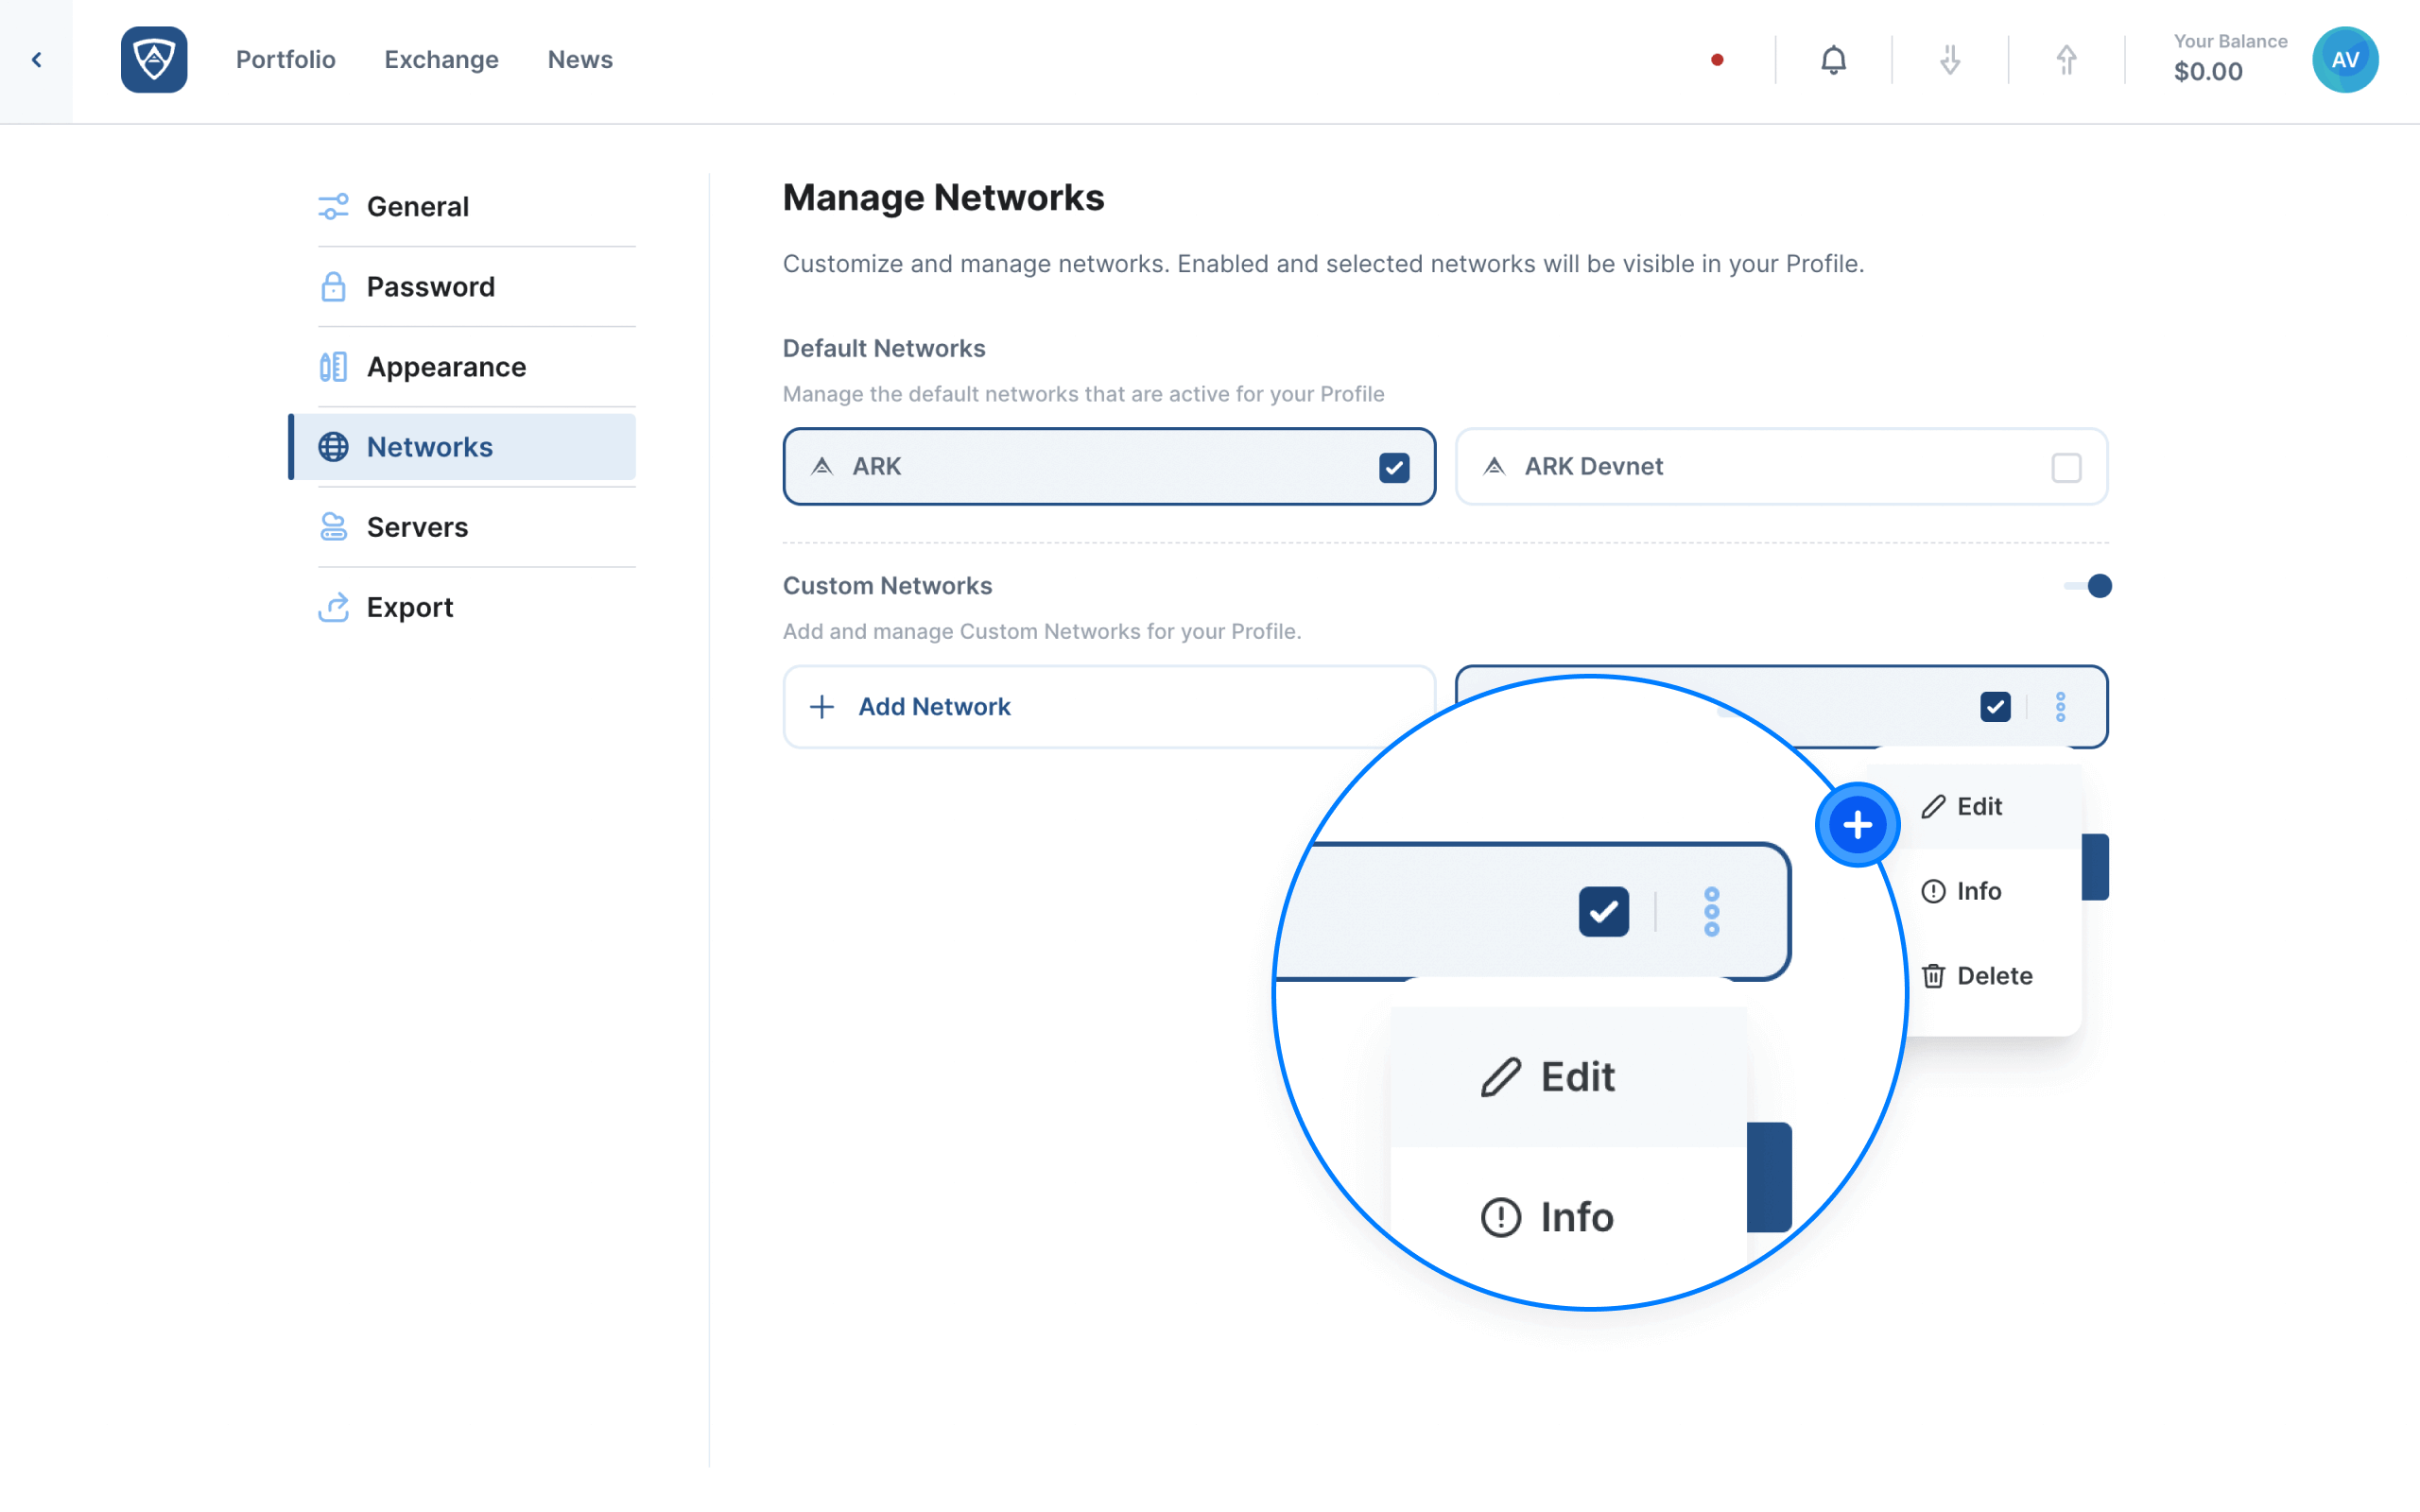
You can edit a custom network by clicking on the kebab menu (three dots) that appears immediately to the right of the network you wish to edit and selecting Edit from the dropdown menu.
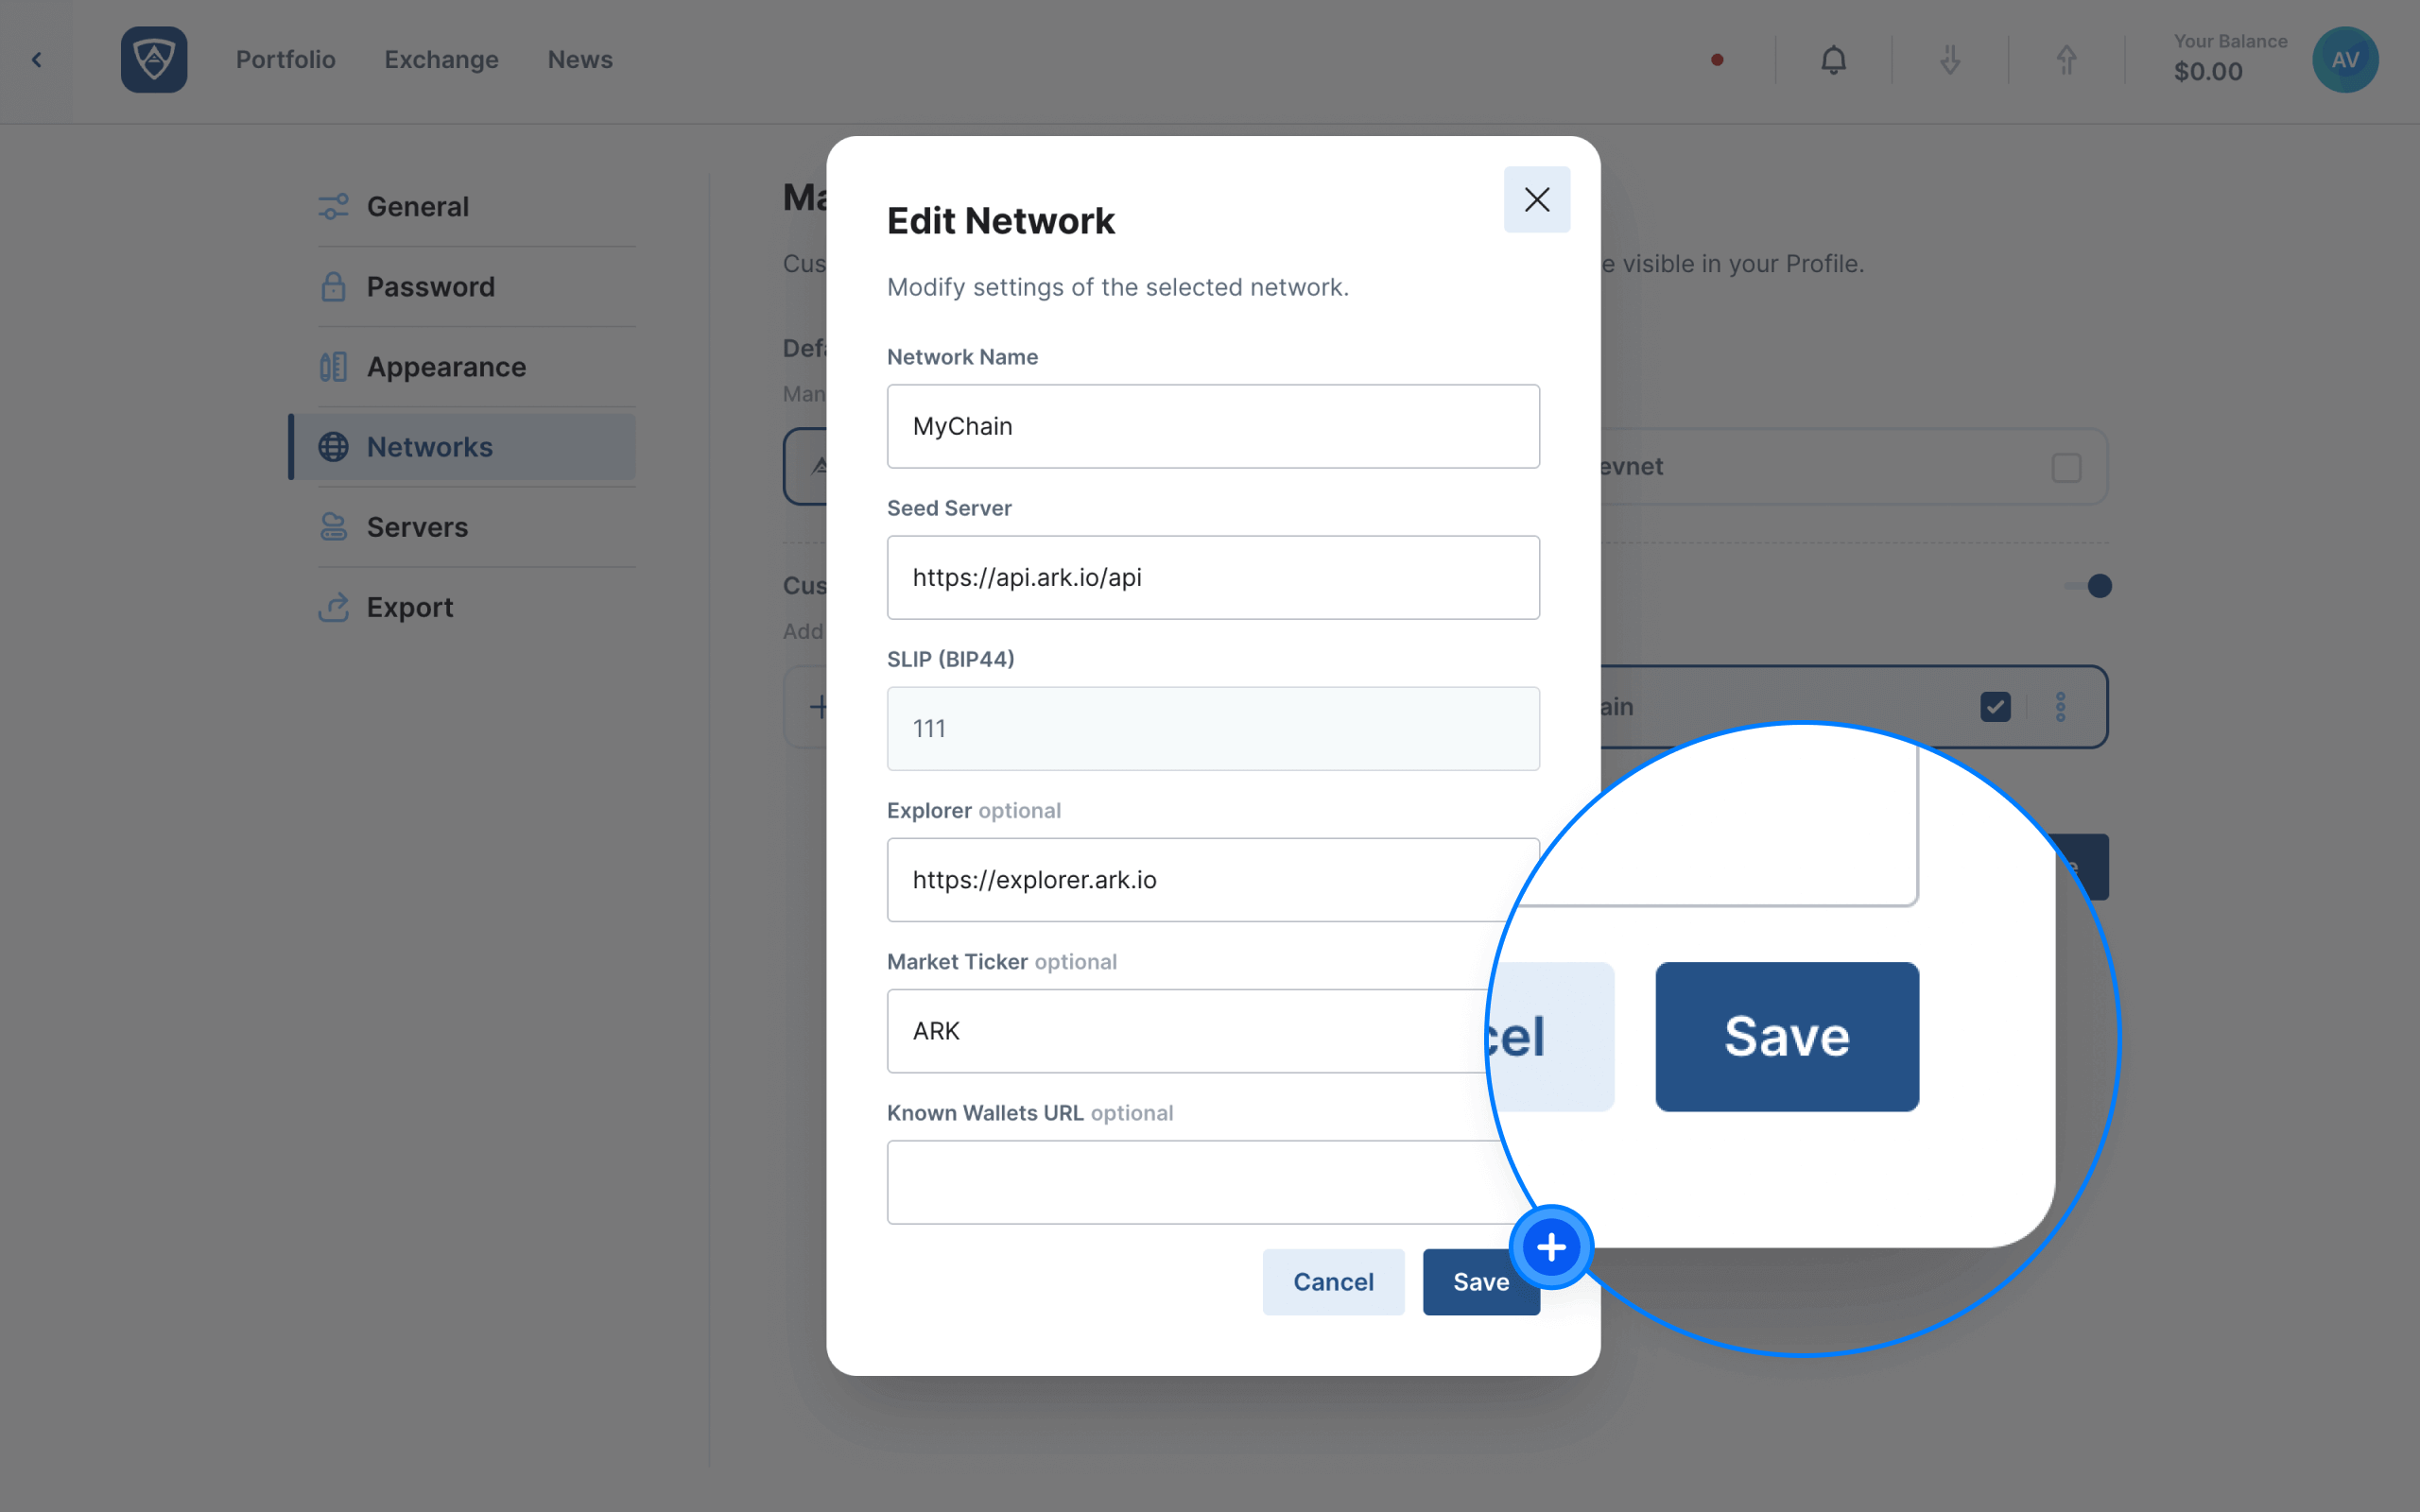
The Edit Network modal will appear. Here you can edit your network’s name, seed server and SLIP (BIP44). In addition, you can add and edit your server’s explorer, market ticker and known wallets URL. When ready, click the Save button to retain your settings. Alternatively, if you clicked on the server in error, click the Cancel button.
View Network Information
Watch this helpful tutorial video on How to View Network Information in ARKVault
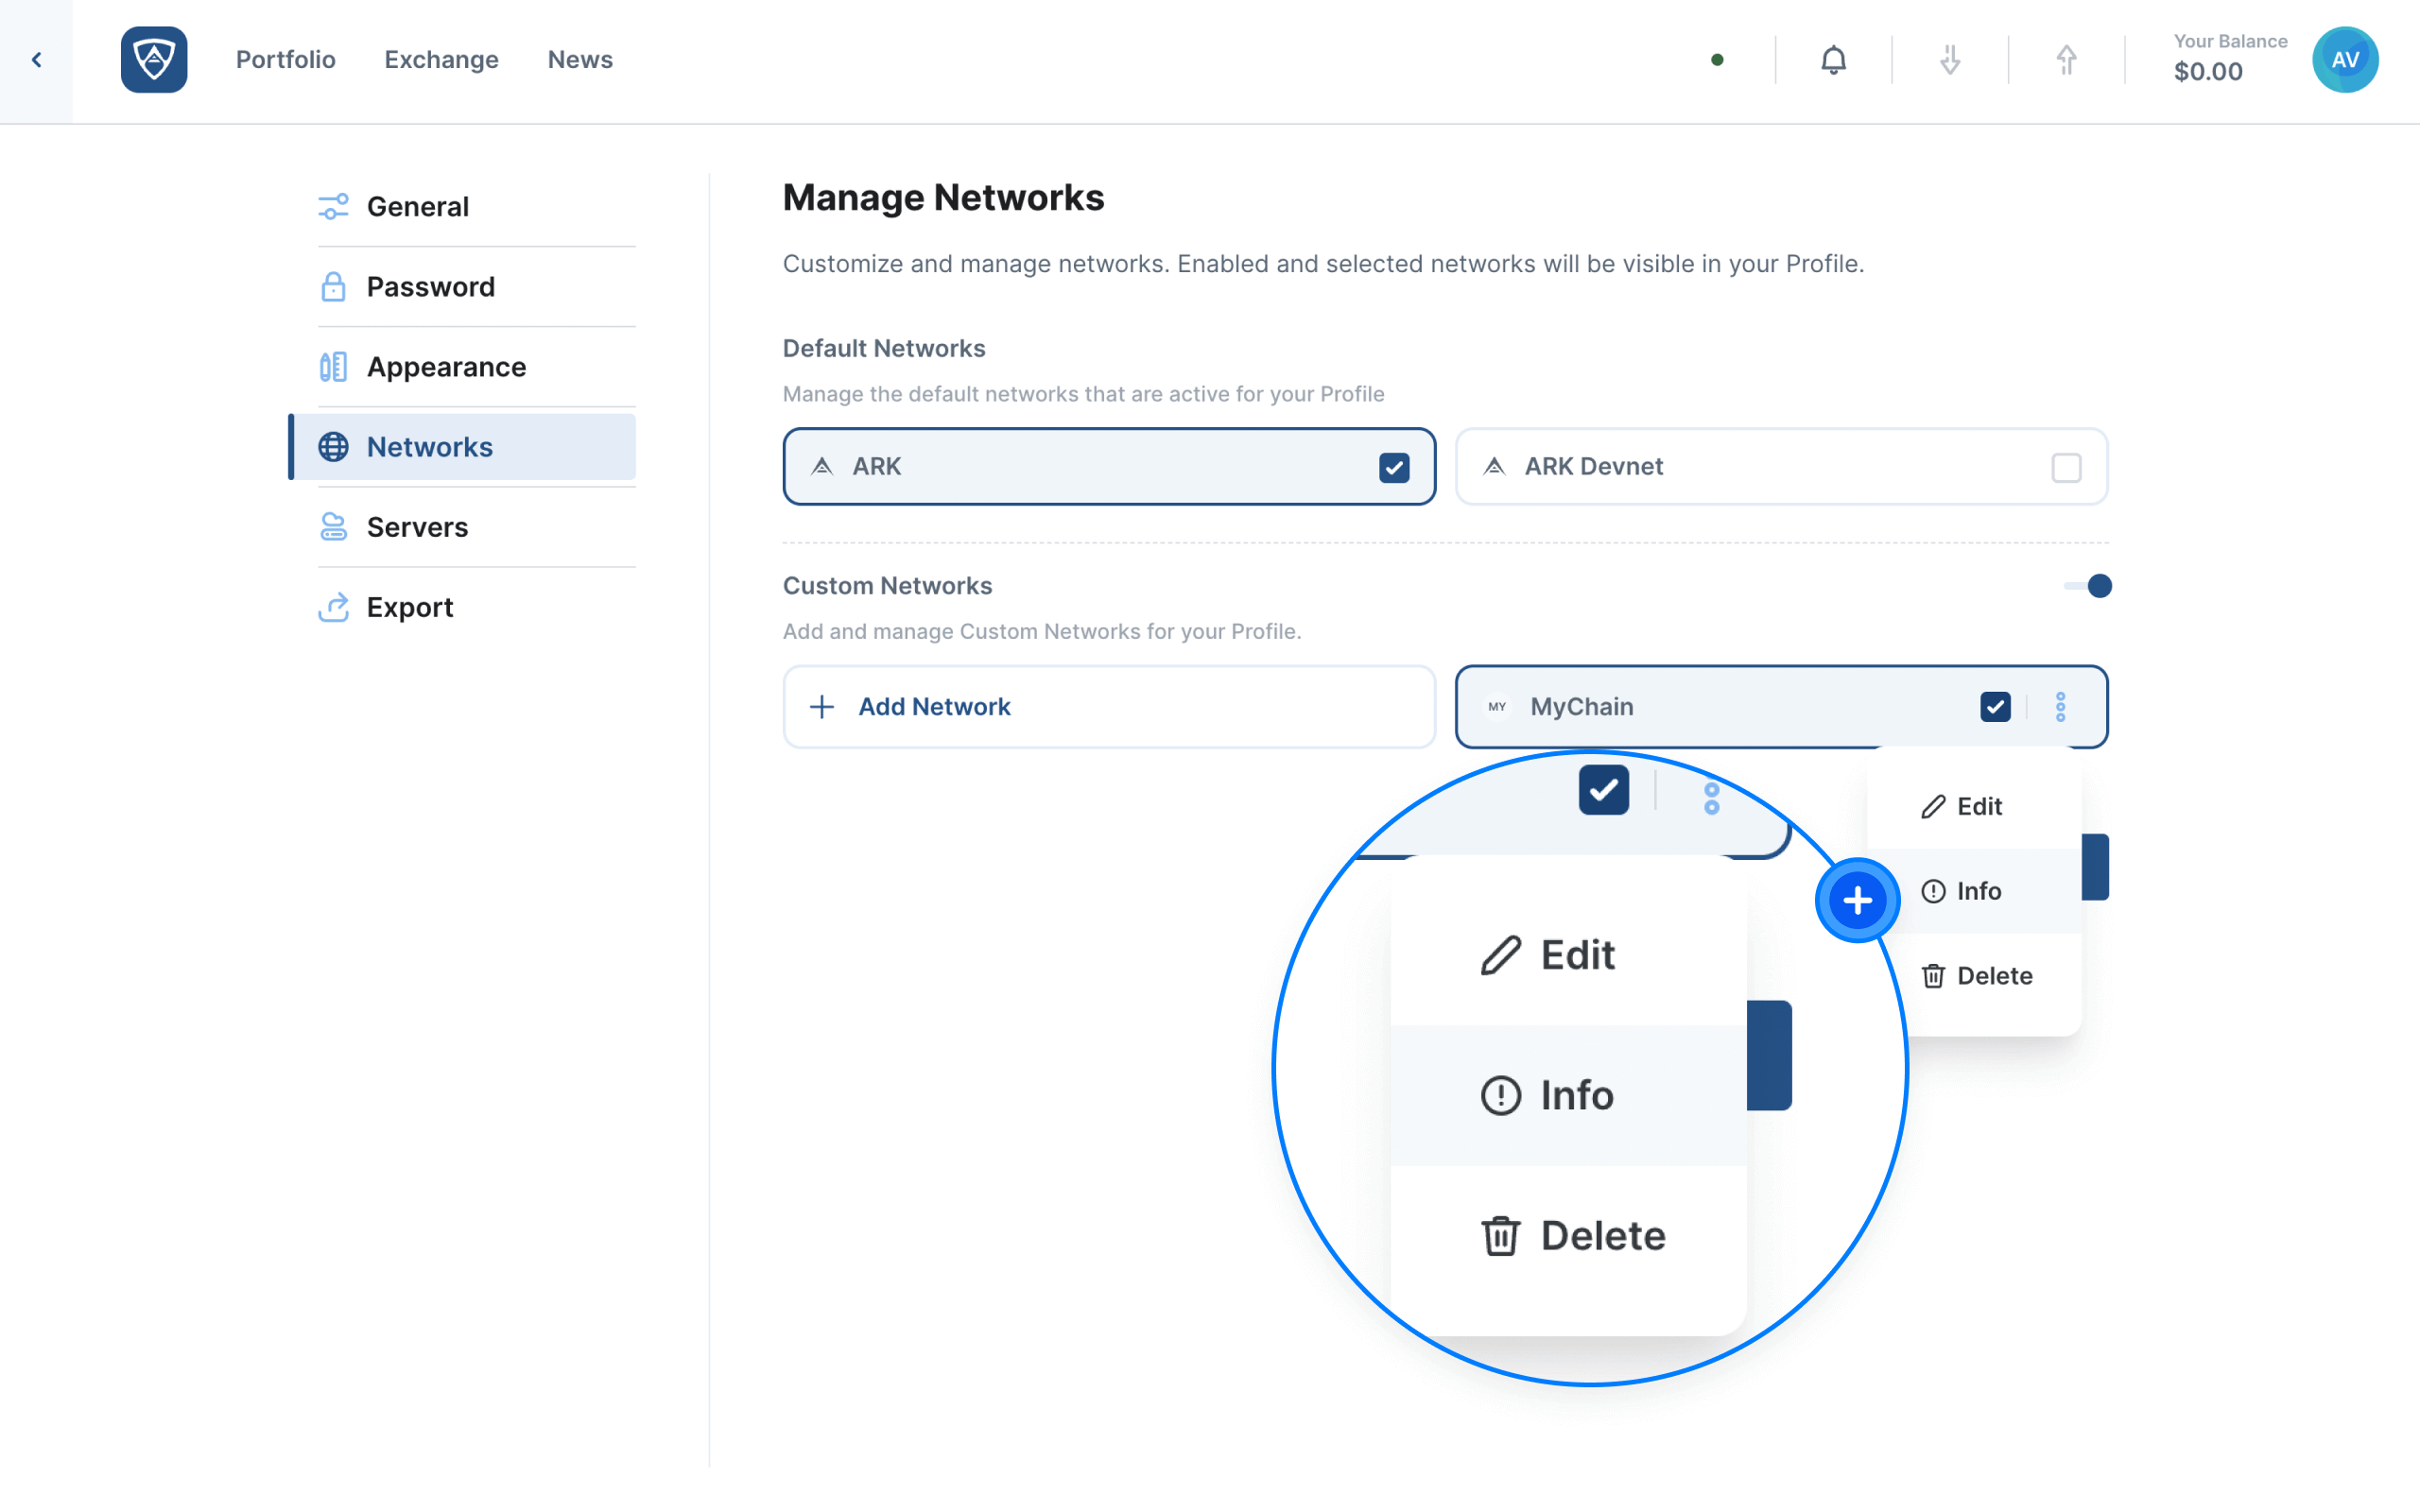
You can view a custom network’s information by clicking on the kebab menu (three dots) that appears immediately to the right of the network you wish to view and selecting Info from the dropdown menu.
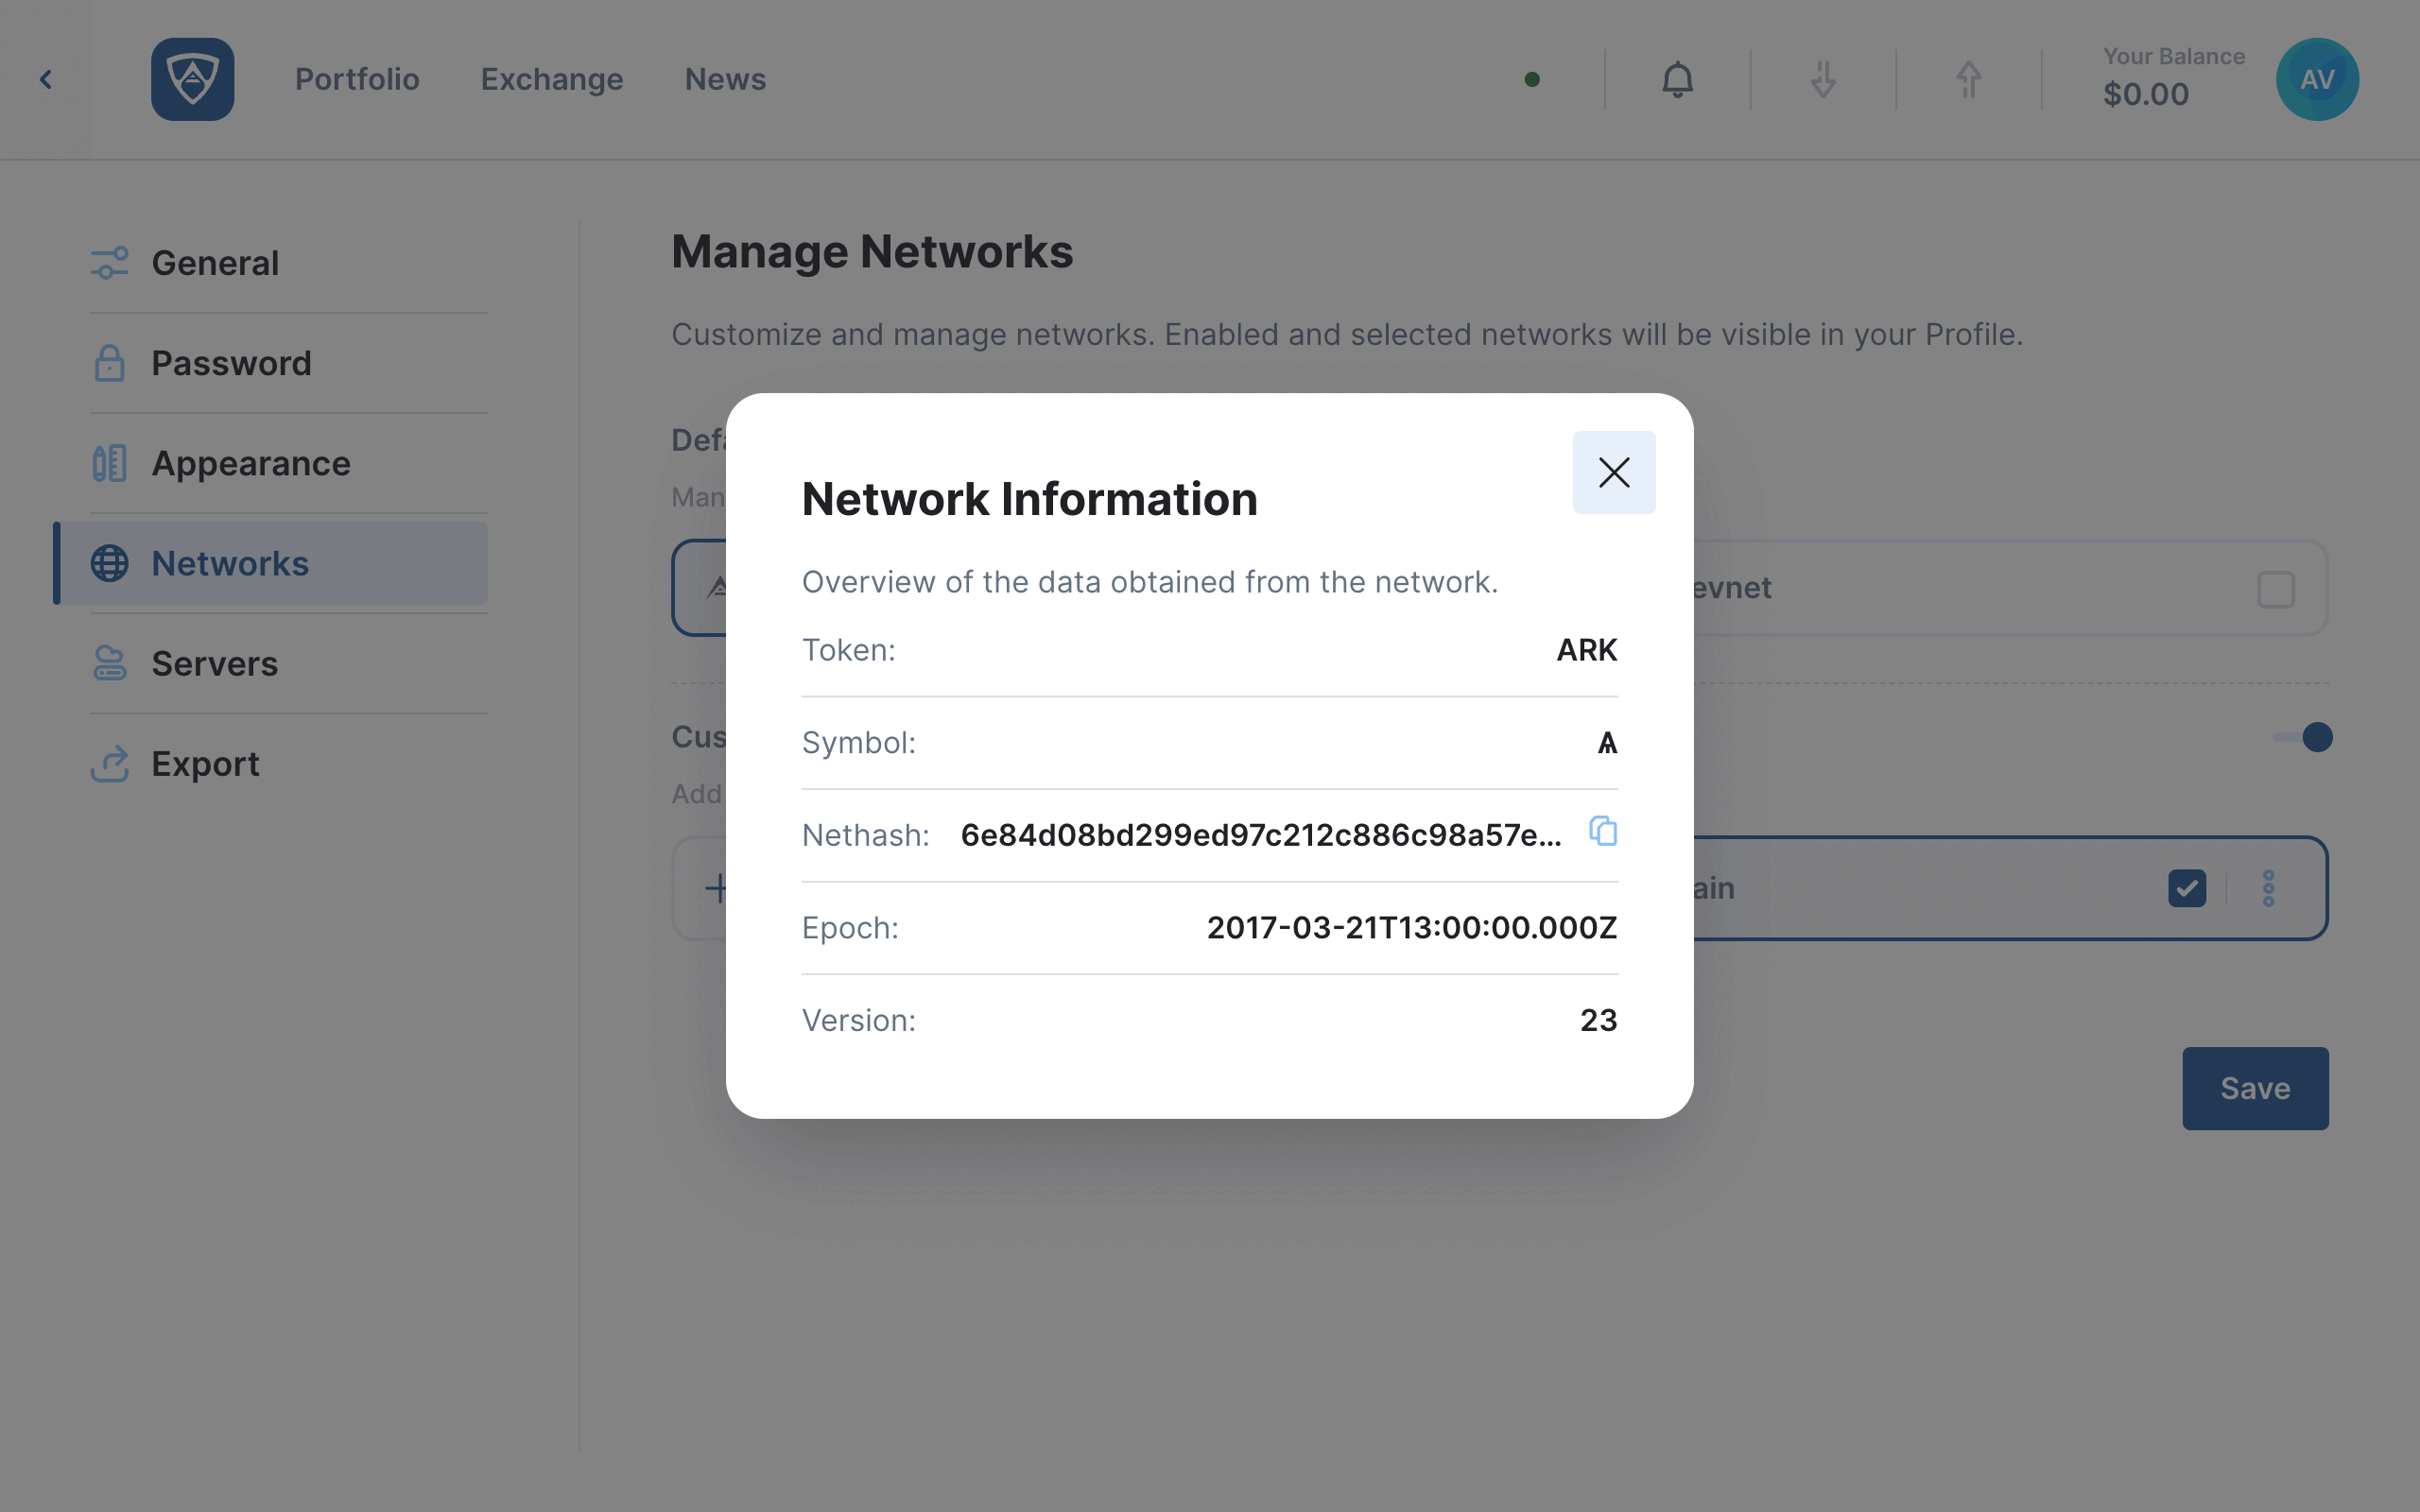
The Network Information modal will appear. Here you can view your network’s token, symbol, nethash, epoch and version.
Information
Navigate away from the Network Information modal by clicking anywhere in your browser (you will need to click outside of the modal itself).
Remove a Custom Network
Watch this helpful tutorial video on How to Remove a Custom Network in ARKVault
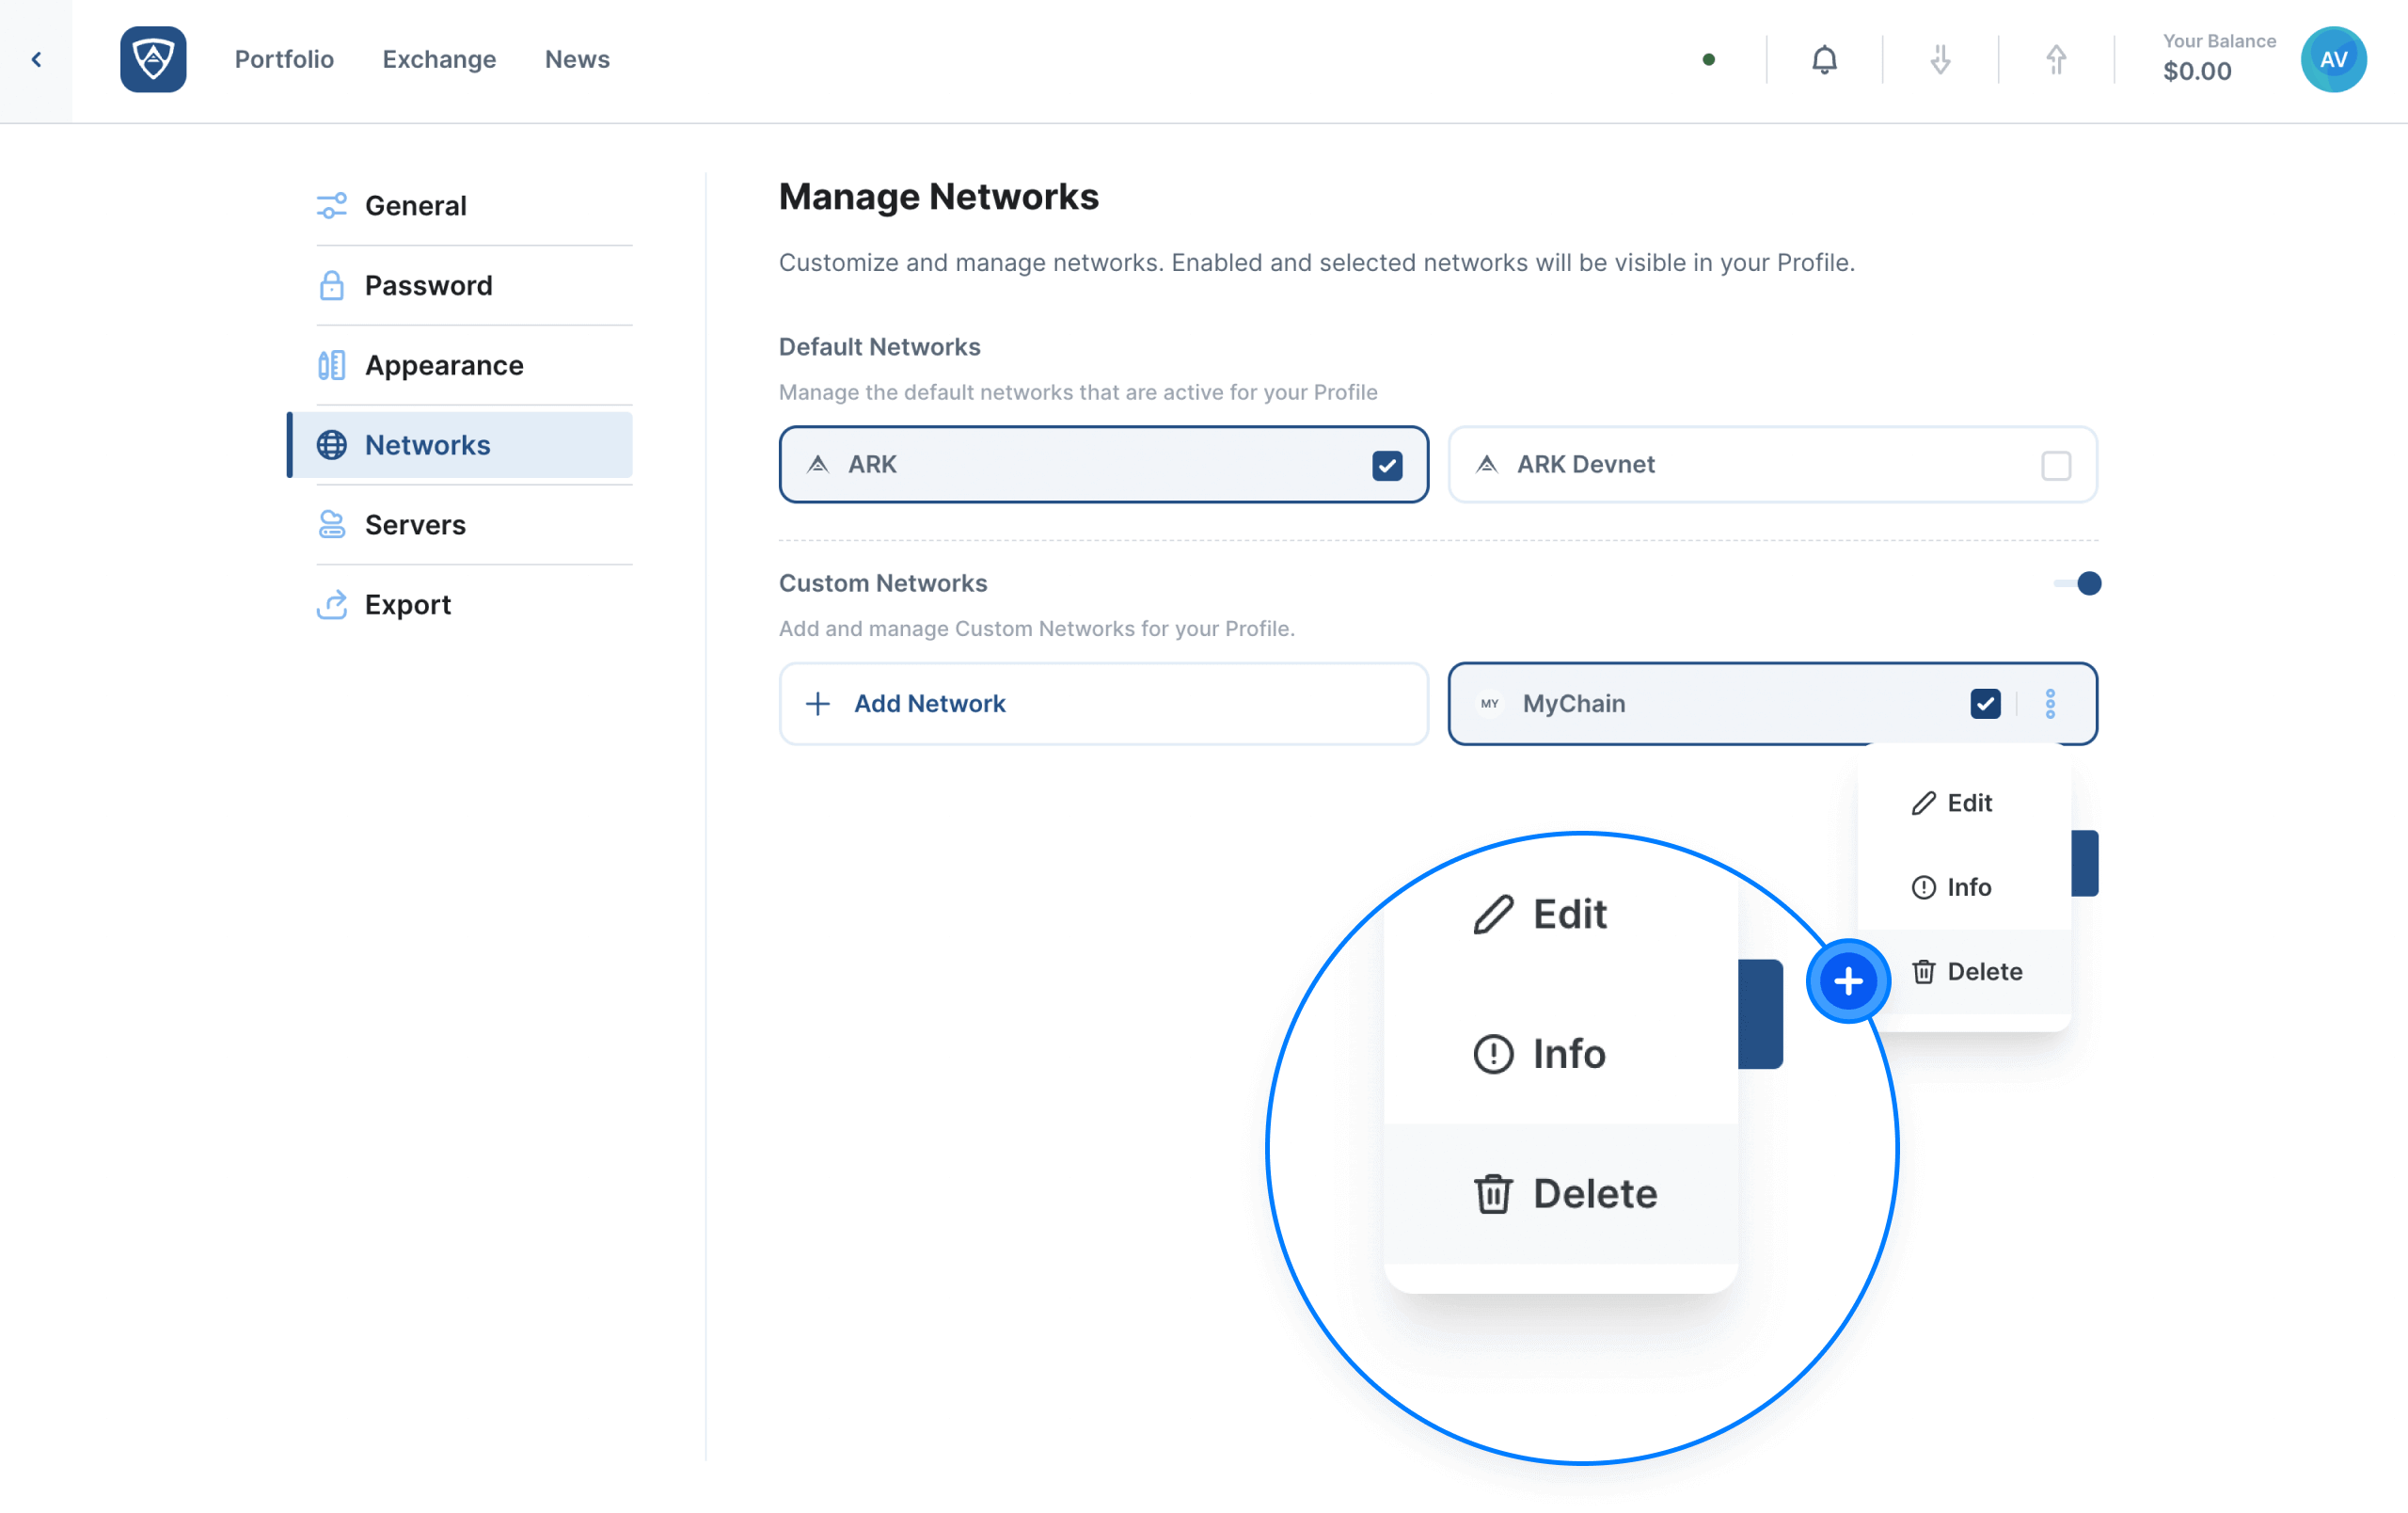
If you wish to remove a custom network, click the kebab menu (three dots) located to the right of the network you wish to remove and select Delete from the dropdown menu.
The Remove Network modal will appear asking you to confirm your decision.
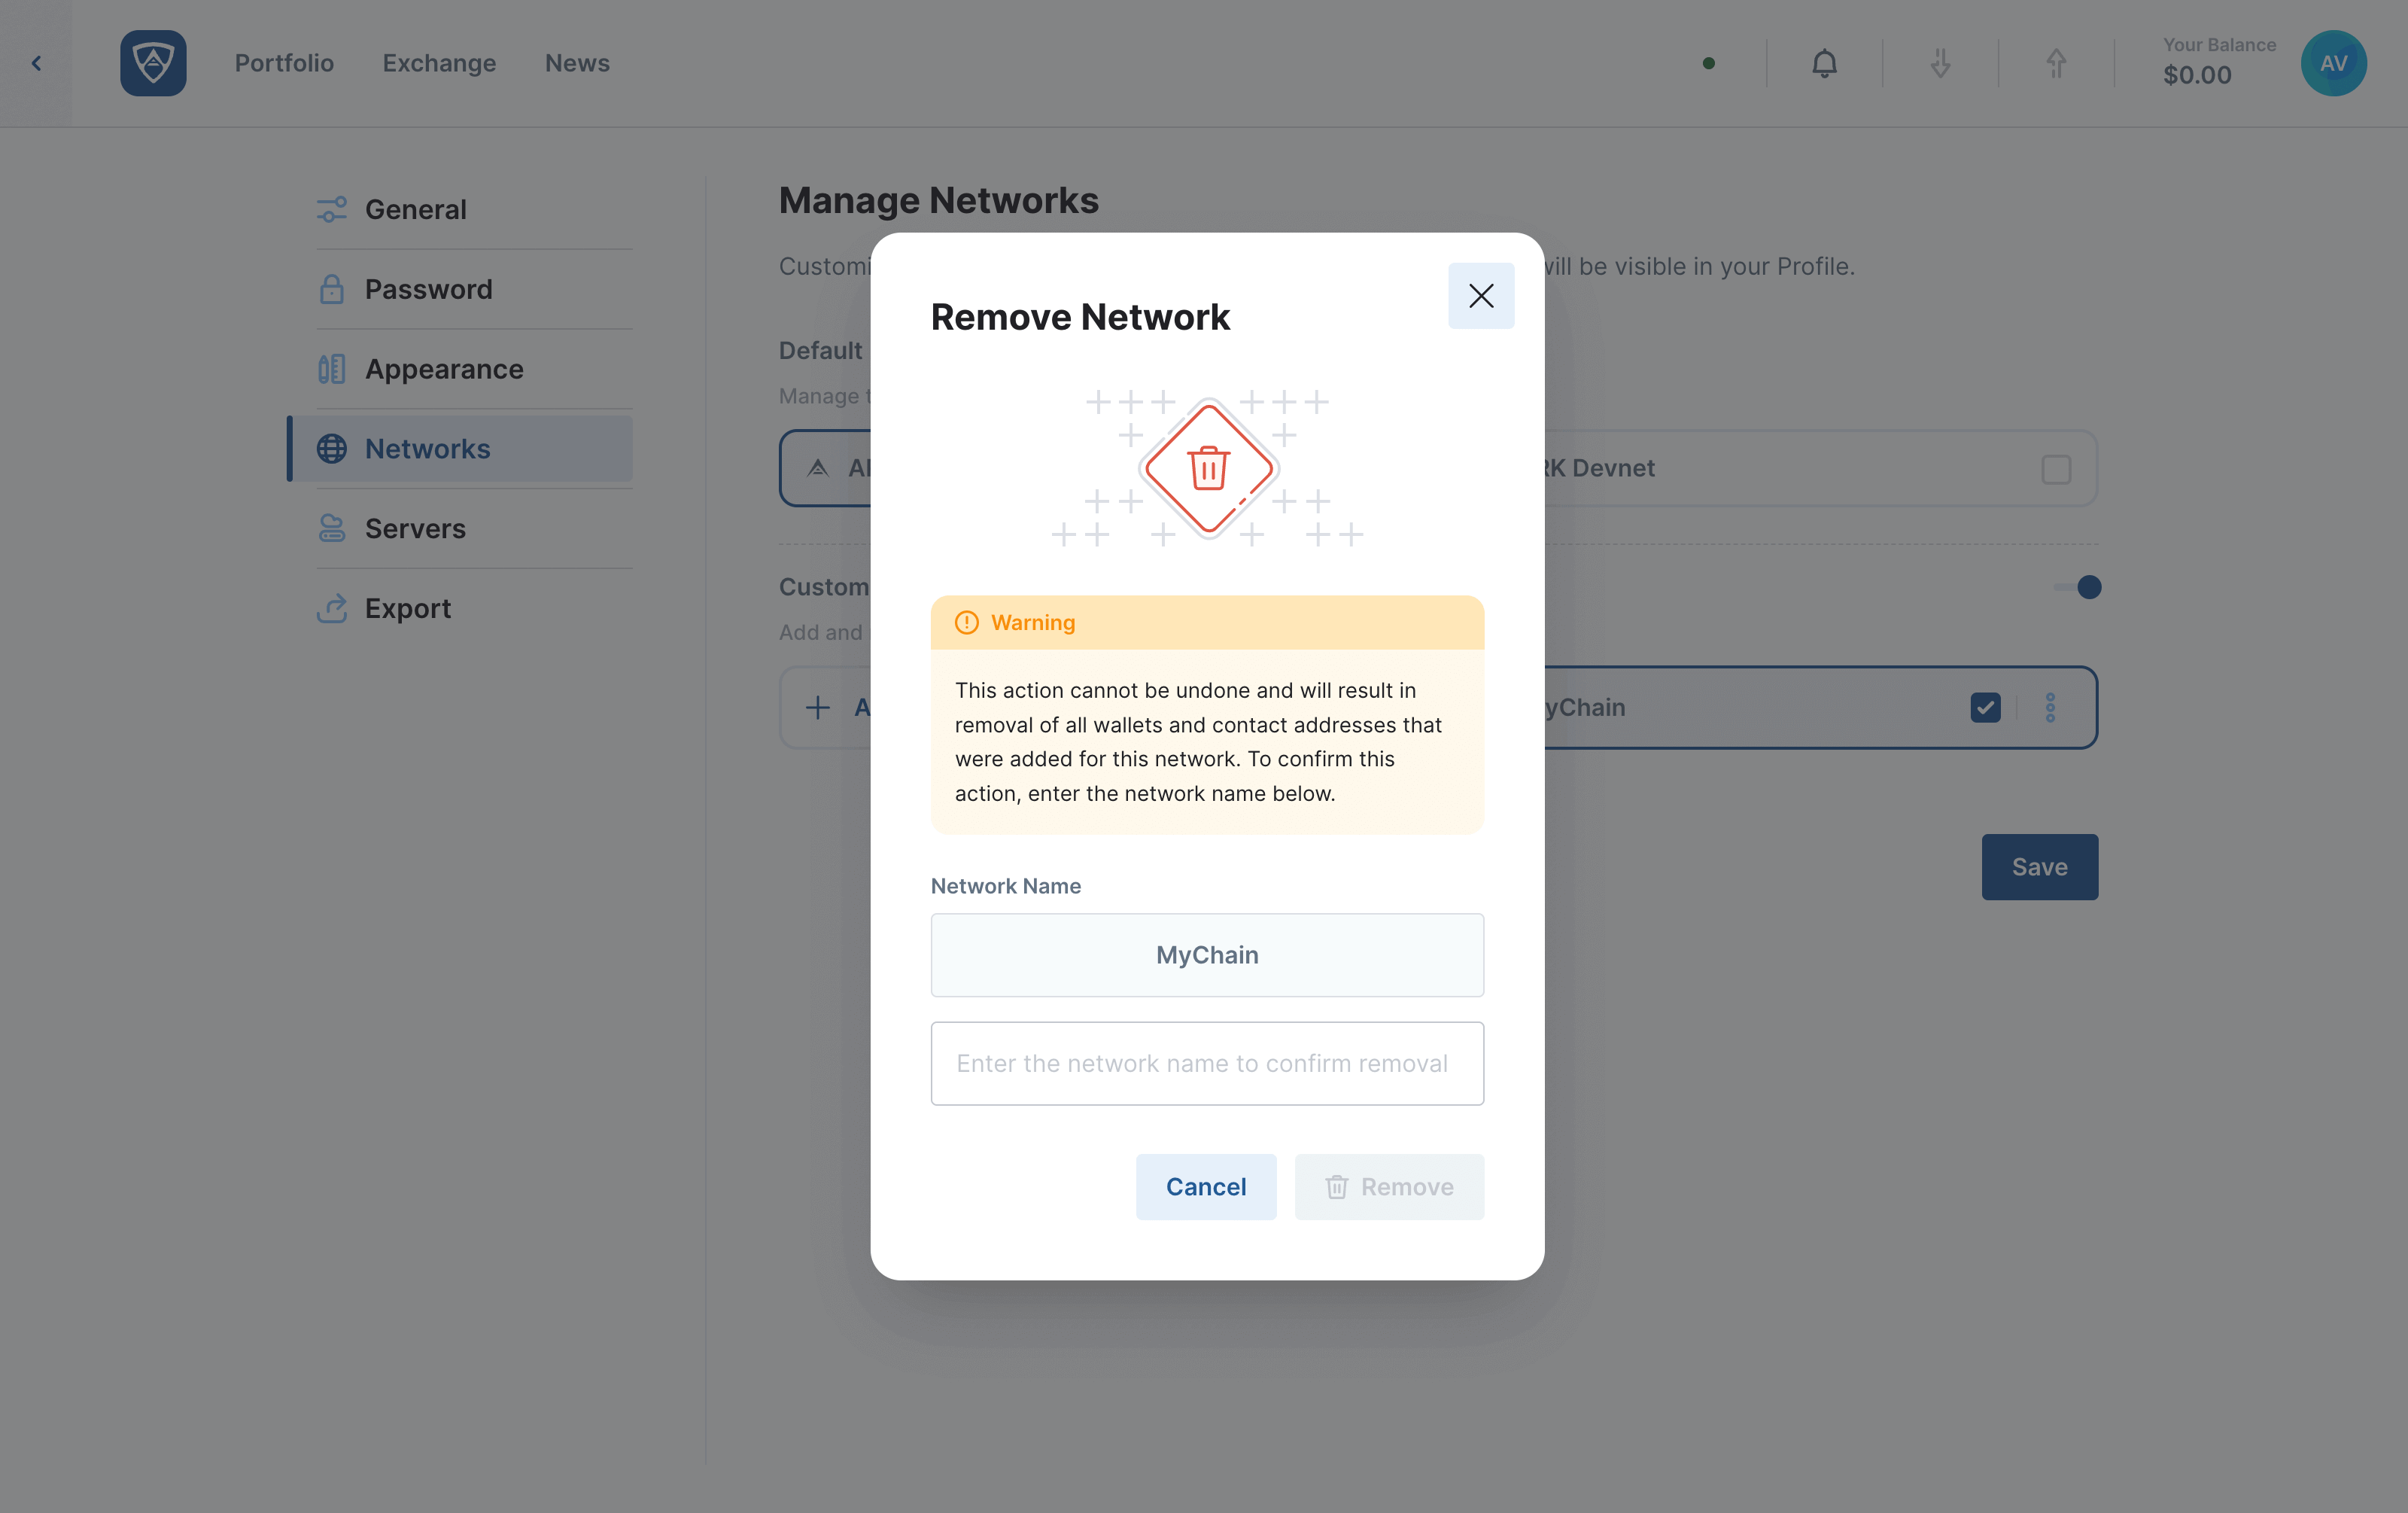
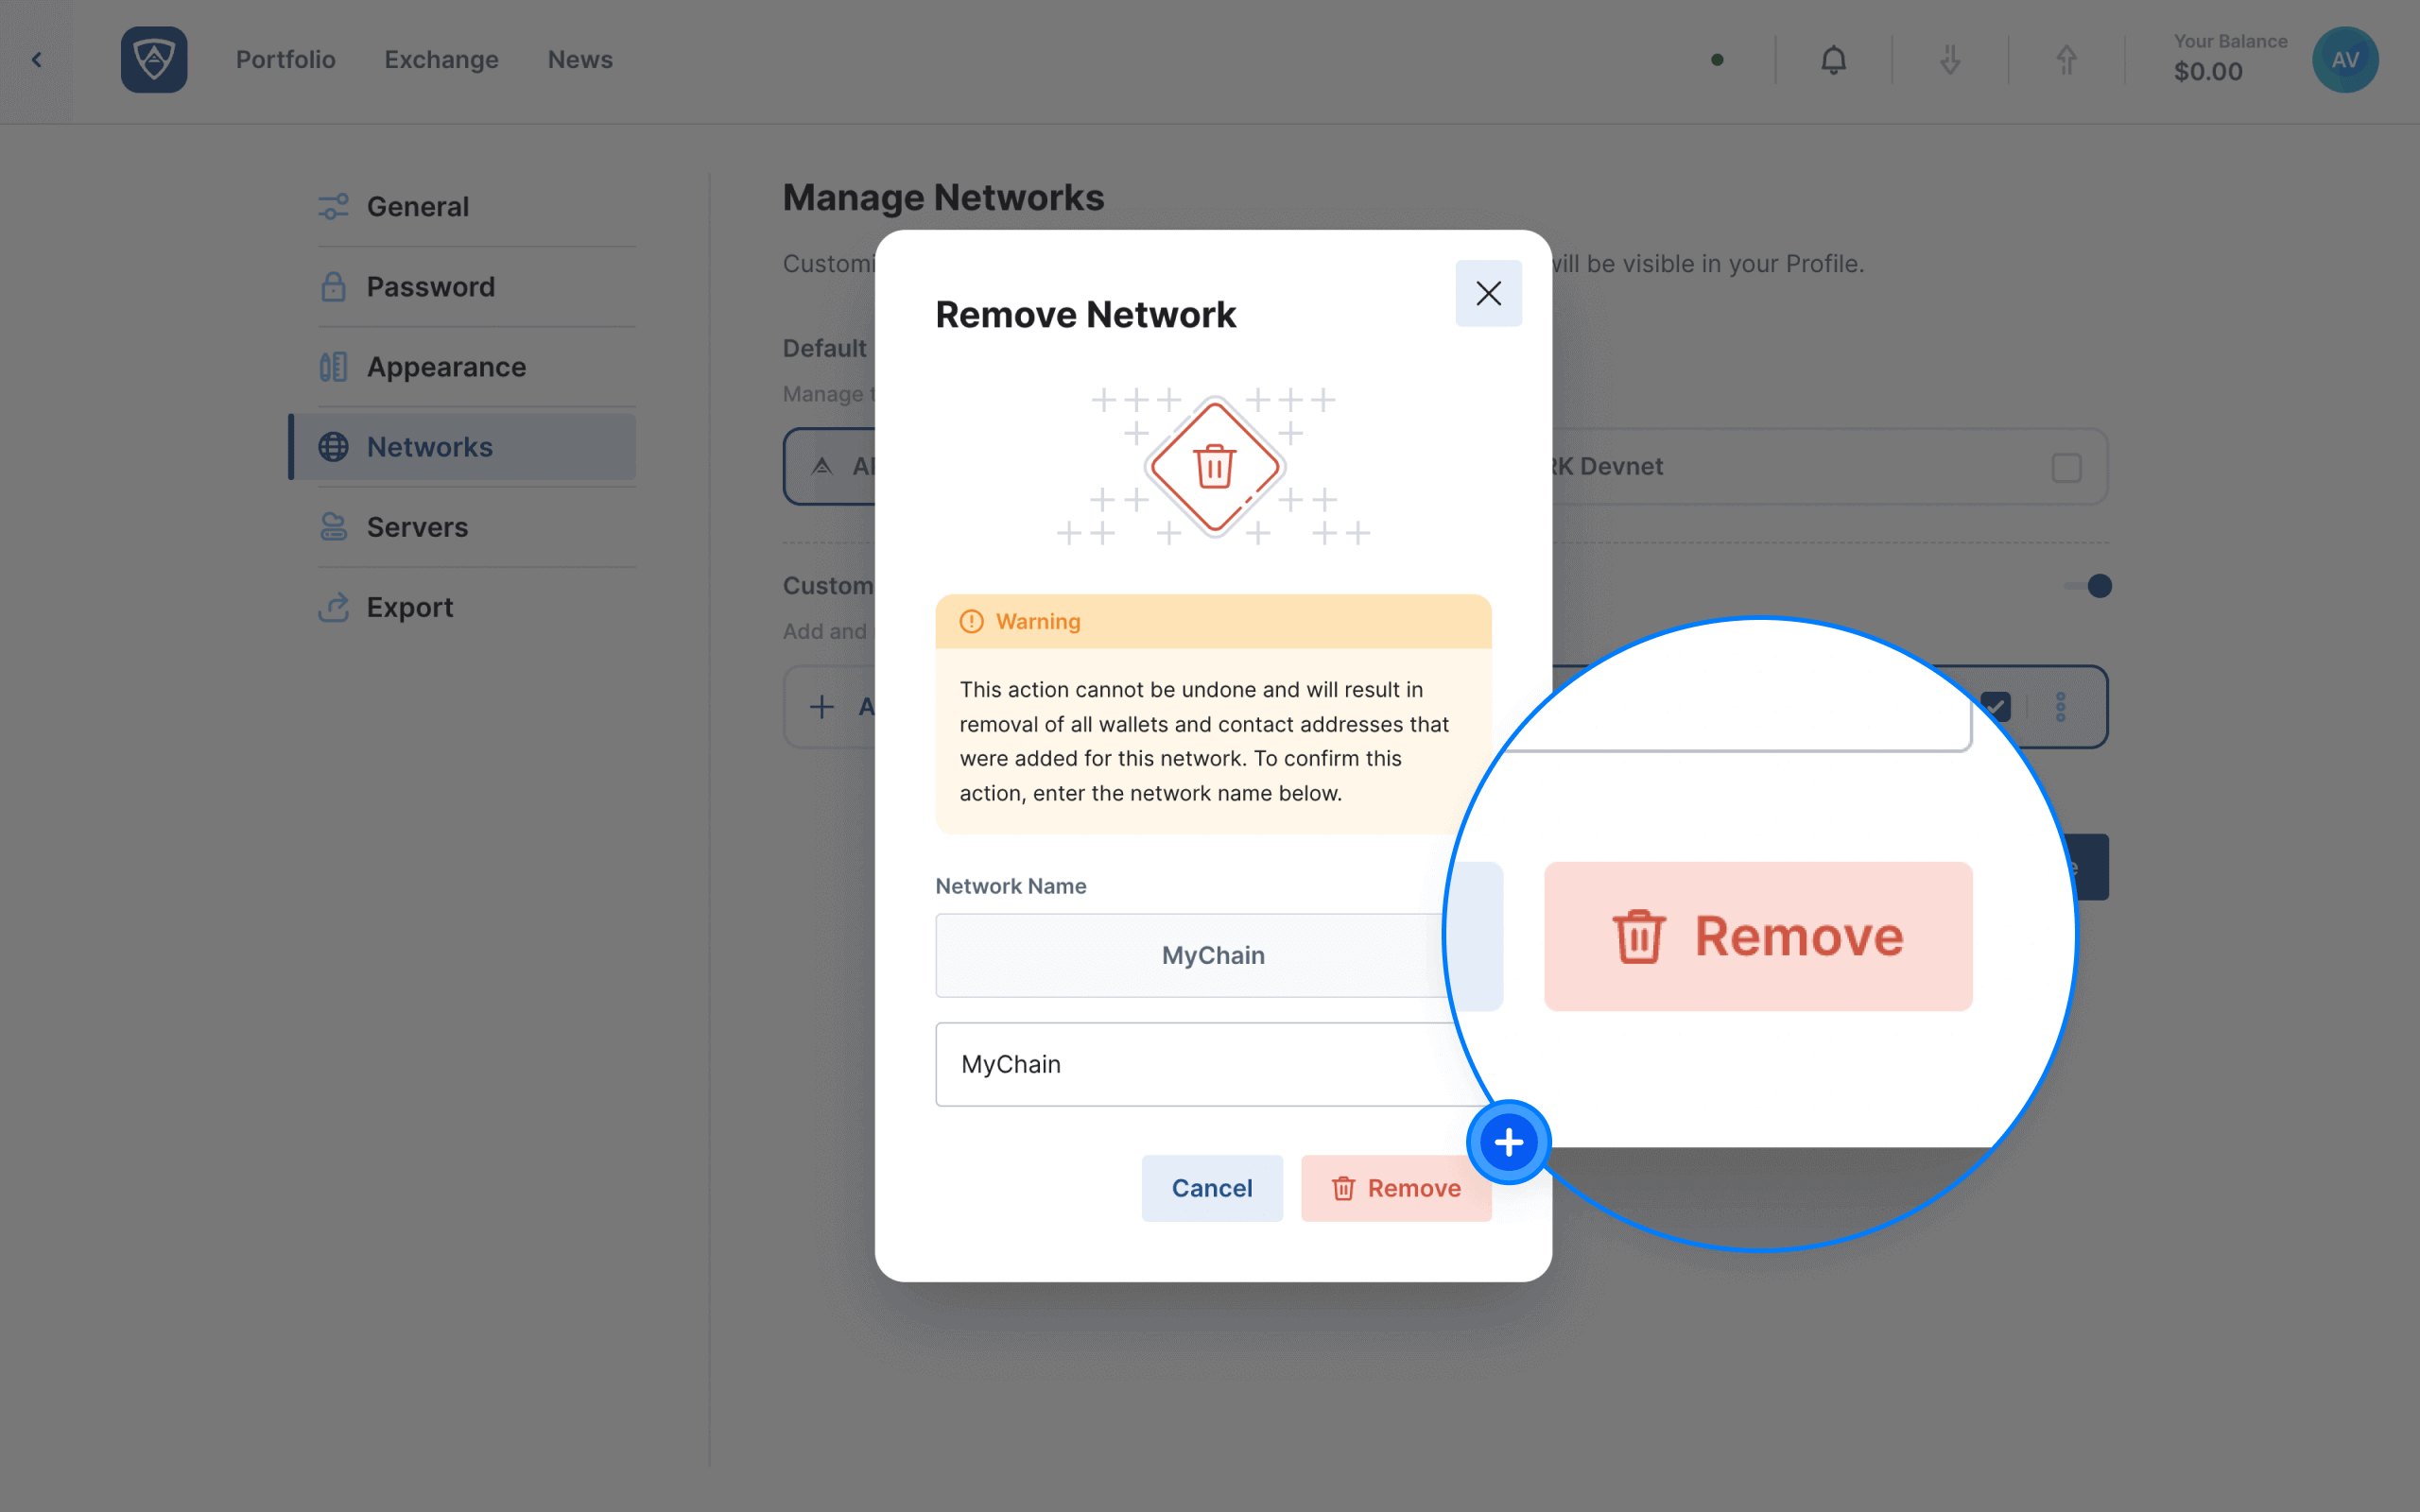
If you wish to proceed with the deletion, type the name of the network in the field provided and click the Remove button to finalize the process. Alternatively, if you do not wish to proceed, click the Cancel button.
Attention
Whenever you make any changes to the Manage Networks page, you will need to click the Save button located in the bottom right of the page in order to retain them.