Multisignature Wallets
Schnorr Signatures aggregate multiple signatures and their corresponding keys into a single public key. As a result, it is possible to initiate transactions in which a minimum number of participants (or signatures) must provide their consent in order to validate them. The following information will explain how to:
Overview
To understand the purpose of multisignature wallets, it is necessary to understand some fundamentals with regards to their functionality. If you wish to create a multisignature wallet, you will need at least one other address that has broadcast a transaction to the network to validate its creation.
Key Facts:
- This is considered an
mofn(orthreshold) multisignature scheme mrepresentsminimum required signatureswhilenrepresentstotal signaturesmis less than or equal ton, meaning that out ofnparticipants, at leastm(thethreshold) must sign a transaction in order to validate it- Multisignature wallets must have at least 2 and no more than 16 total participants (
n) - Any multisignature wallet with
n = 2will require both participants to sign a transaction in order to validate it - The result of a multisignature registration is a shared wallet with an associated multisignature address
Process
Participant #1adds a number of participants (n) and the minimum number signatures required (m) to the registration transaction- Each of
nparticipants signs the registration transaction Participant #1adds the final signature to the registration transactionParticipant #1broadcasts the registration transaction (containing allnsignatures as well as the final signature) to the network- This results in the creation of a multisignature address
Import - Each participant imports the multisignature wallet using its address.
Funding - One or more parties then transfers funds to the multisignature wallet.
- Any one of
nparticipants initiates a transaction from the multisignature wallet - Each of
mparticipants signs this transaction - Any one of
nparticipants broadcasts the transaction (containing a minimum ofmsignatures) to the network
Register a Multisignature Wallet
Watch this helpful tutorial video on How to Register a Multisignature Wallet in ARKVault
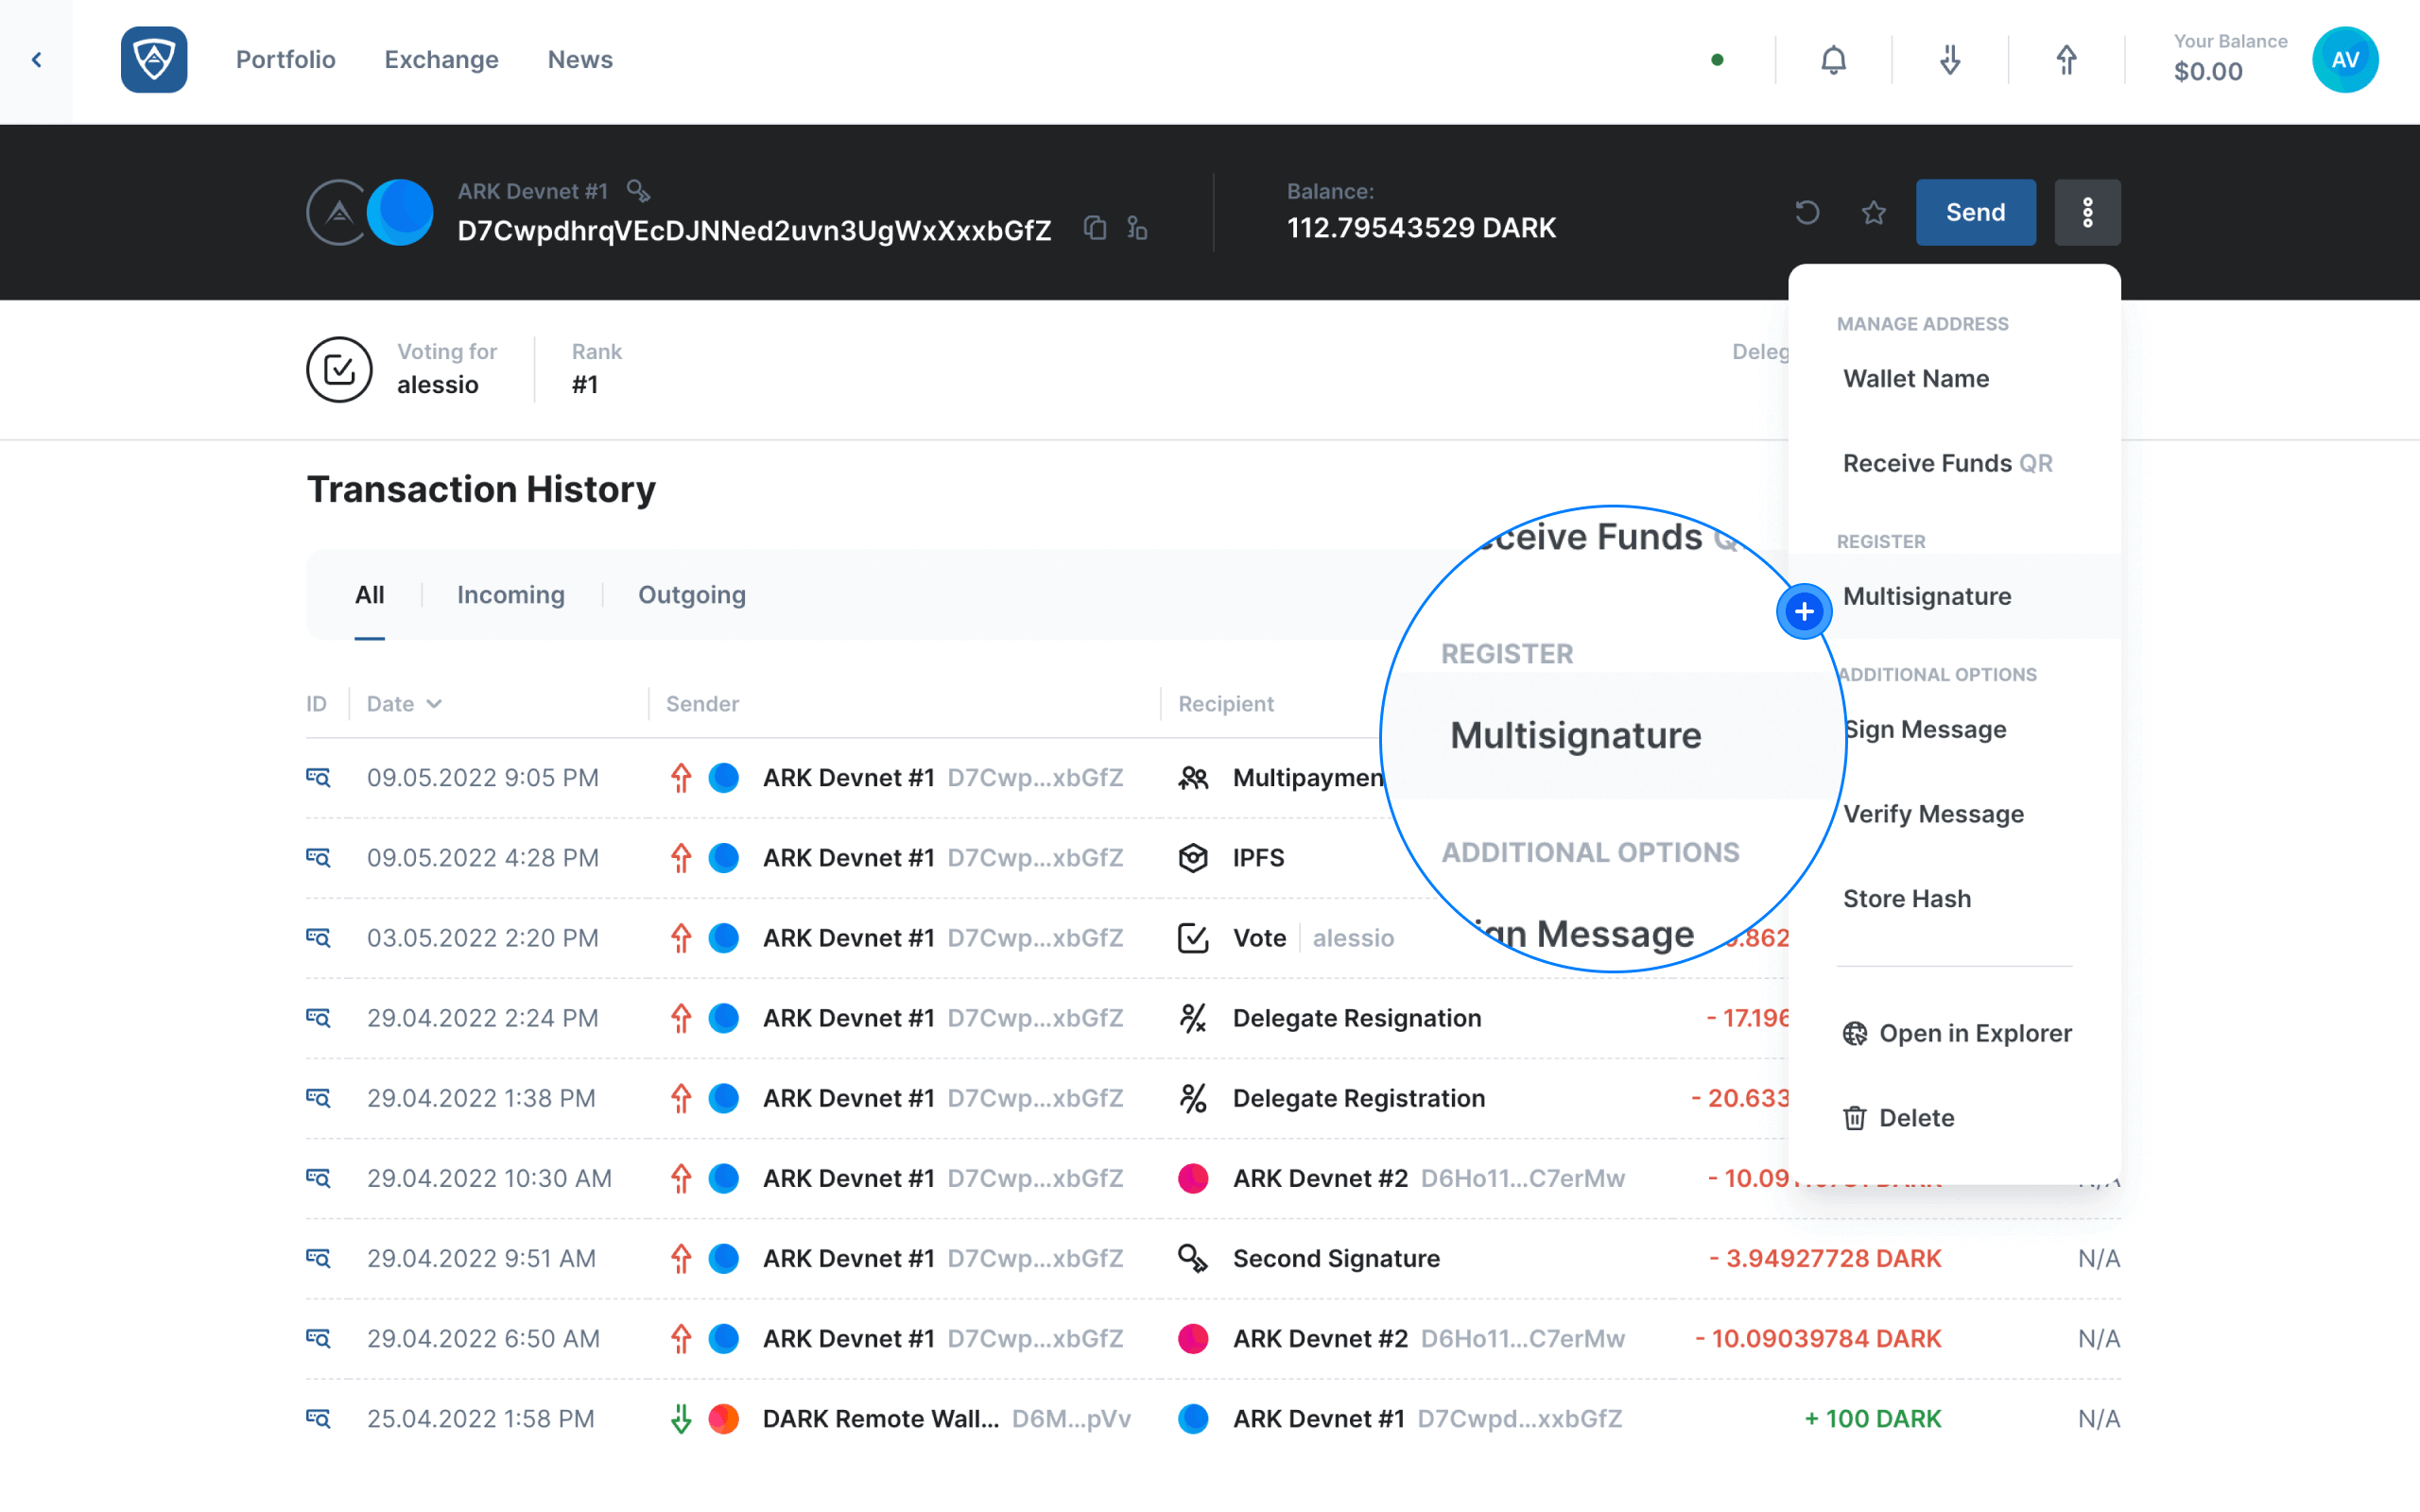
While viewing the wallet from which you wish to register a multisignature wallet, click the kebab menu (three dots) that appears in the upper right corner of the page and select Multisignature from the dropdown menu.
Information
Any wallet may initiate the process of creating a multisignature wallet by adding a number of participants to a multisignature registration transaction.
Enter the Registration Details
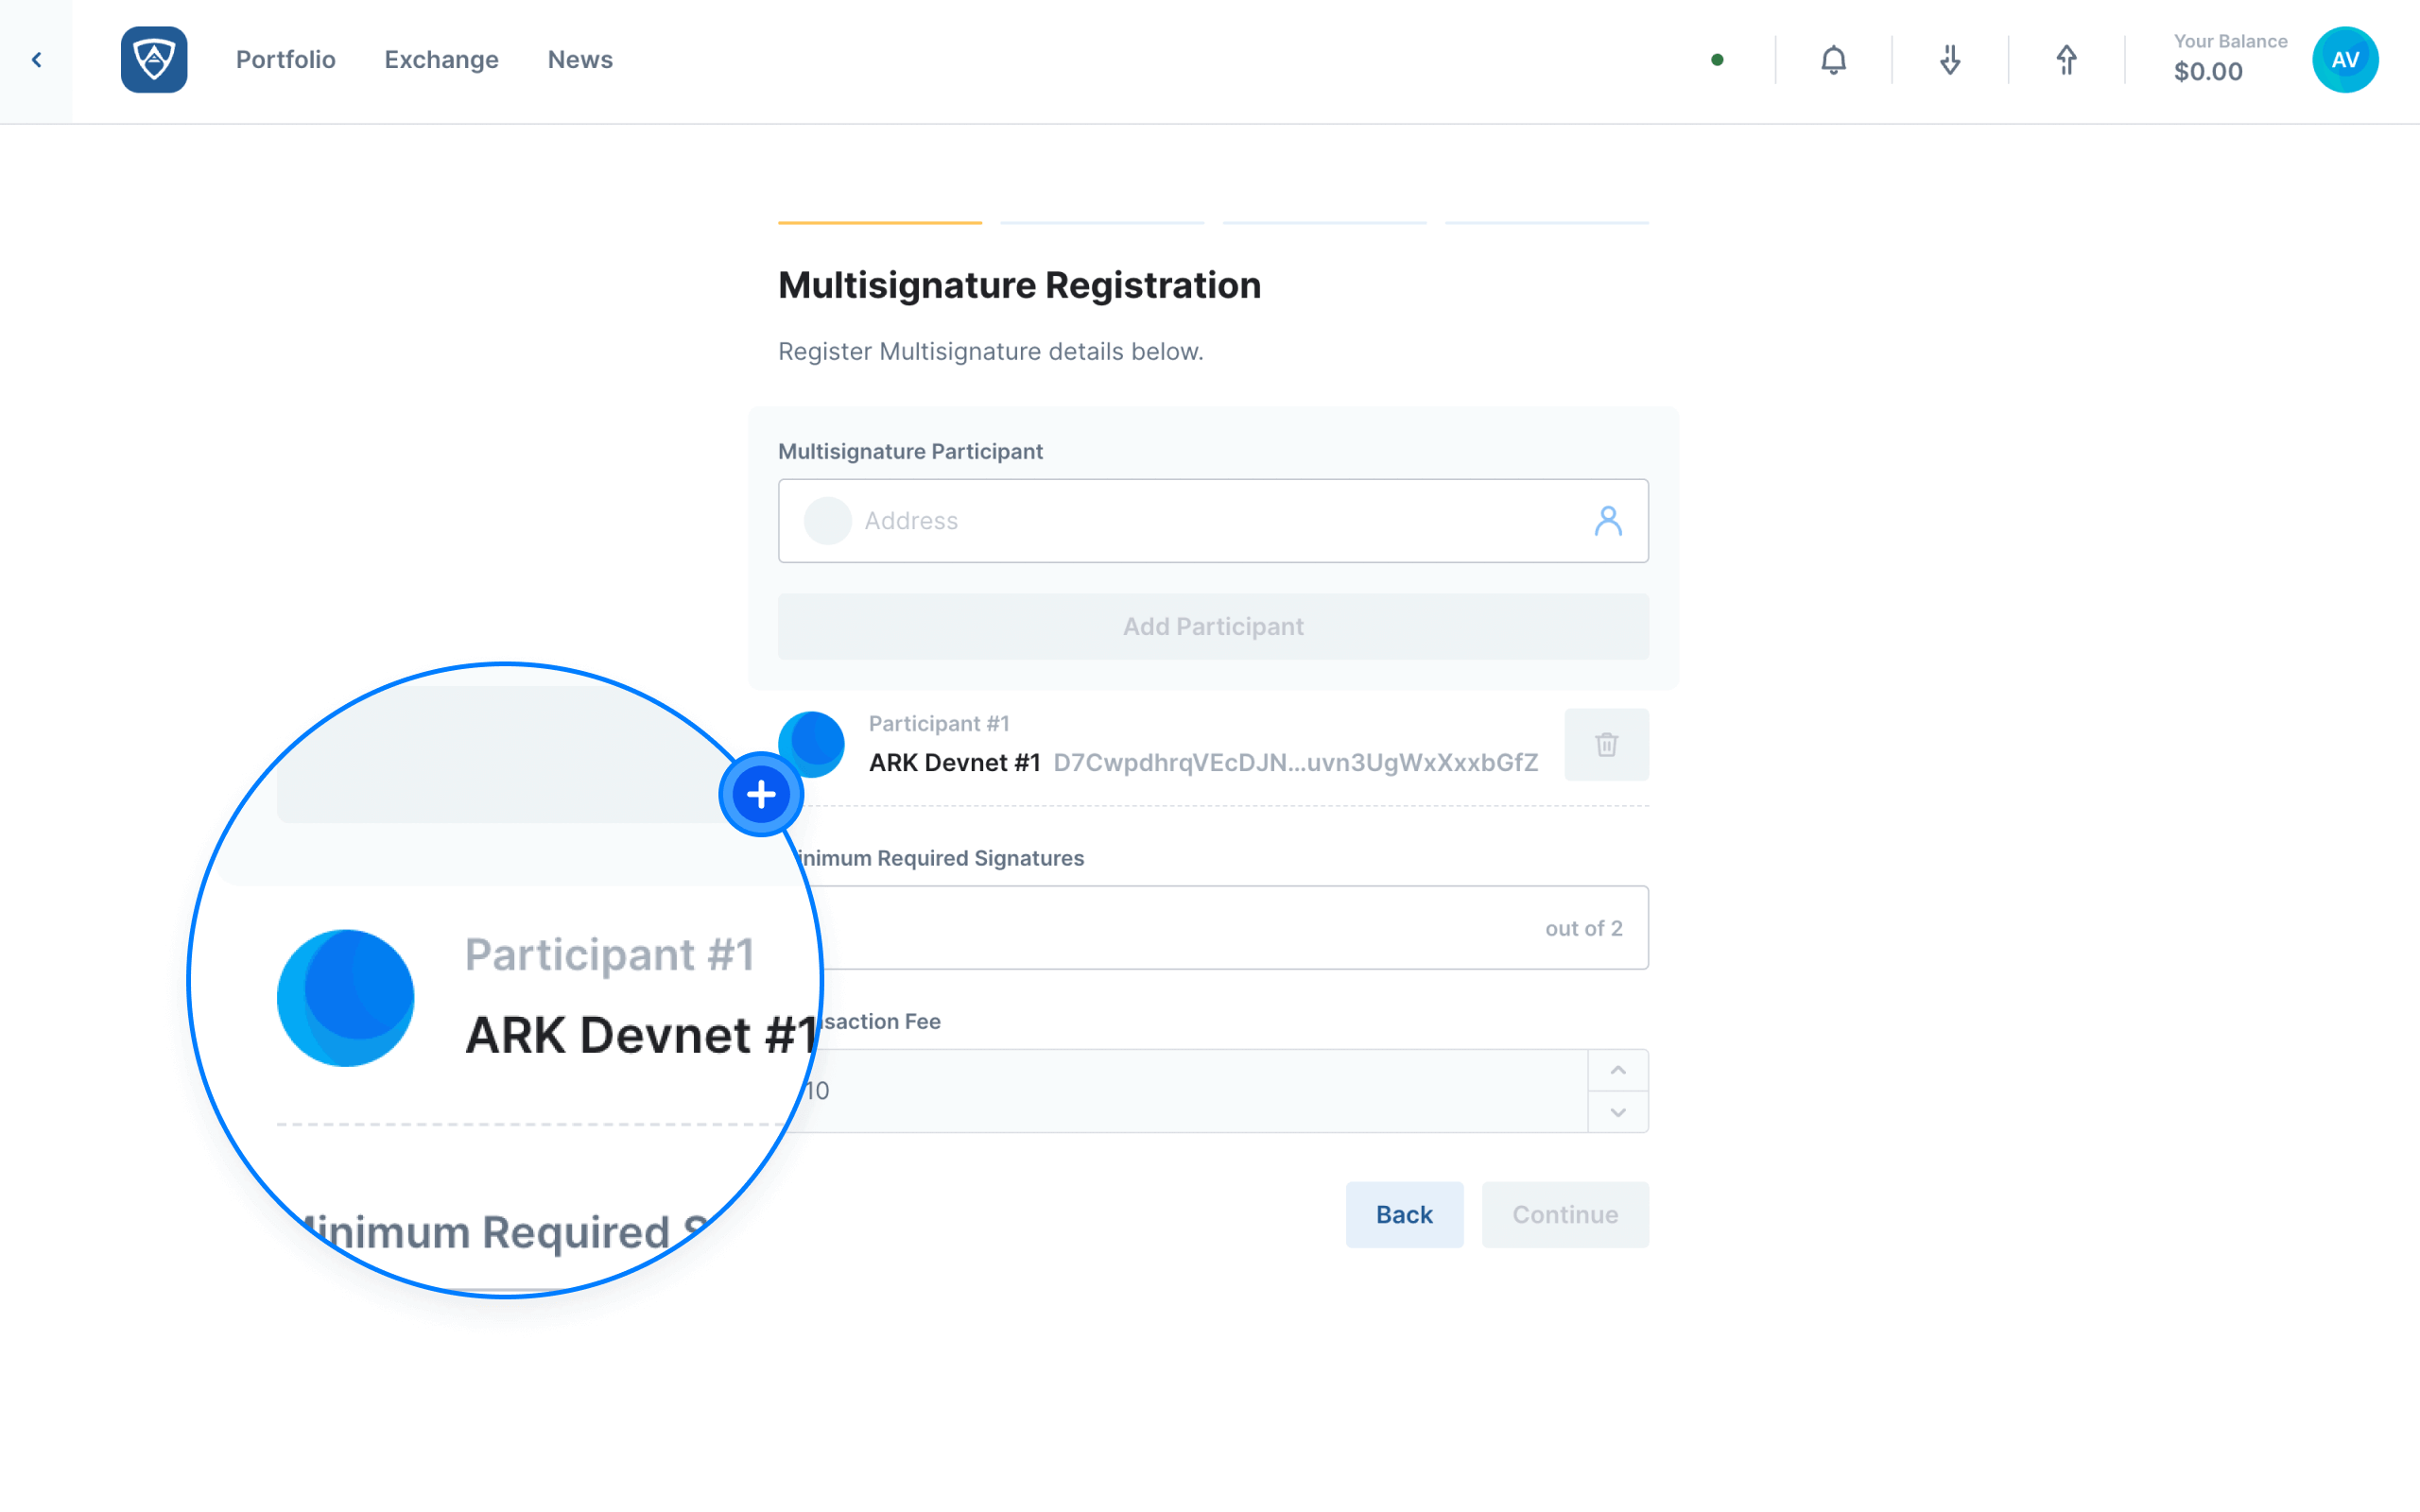
The Multisignature Registration screen will appear. You will notice that your wallet address appears under Participant #1 directly beneath the Multisignature Participant block. Also note the Minimum Required Signatures field in which you may enter between 2 and 16 signatures. Finally, the Transaction Fee field will automatically adjust the required fee as you add participants to your multisignature wallet registration.
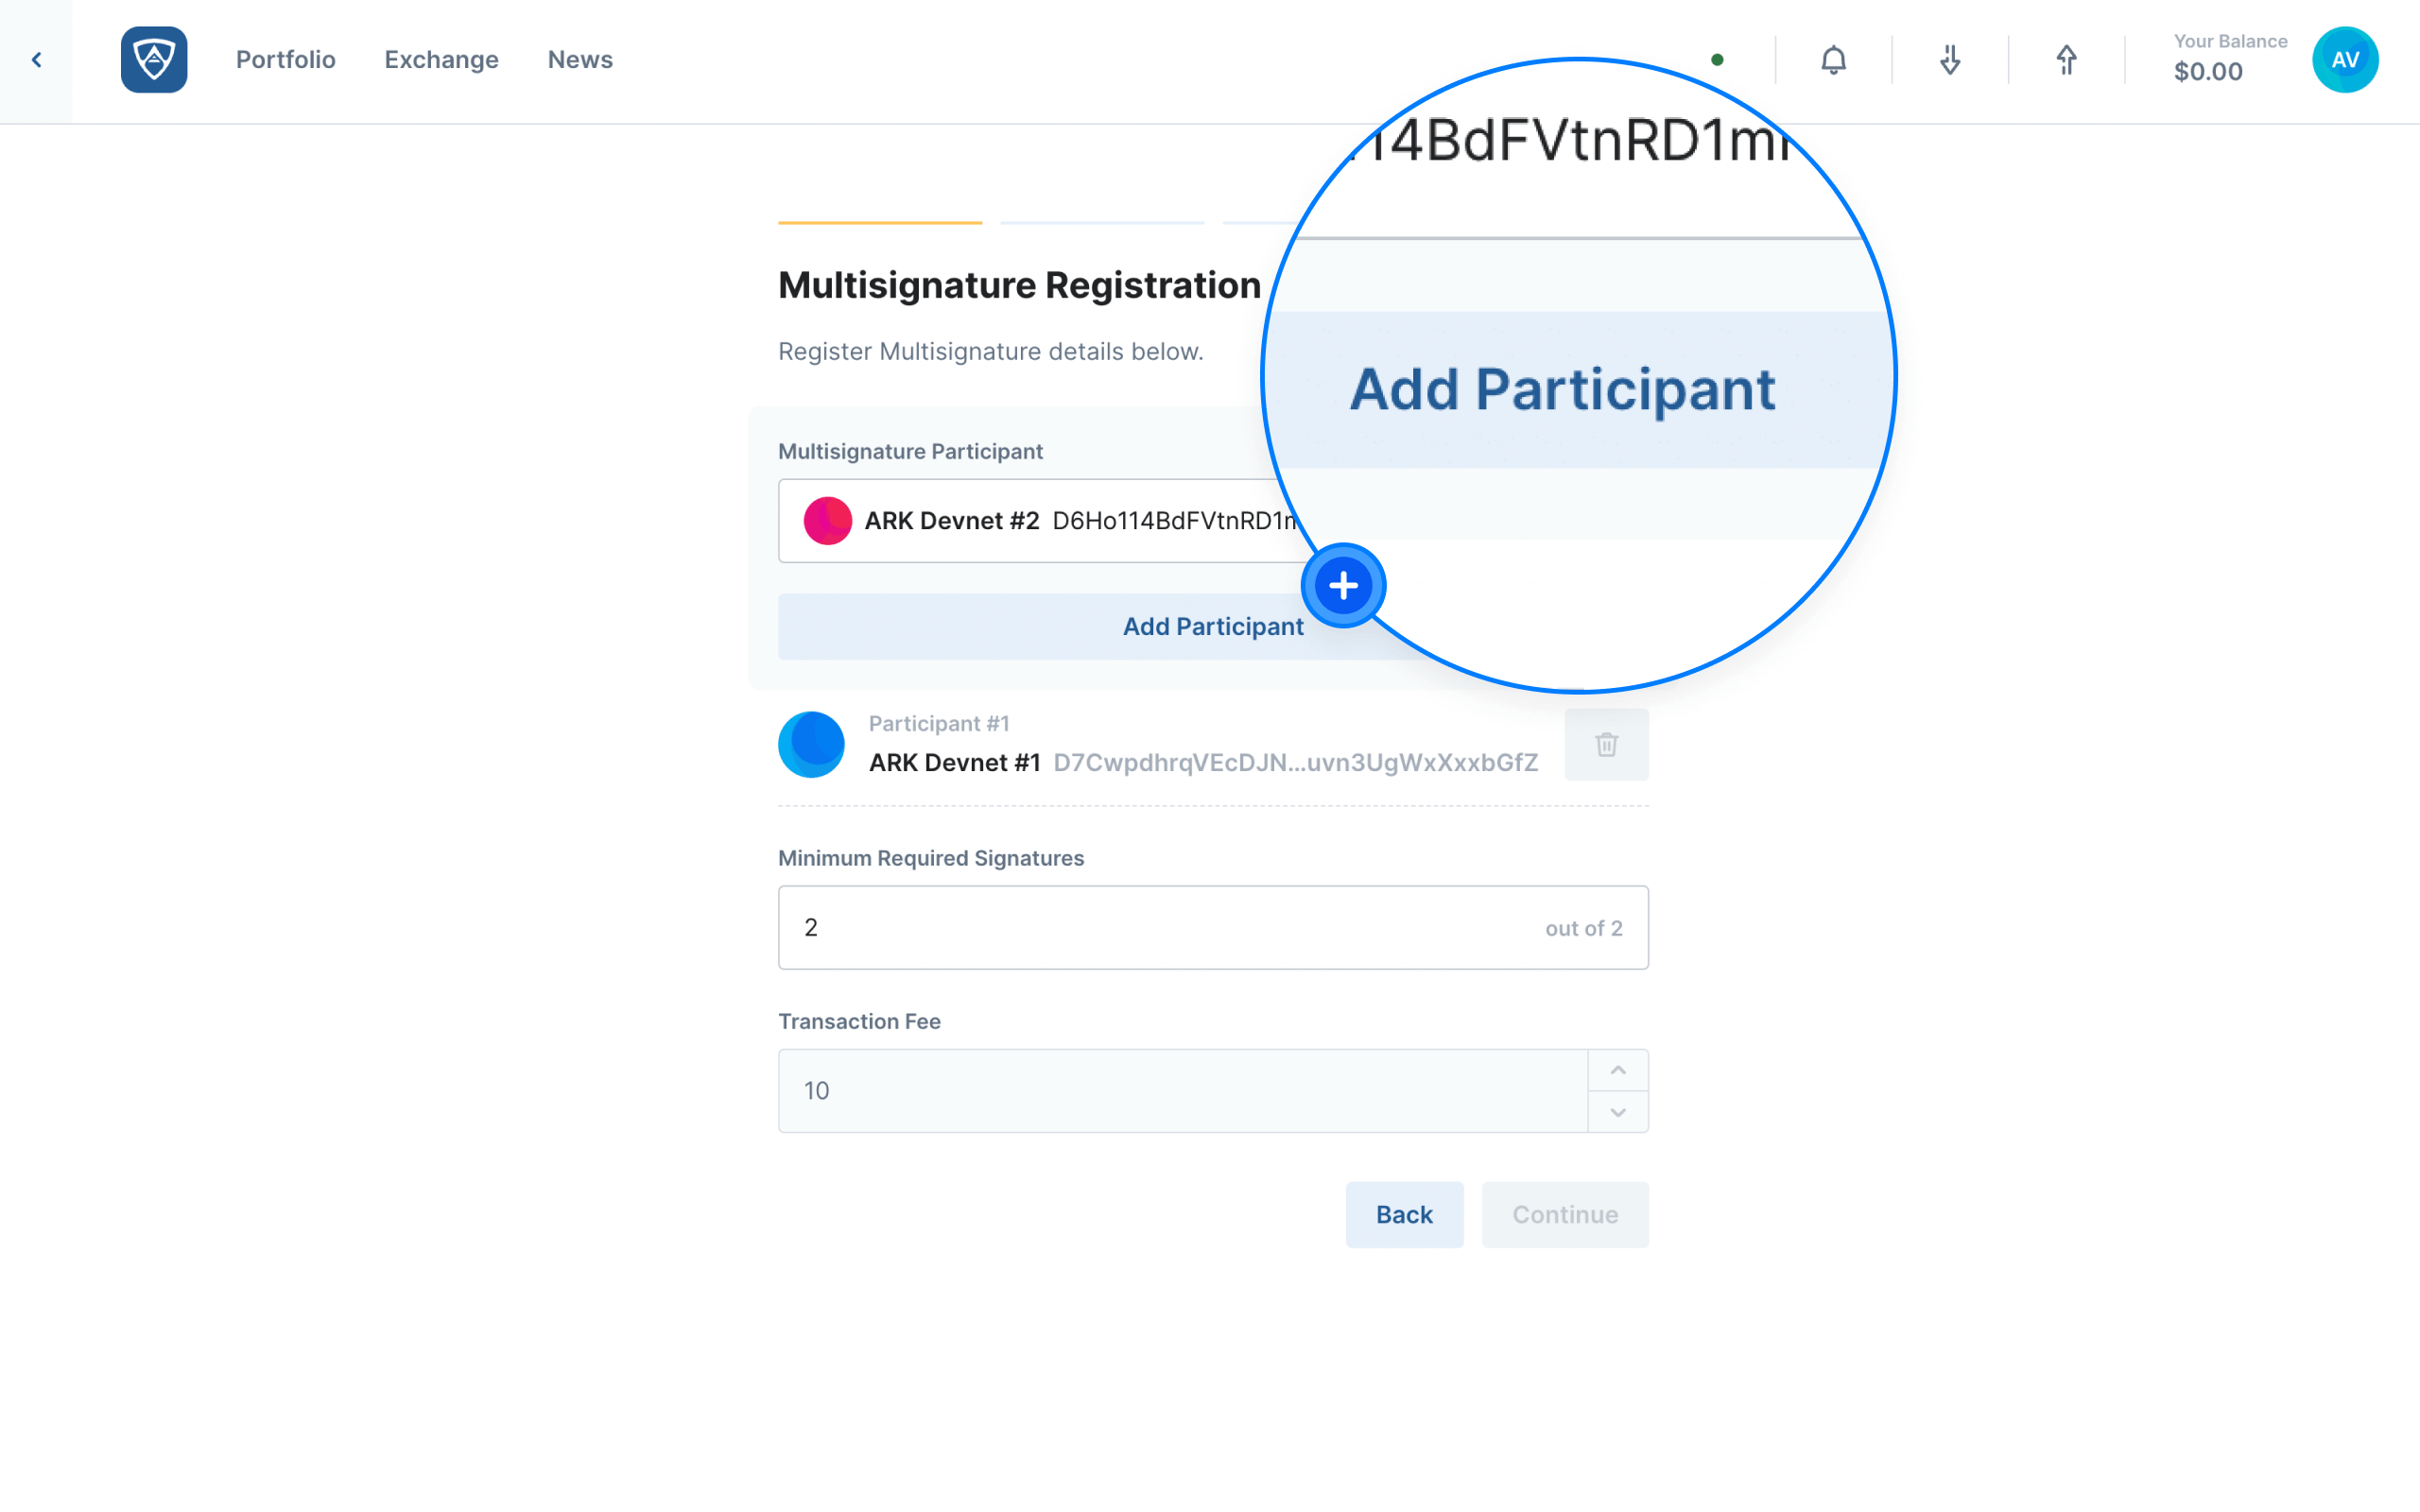
Add the address of the wallet you wish to include as a participant in the Multisignature Participant block. When ready, click the Add Participant button.
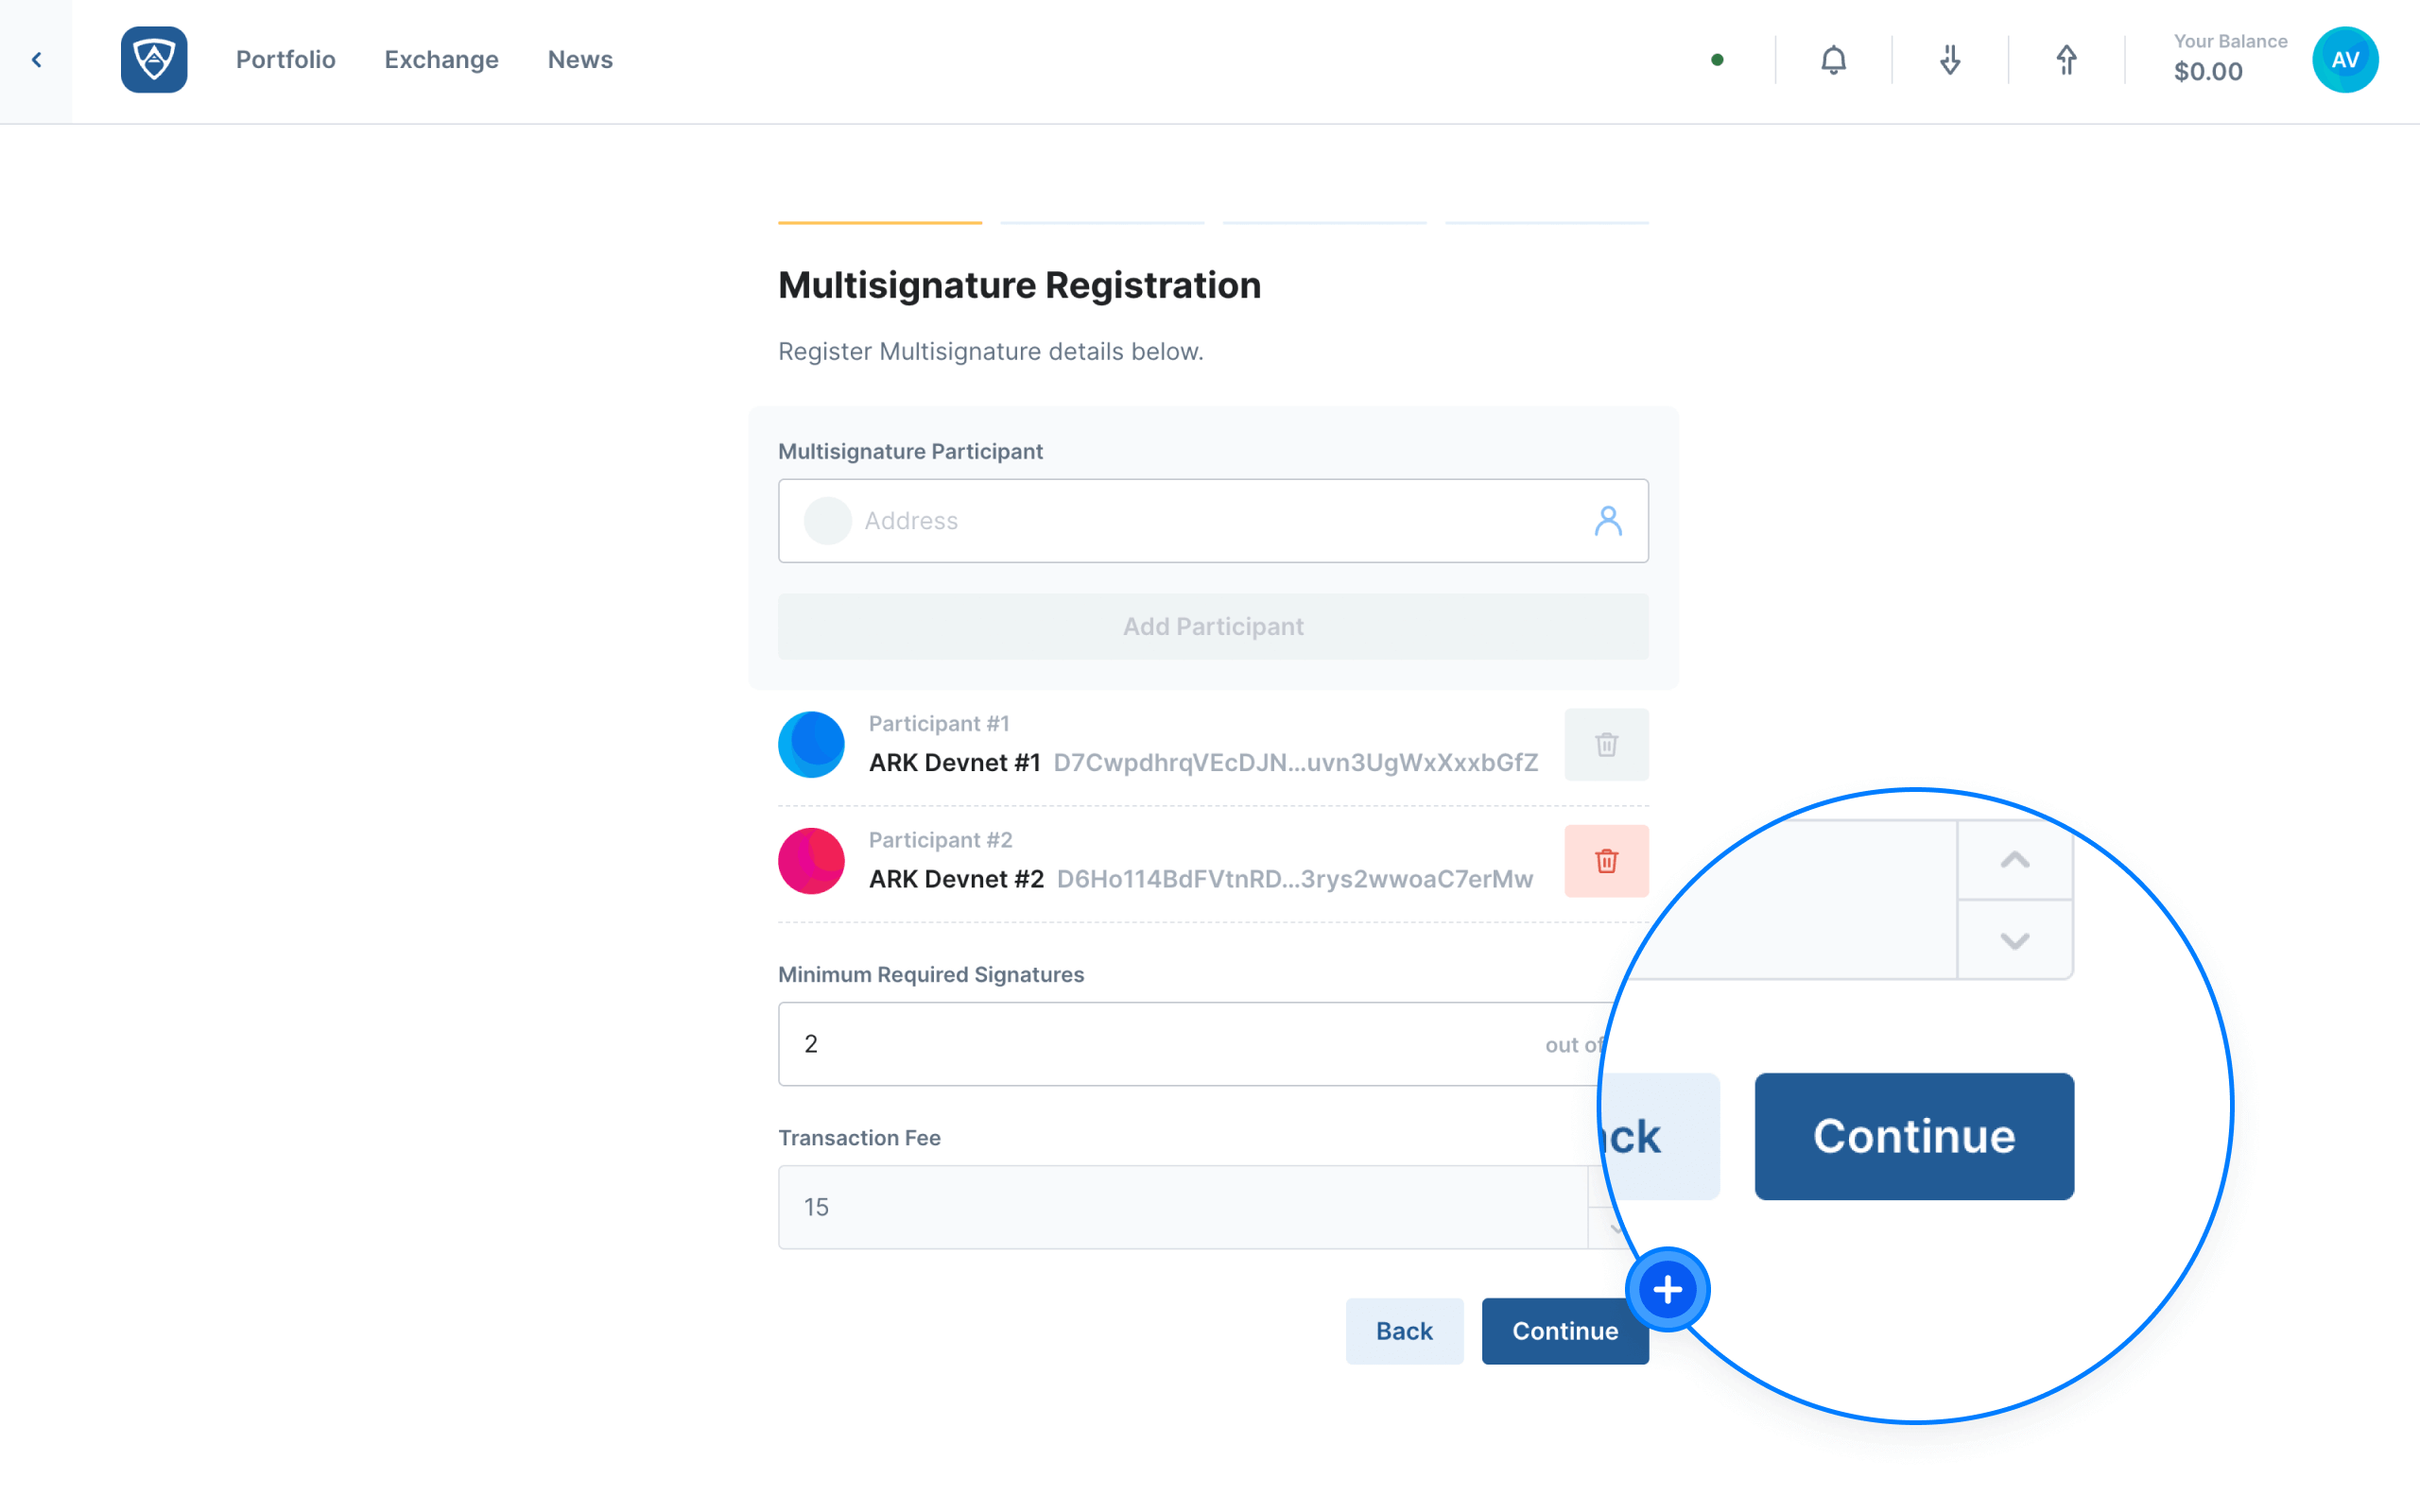
You will notice that the address you entered now appears beneath your wallet address as Participant #2. You will also notice that the Transaction Fee adjusts automatically after adding Participant #2. You may continue to add participants as required using the steps provided until all desired participants appear in the list of participants. When ready, click the Continue button. Alternatively, if you need to make adjustments or wish to abandon the process, click the Back button.
Review the Registration
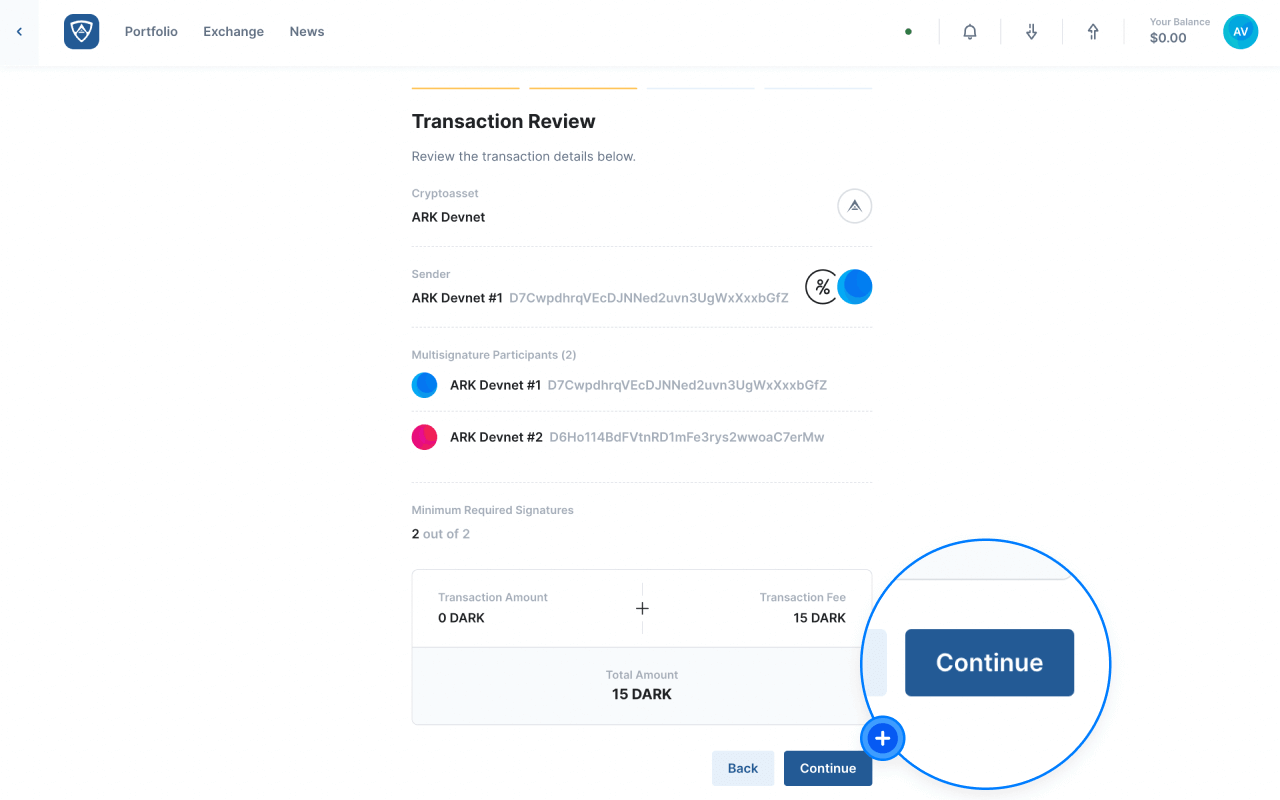
The Transaction Review screen will then appear providing you with all the details related to your multisignature wallet registration. Upon reviewing the information, click the Continue button. Alternatively, if you wish to make adjustments, click the Back button.
Authenticate the Registration
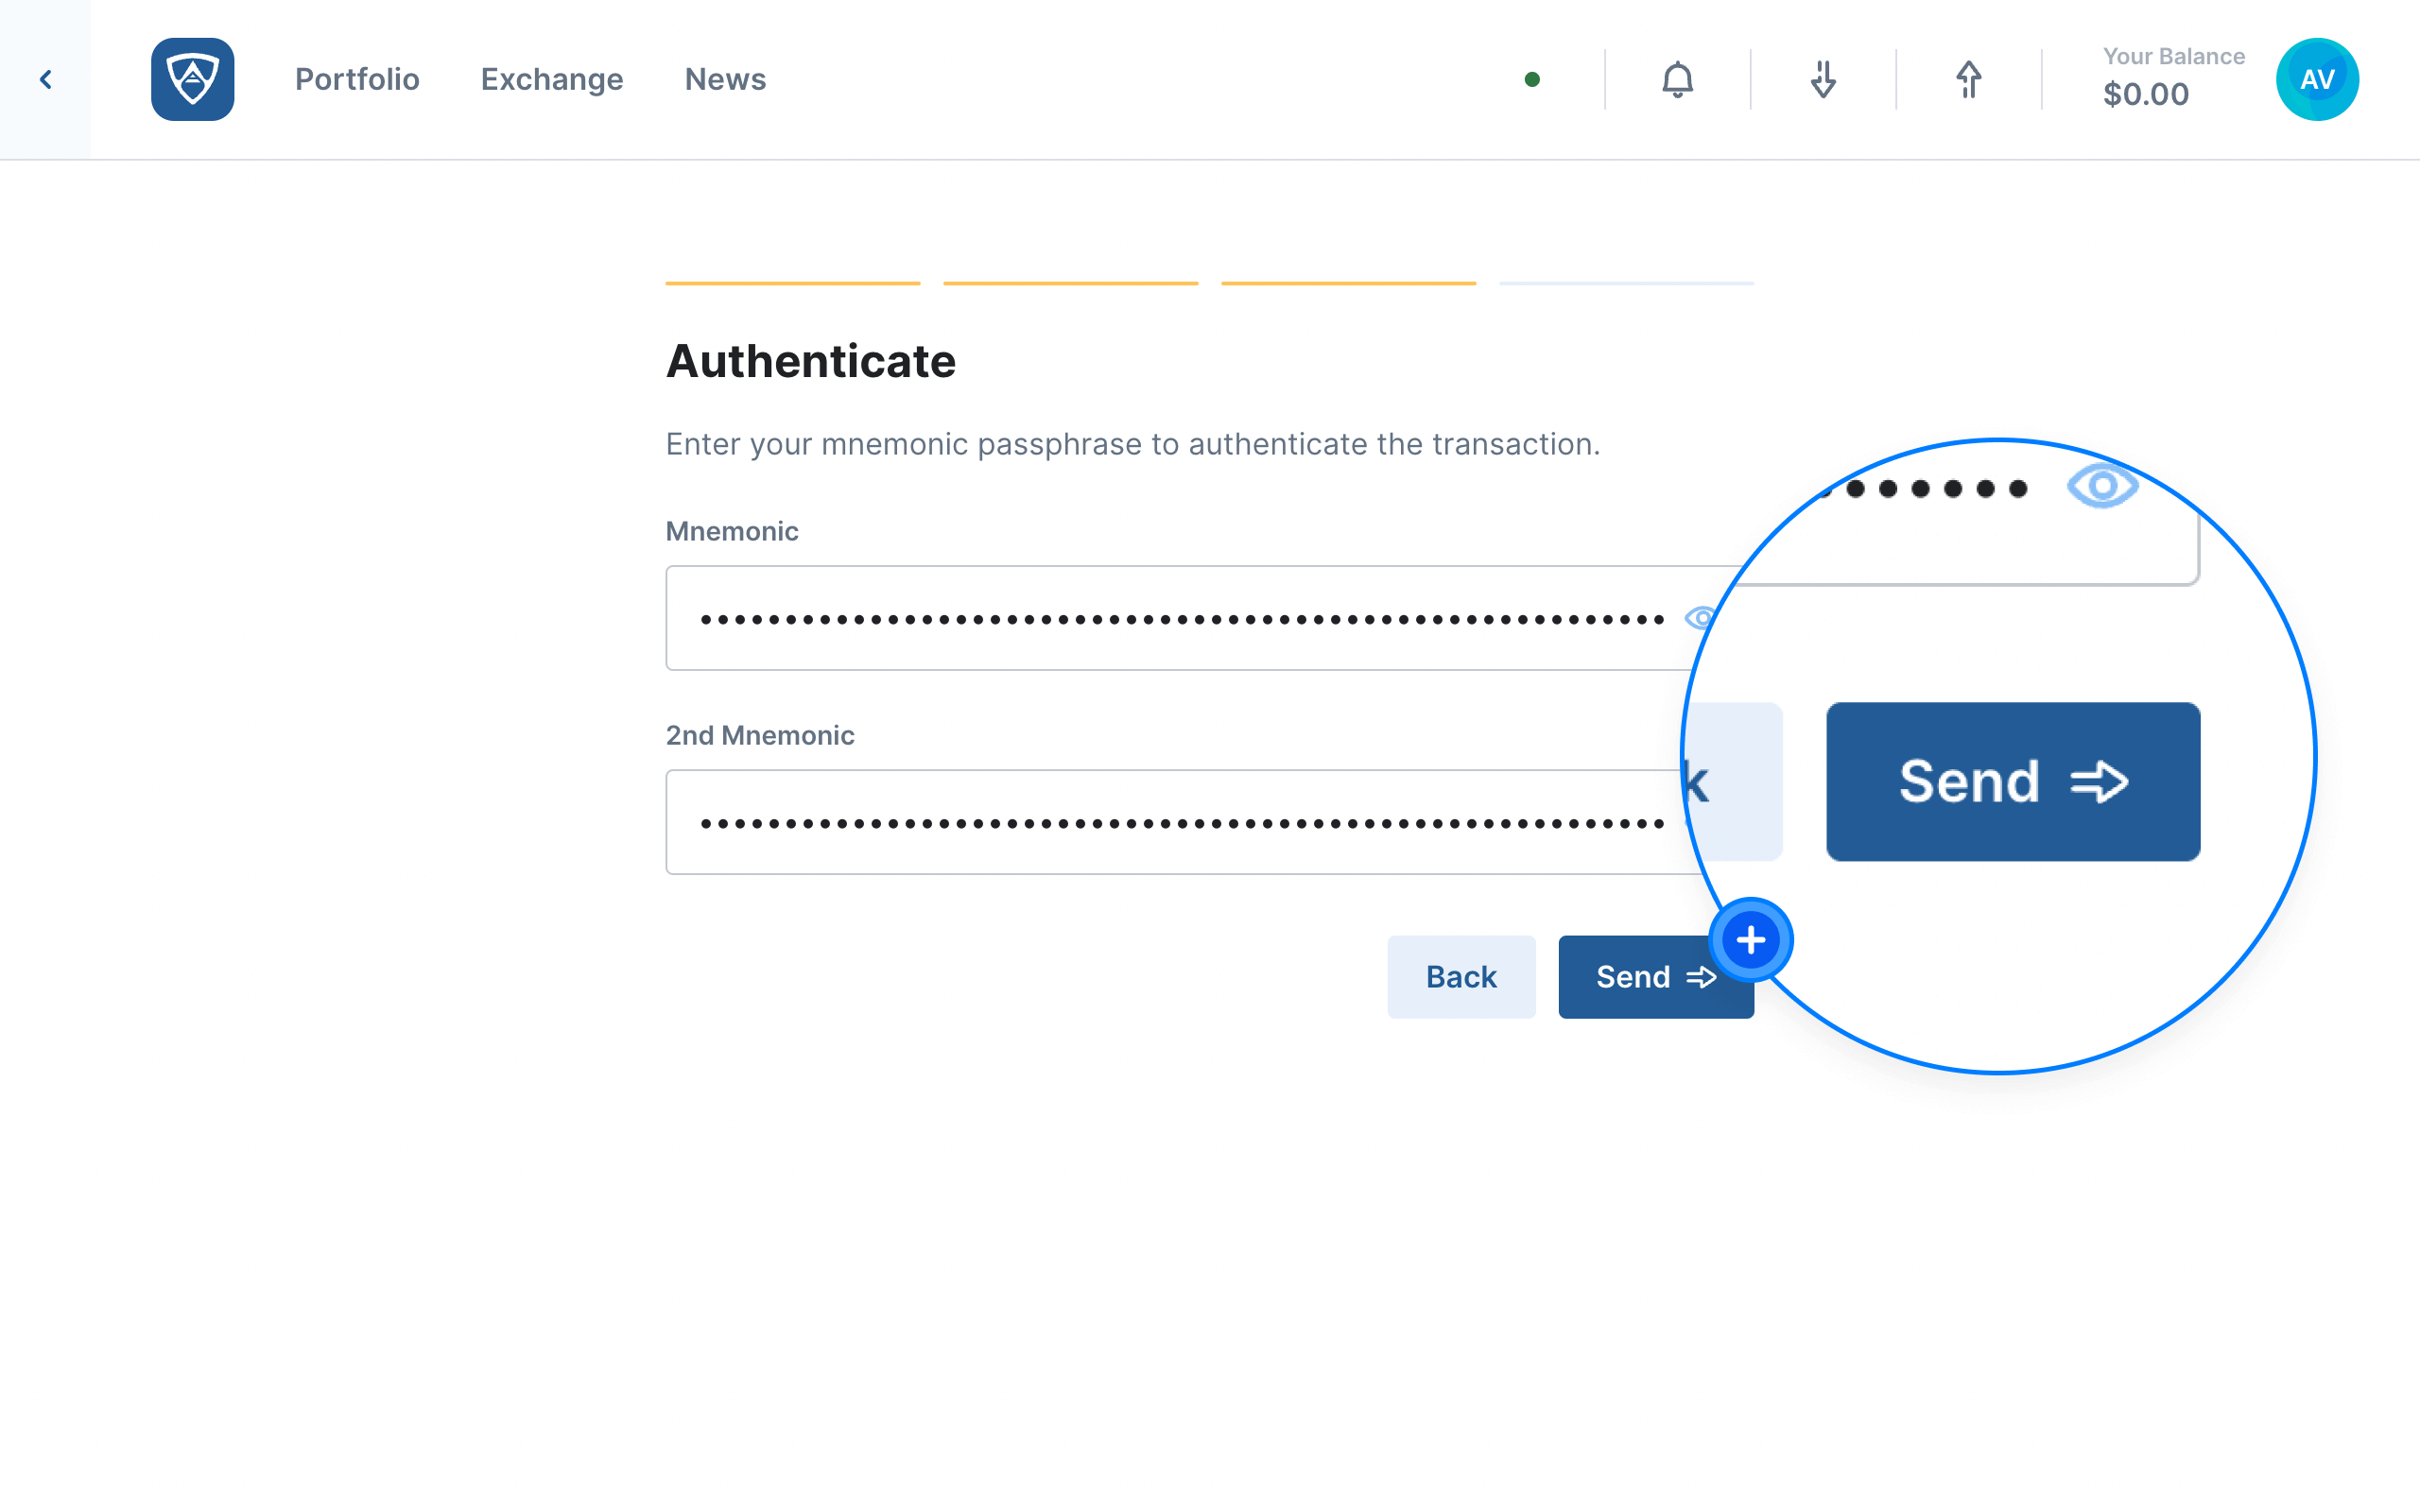
The Authenticate screen will then appear. You will need to sign the multisignature registration using your wallet’s credentials, such as a mnemonic recovery phrase or encryption password for example. Upon entering the required credentials, click the Send button to create the initial transaction. Alternatively, if you need to make adjustments, click the Back button.
Create the Initial Transaction
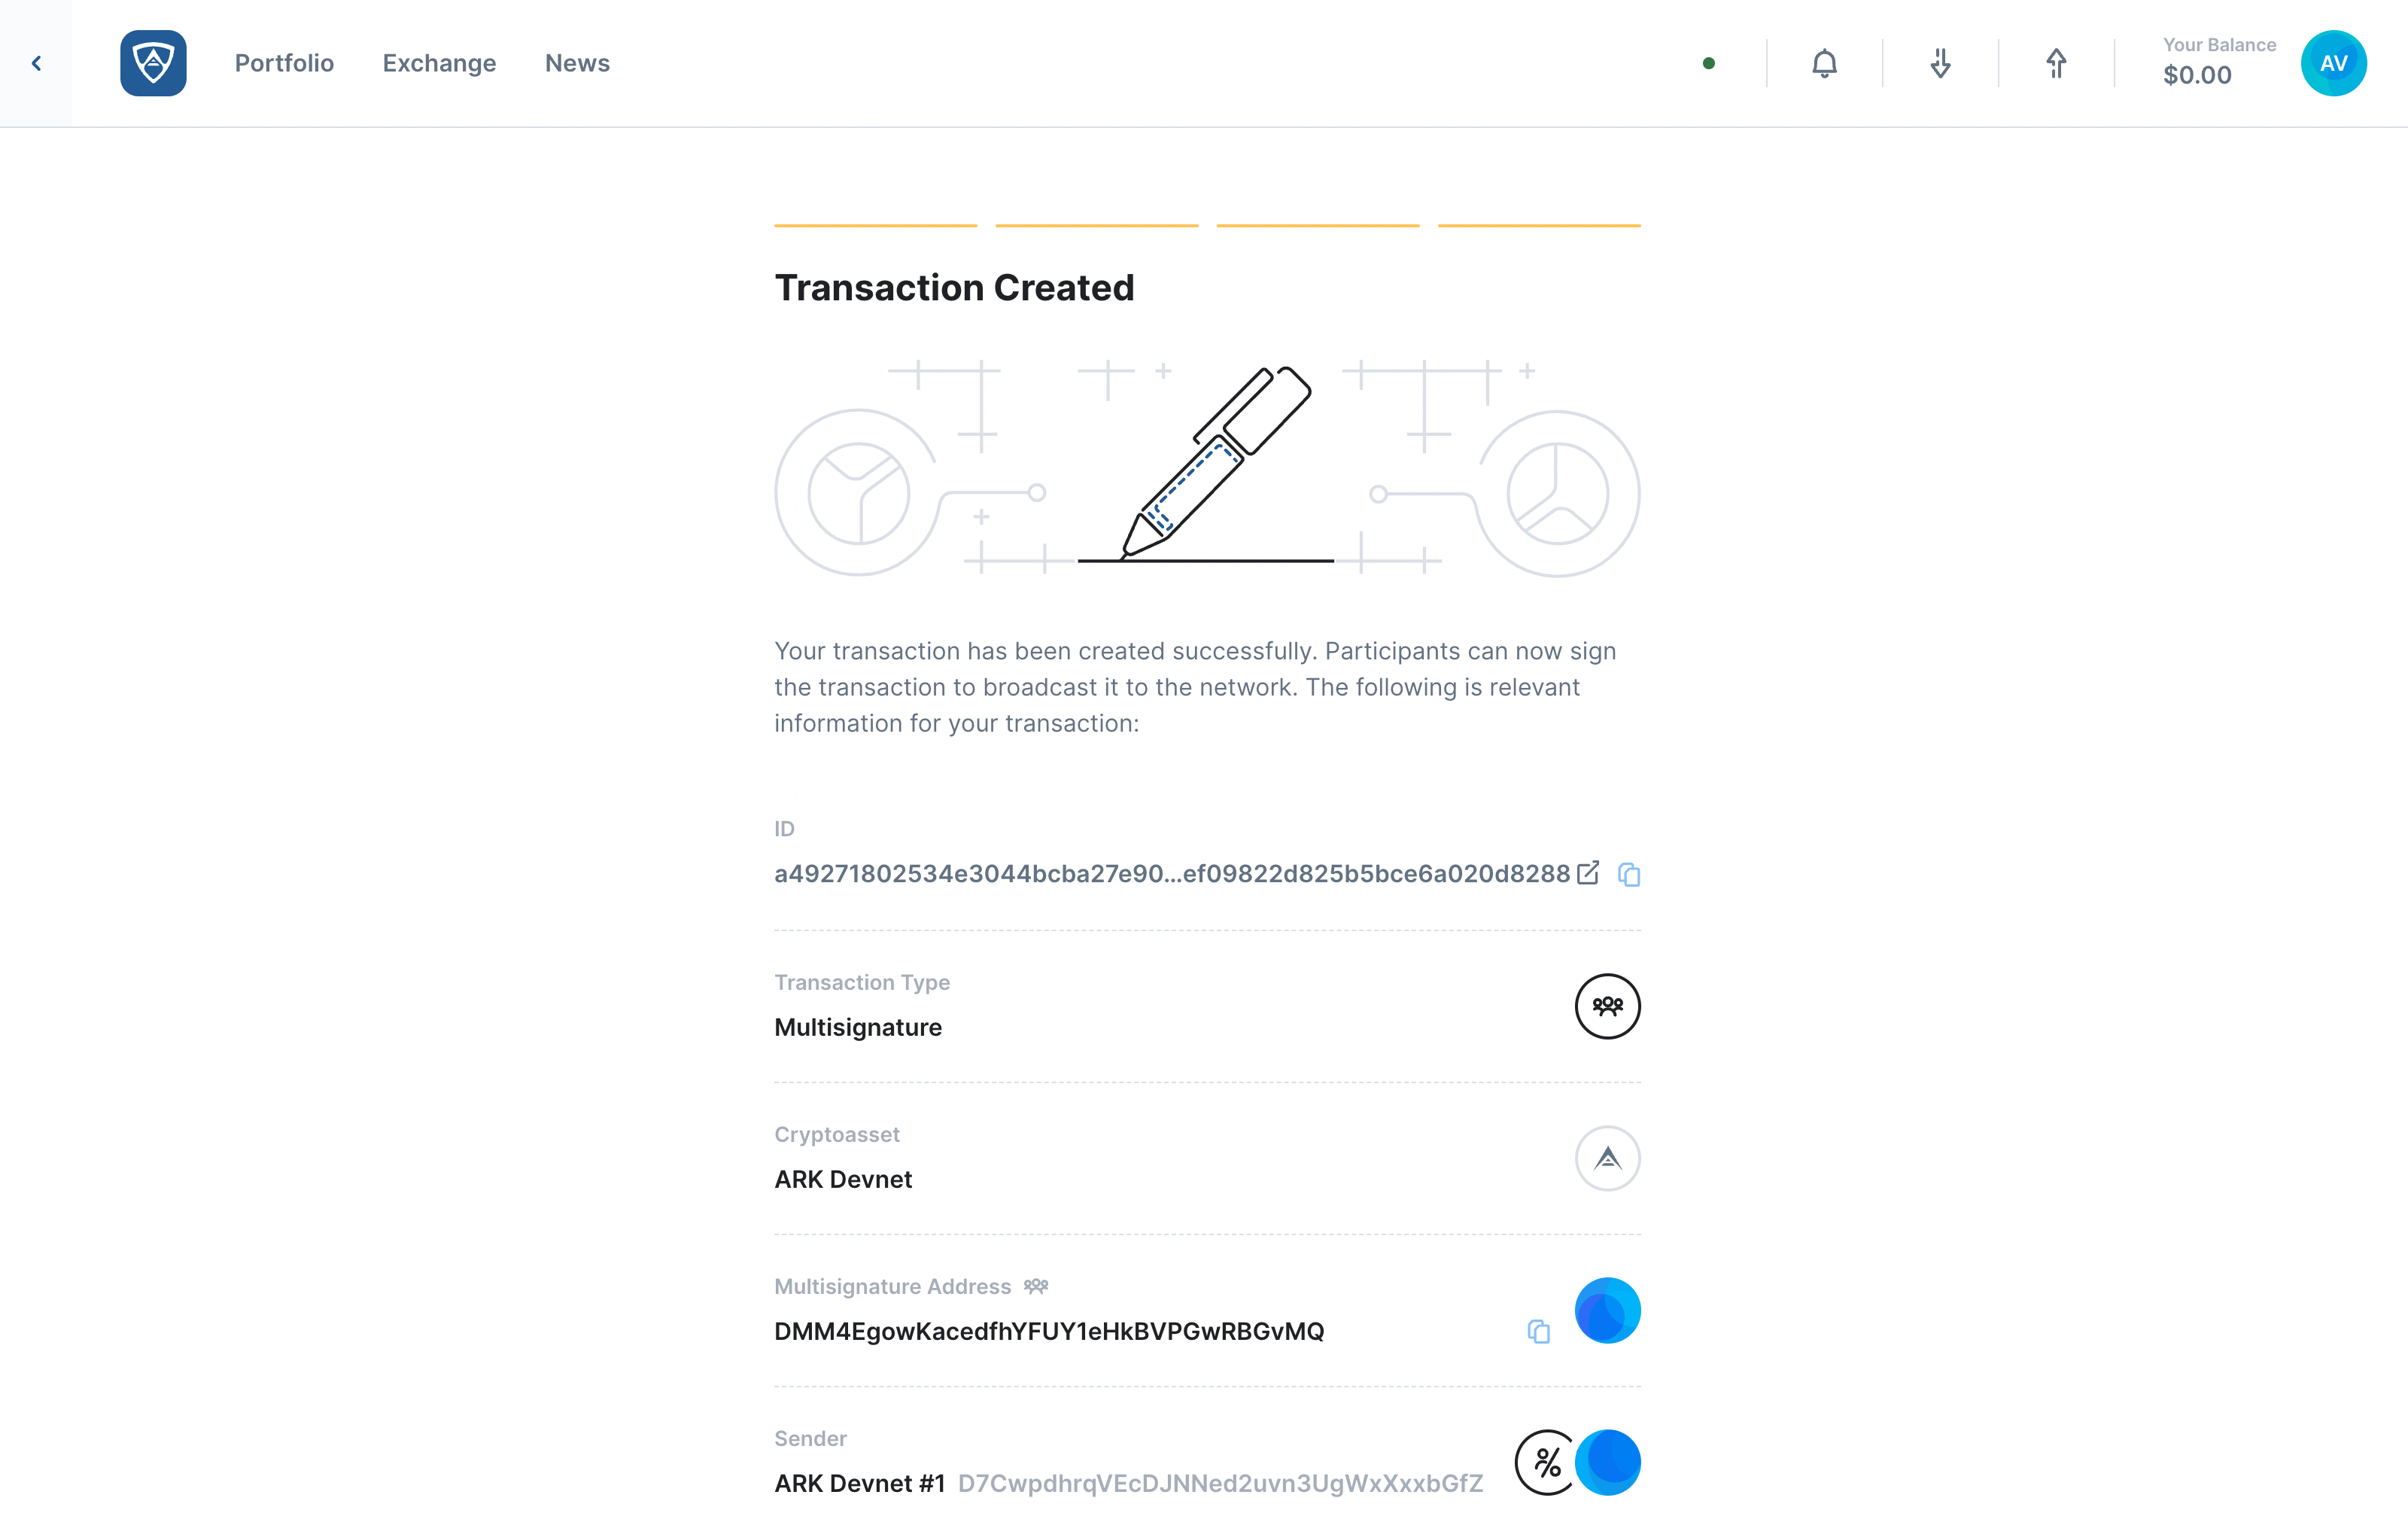
The Transaction Created screen will then appear confirming the successful creation of your multisignature wallet registration. Upon reviewing the details, click the Go to Wallet button at the bottom of the screen.
Review Pending Transactions
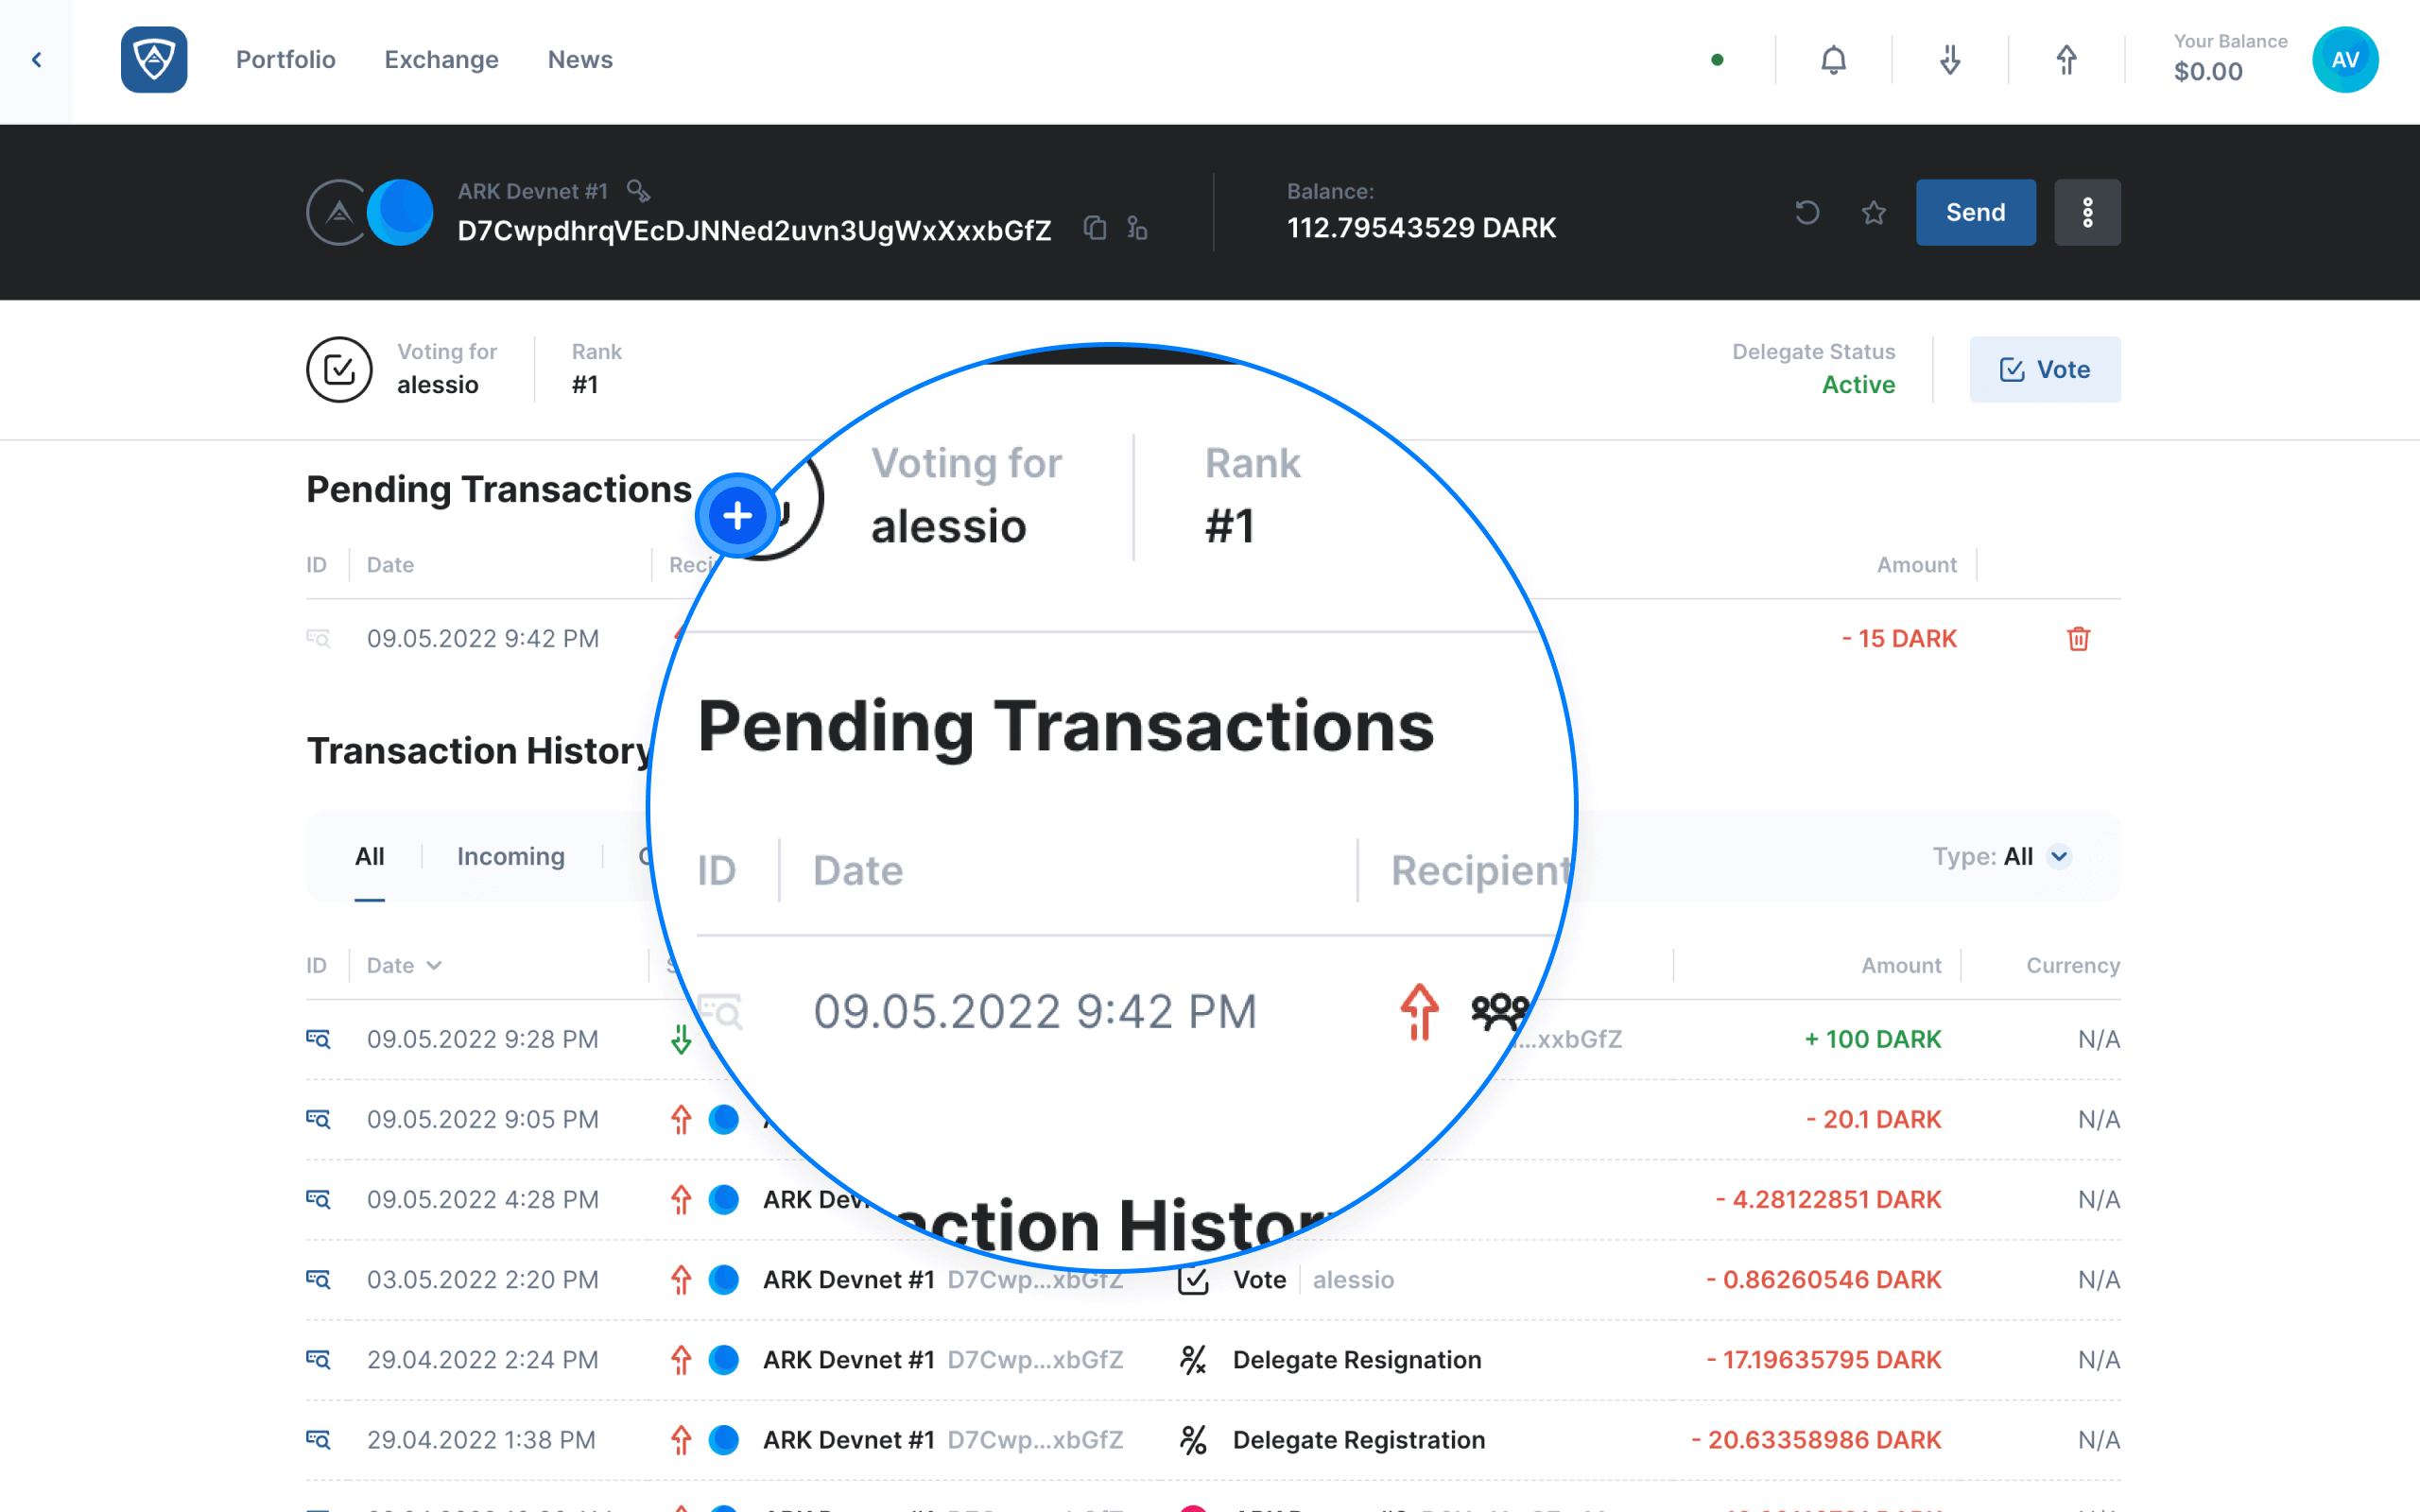
Having navigated back to the wallet from which you created the transaction, you will notice that your multisignature wallet registration appears under a Tab entitled Pending Transactions. In order to complete the transaction, each participant will need to sign it.
Have Participants Sign the Transaction
While a participant views the wallet included as a signatory in the multisignature wallet, they will also see the pending multisignature registration under the Pending Transactions Tab. In order to sign the transaction, they must click the blue Sign button located to the right of the pending registration.
The Multisignature modal will appear, allowing the participant the chance to review the details of the registration as well as its current status. If everything is in order, the participant can click the Sign button. However, if anything requires querying or an adjustment, the participant can click the Cancel button.
The Authenticate modal will then appear. Each participant will need to sign the multisignature registration using their wallet’s credentials, such as a mnemonic recovery phrase or encryption password for example. Upon entering the required credentials, each participant may click the Continue button to sign the registration. Alternatively, if you need to make adjustments, click the Back button.
The Transaction Signed modal will then appear confirming that the relevant participant successfully signed the multisignature wallet registration. Moreover, each participant will have the ability to see who has signed the registration thus far. Upon reviewing the details, the participant may click the X button in the top right corner of the modal to close it.
Broadcast the Registration
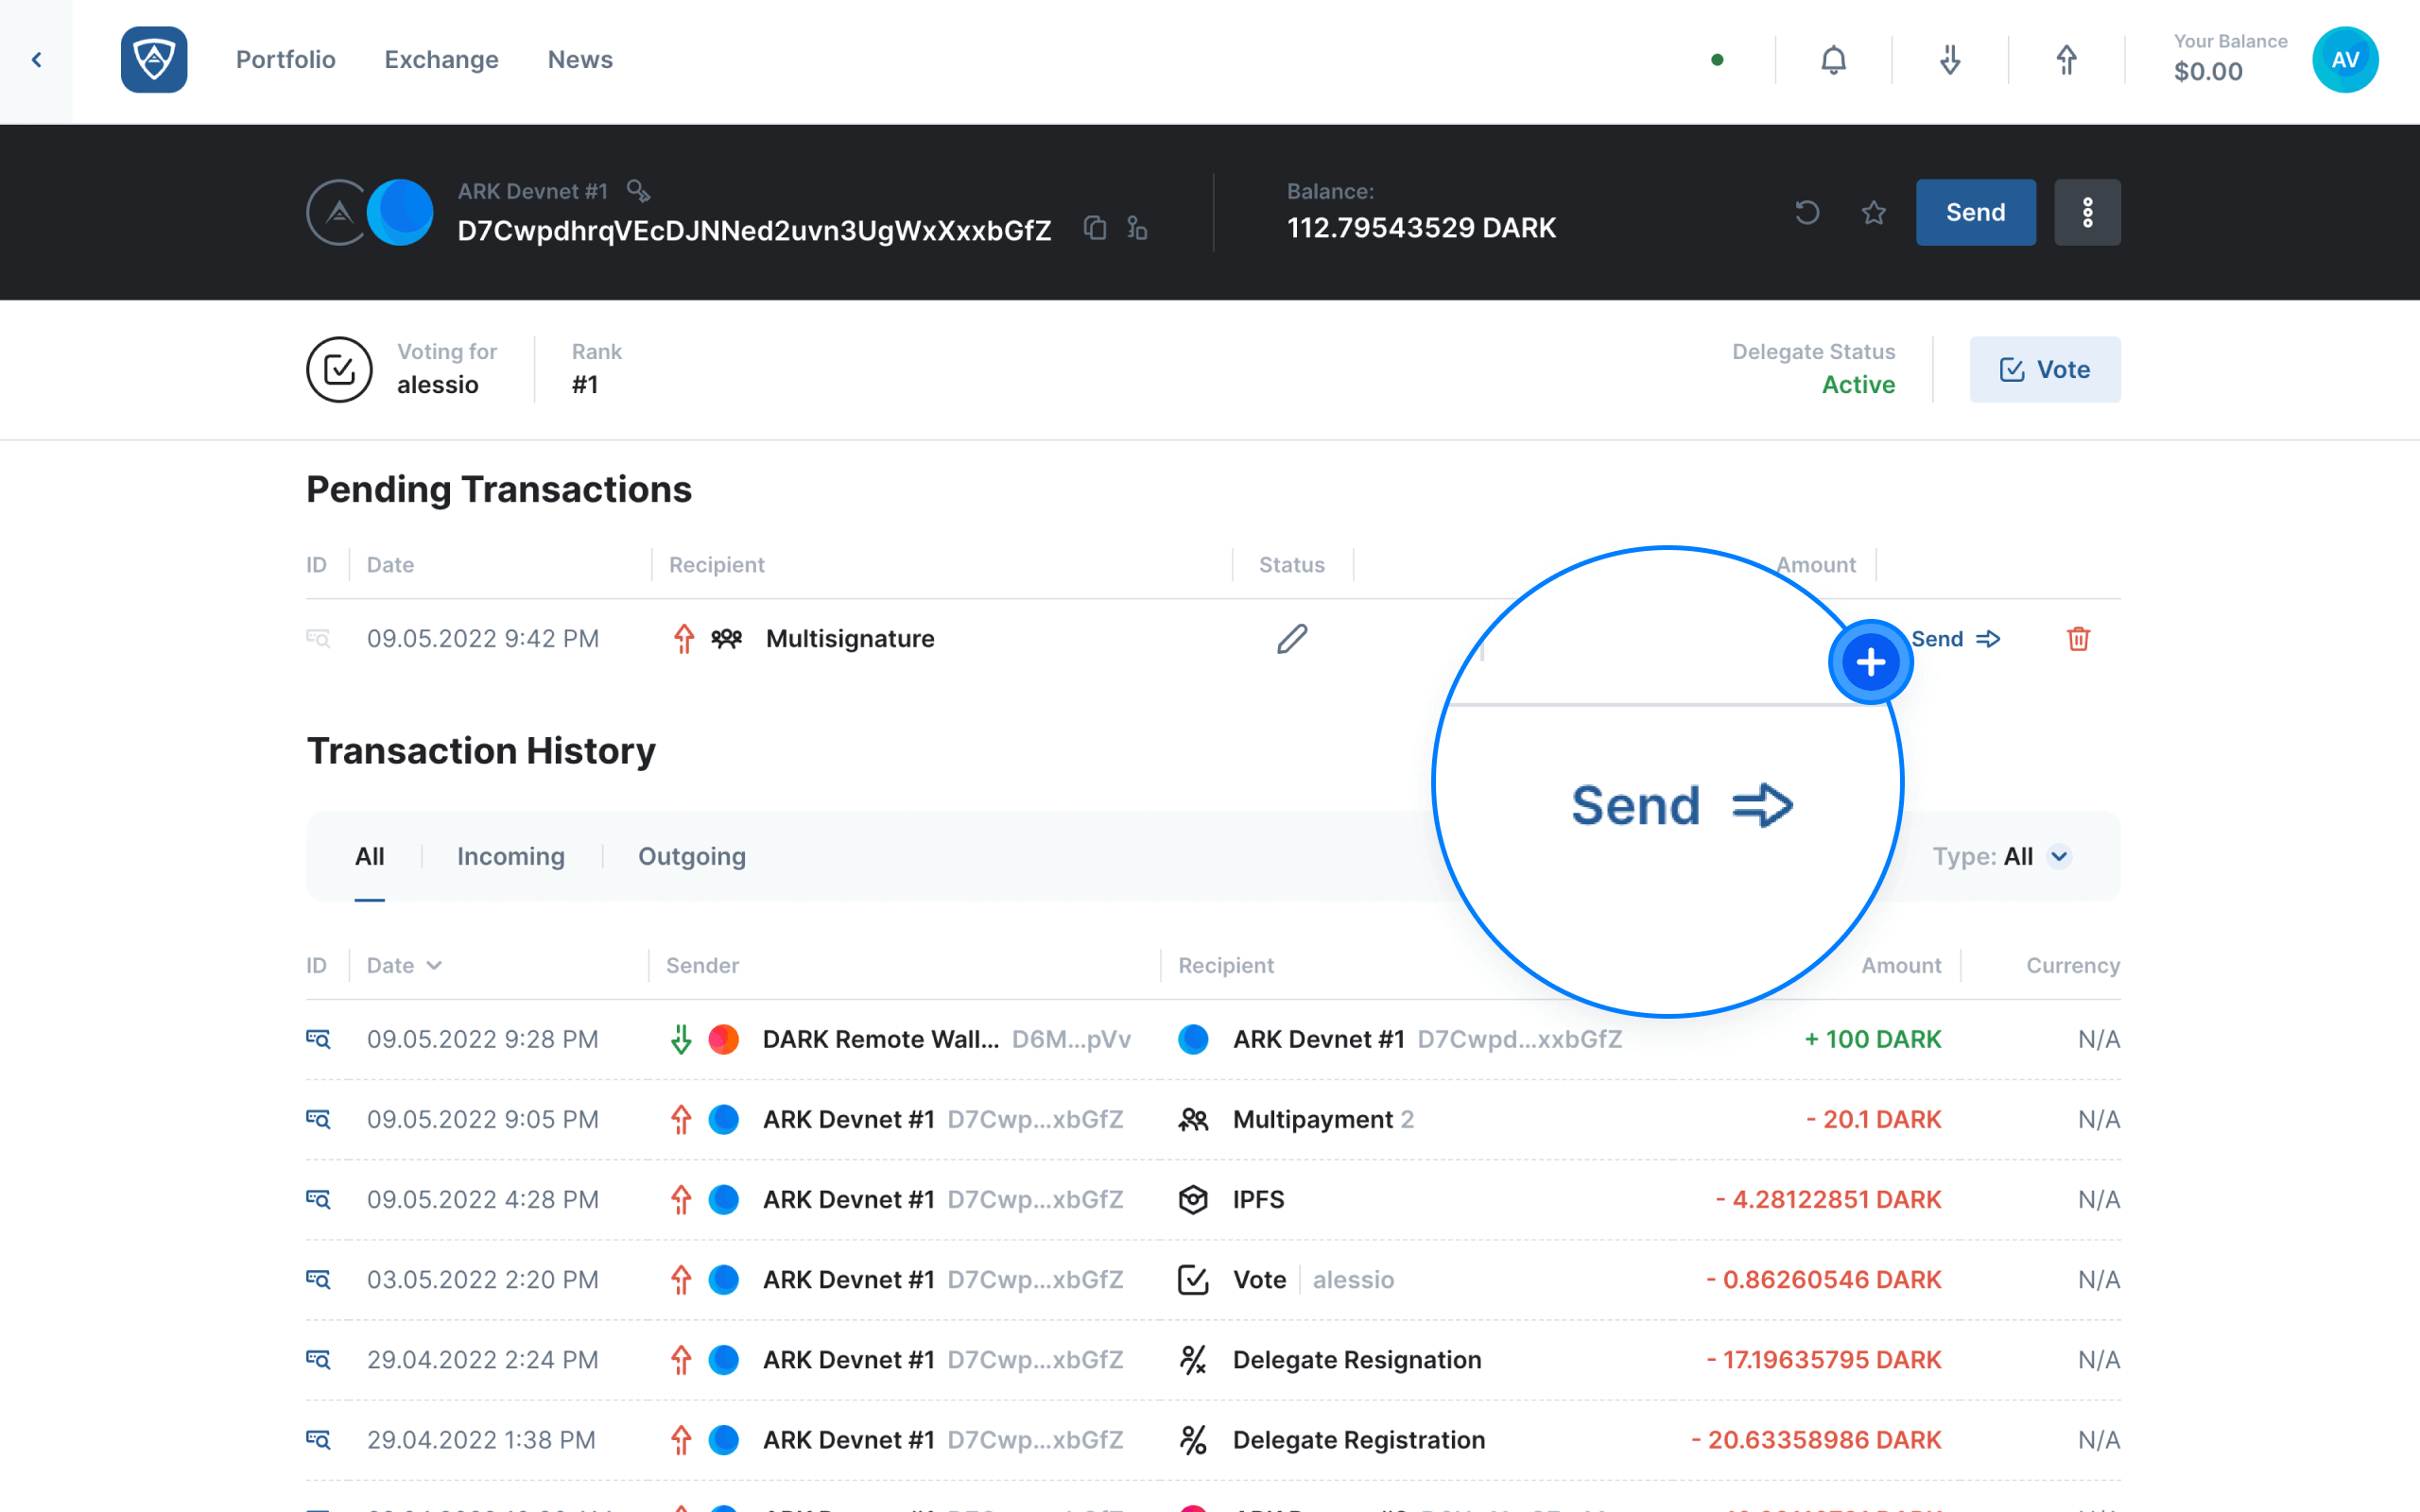
Any participants who have signed the registration will now see that the status of the pending transaction has changed, meaning the participant who initiated the registration must broadcast it to the network.
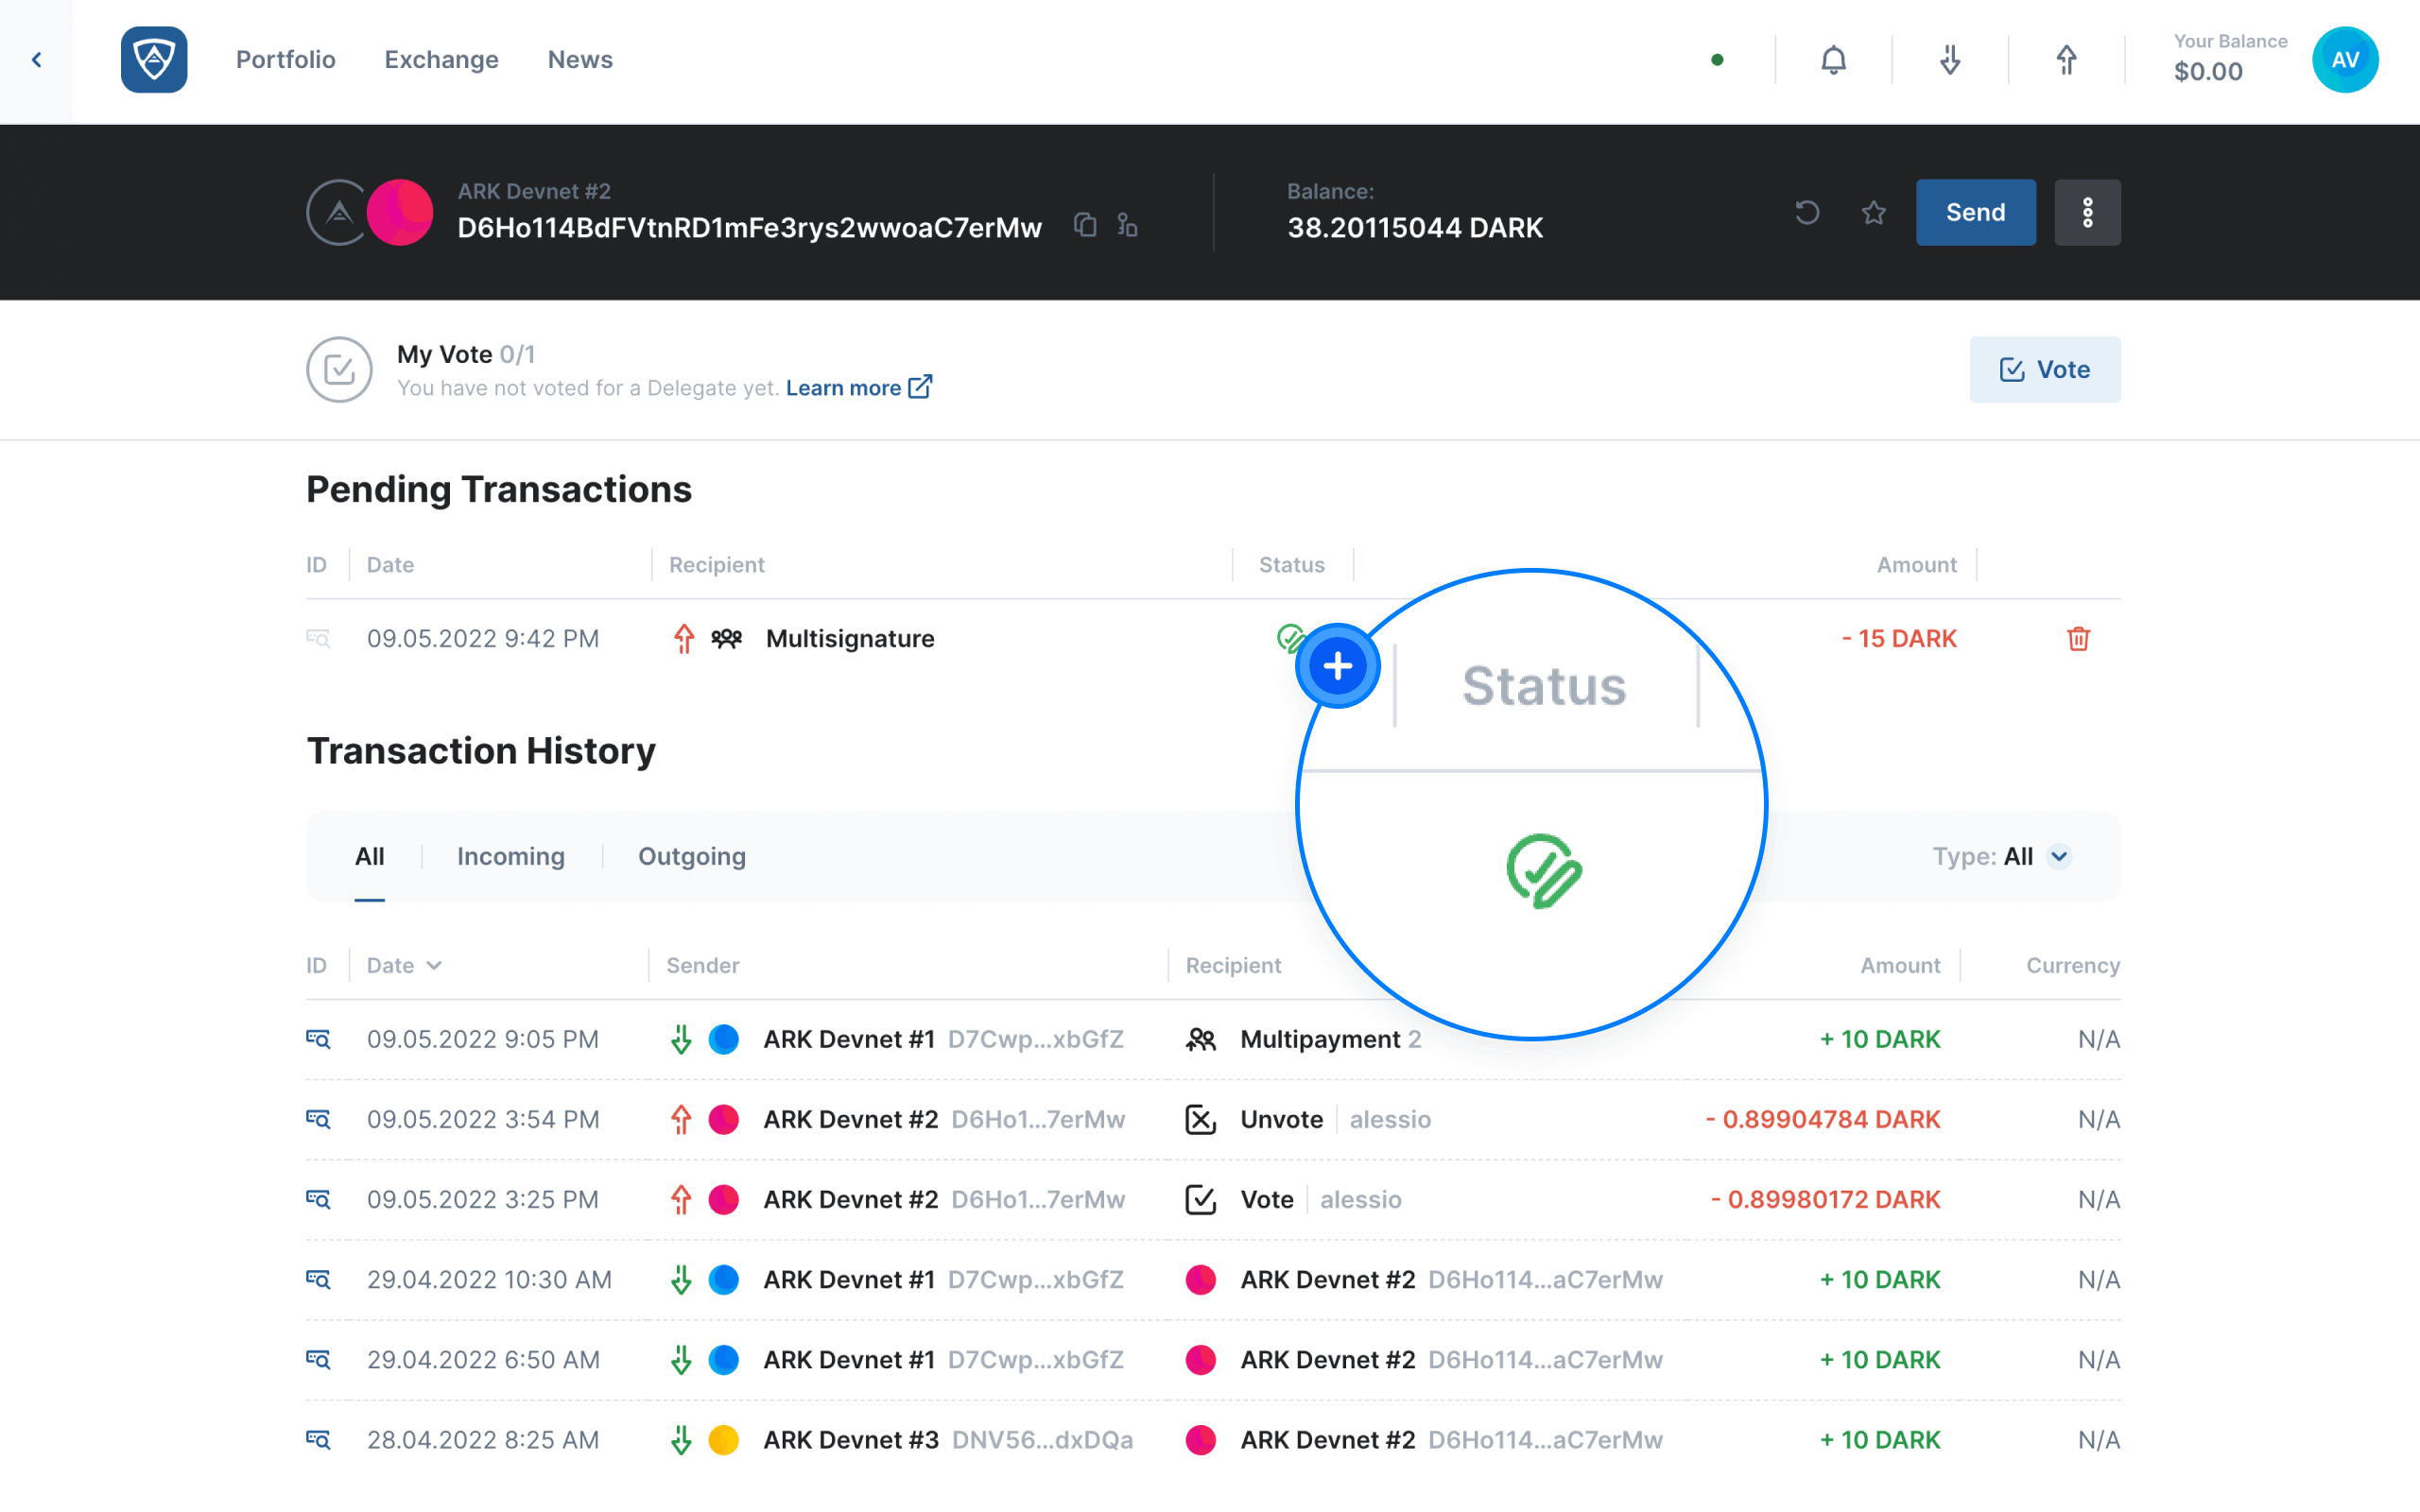
You will now see that you have the ability to broadcast the registration to the network. Click the blue Send button that appears to the right of the pending registration in order to do so.
The Multisignature modal will appear listing all participants who have signed the registration. If all is in order, click the Send button. Alternatively, if you need to query something or make adjustments, click the Cancel button.
![]()
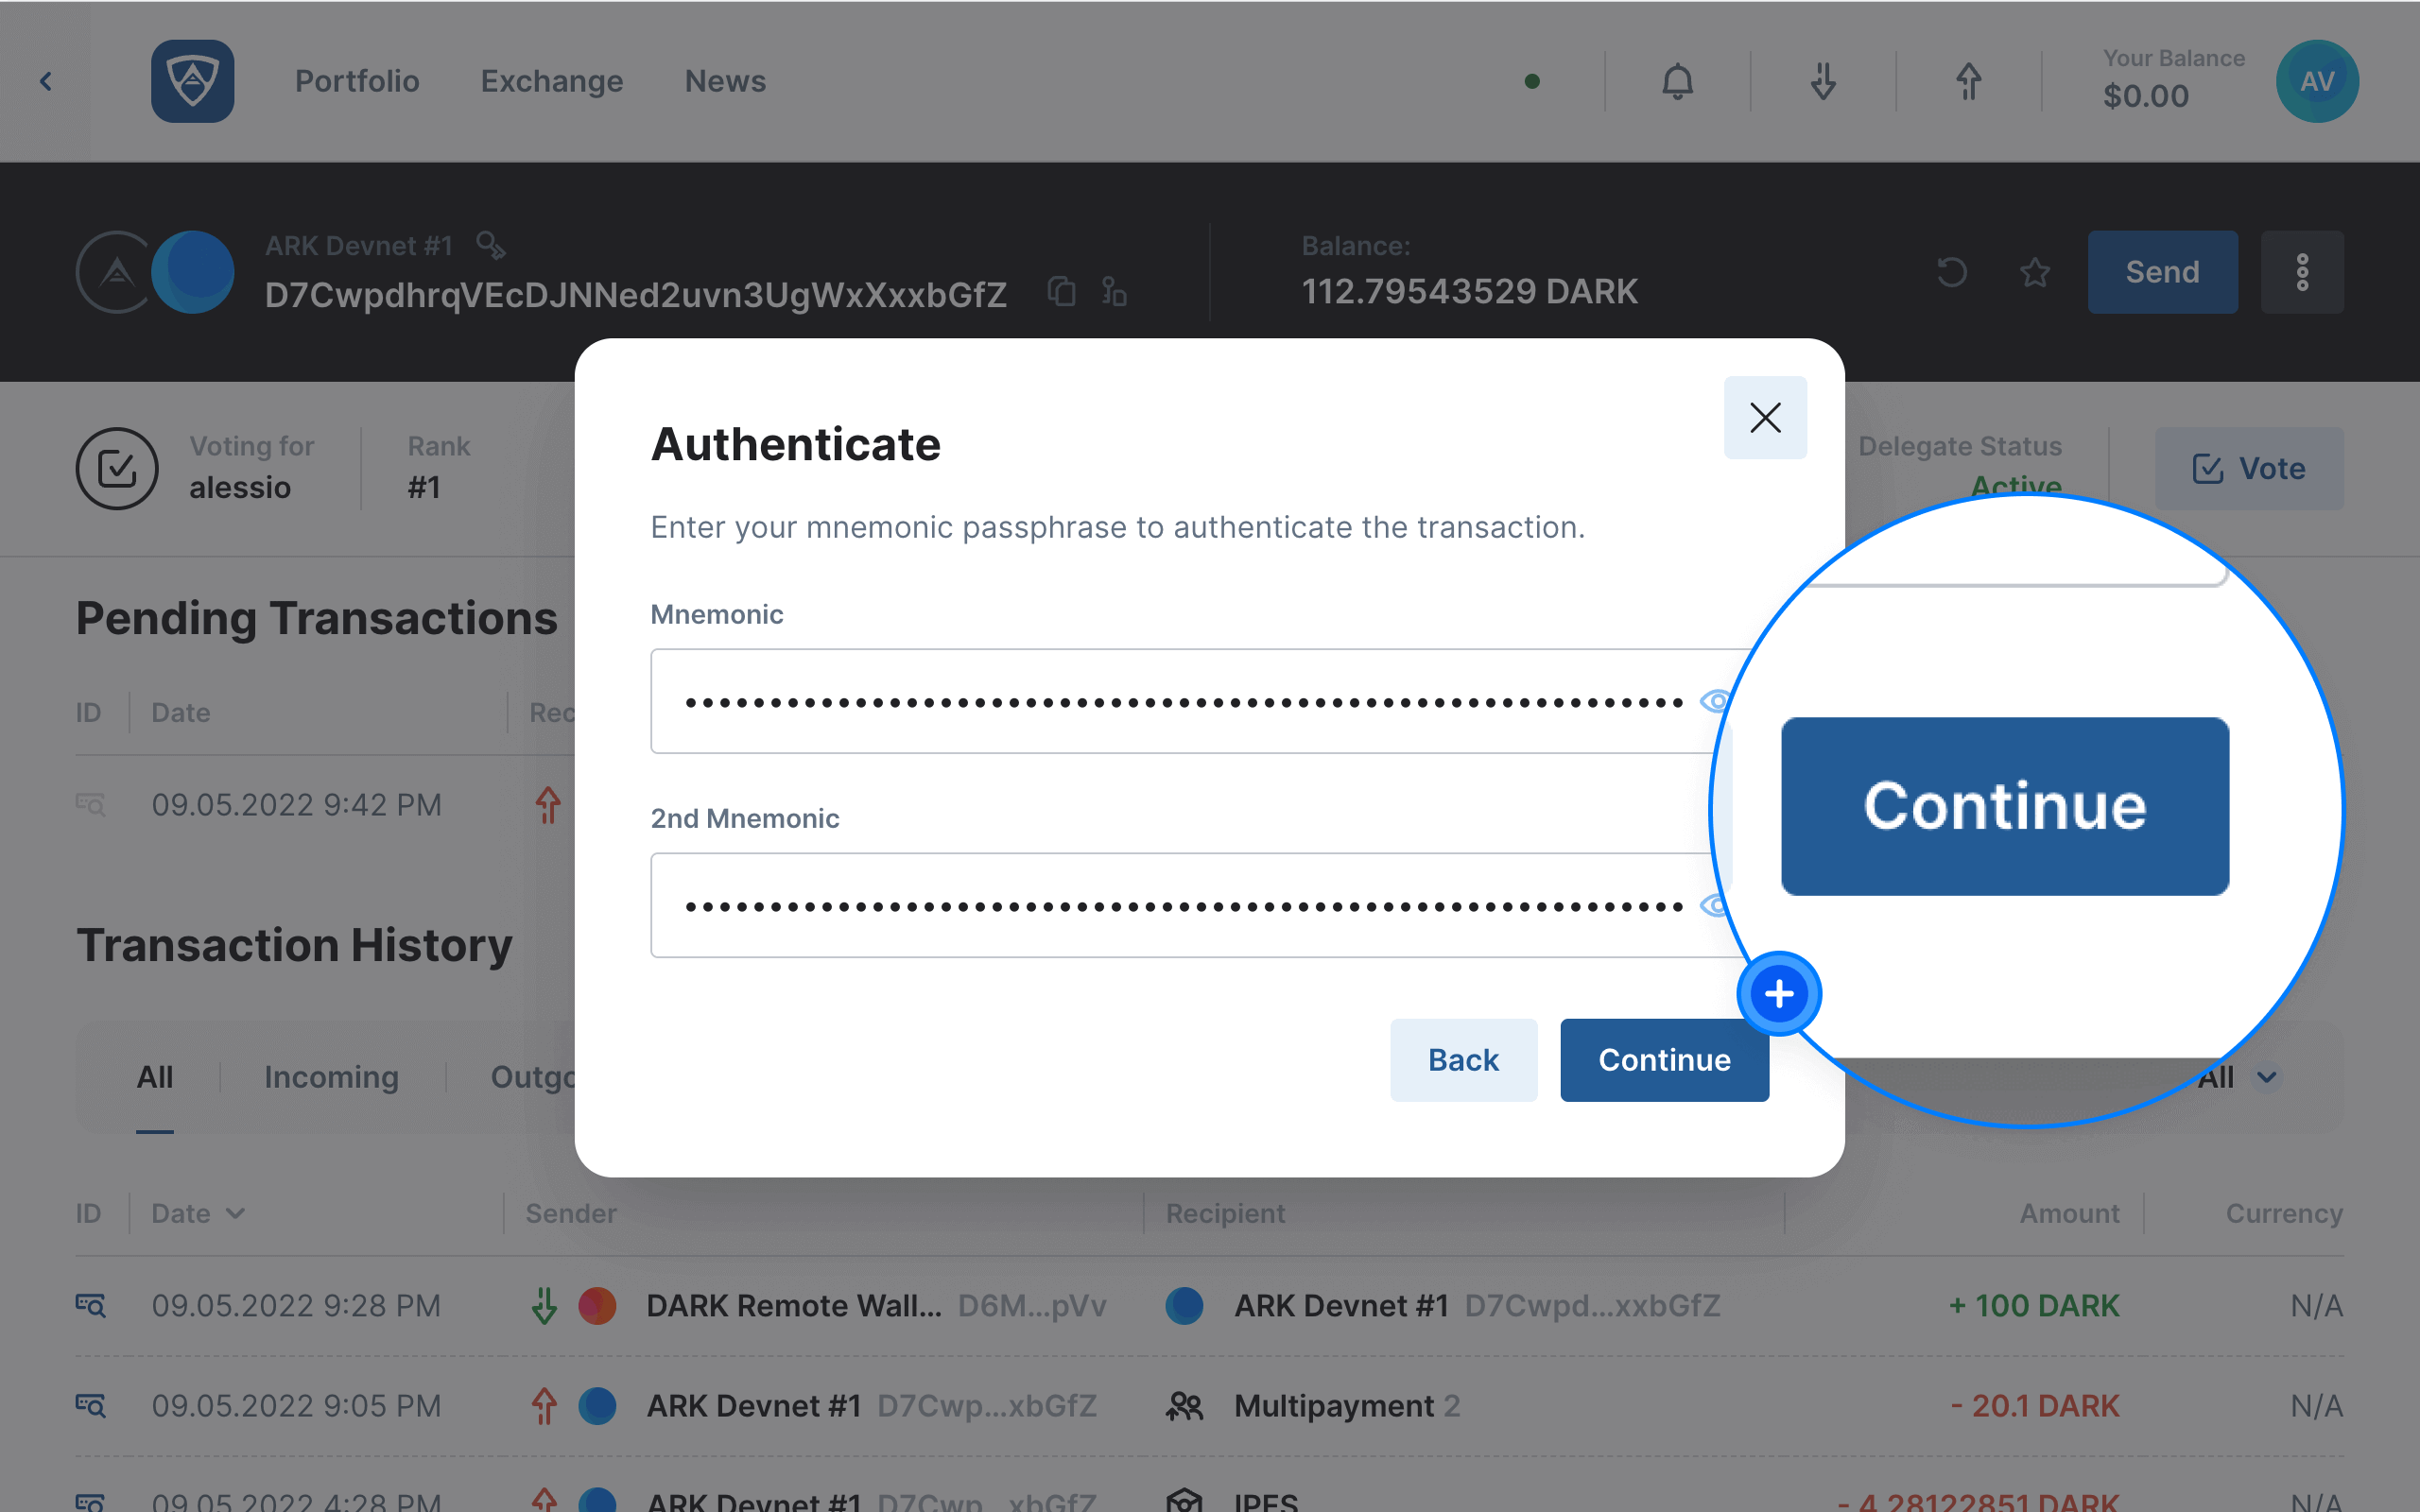
The Authenticate modal will then appear. You will need to sign the final multisignature registration by using your wallet’s credentials, such as a mnemonic recovery phrase or encryption password for example. Upon entering the required credentials, click the Continue button to complete the multisignature registration process. Alternatively, if you need to make adjustments, click the Back button.
Complete the Multisignature Wallet Registration
The Transaction Sent screen will appear confirming the successful creation of your multisignature wallet. You may then review the details of the transaction before continuing or ending your session.
![]()
Import a Multisignature Wallet
After creating a multisignature wallet, each participant may import it using the Multisignature Address located among the details of its registration. In this case, the address is DMM4EgowKacedfhYFUY1eHkBVPGwRBGvMQ.
Help
You may import a multisignature wallet by following the necessary steps on the Import a Wallet page.
Use a Multisignature Wallet
Watch this helpful tutorial video on How to Use a Multisignature Wallet in ARKVault
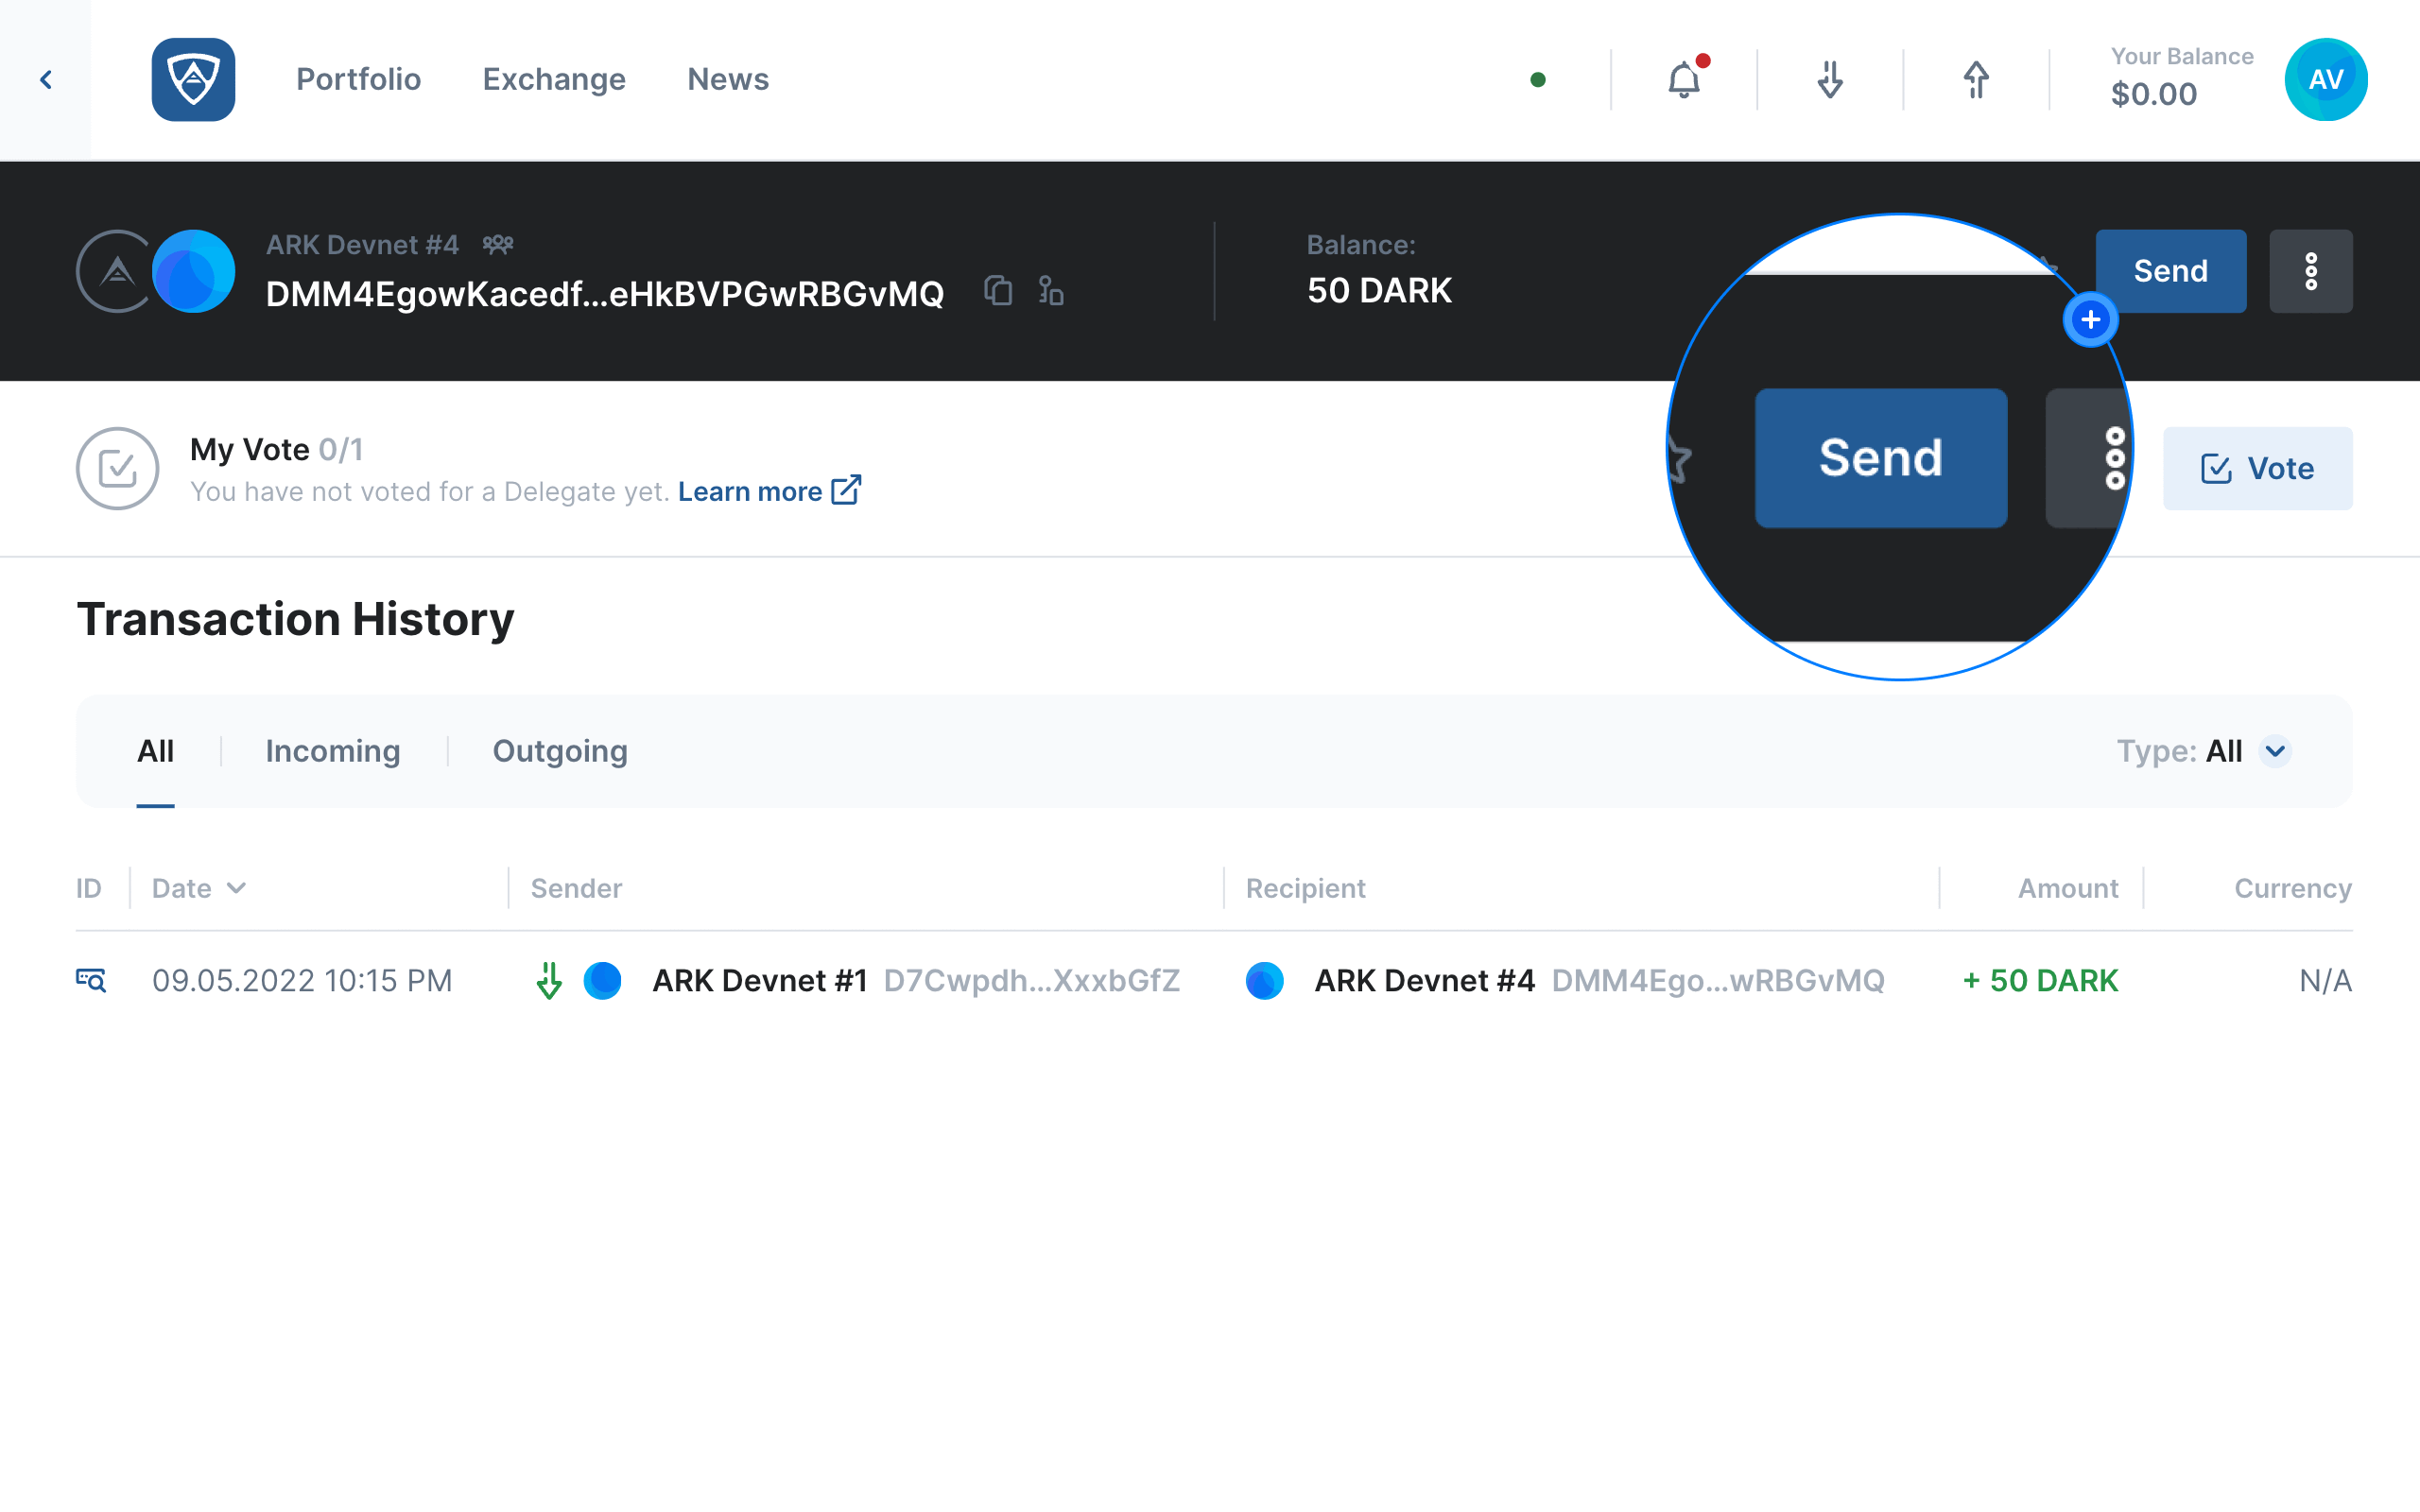
While viewing the multisignature wallet from which you wish to transfer funds, click the Send button located in the upper right corner of ARKVault.
Information
Any 1 of n participants may initiate a transaction from a multisignature wallet.
Enter the Transaction Details
The Send screen will appear. Here you will enter the address(es) to which you wish to transfer funds, as well as the amount you would like to transfer. Enter a memo in the field provided if you so desire and select a transaction fee. You may select a Slow, Average or Fast fee or switch to Advanced and enter a custom amount if desired. Upon entering the transaction details, click the Continue button. Alternatively, if you wish to abandon the process or make adjustments, click the Back button.

Review the Initial Transaction
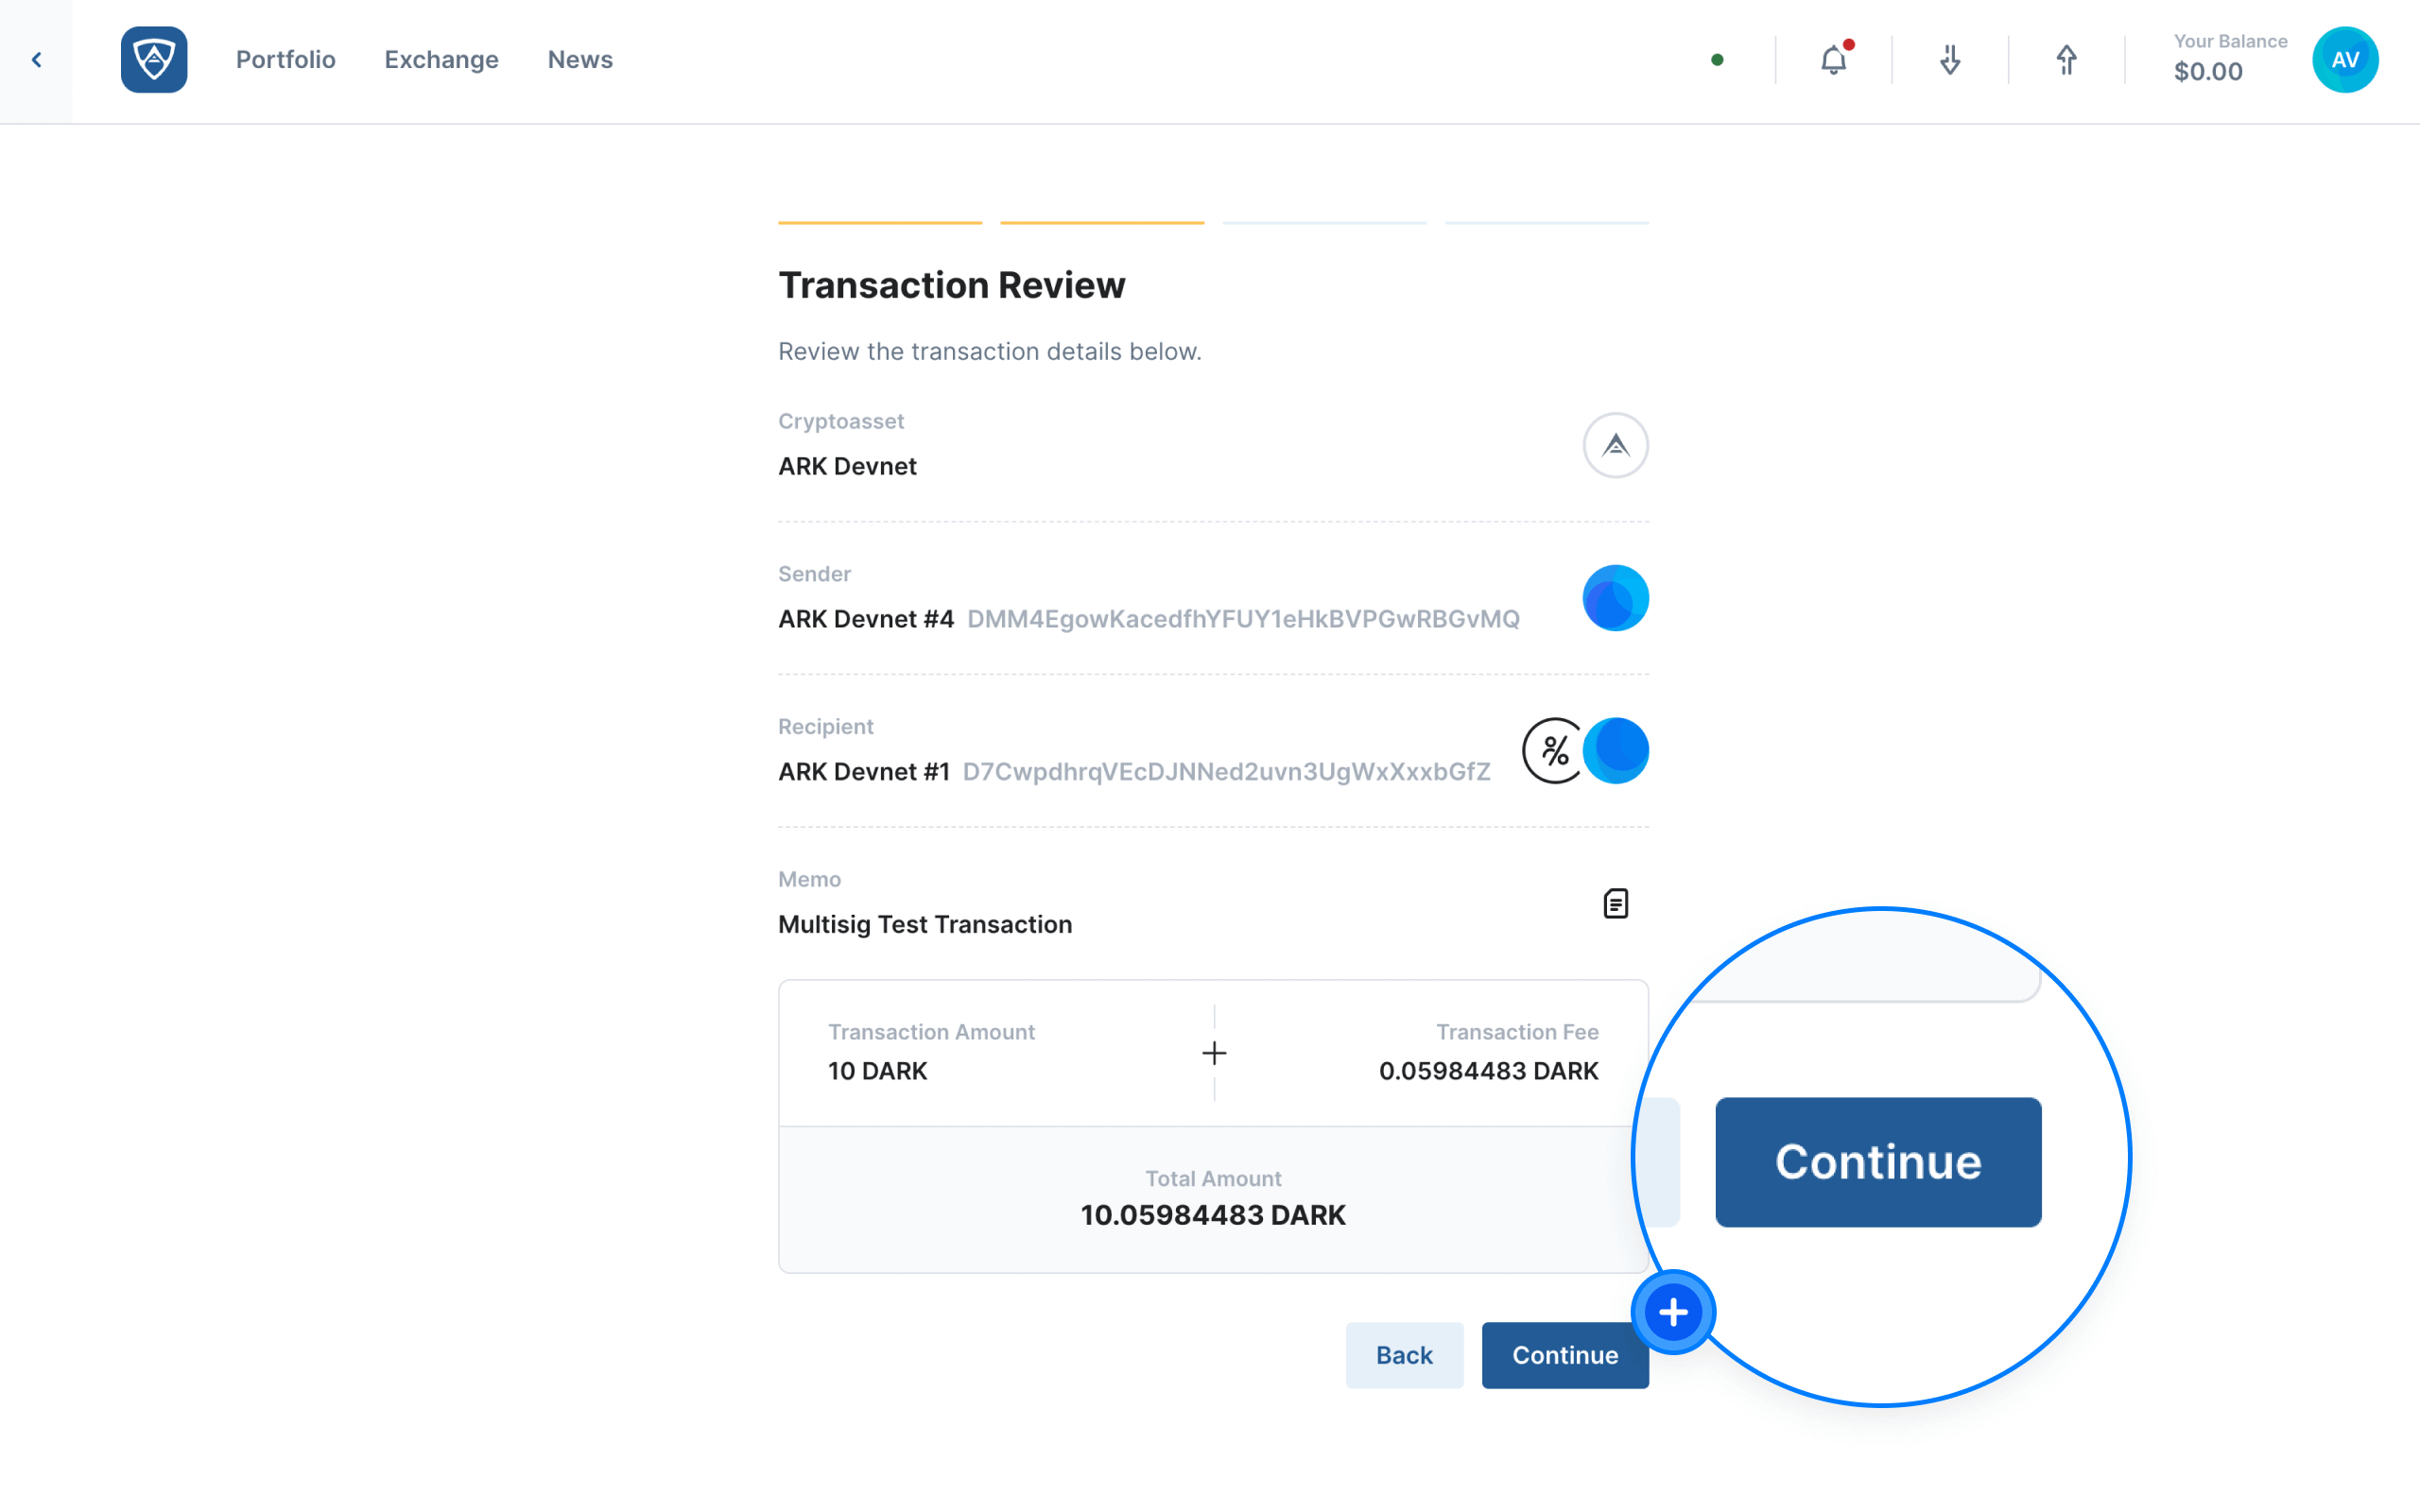
The Transaction Review screen will then appear providing you with all the details related to your multisignature wallet transaction. Upon reviewing the information, click the Continue button. Alternatively, if you wish to make adjustments, click the Back button.
Finalize the Initial Transaction
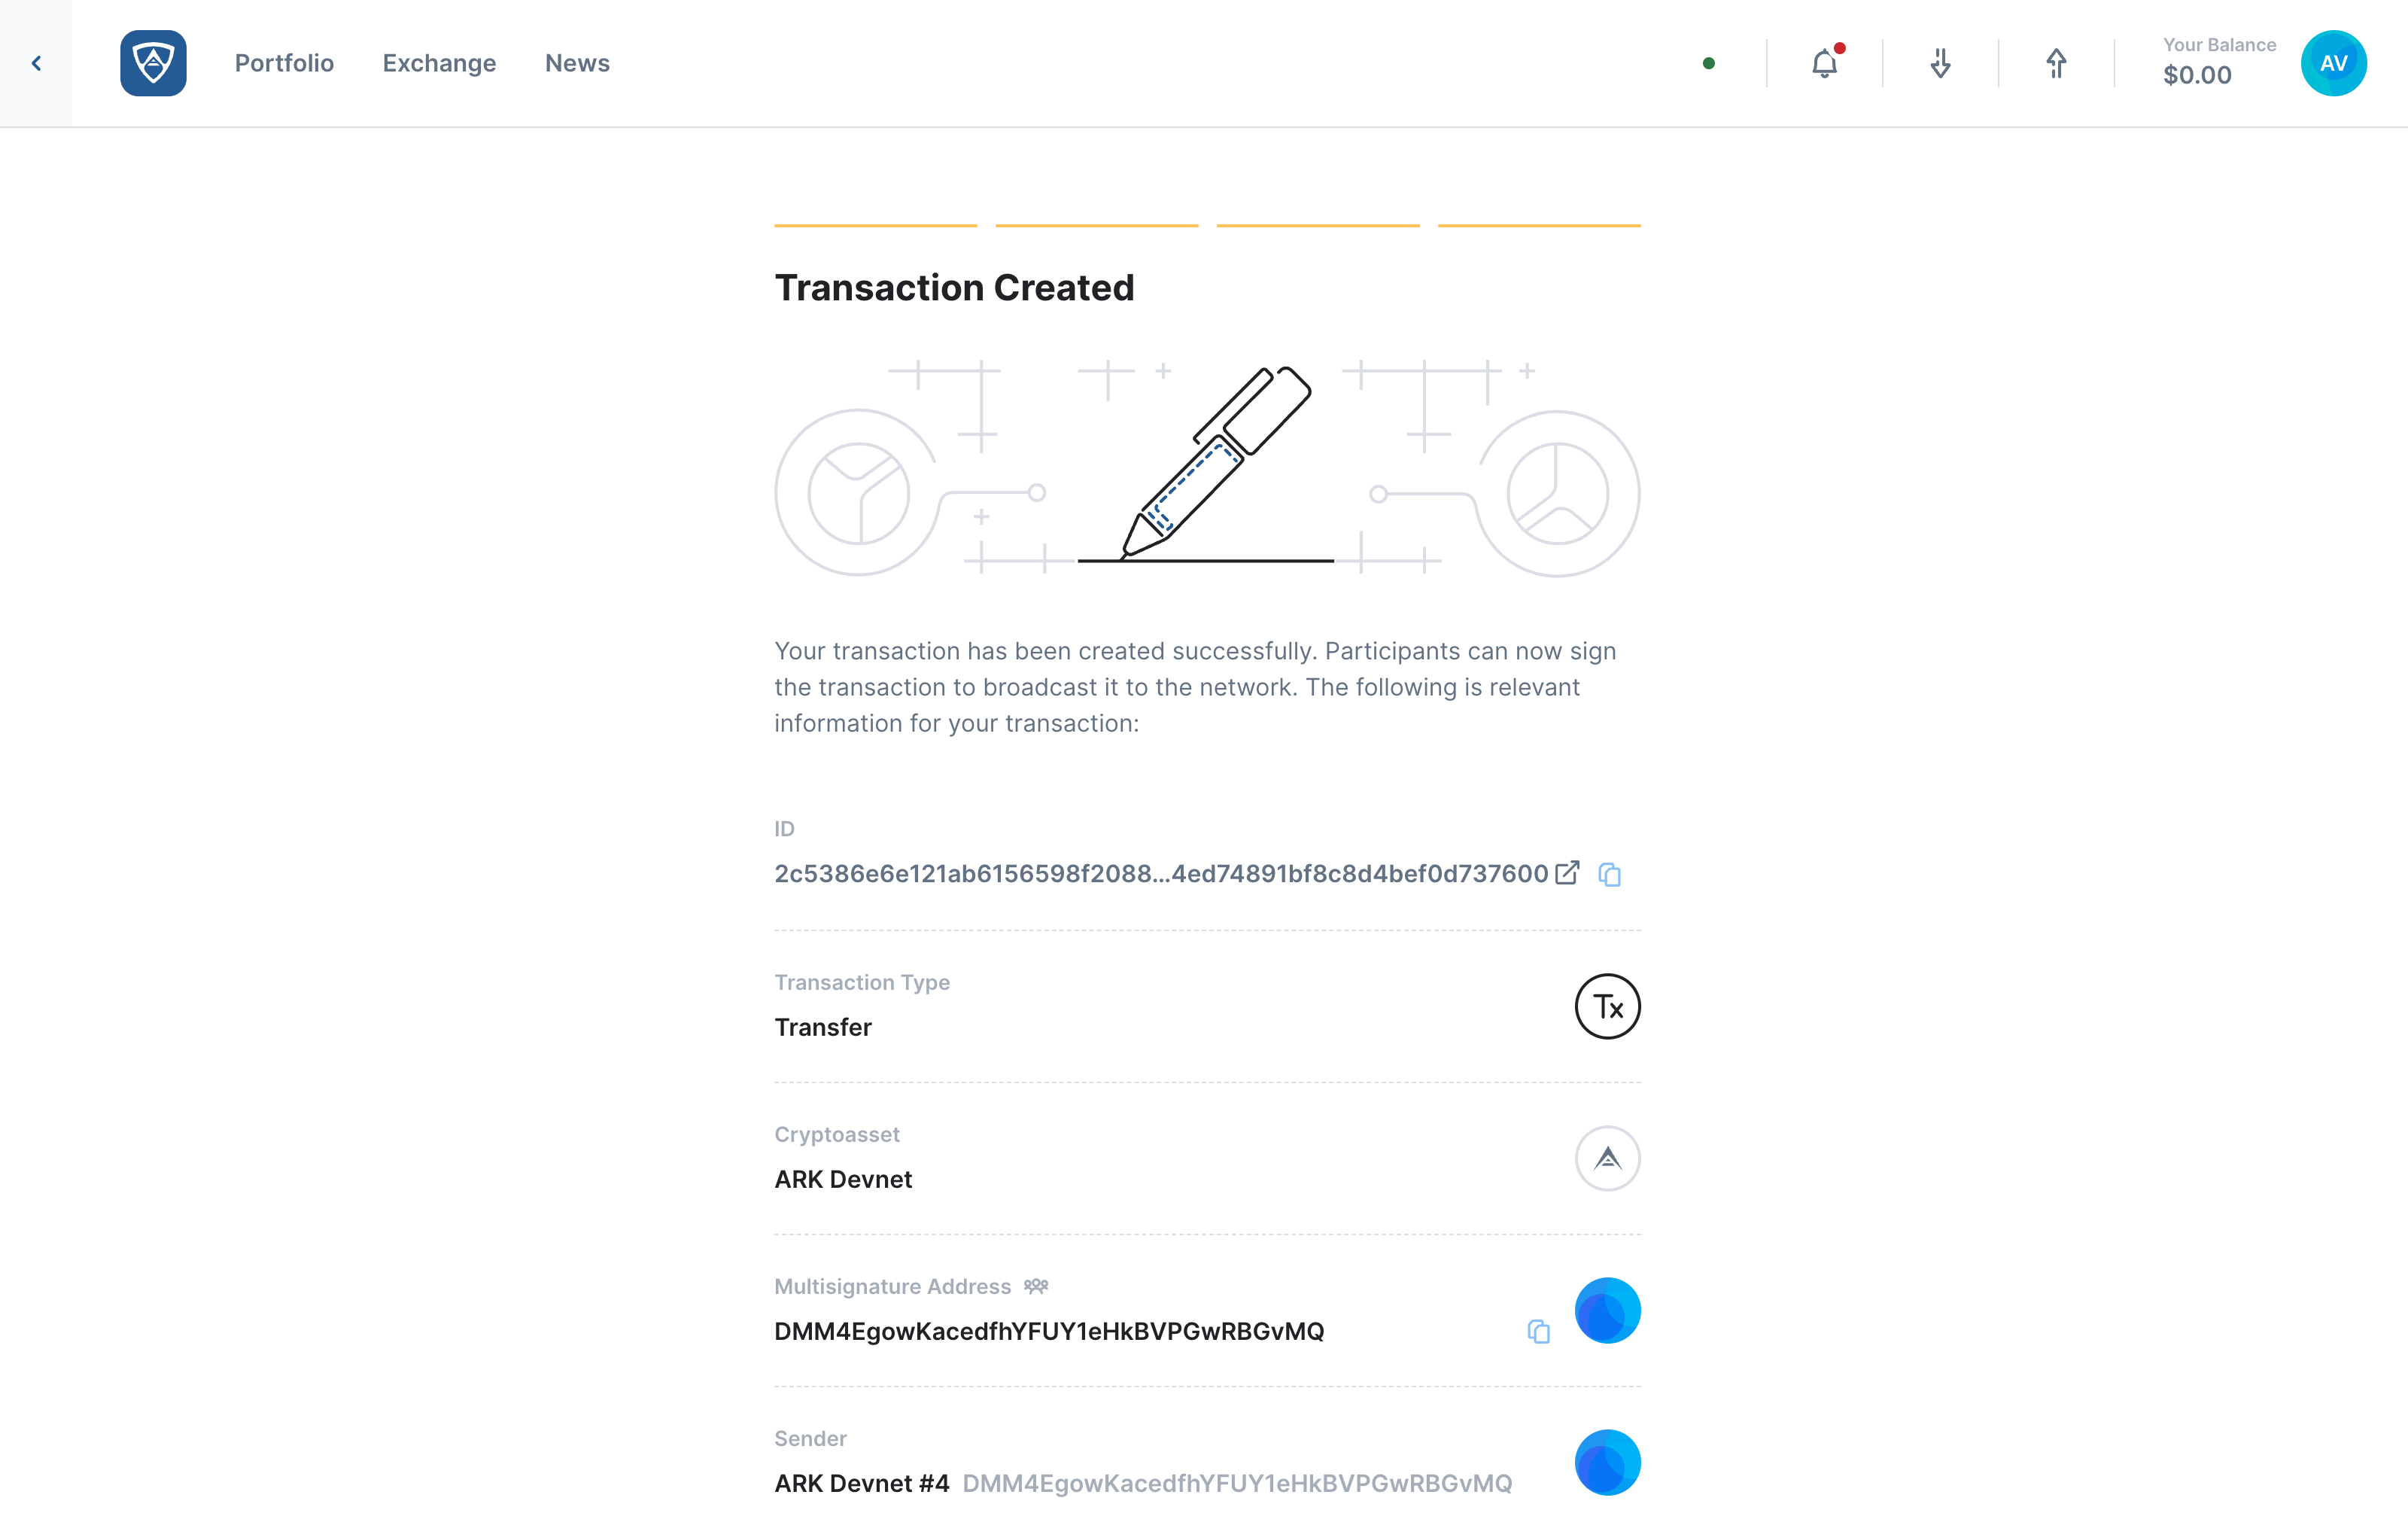
The Transaction Created screen will appear providing you with all the information related to your multisignature wallet transaction. It will also inform you that the minimum number of participants need to sign the transaction in order to validate and broadcast it to the network. Upon reviewing all the details, click the Back to Wallet button located at the bottom of the screen.
Review Pending Multisignature Transfer
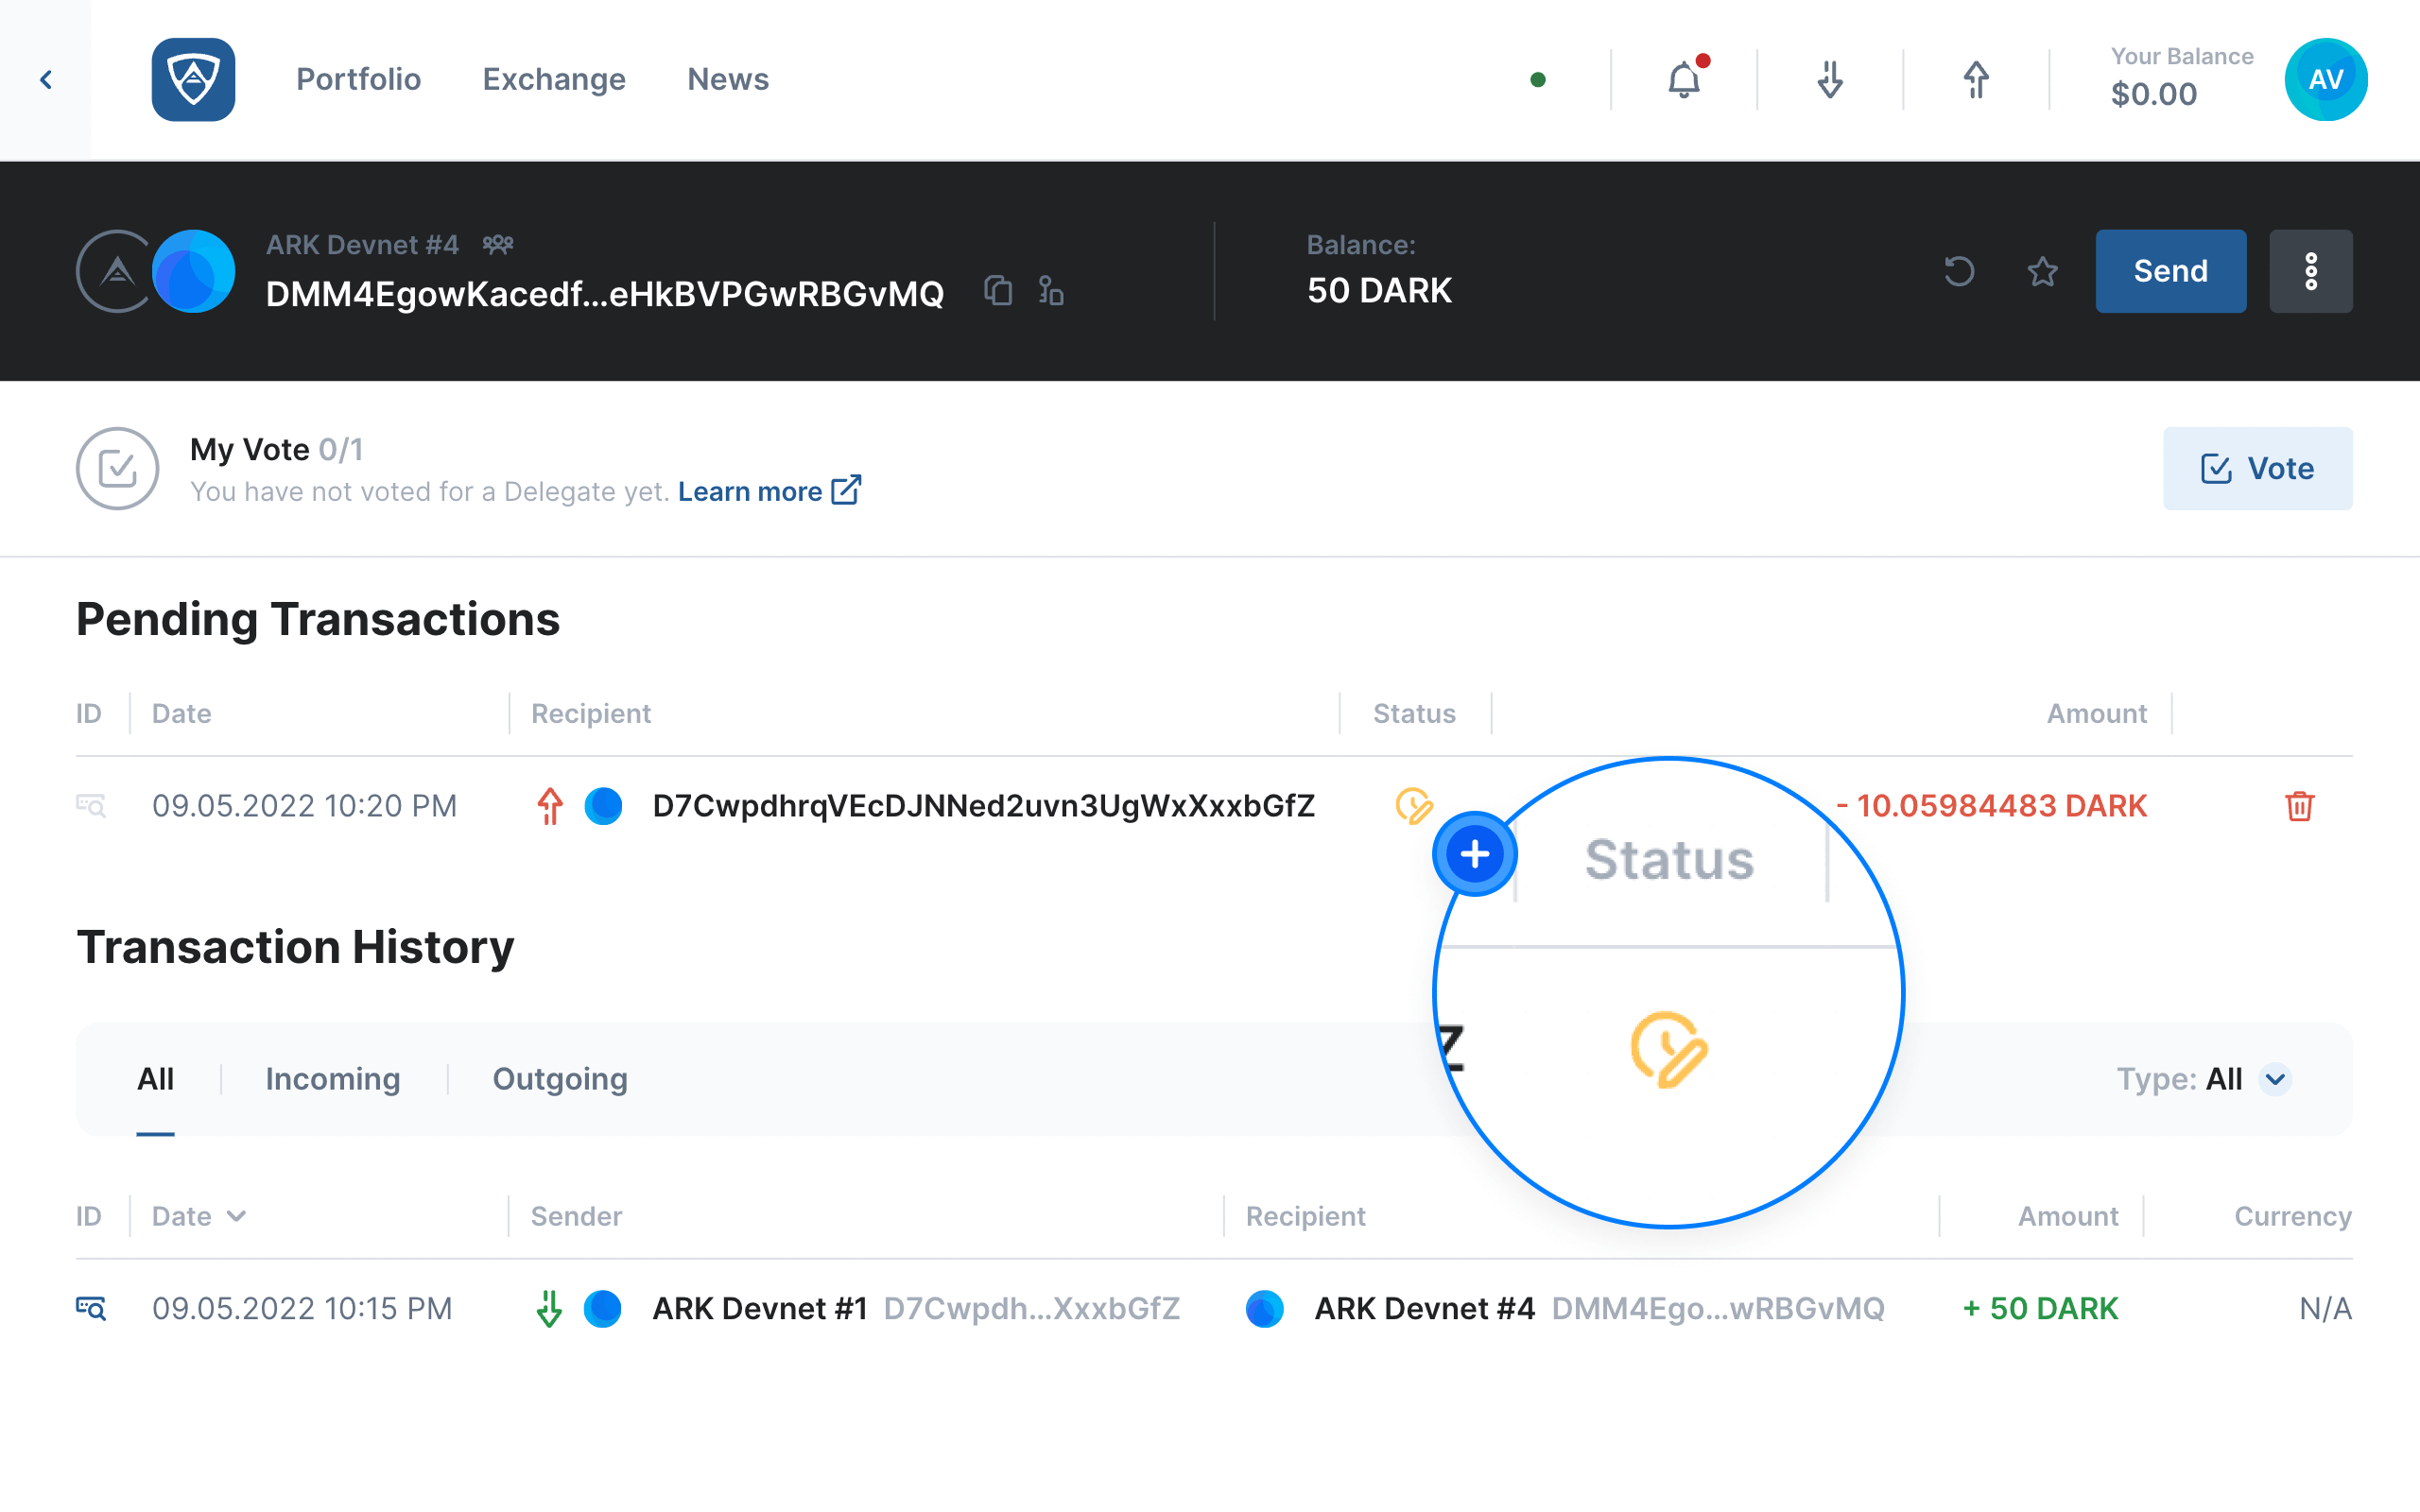
While viewing the multisignature wallet, you will notice that your transfer of funds appears under the Pending Transactions Tab. You will also notice that by hovering your cursor over the icon that appears under Status, a tooltip will appear stating Awaiting m other signatures. A minimum number of participants will now need to sign the transaction in order to broadcast it to the network.
Have Participants Sign the Transfer
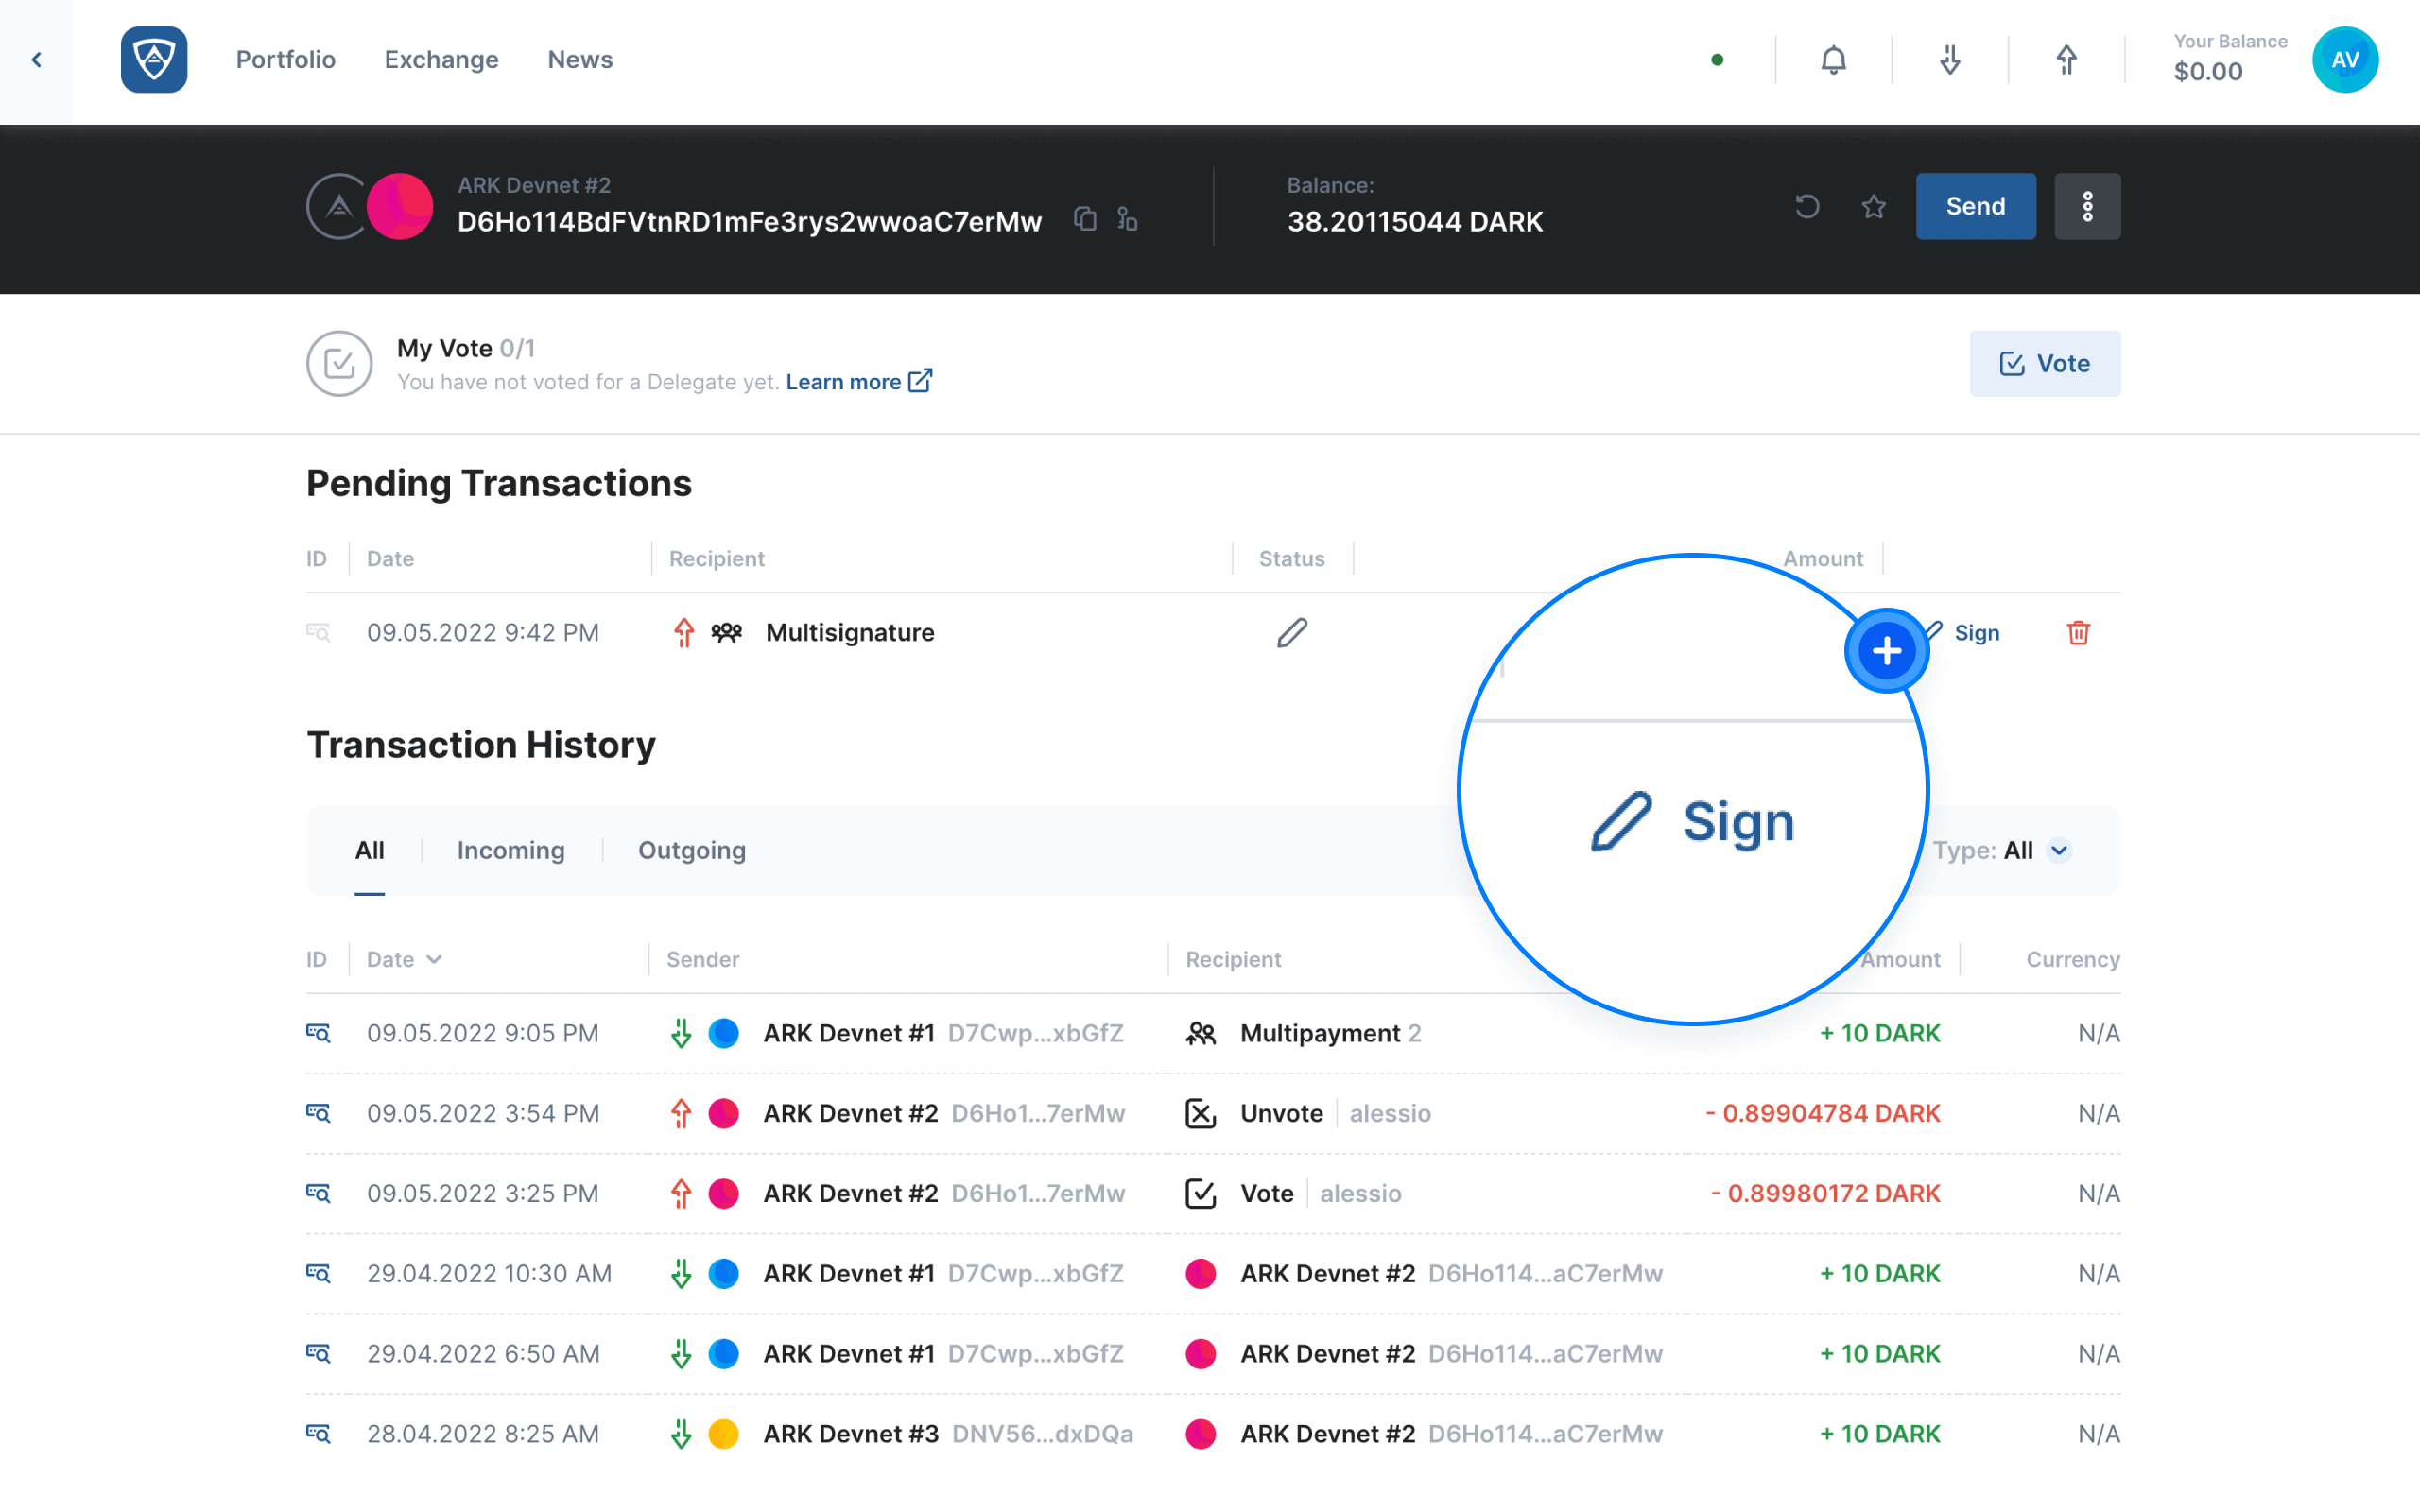
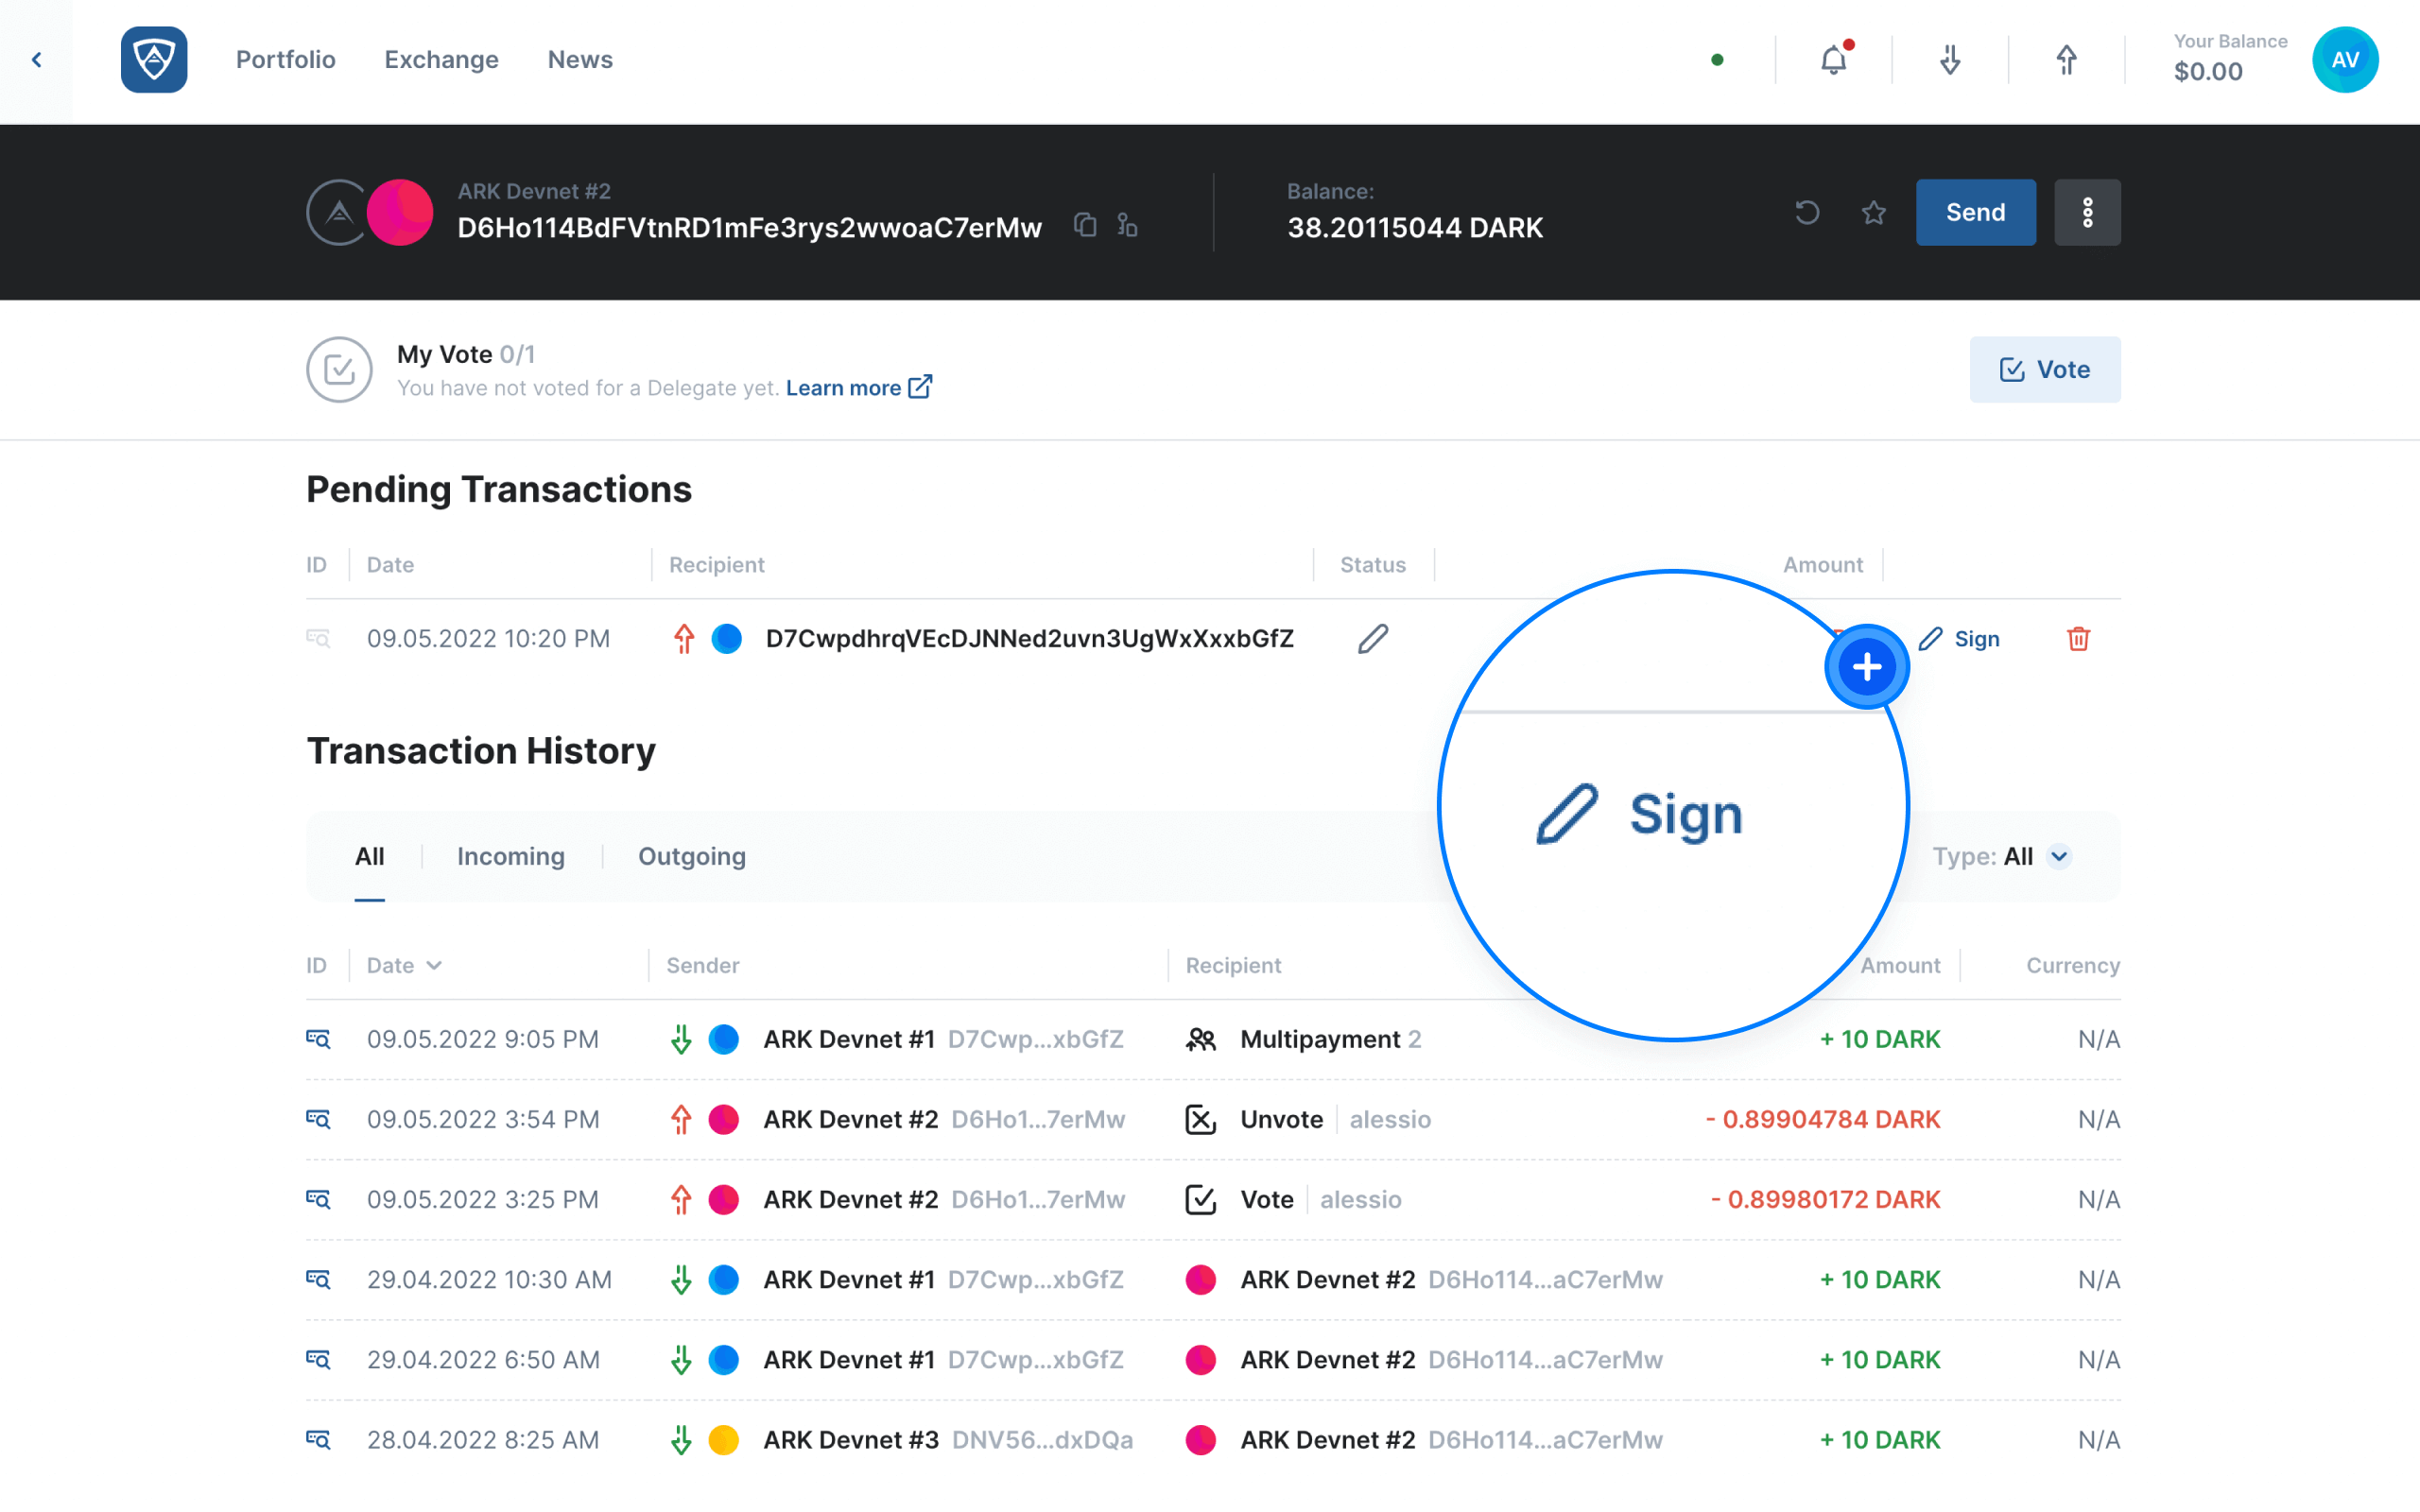
While a participant views the wallet included as a signatory in the multisignature wallet, they will also see the pending multisignature transaction under the Pending Transactions Tab. In order to sign the transaction, they must click the blue Sign button located to the right of the pending transaction.
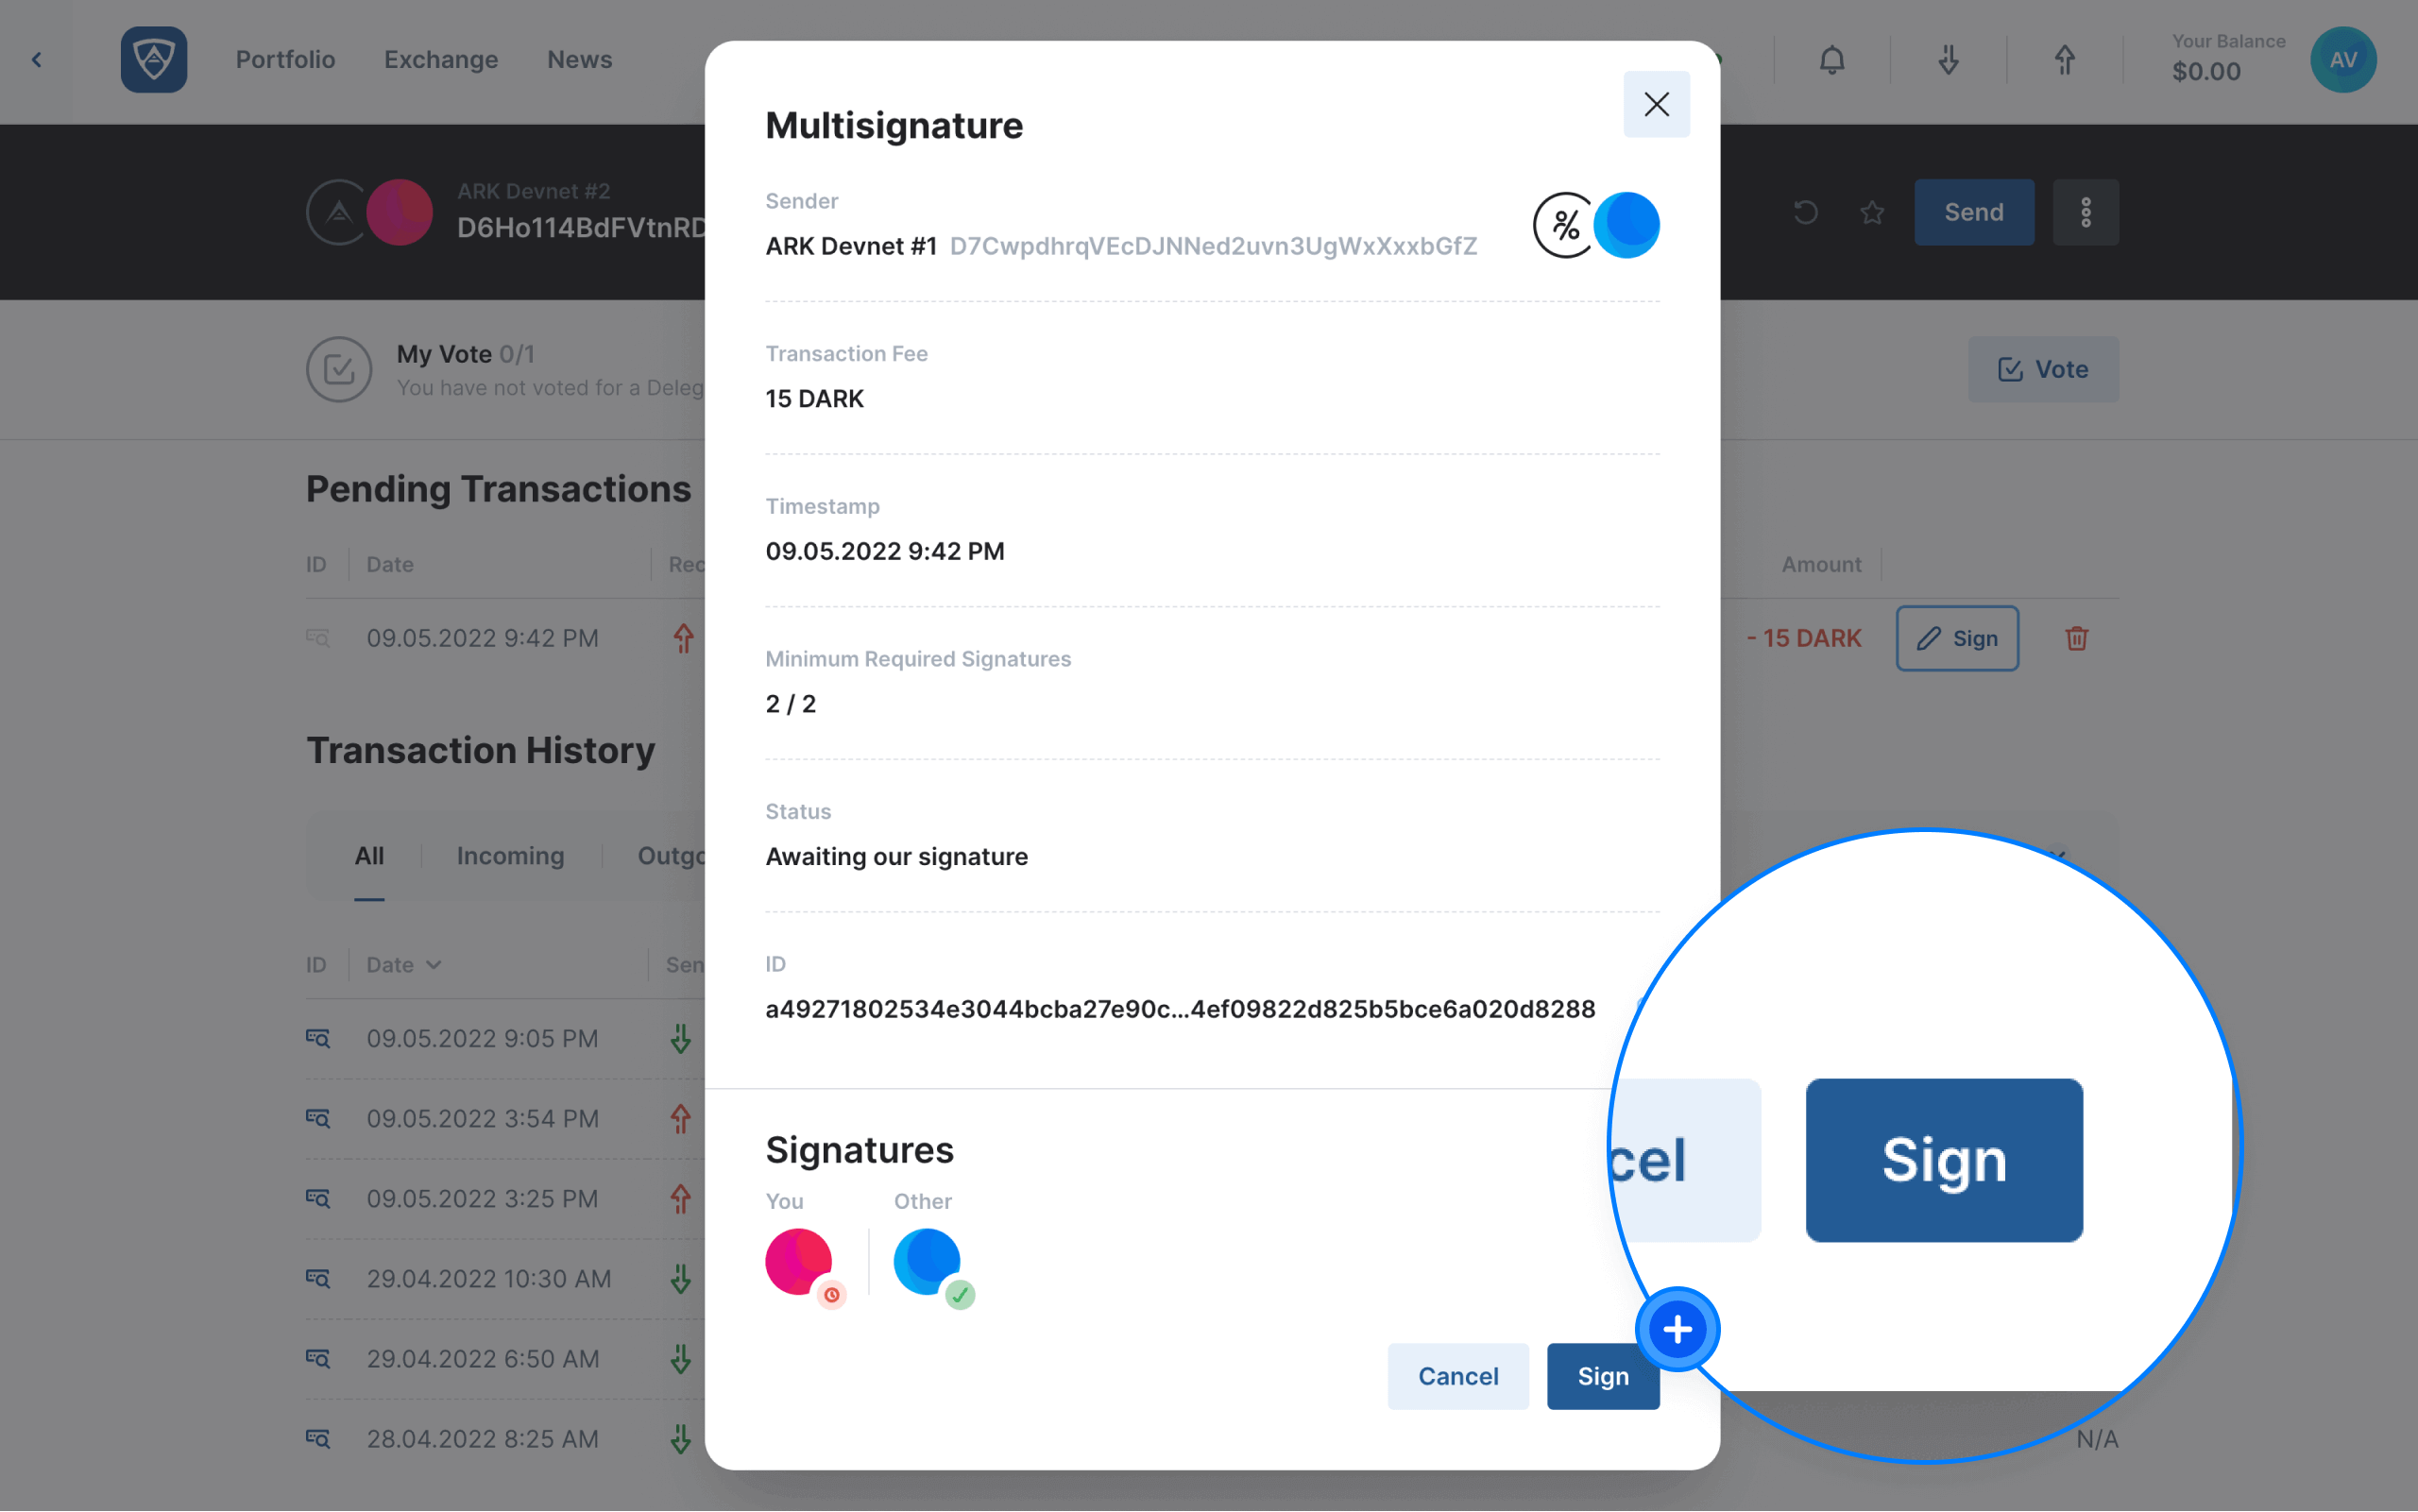
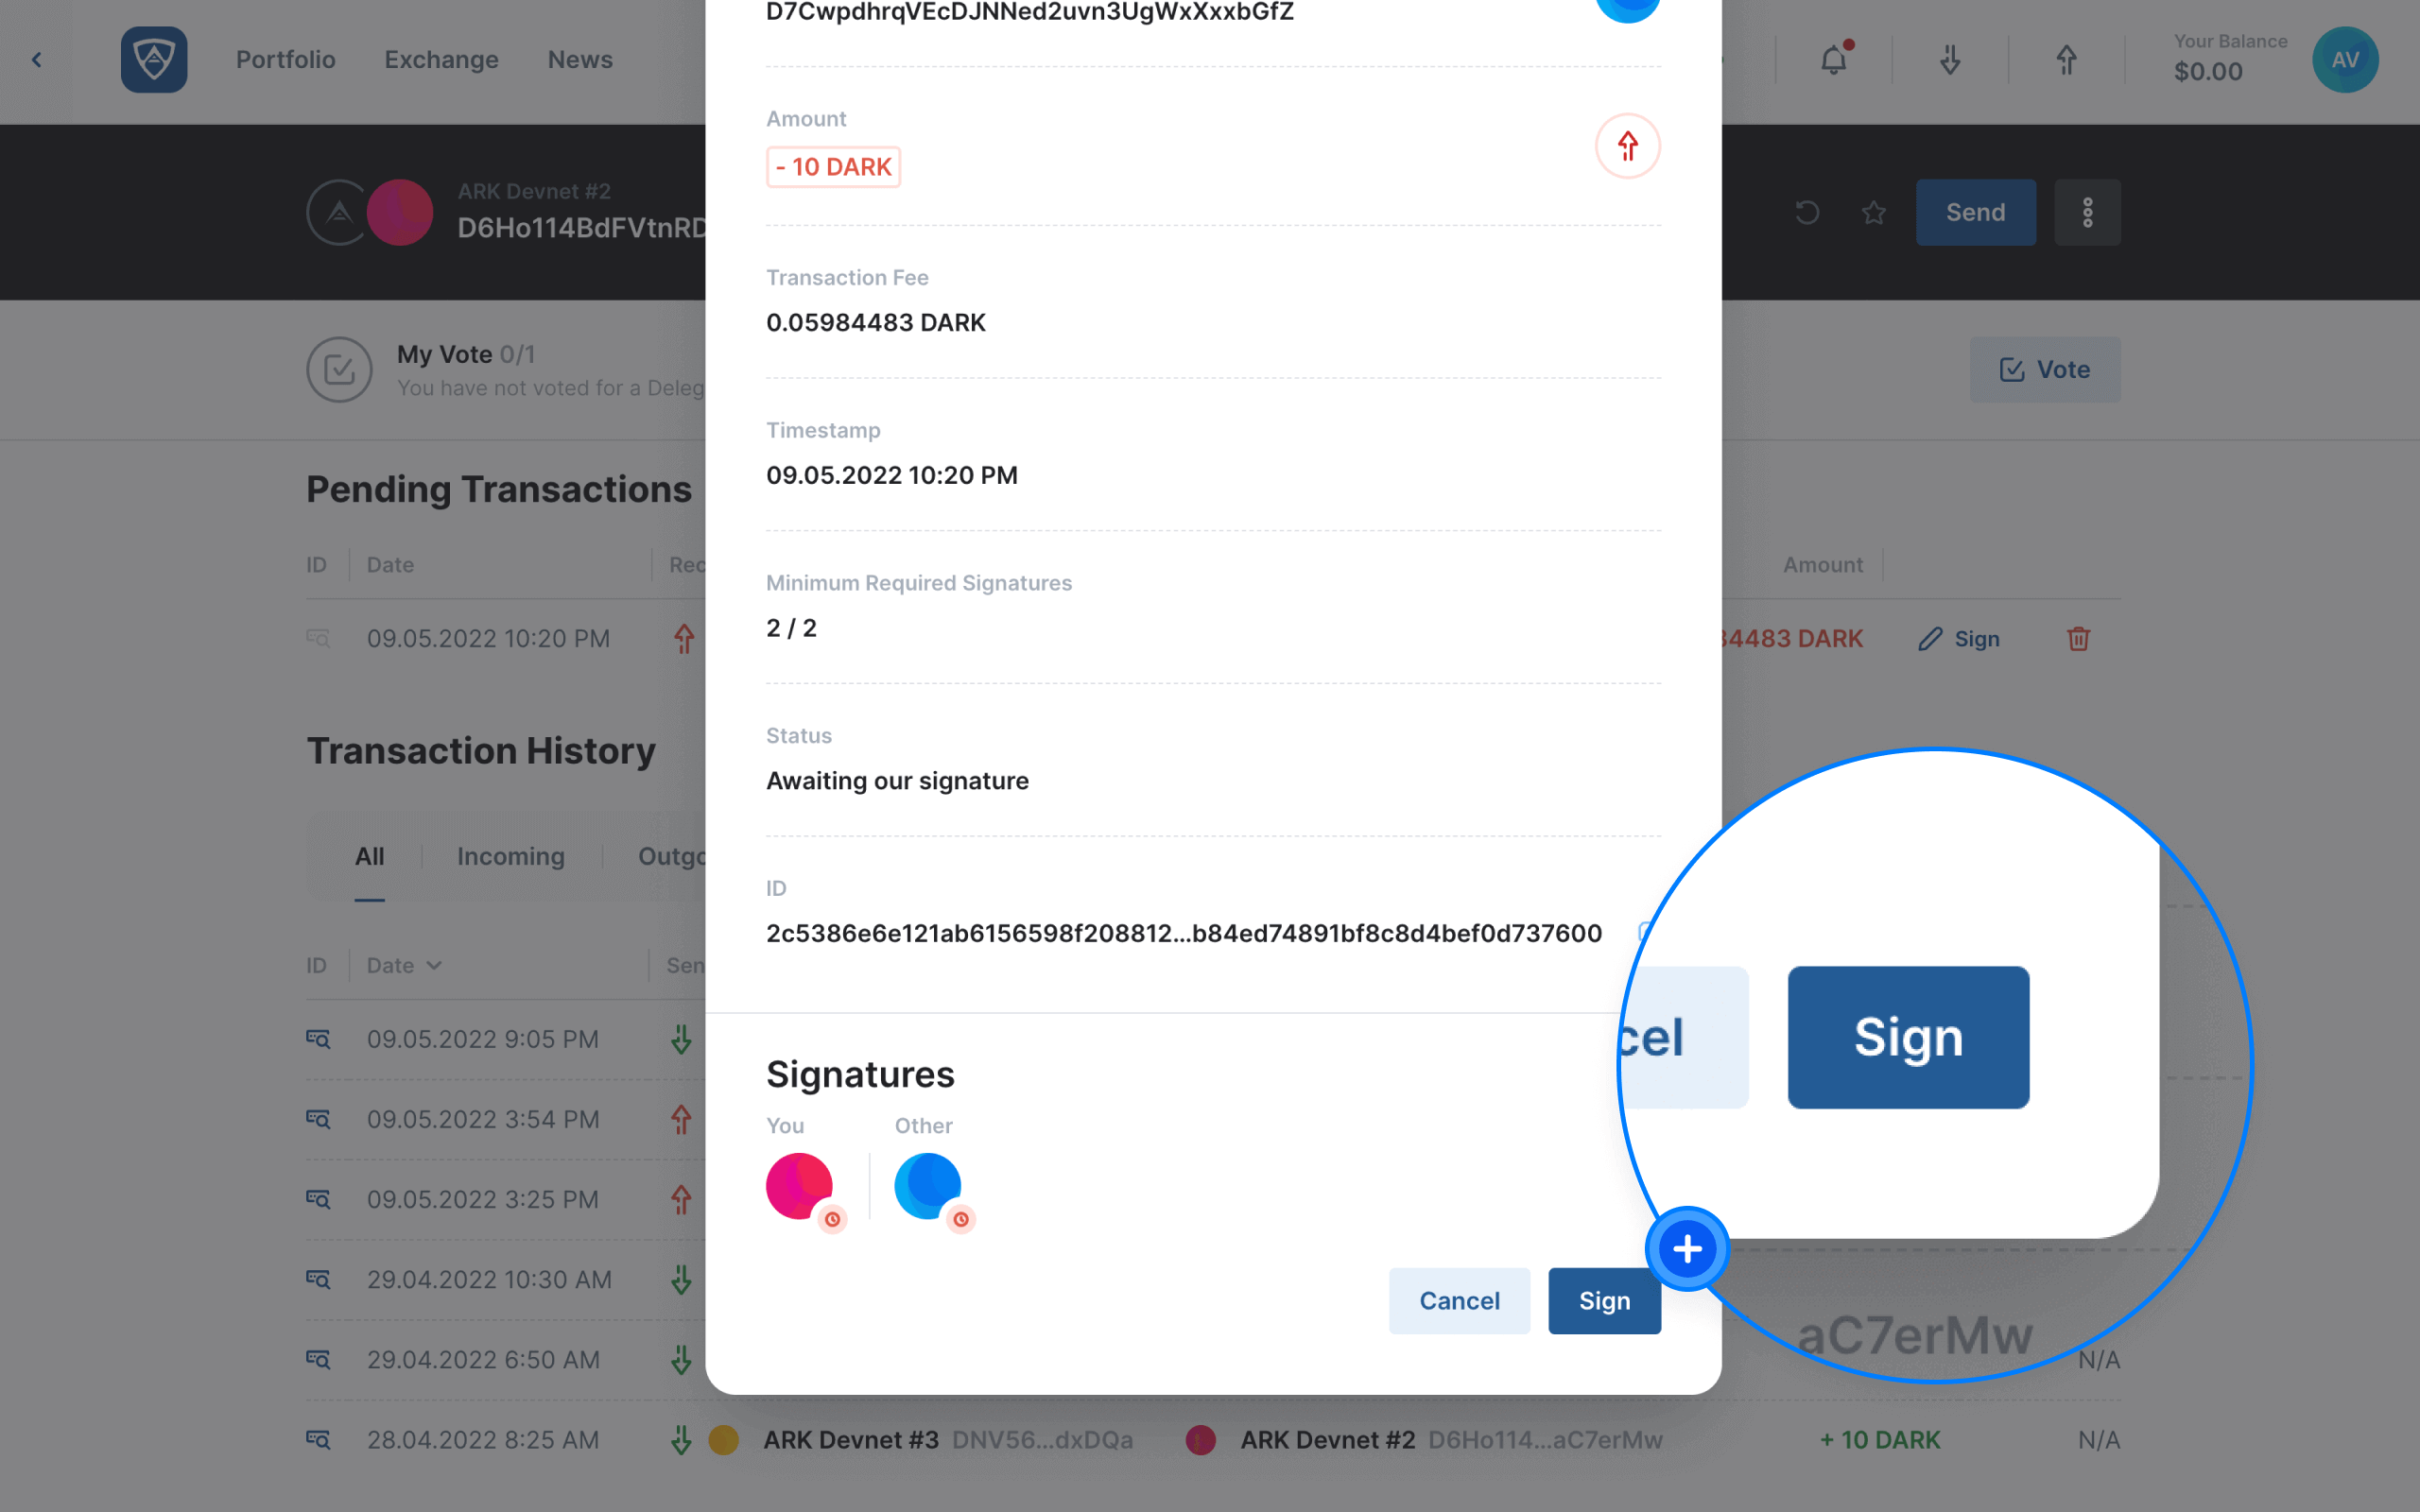
The Transfer modal will appear, allowing the participant the chance to review the details of the transaction as well as its current status.
![]()
If everything is in order, the participant can click the Sign button. However, if anything requires querying or an adjustment, the participant can click the Cancel button.
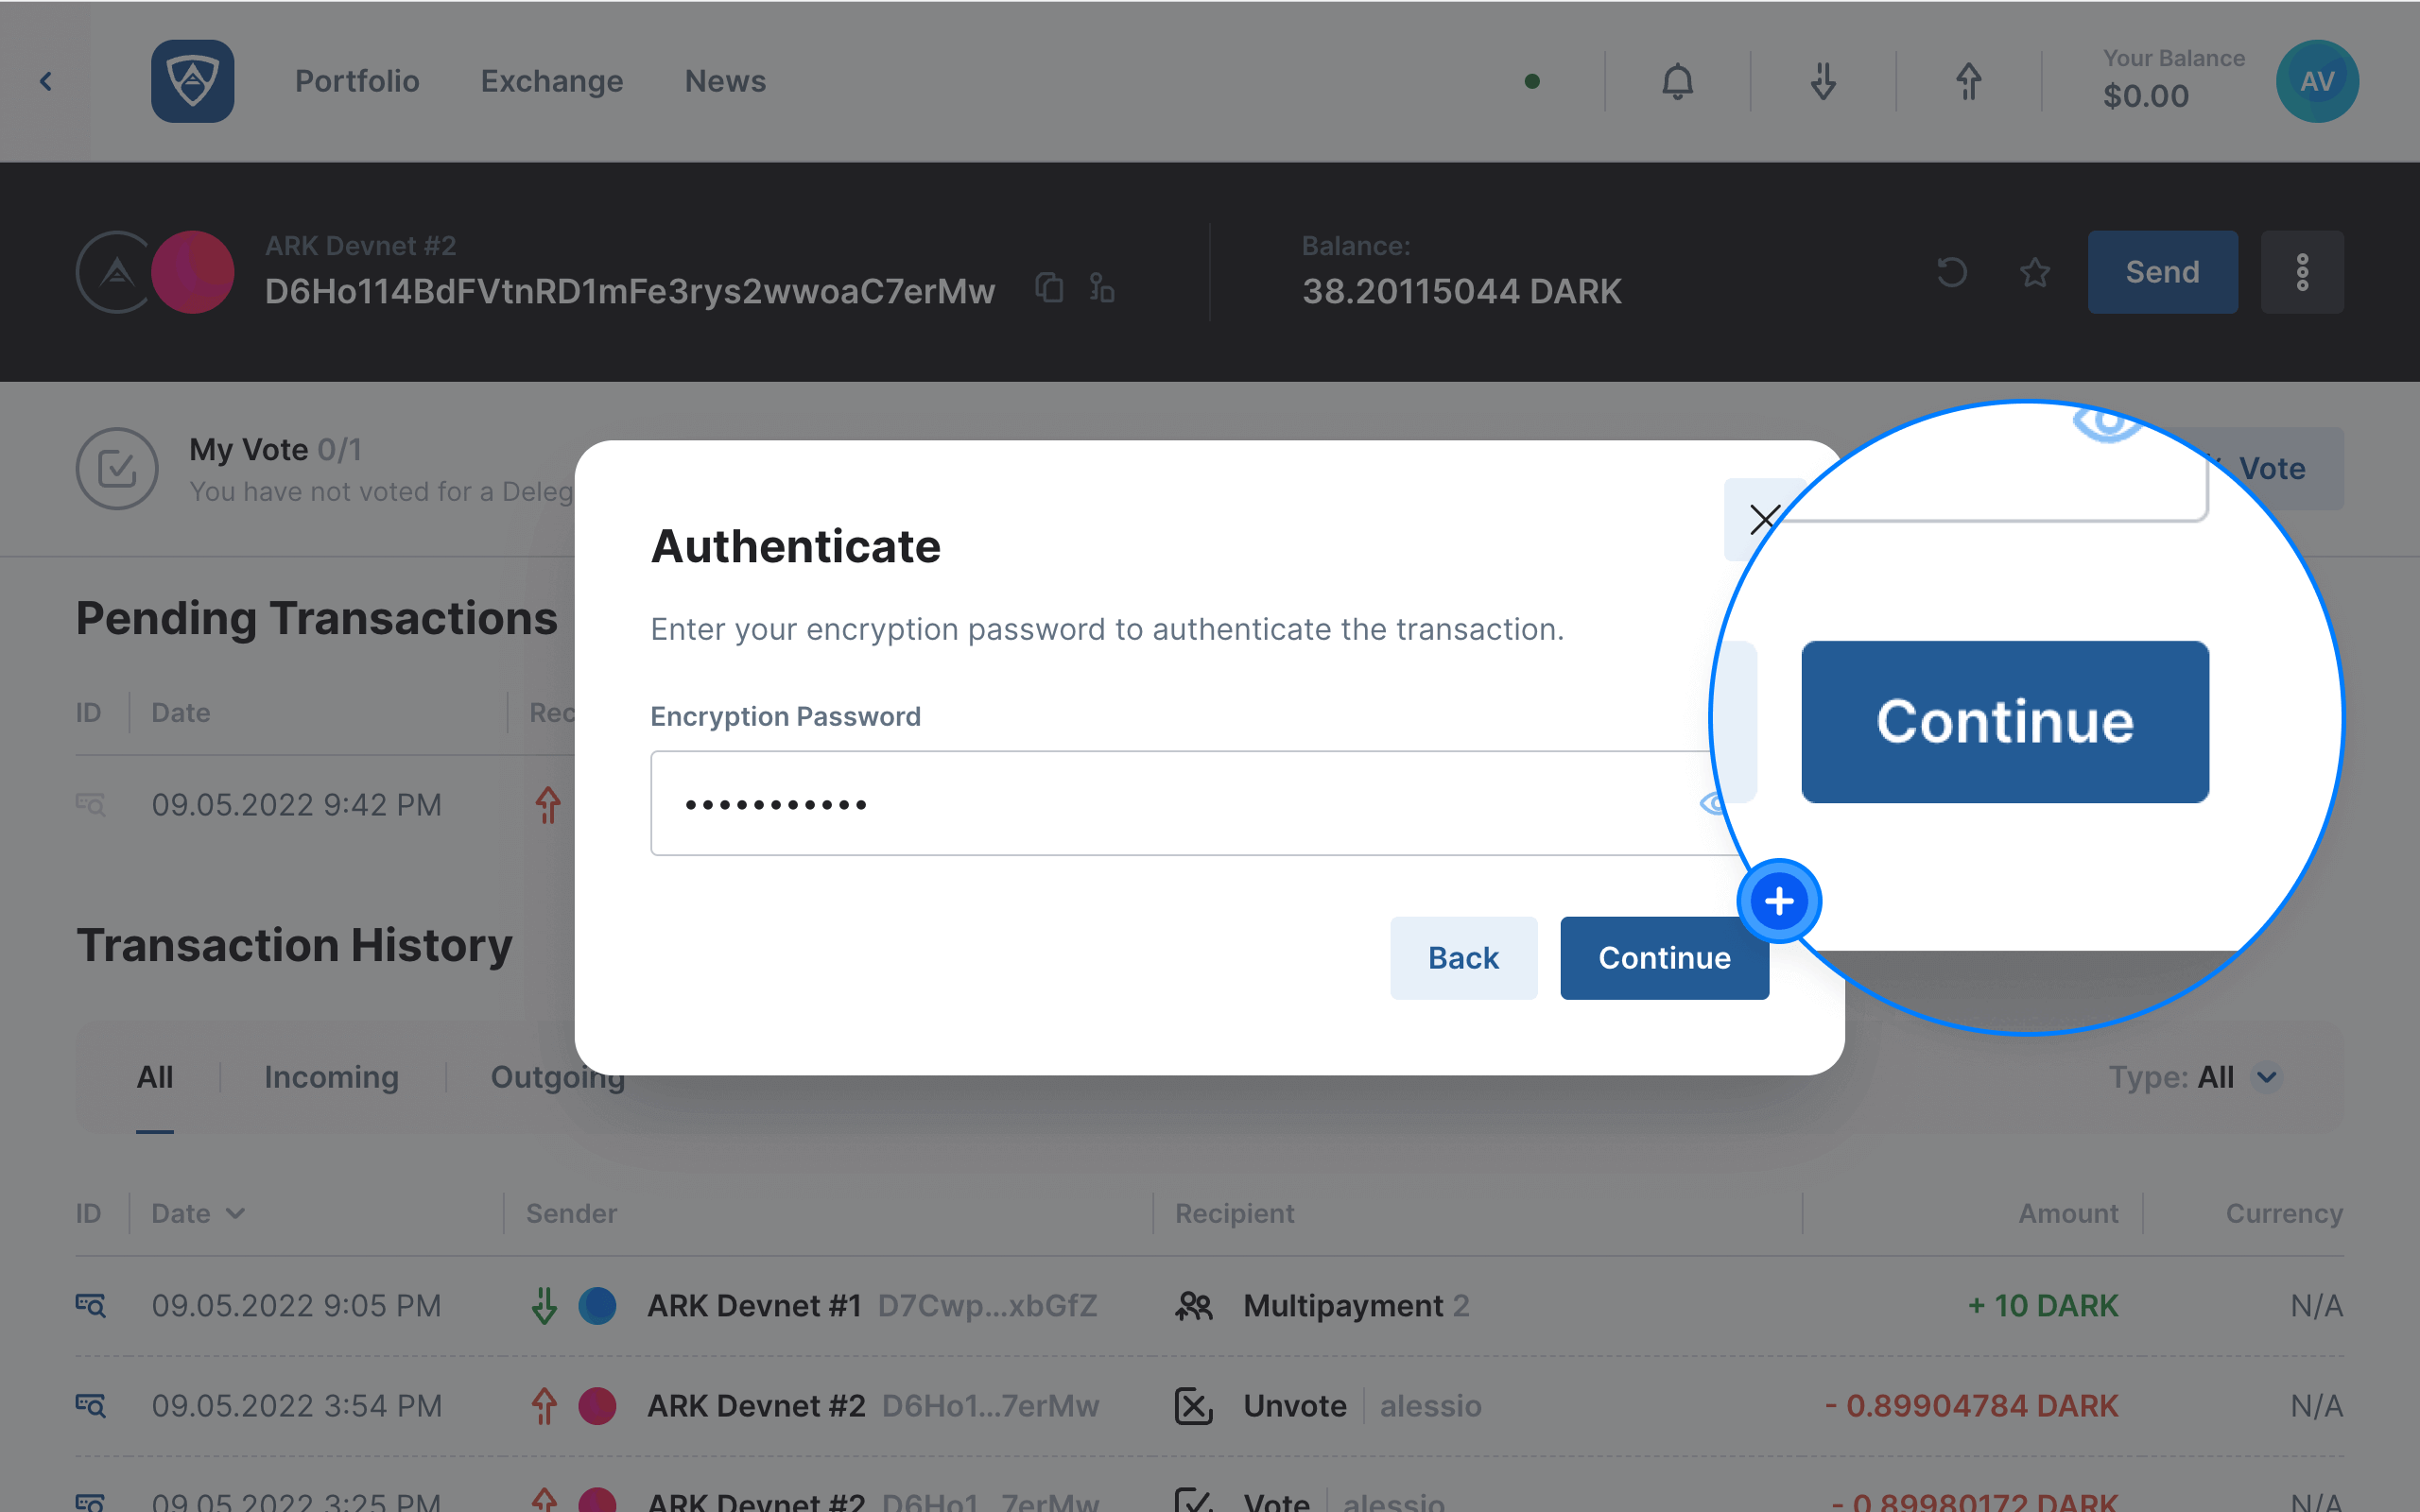
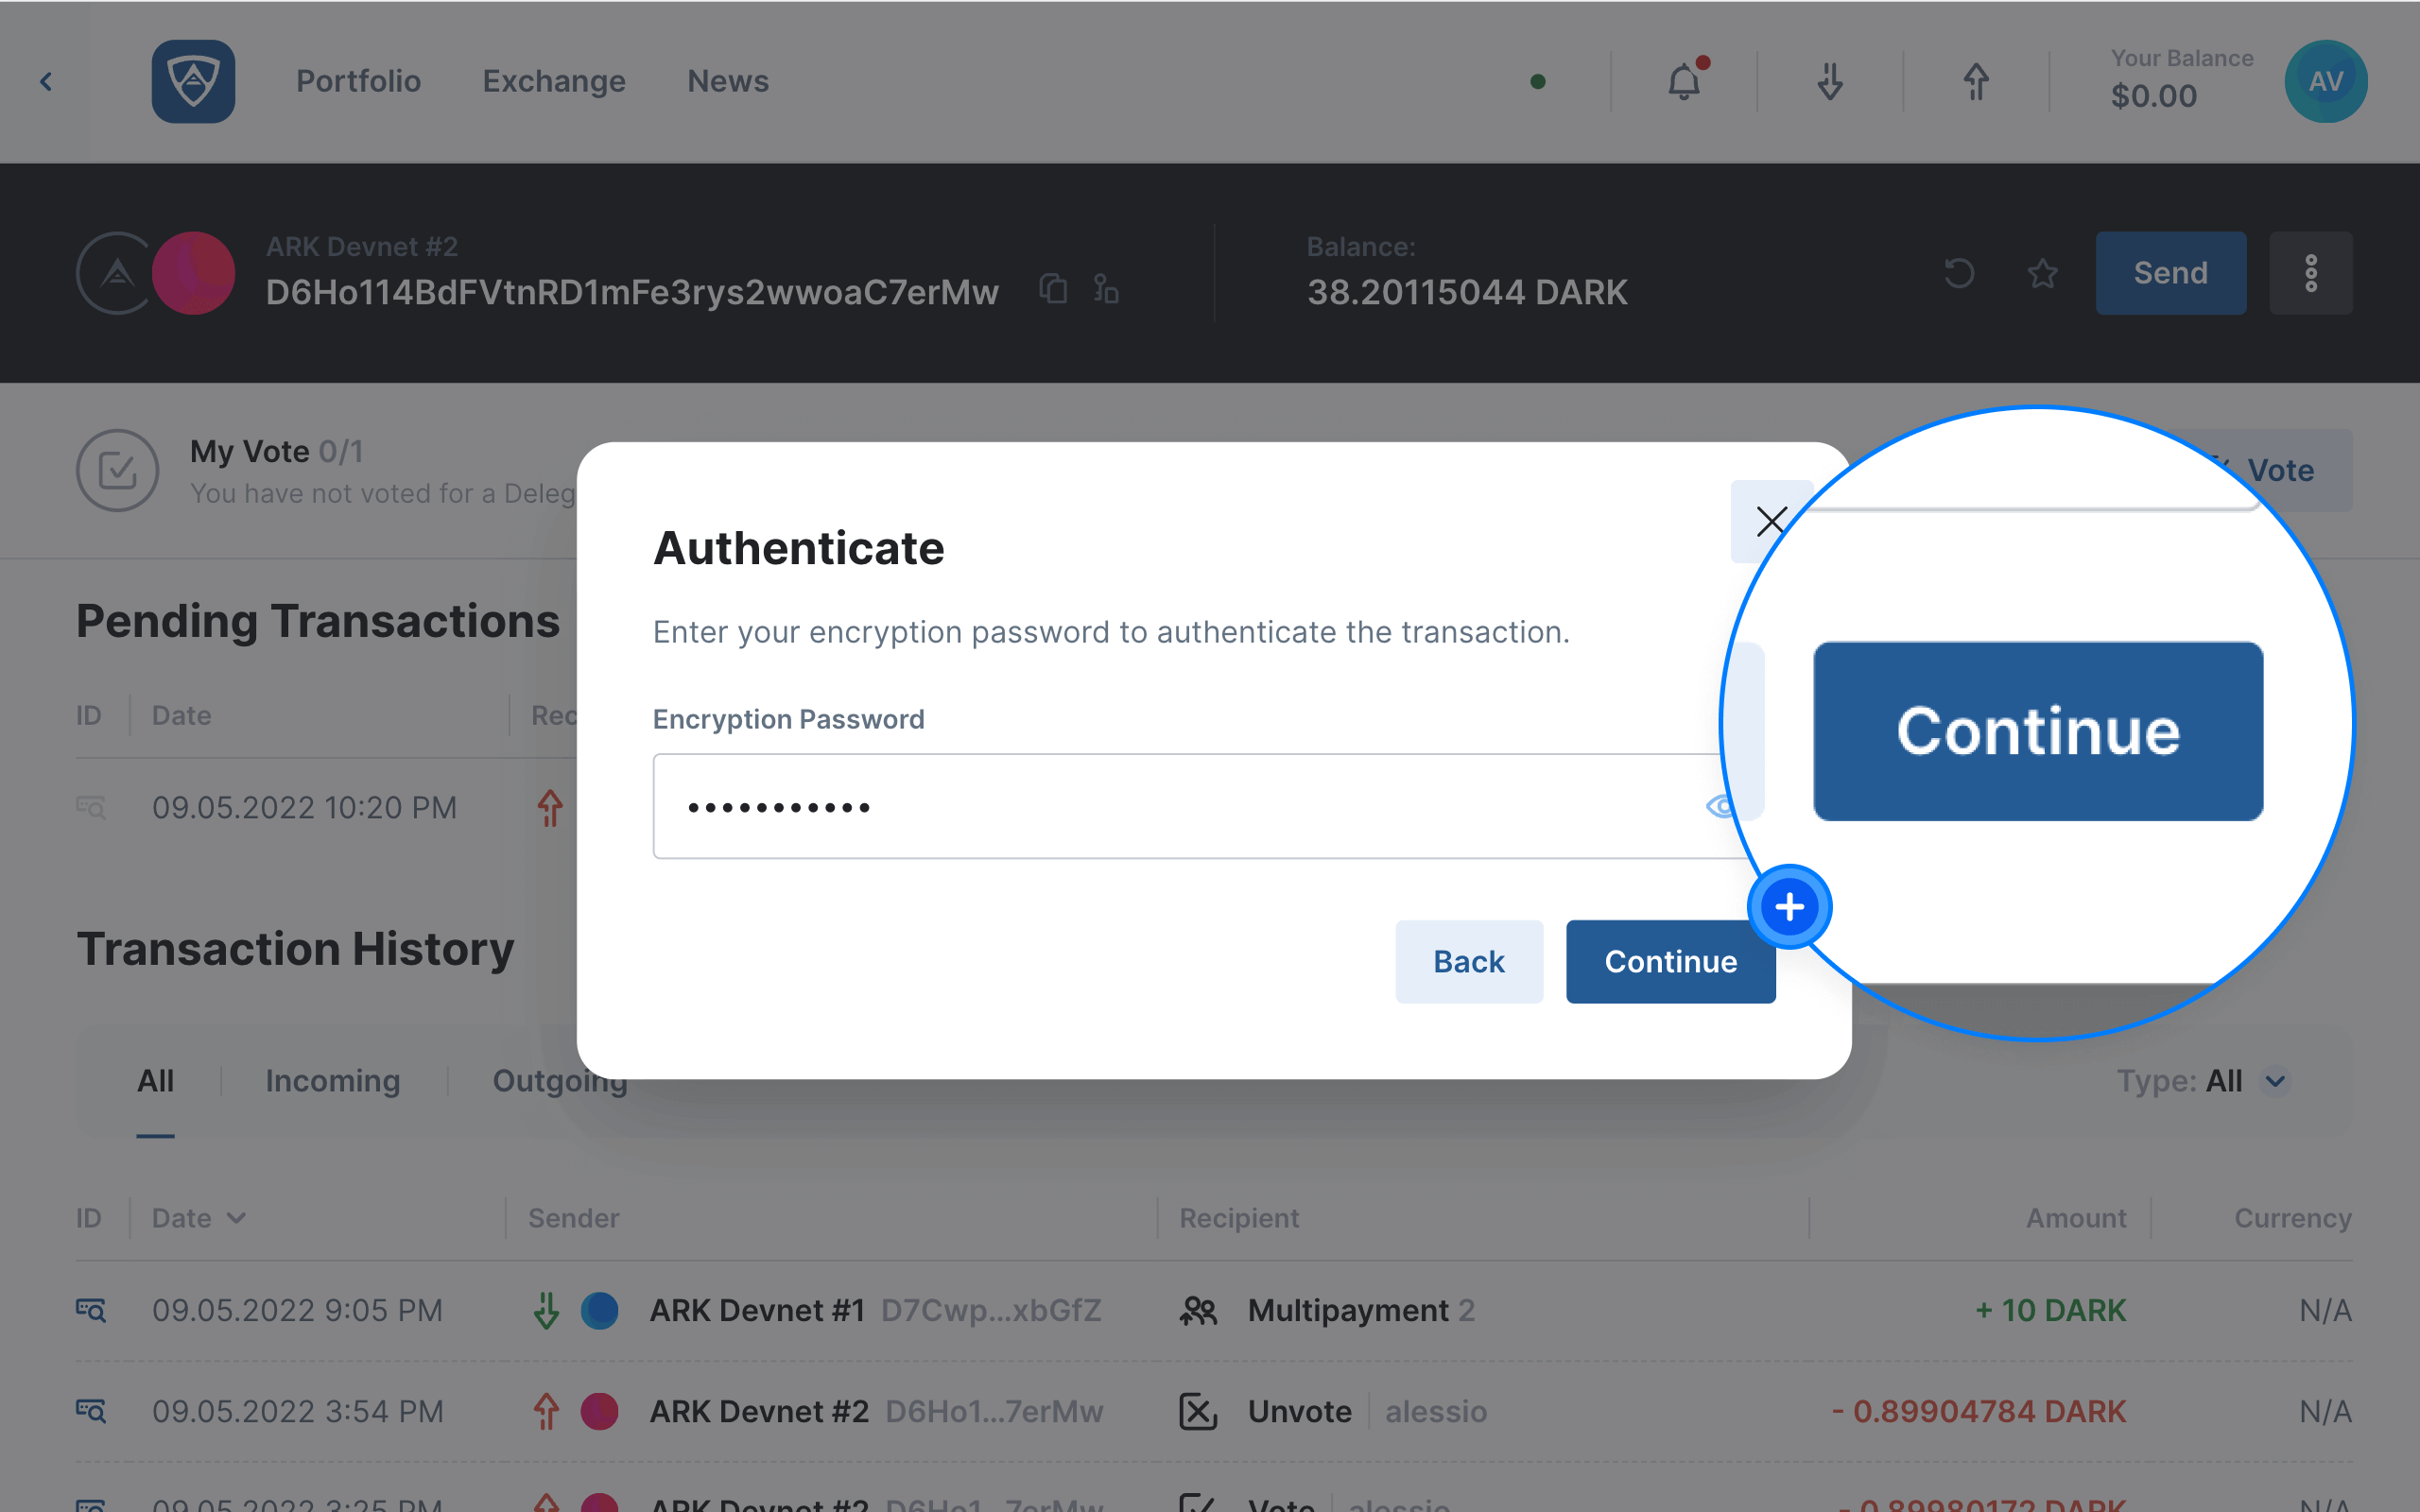
The Authenticate modal will then appear. The participant will need to sign the transaction using their wallet’s credentials, such as a mnemonic recovery phrase or encryption password for example. Upon entering the required credentials, the participant may click the Continue button to add their signature. Alternatively, if the participant needs to make adjustments or query the transaction, they may click the Back button.
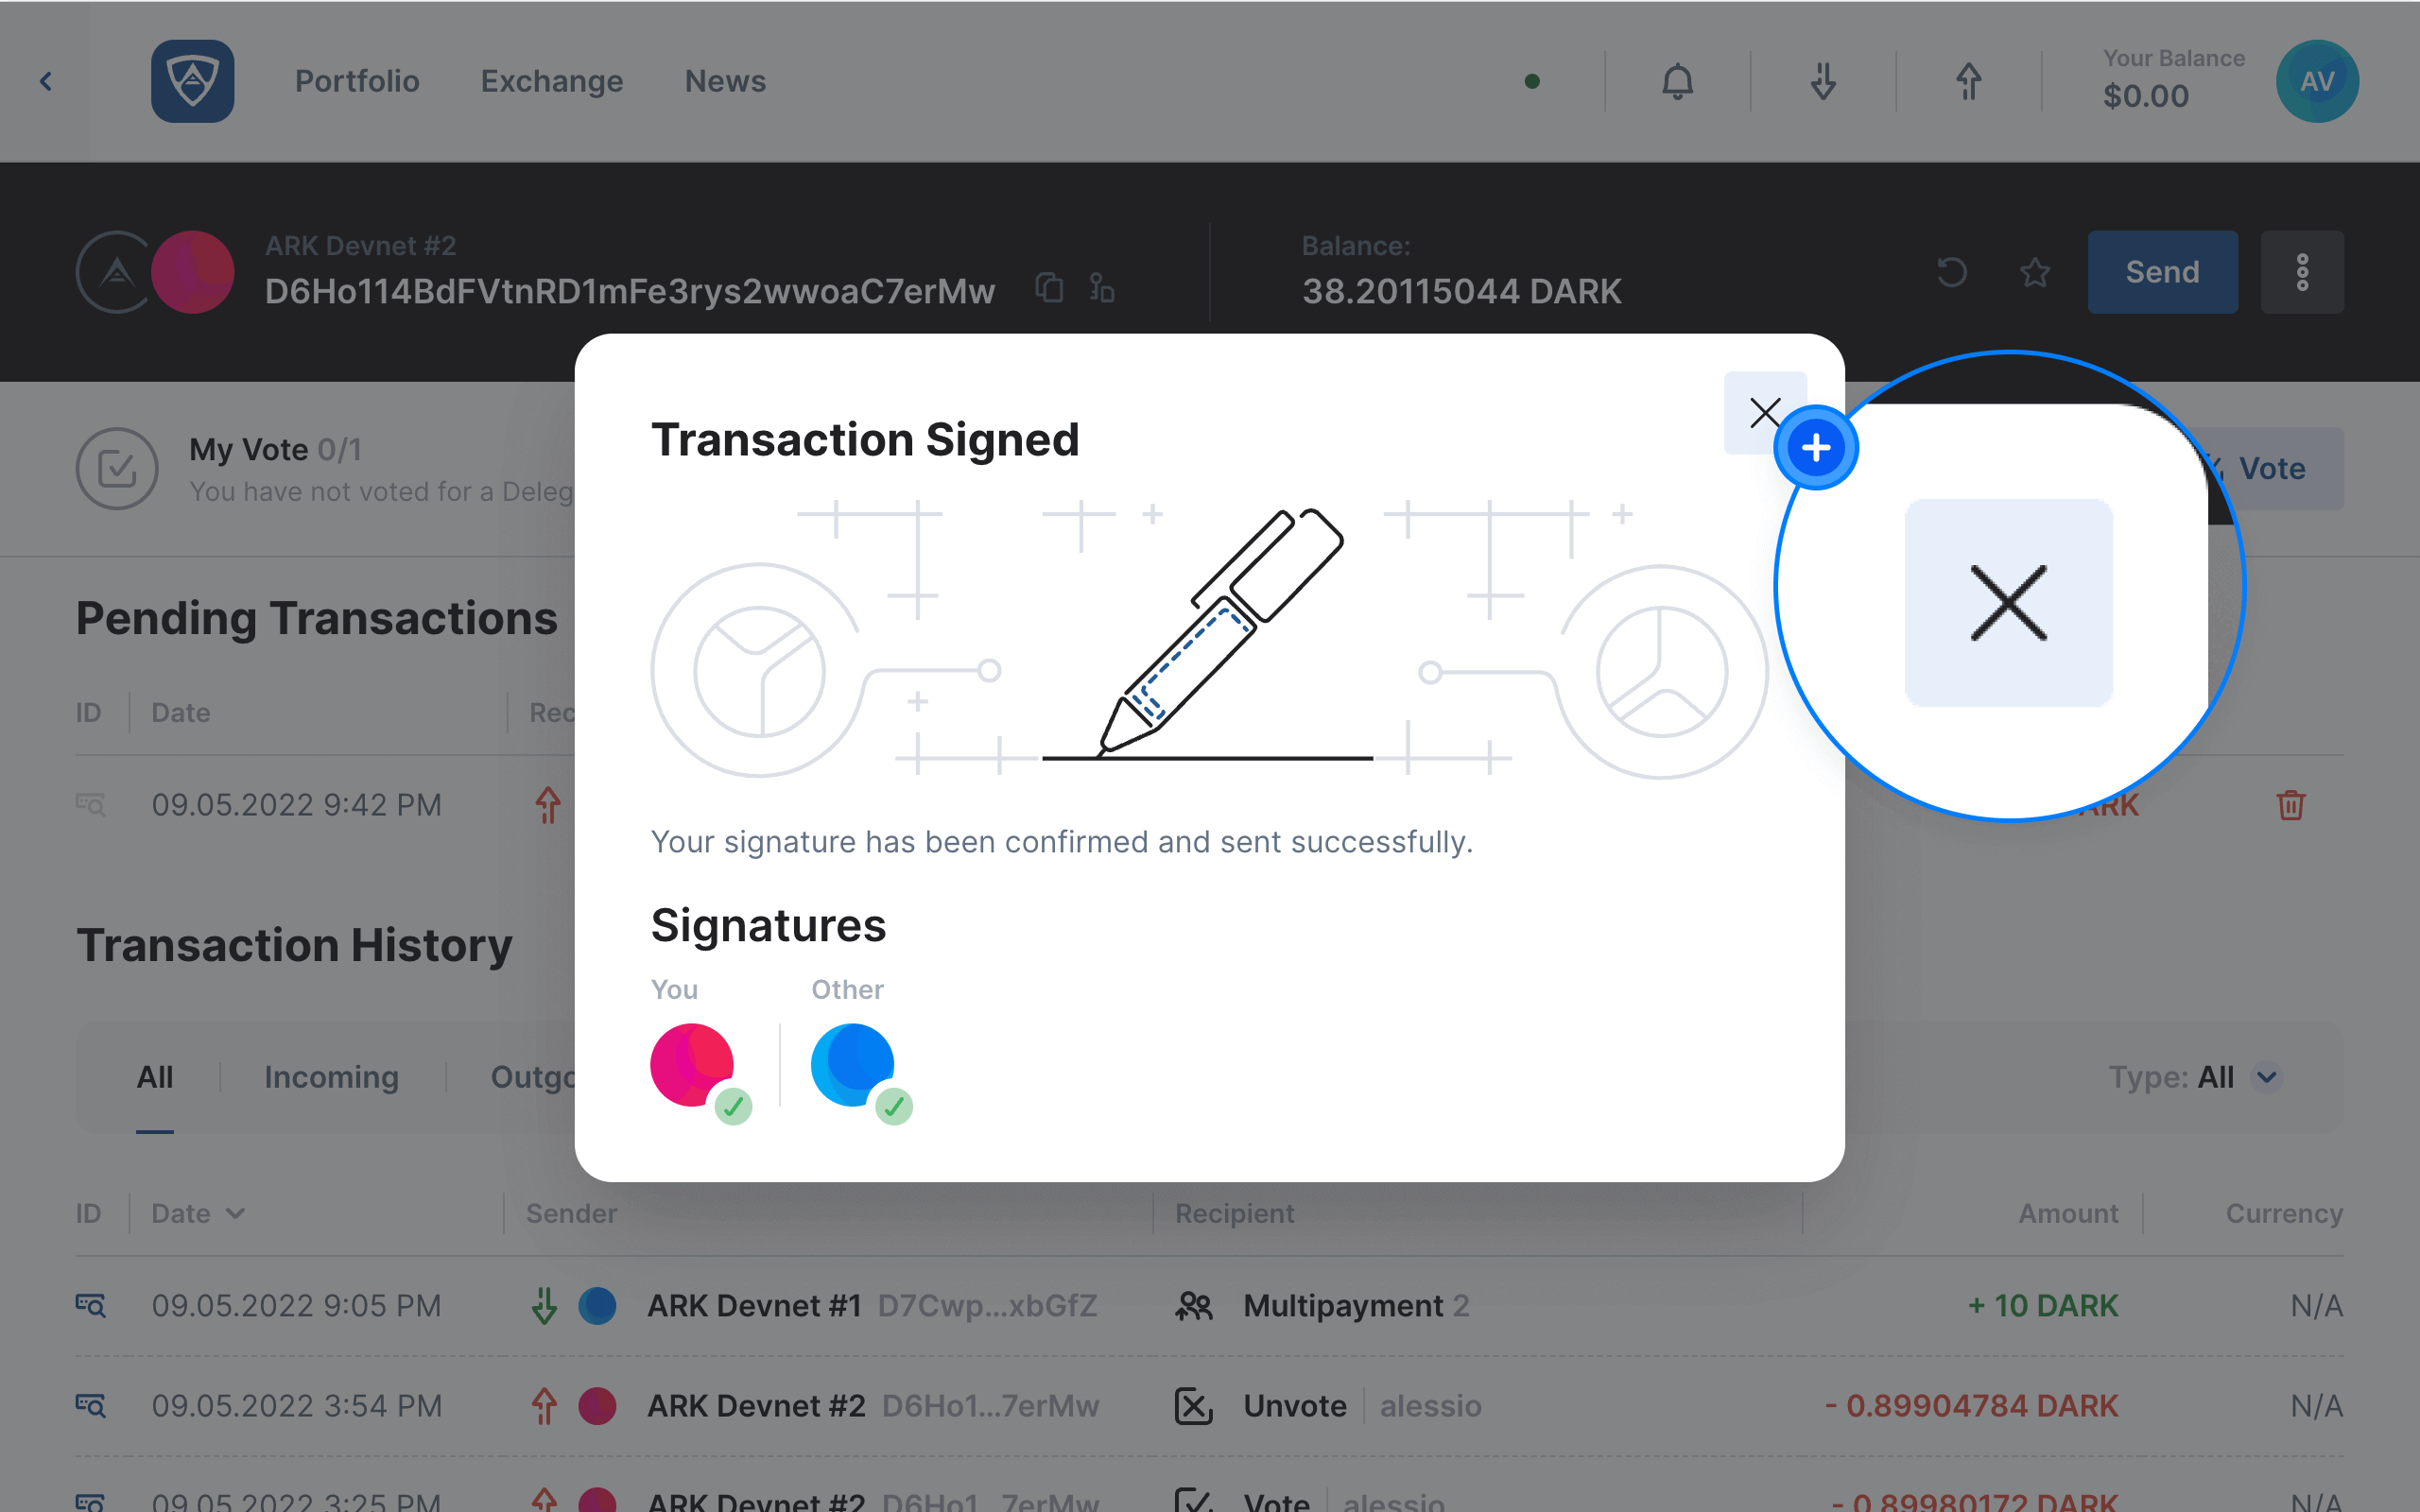
The Transaction Signed modal will then appear confirming that the relevant participant successfully signed the multisignature wallet transaction. Moreover, each participant will have the ability to see who has signed the transaction thus far. Upon reviewing the details, the participant may click the X button in the top right corner of the modal to close it.

Information
Each participant will repeat the above process until m signatures is attained, at which point the transaction will autocomplete and receive the necessary confirmations in order to broadcast it to the network.
Review the Transaction
Once the final participant adds their signature, the transaction will complete automatically.
![]()
While viewing the multisignature wallet, the transaction will appear in its Transaction History. Clicking on the transaction brings up the Transfer modal confirming that the transfer completed successfully. Upon reviewing the details, you may continue or terminate your session accordingly.
![]()