Export Transaction History
ARKVault allows you to export a wallet’s transaction history according to a number of preset parameters or between any two dates. Moreover, it also allows you to include or exclude certain information and choose from some formatting options, resulting in a custom record of a wallet’s transactions that you can access via a convenient CSV file. The following information will explain how to:
Prepare a Wallet’s Transaction History Record
Watch this helpful tutorial video on How to Export a Wallet’s Transaction History in ARKVault
While viewing a wallet, click the kebab menu (three dots) that appears near the upper right corner of the page and select Transaction History from the dropdown menu.
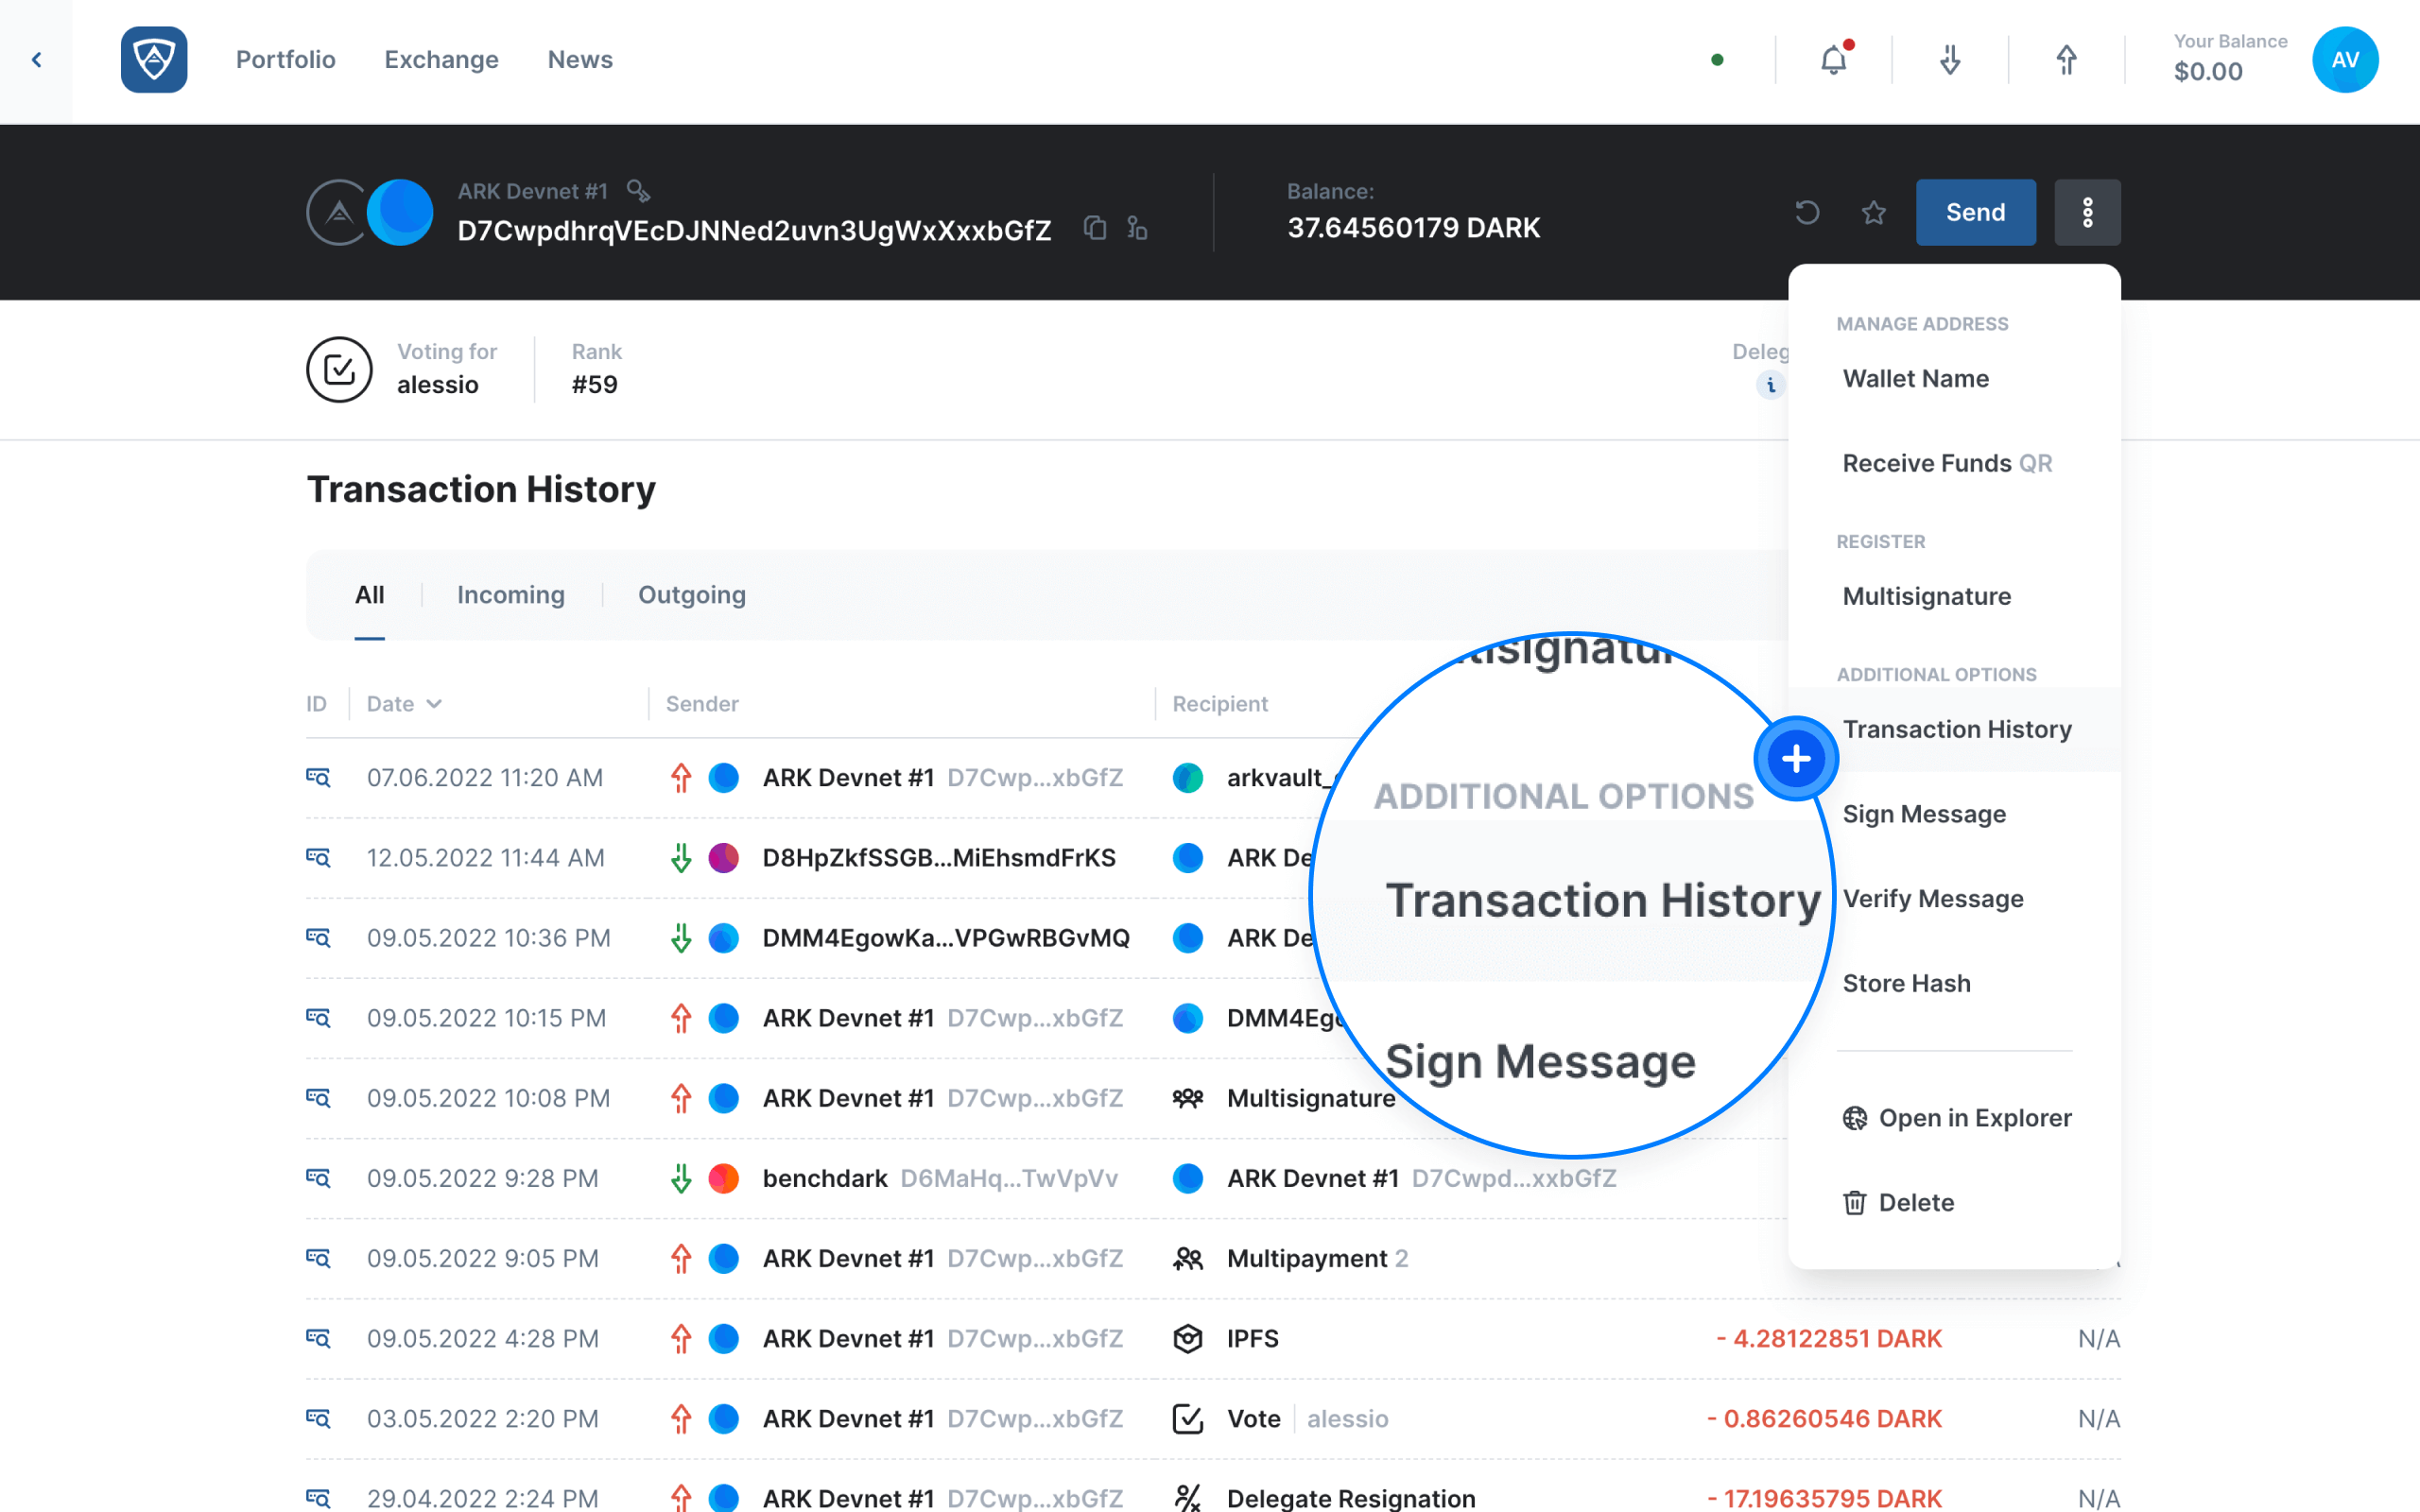
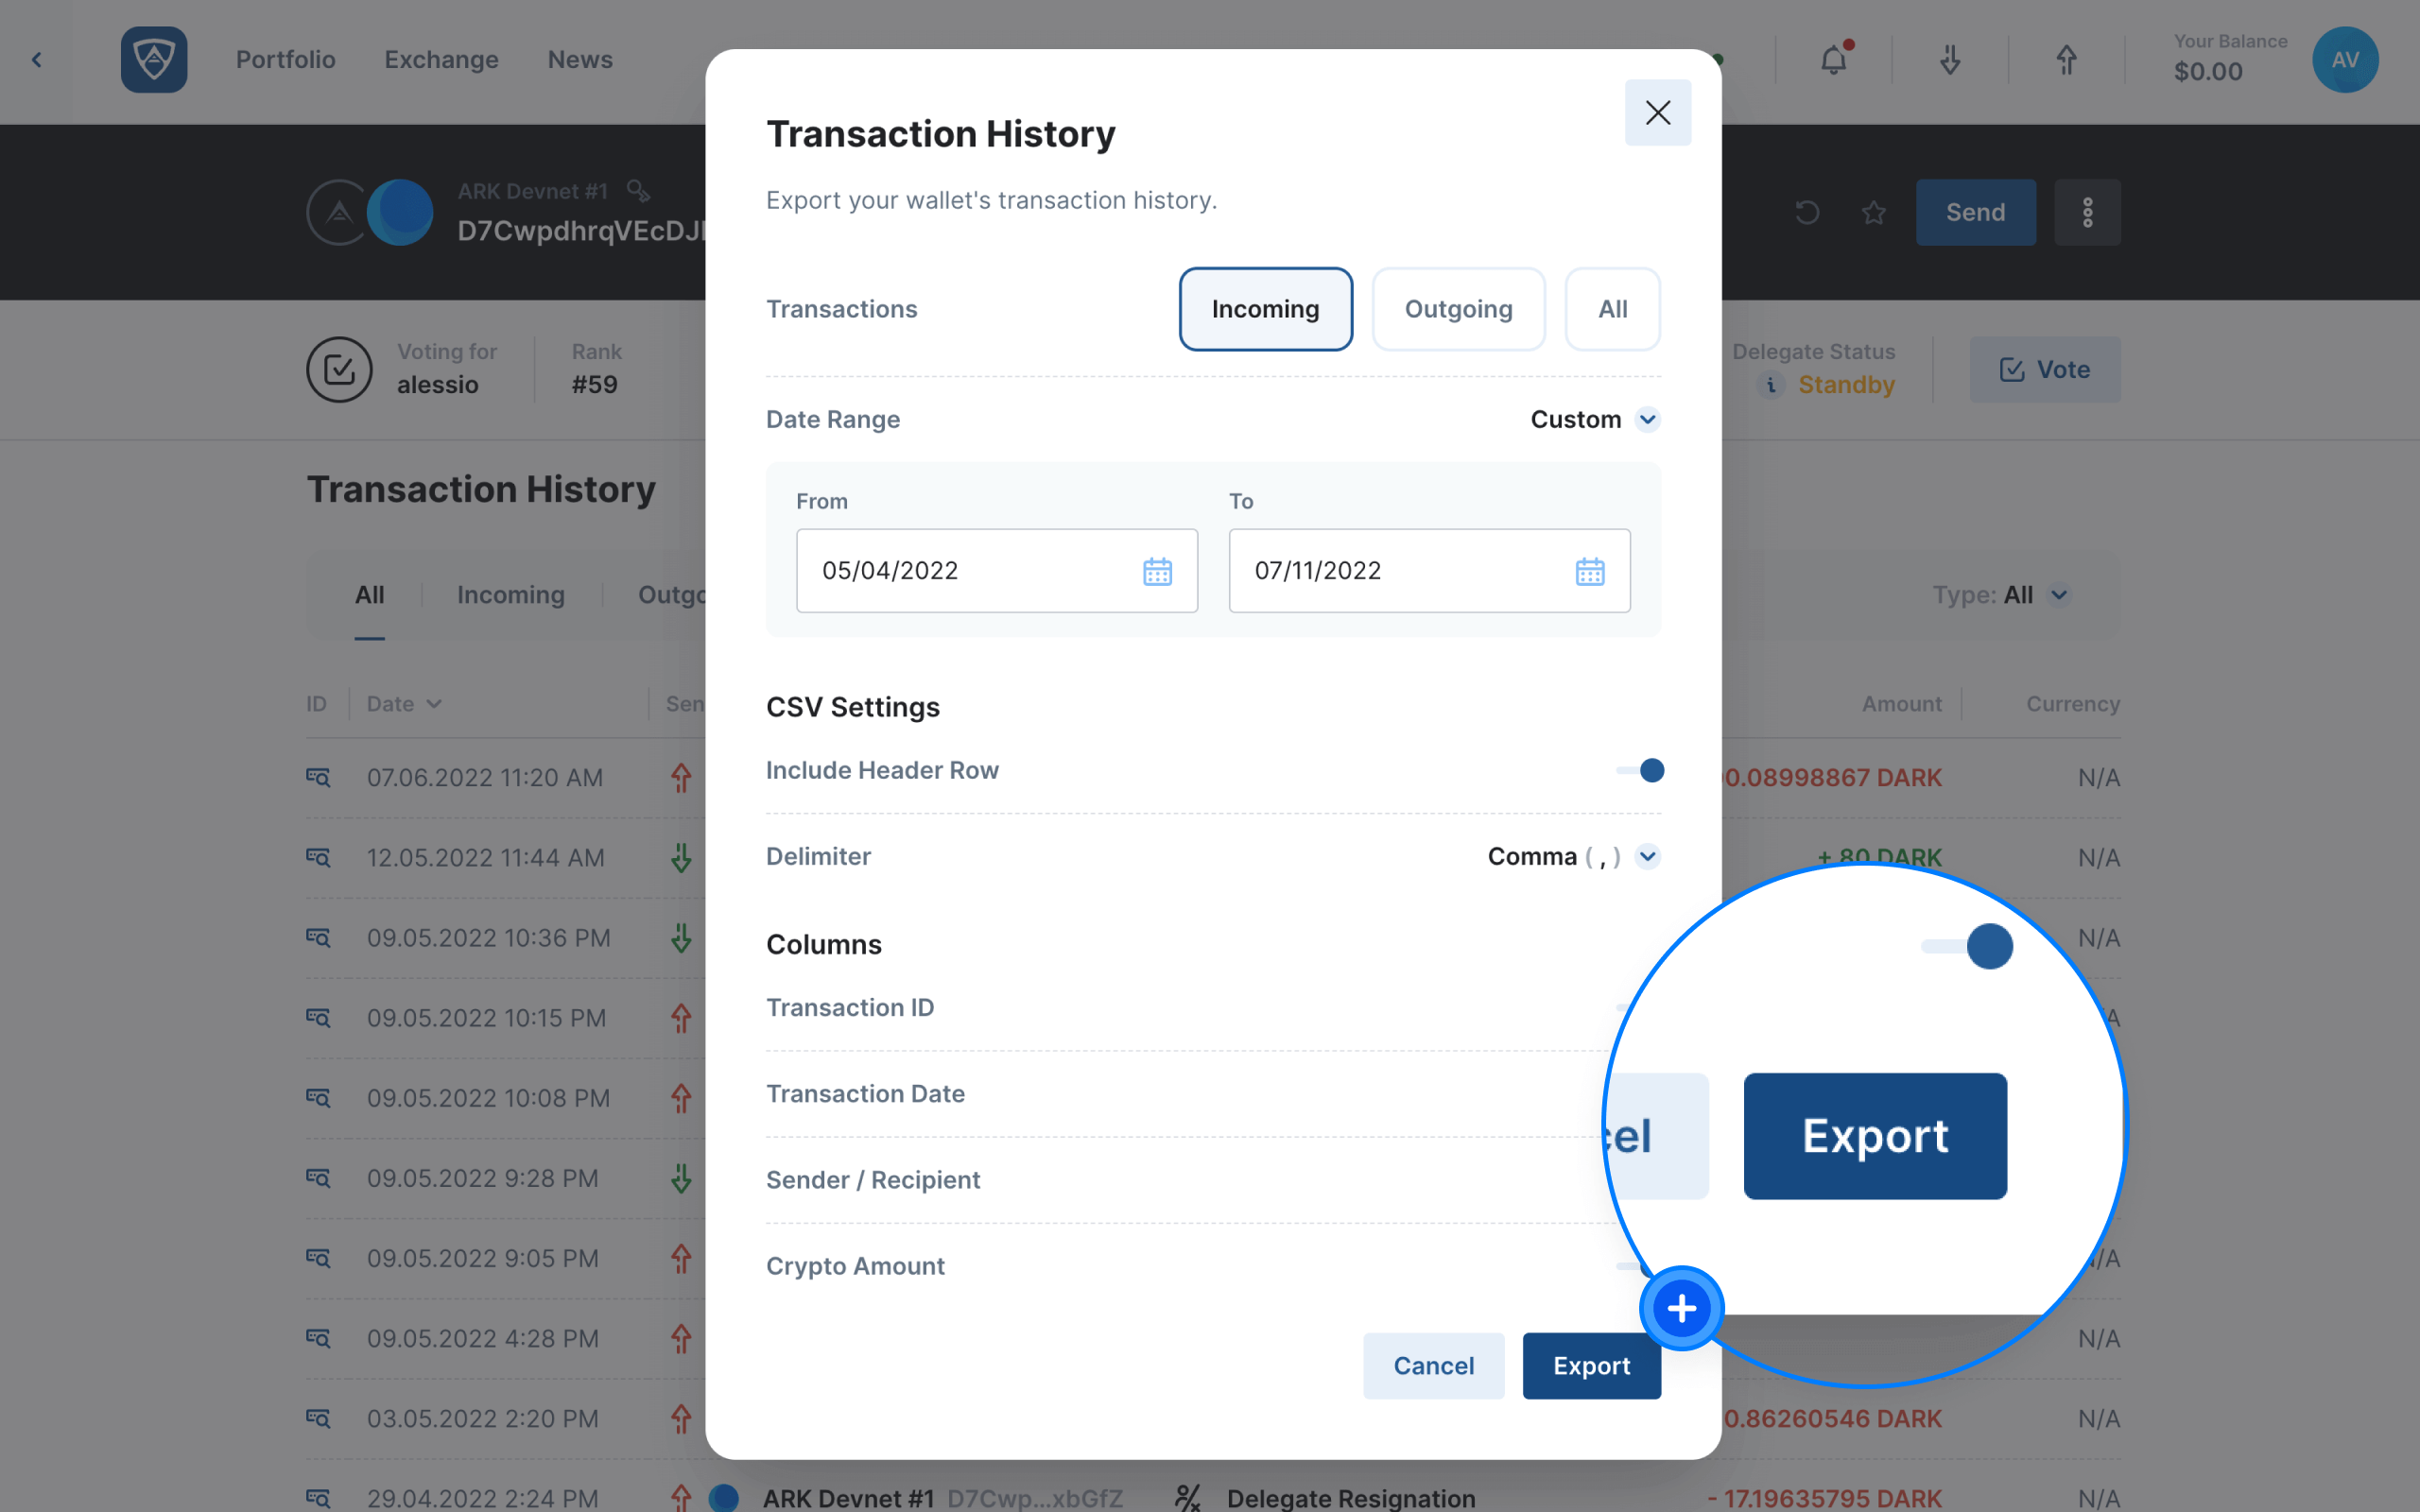
The Transaction History modal will appear, allowing you to decide on several parameters, namely:
- Transactions
- Date Range
- CSV Settings, and
- Columns
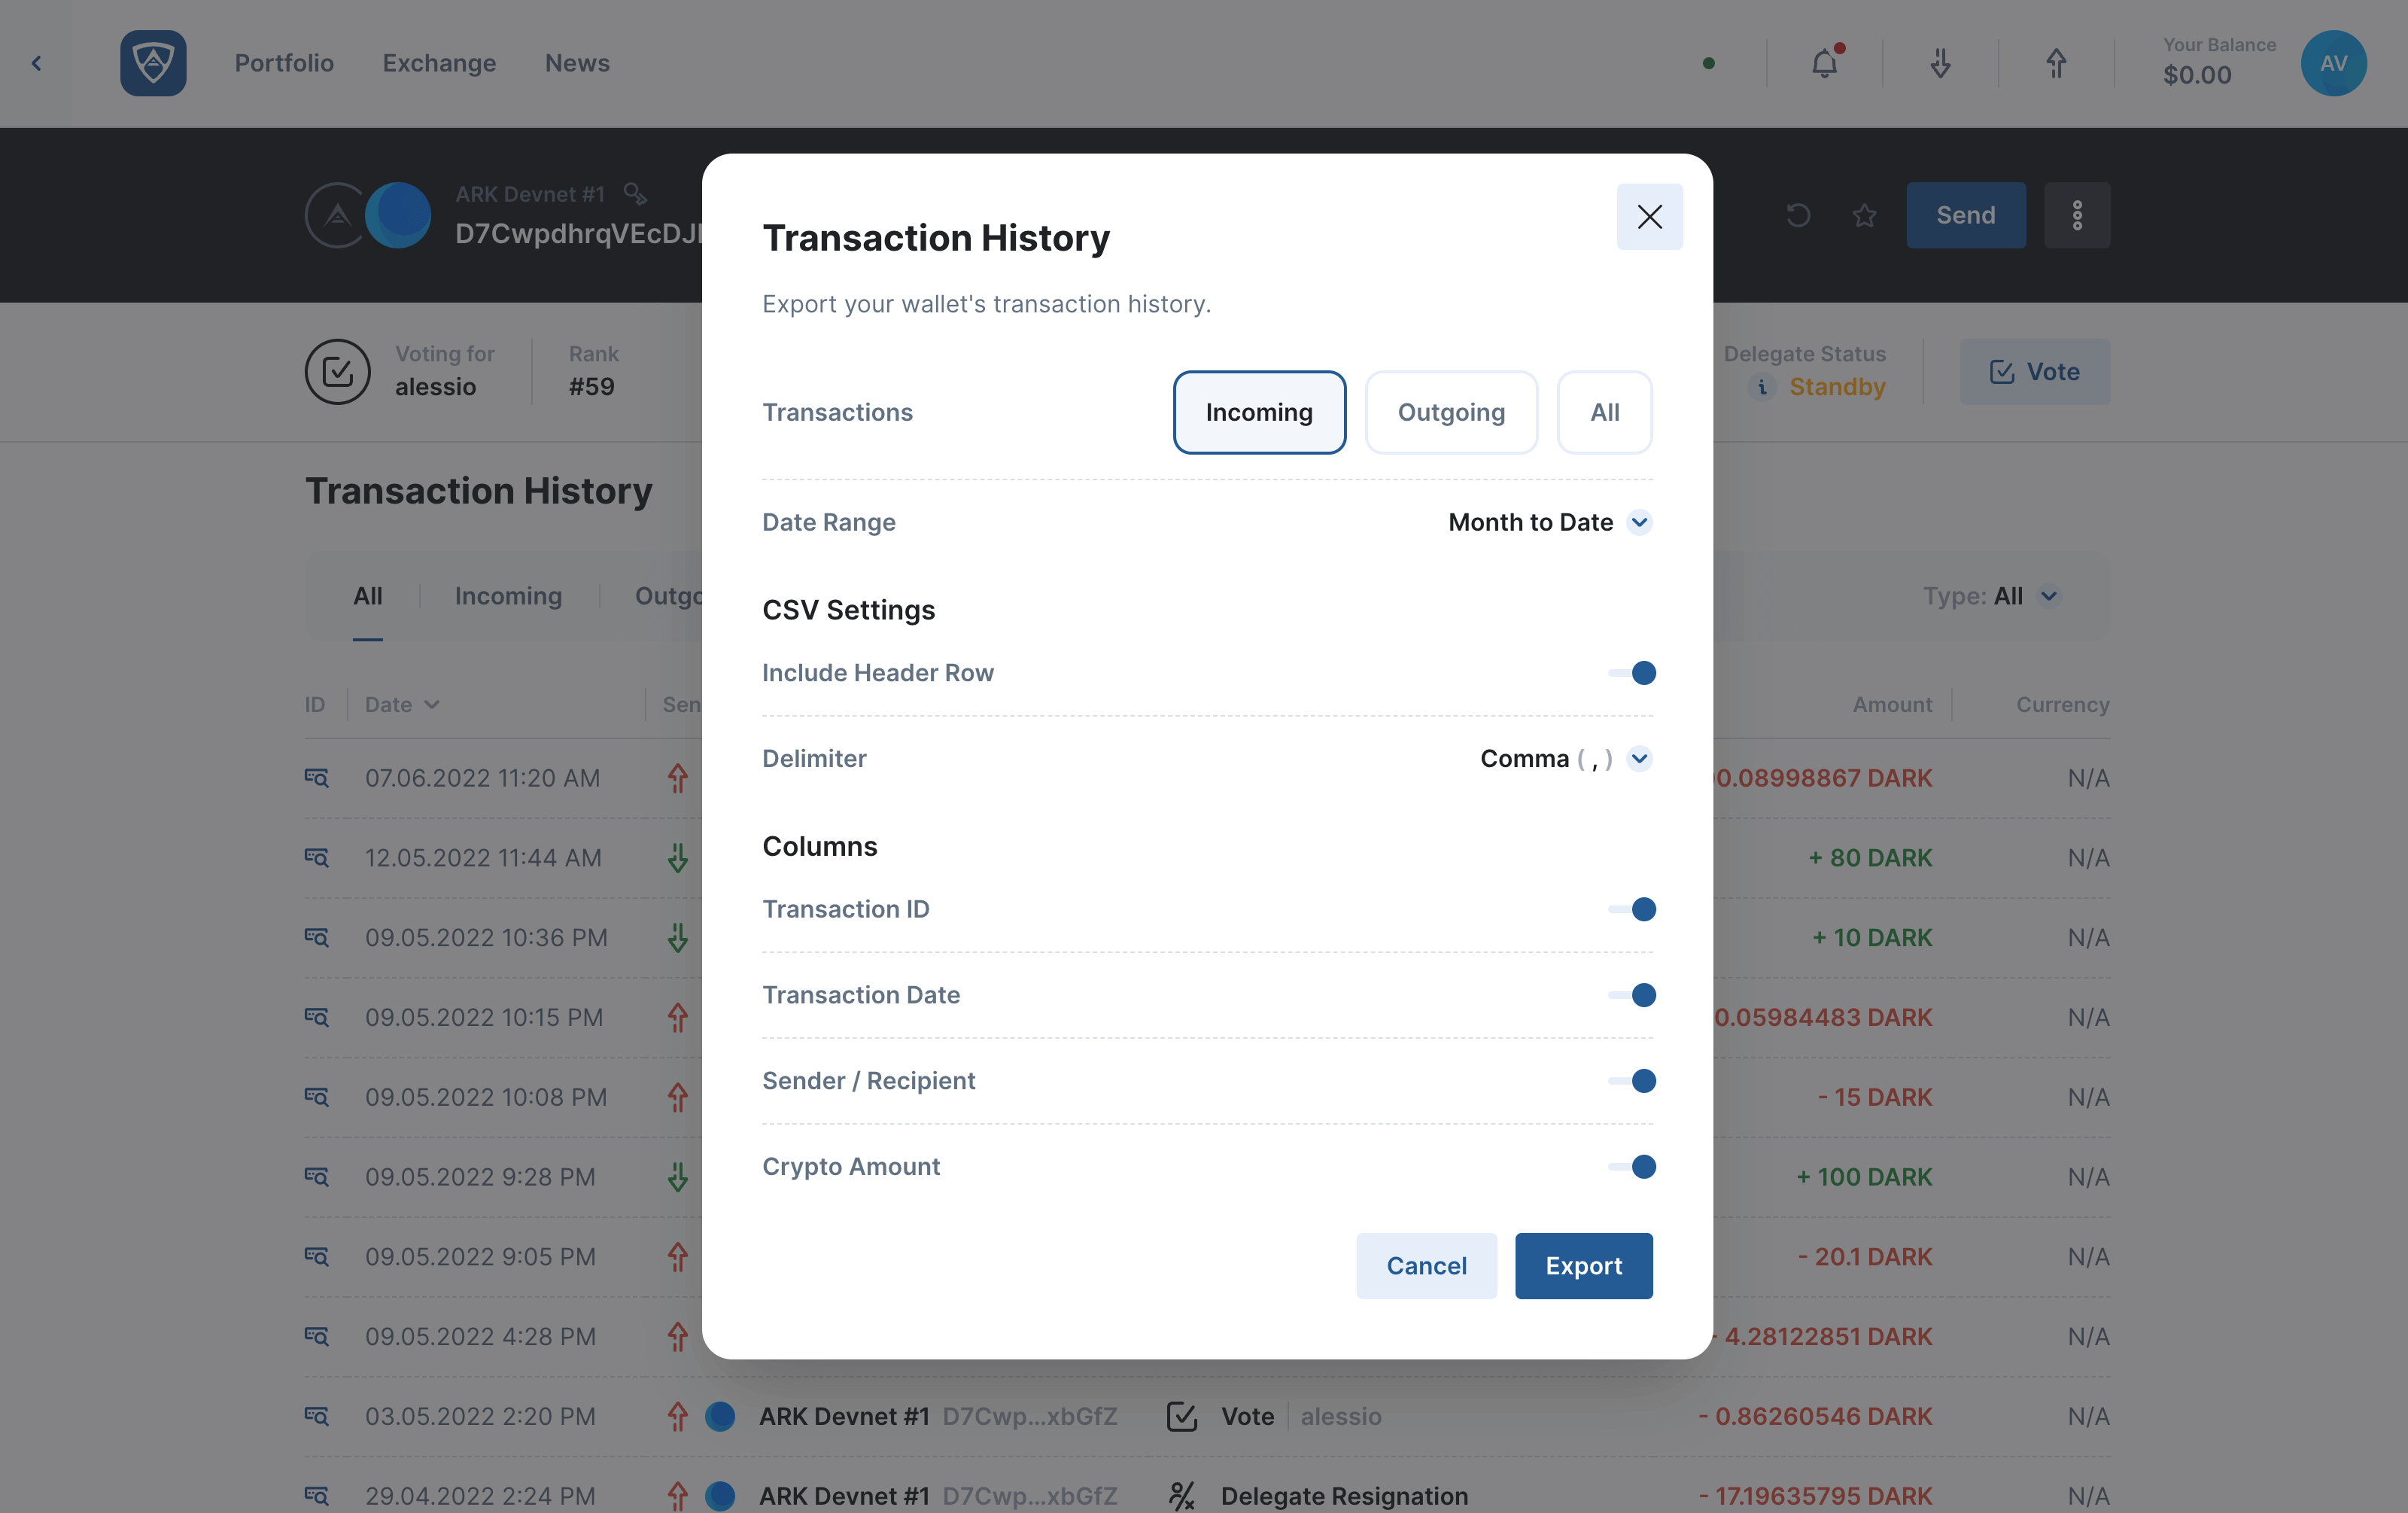
Clicking on the arrow next to the far right of the Date Range parameter opens a dropdown menu. Here you may select from several options including:
- Month to Date
- Last Month
- Quarter to Date
- Last Quarter
- Year to Date
- Last Year
- All, and
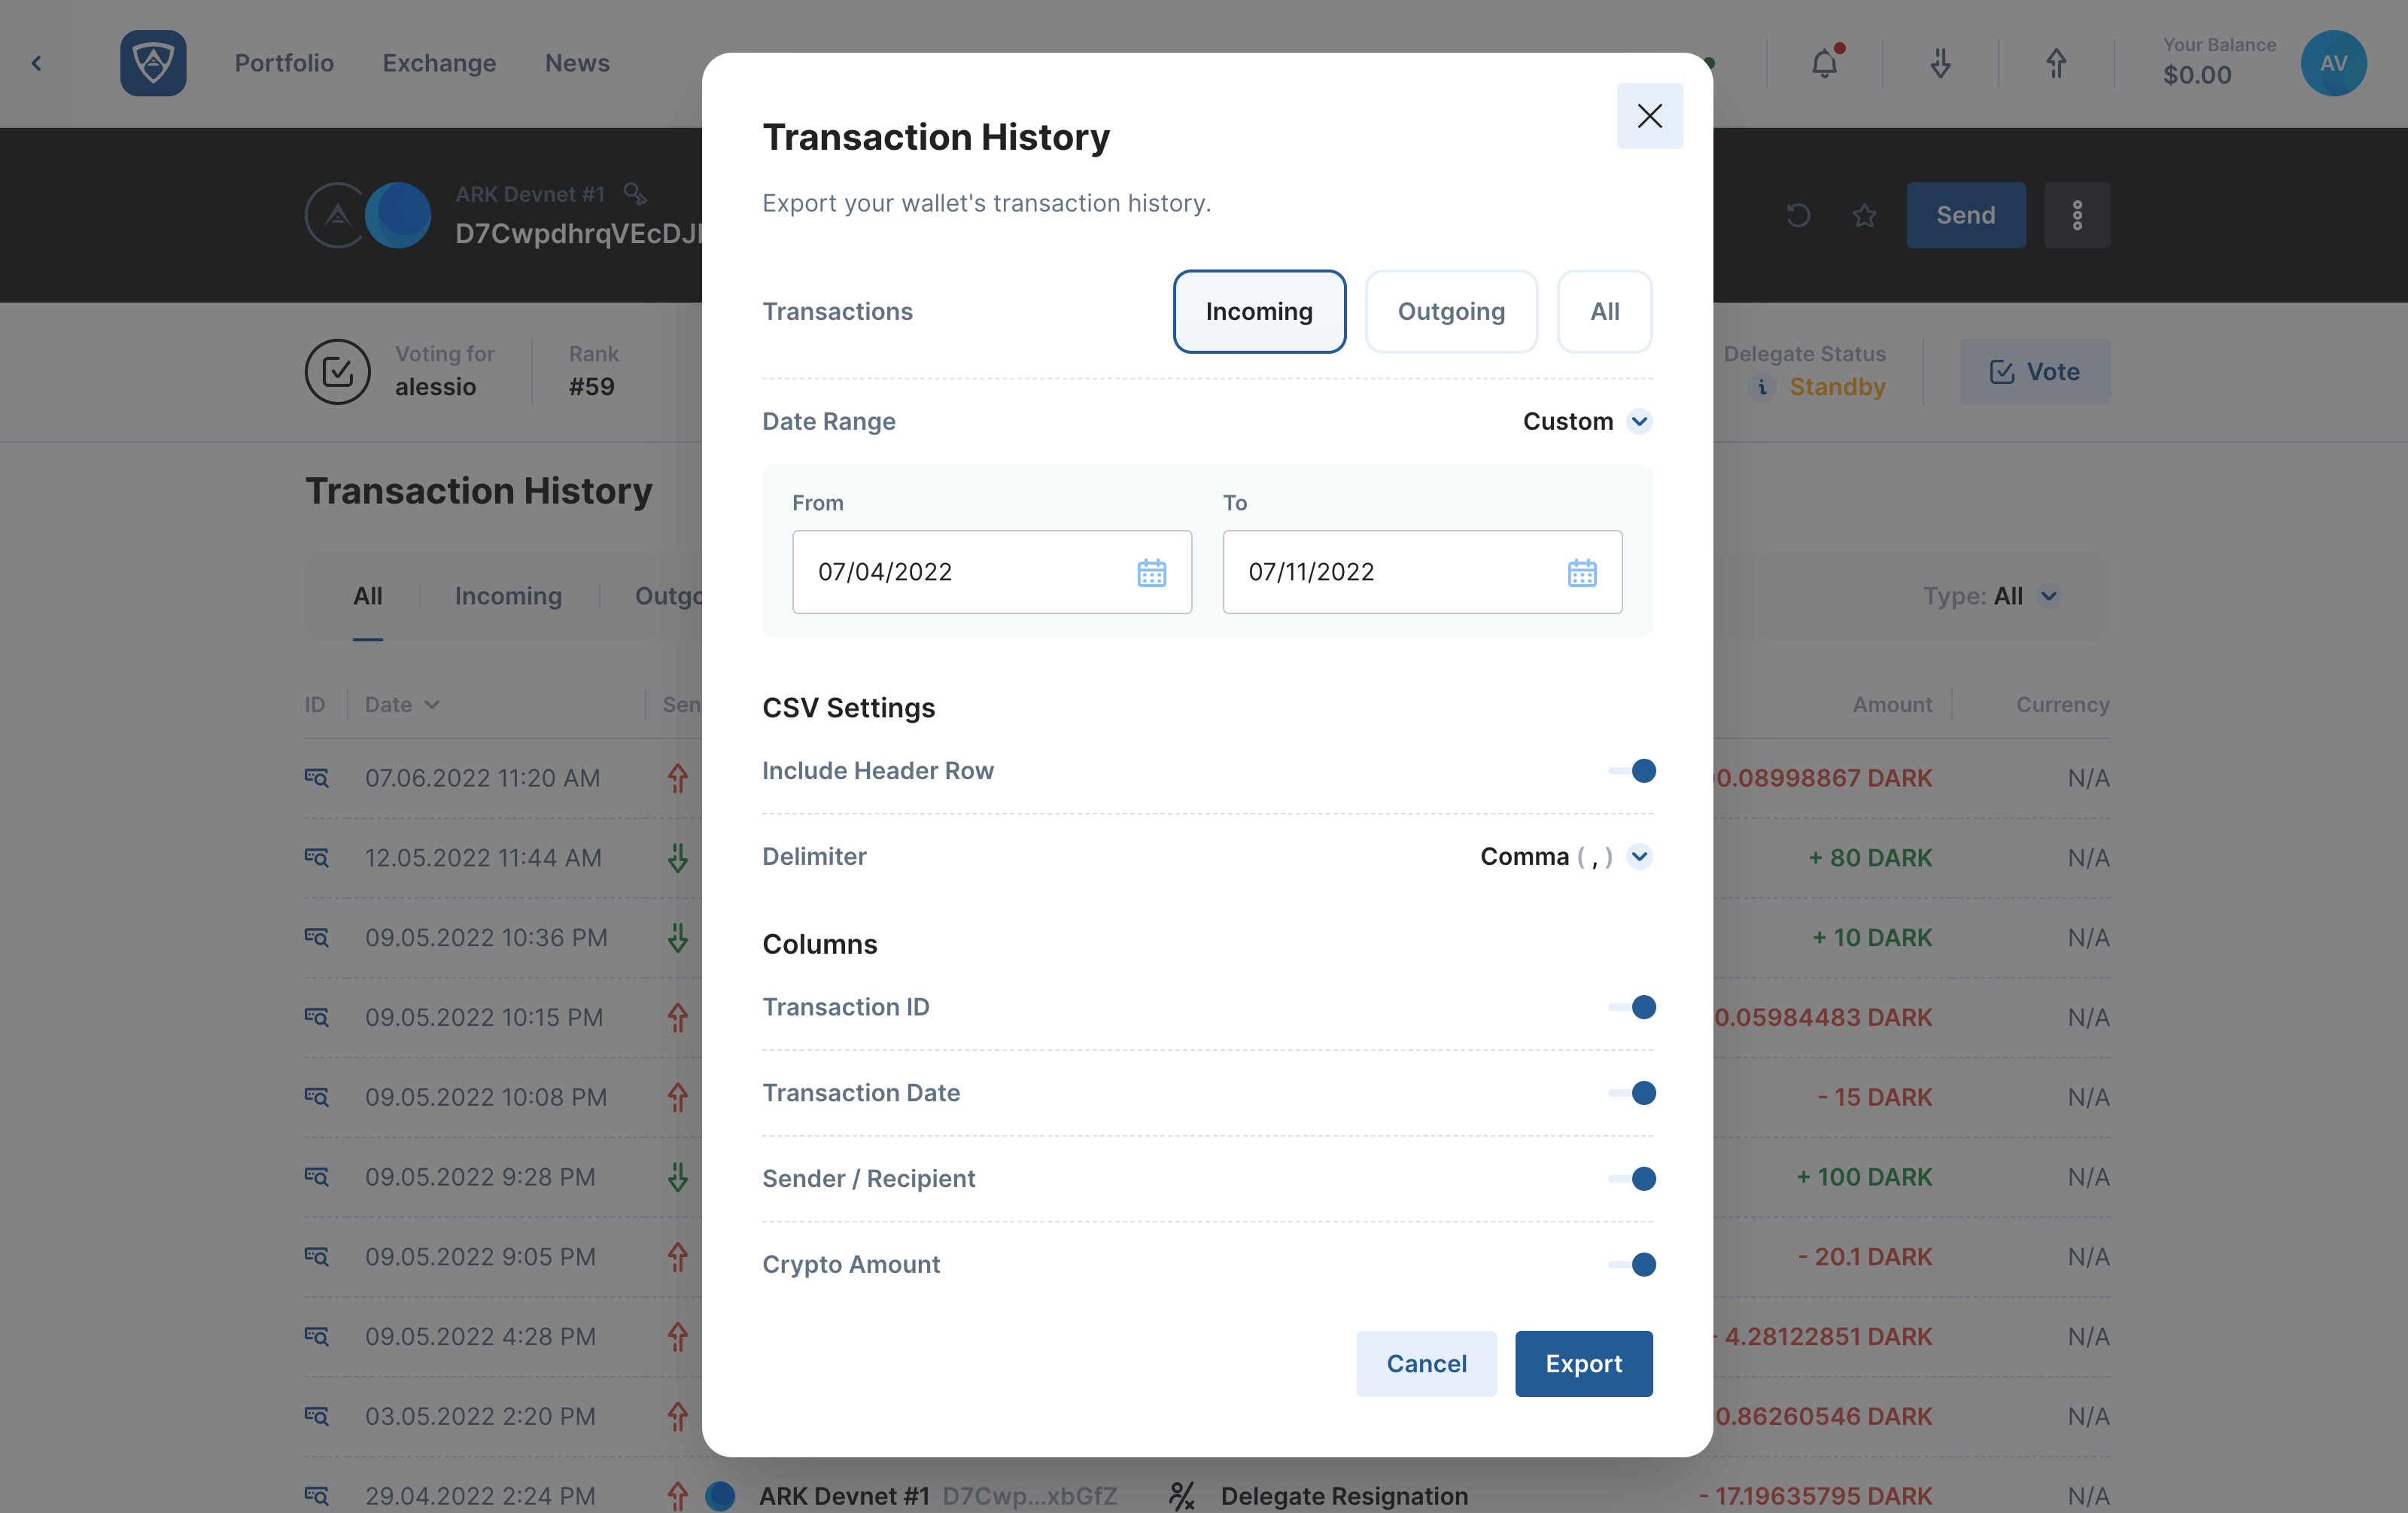
- Custom

Selecting Custom from the dropdown menu changes the format of the Date Range section. You will notice two date fields now appear. Clicking on the first of these allows you to select an exact day, month and year to start from while clicking on the second allows you to define an exact end date.
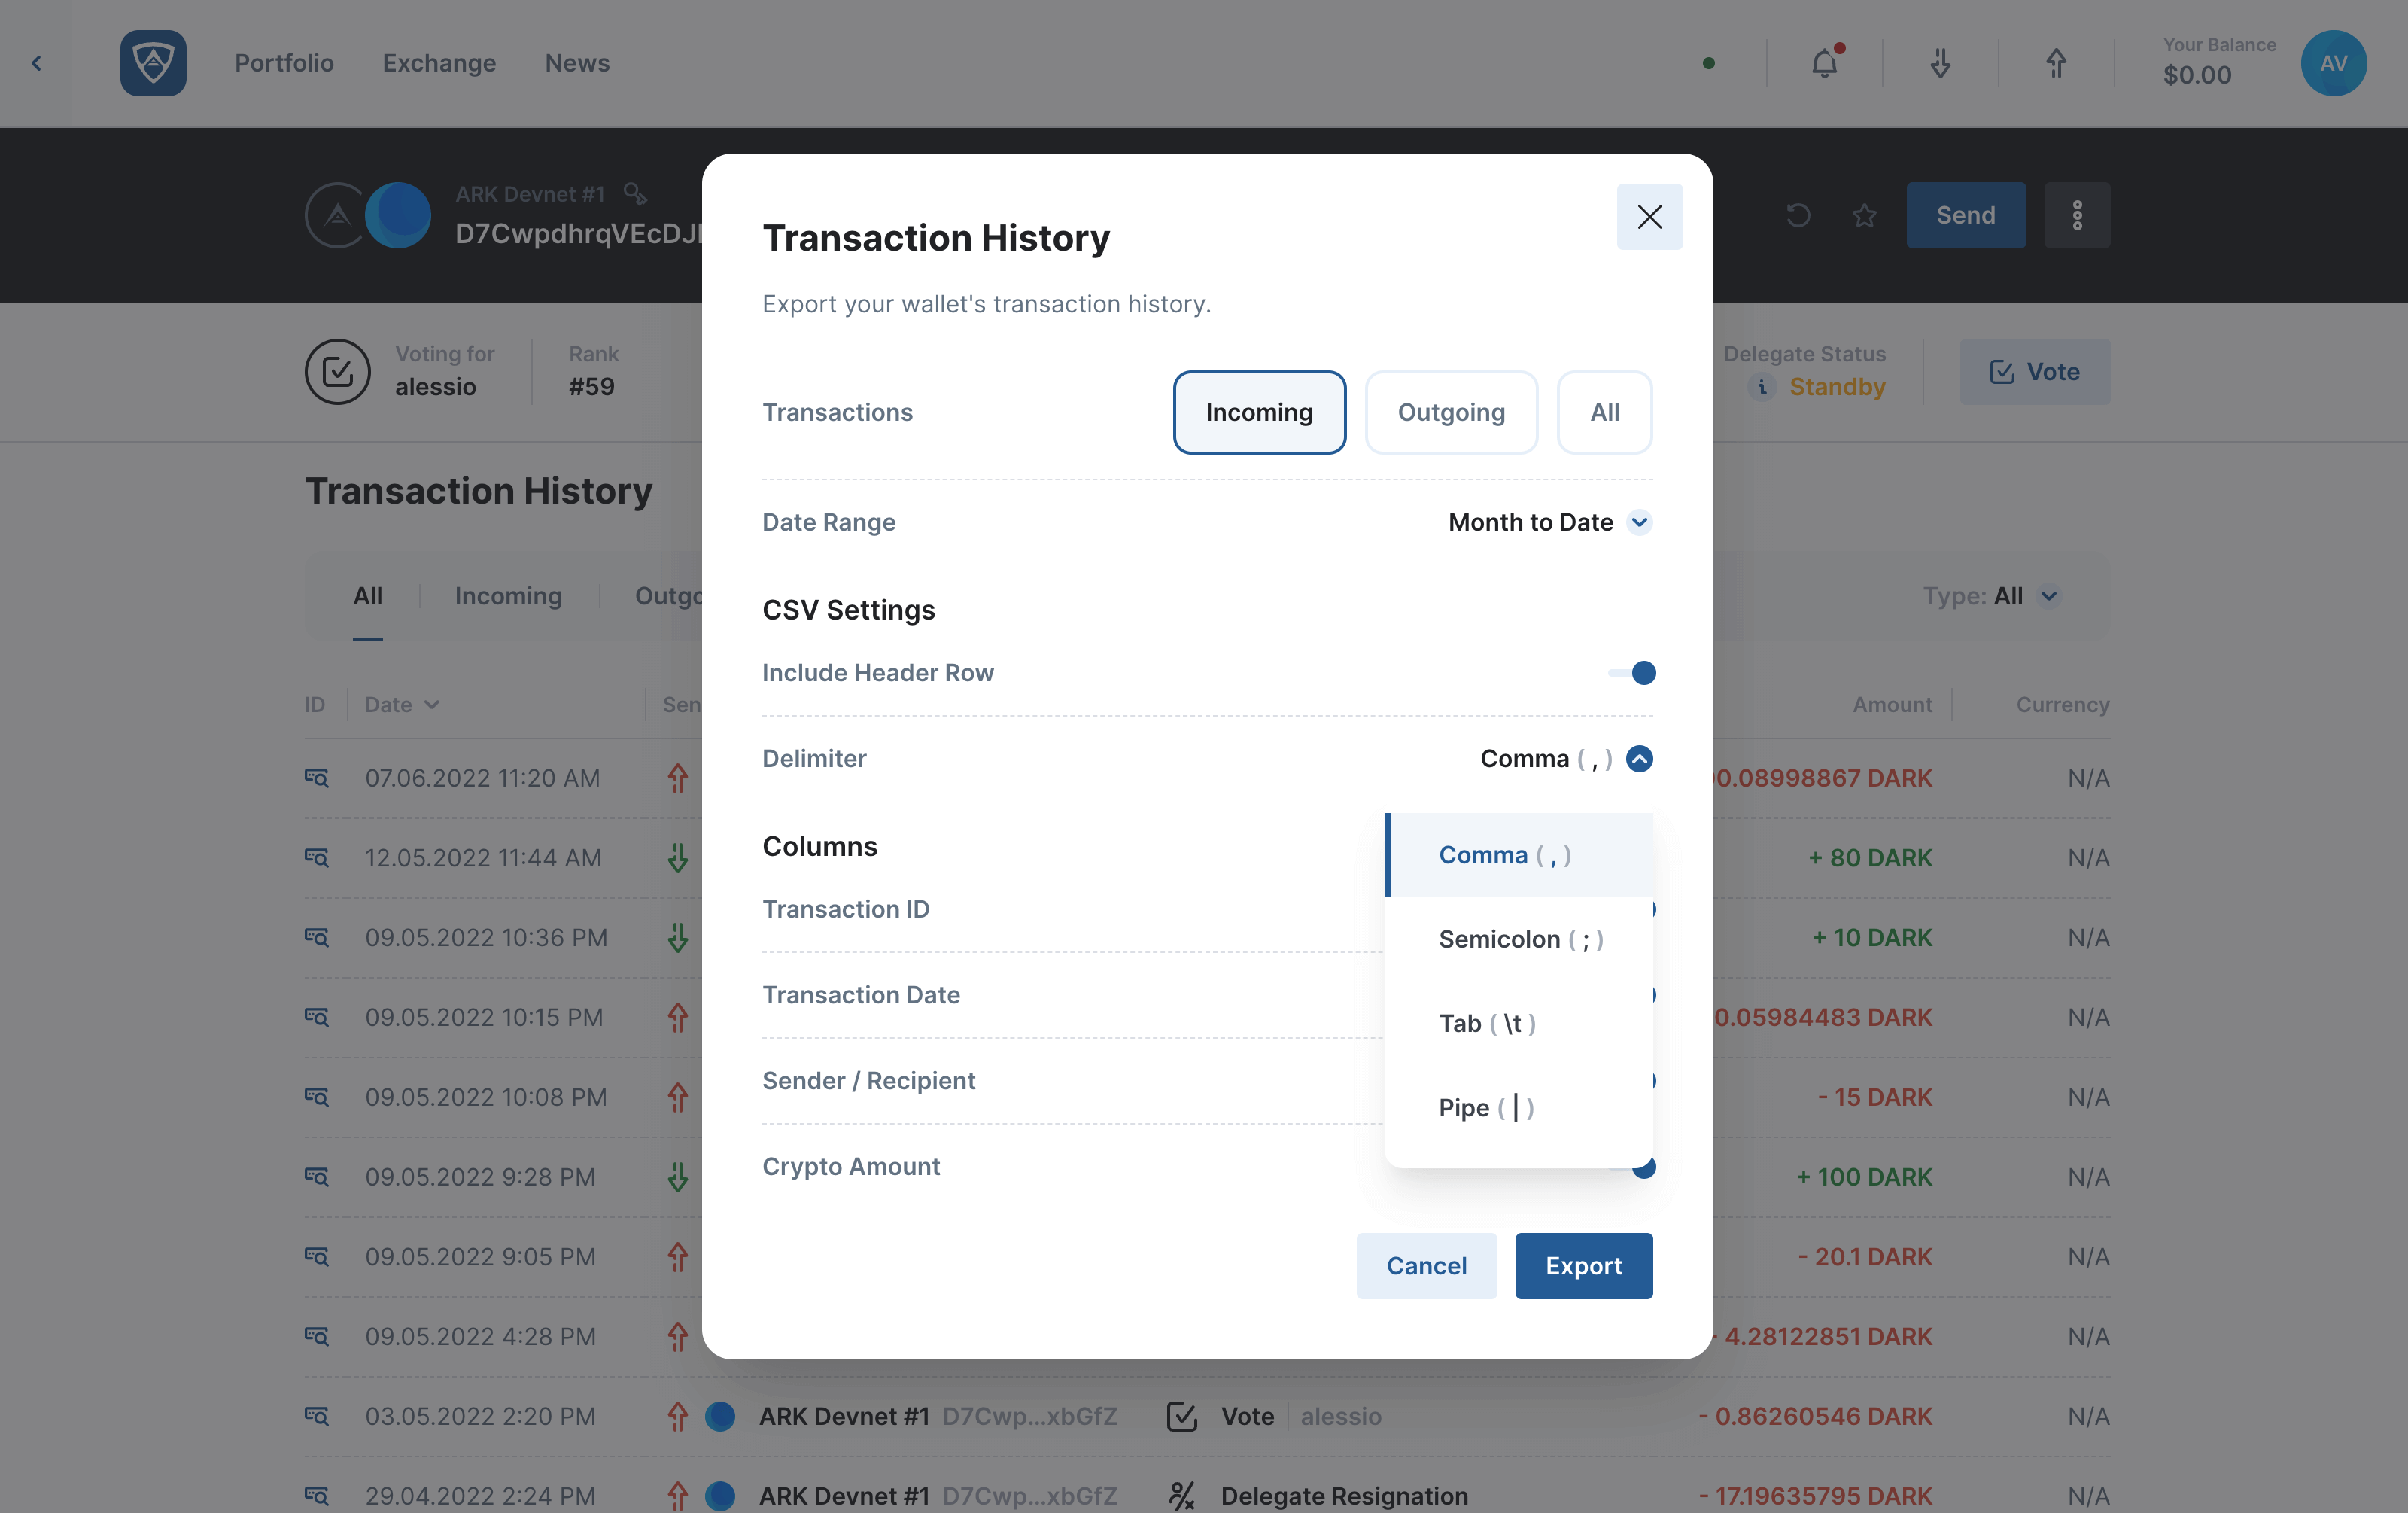
Clicking on the arrow to the far right of the Delimiter parameter located under CSV Settings opens a dropdown menu. Here you may select from several options including:
- Comma (,)
- Semicolon (;)
- Tab (\t), and
- Pipe (|)
Export a Wallet’s Transaction History
Upon making your selections and reviewing the details, click the Export button to begin compiling the requested data. Alternatively, if you selected the incorrect wallet or need to review some information before proceeding, click the Cancel button.
Information
You may also decide which Columns to include or exclude by clicking the toggle that appears at the far right of each individual column. These columns include Transaction ID, Transaction Date, Sender/Recipient and Crypto Amount.
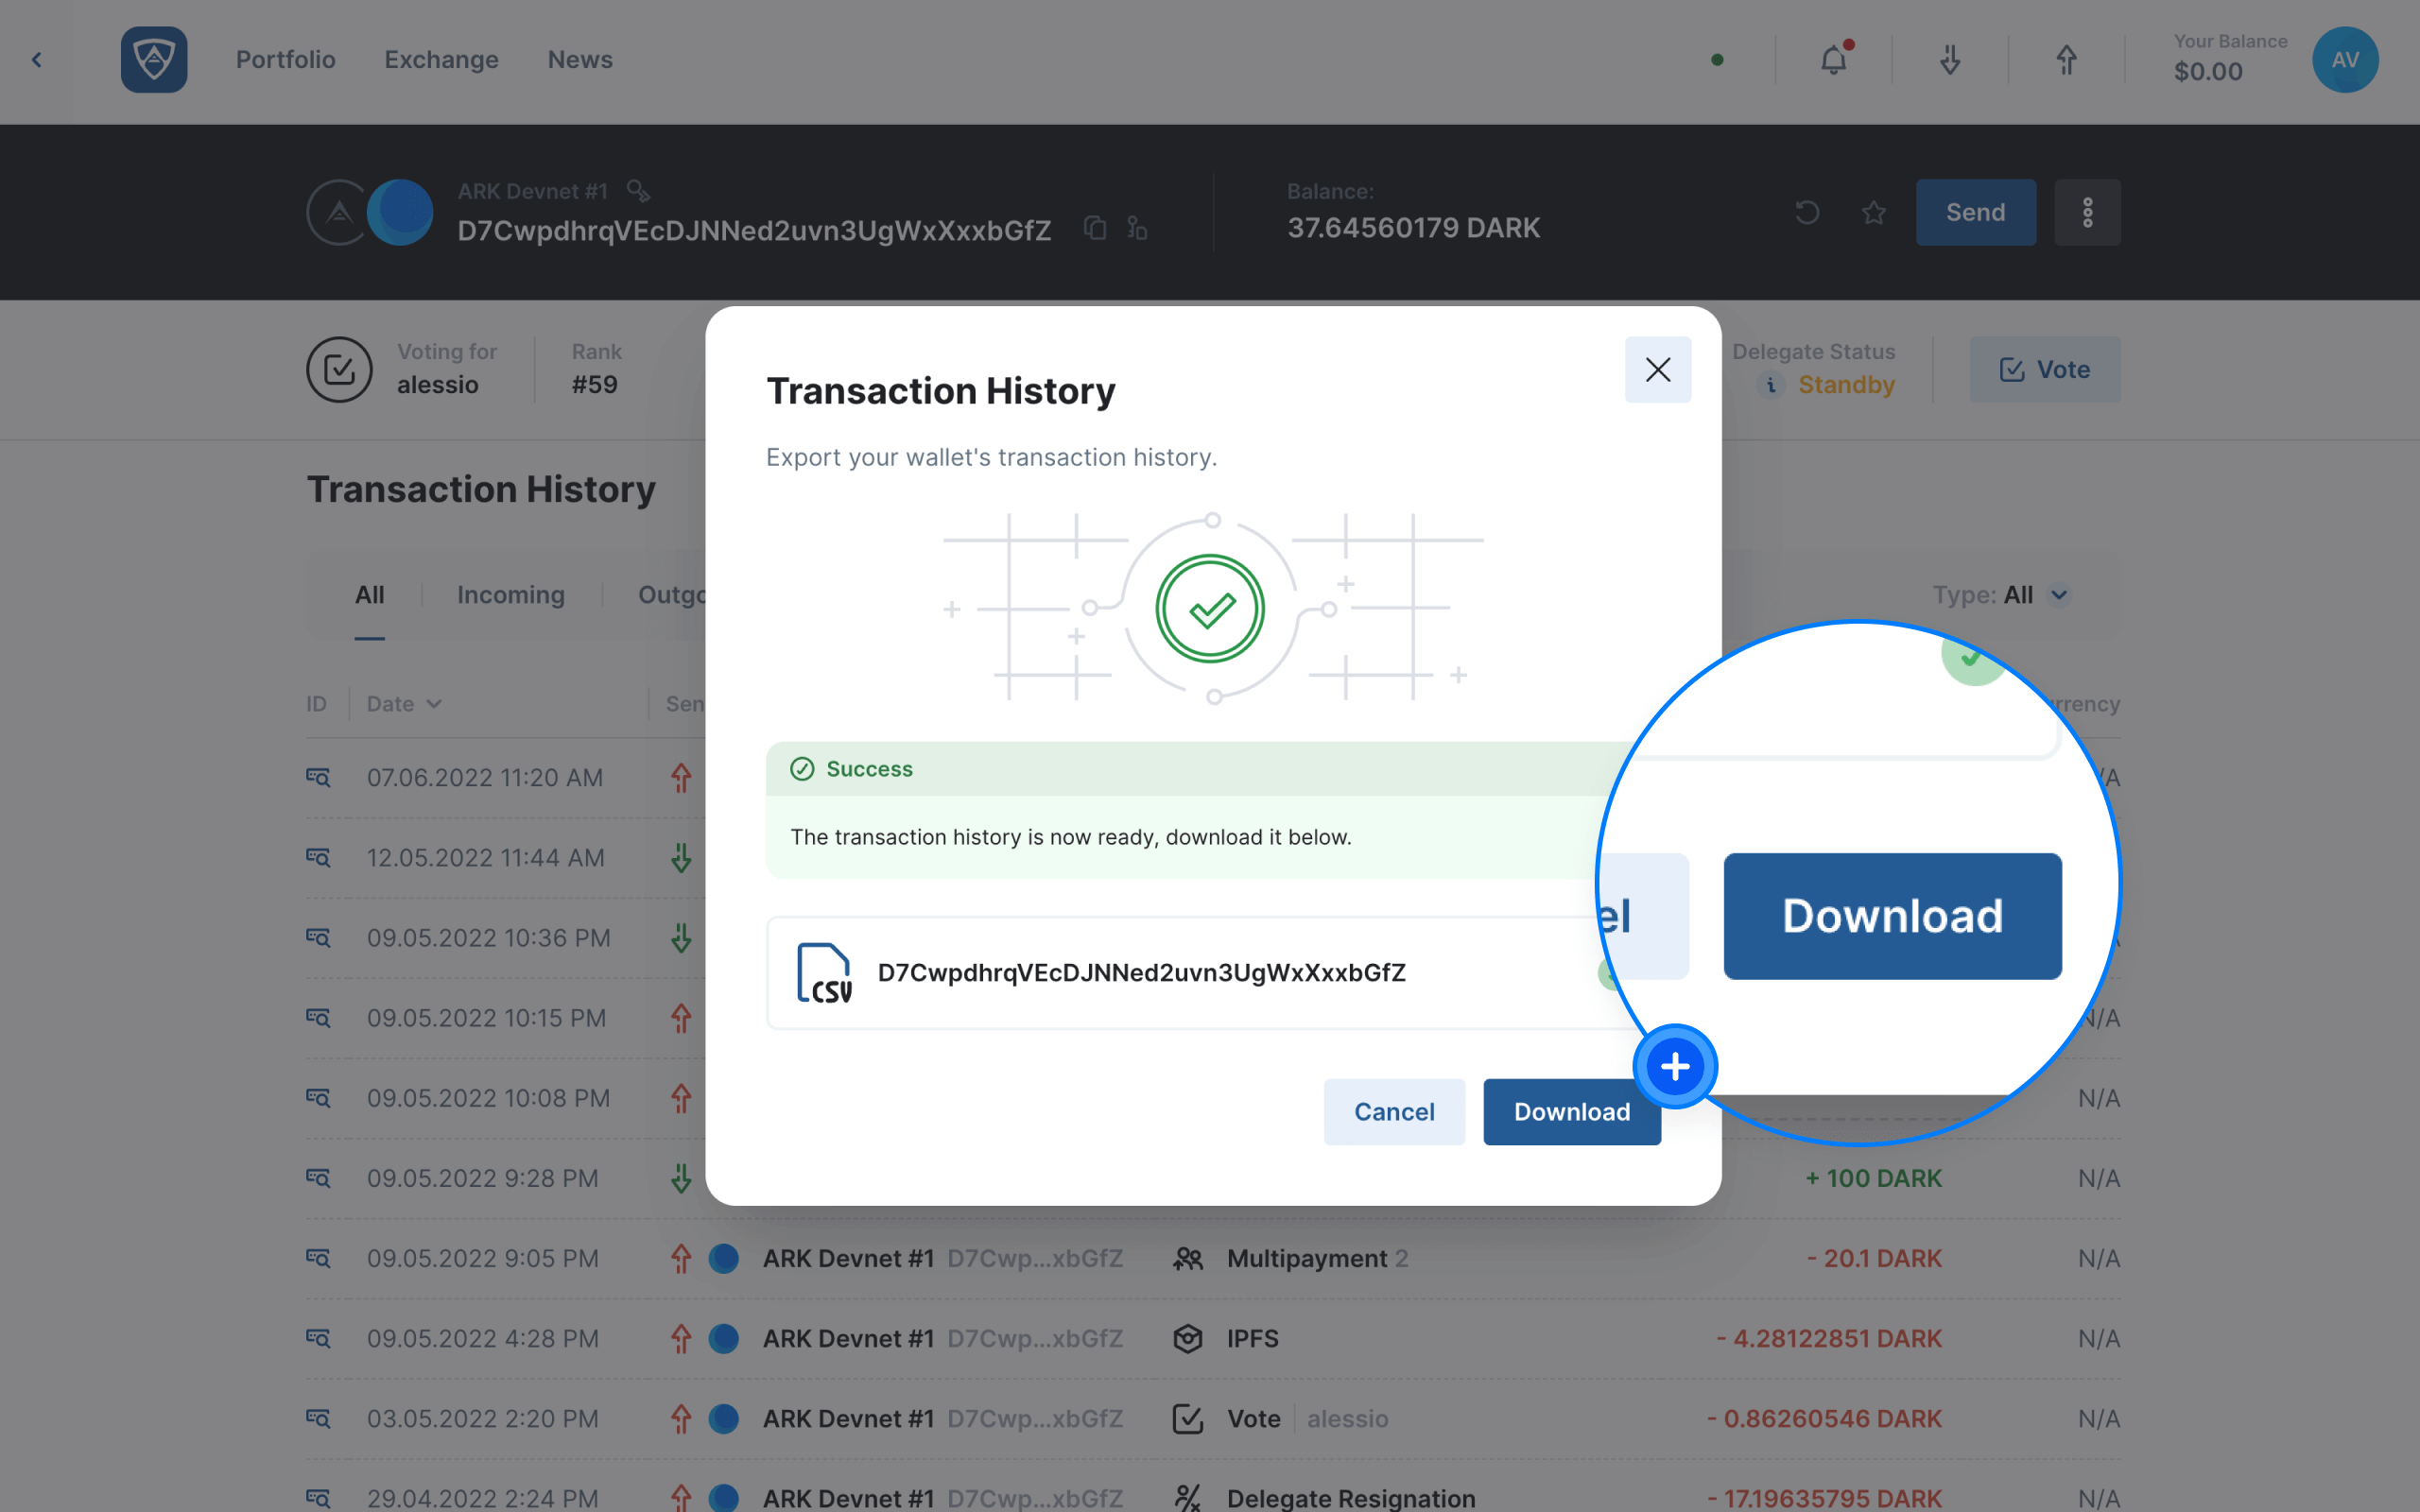
Having compiled the necessary data, you may now download the CSV file to your computer or mobile device. When ready, click the Download button. However, if you need to make adjustments, click the Cancel button.
Select a suitable location to save your CSV file to and rename it if you so wish. When ready, click the Save button to complete the process.
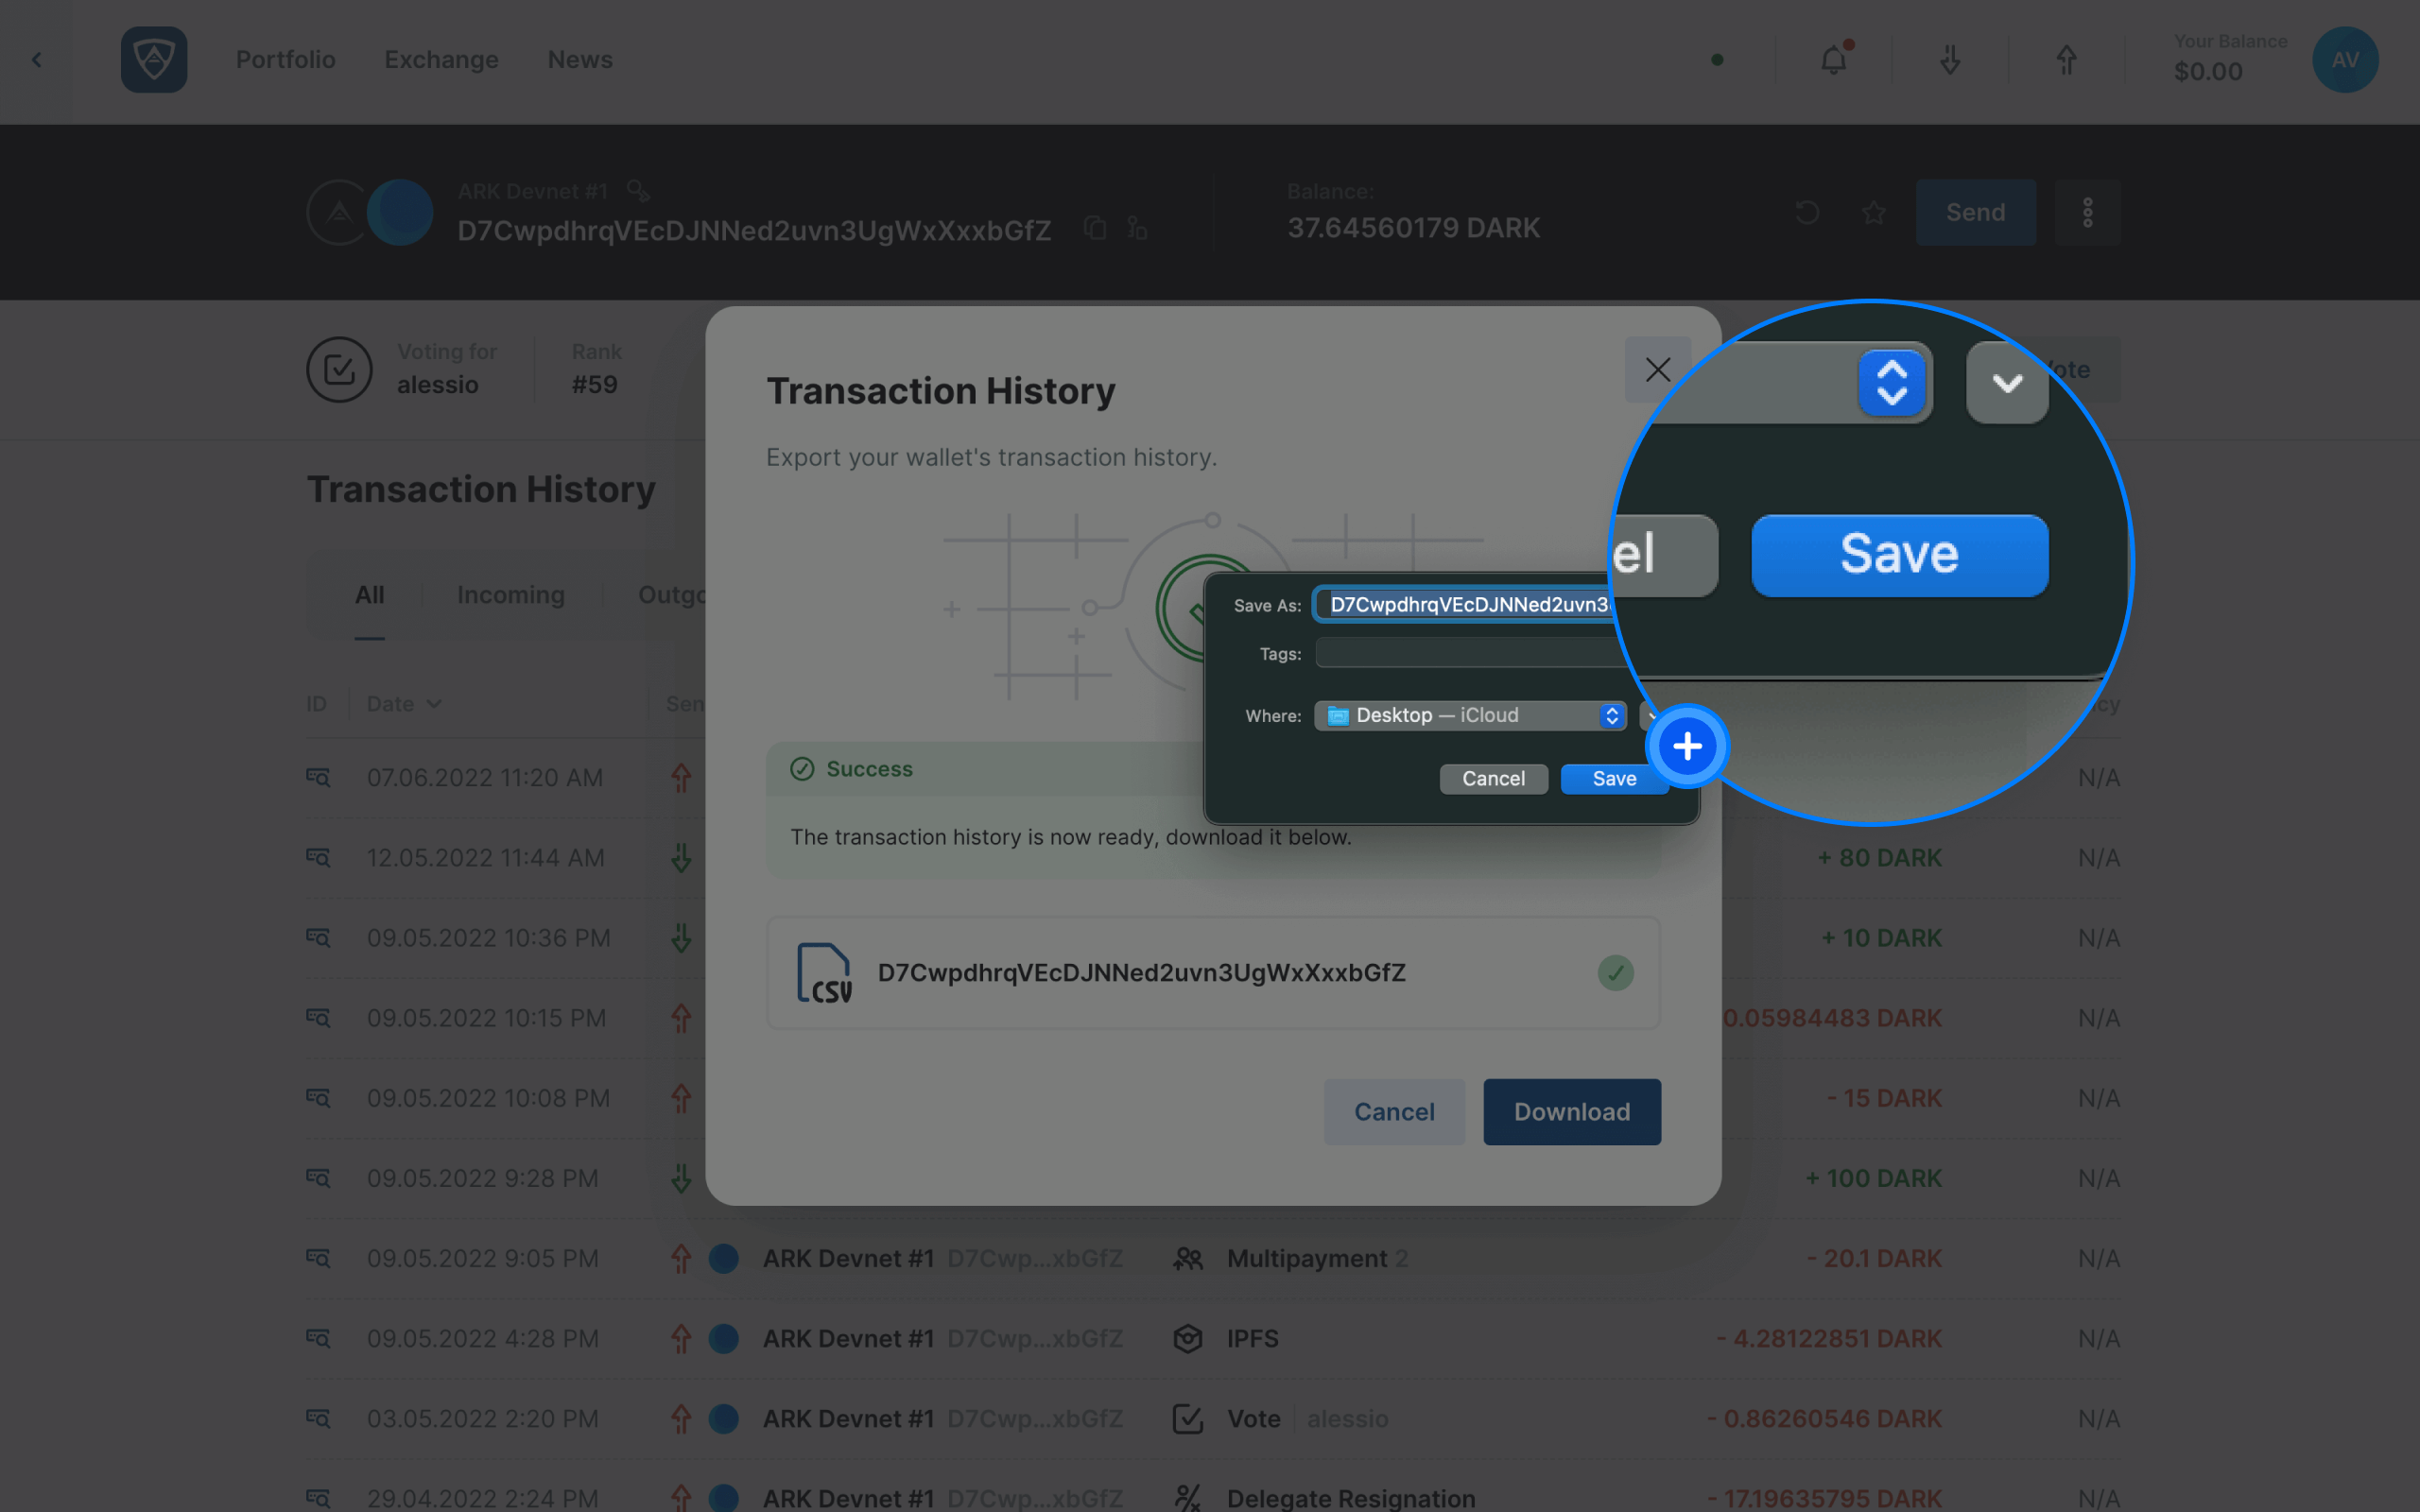
Success
Your requested transaction history is now available via the CSV file you saved to your device.