Ledger Nano X/S Support
ARKVault supports importing wallets, sending transactions, and signing messages using Ledger Nano X & Nano S hardware wallets. The following information will explain:
- How to Install the ARK Ledger App
- How to Import an ARK Ledger Wallet
- Supported ARK Transactions
- How to Transfer ARK Using a Ledger Wallet, and
- How to Sign a Message Using a Ledger Wallet
Install the ARK Ledger App
Information
You will need to install the ARK Ledger App to use a Ledger Nano X or Nano S with ARK.
Import an ARK Ledger Wallet
Help
To learn about importing ARK Ledger Wallets, visit the Import a Ledger Wallet page.
Supported ARK Transactions
You may carry out the following ARK transactions and operations using Ledger hardware wallets.
Nano X:
- Transfers
- Voting
- Multisignature
- IPFS
- Message Signing
Nano S:
- Transfers
- Voting
- IPFS
- Message Signing
Transfer ARK Using a Ledger Wallet
Watch this helpful tutorial video on How to Transfer ARK Using a Ledger Wallet in ARKVault
The process of using a Ledger device to sign an ARK transaction or message is similar to a traditional credential-based wallet. However, the key differences include that:
- The transaction will originate from a wallet imported using a Ledger device, and
- The Ledger device itself will serve as the means to review and sign (or approve) a transaction or message
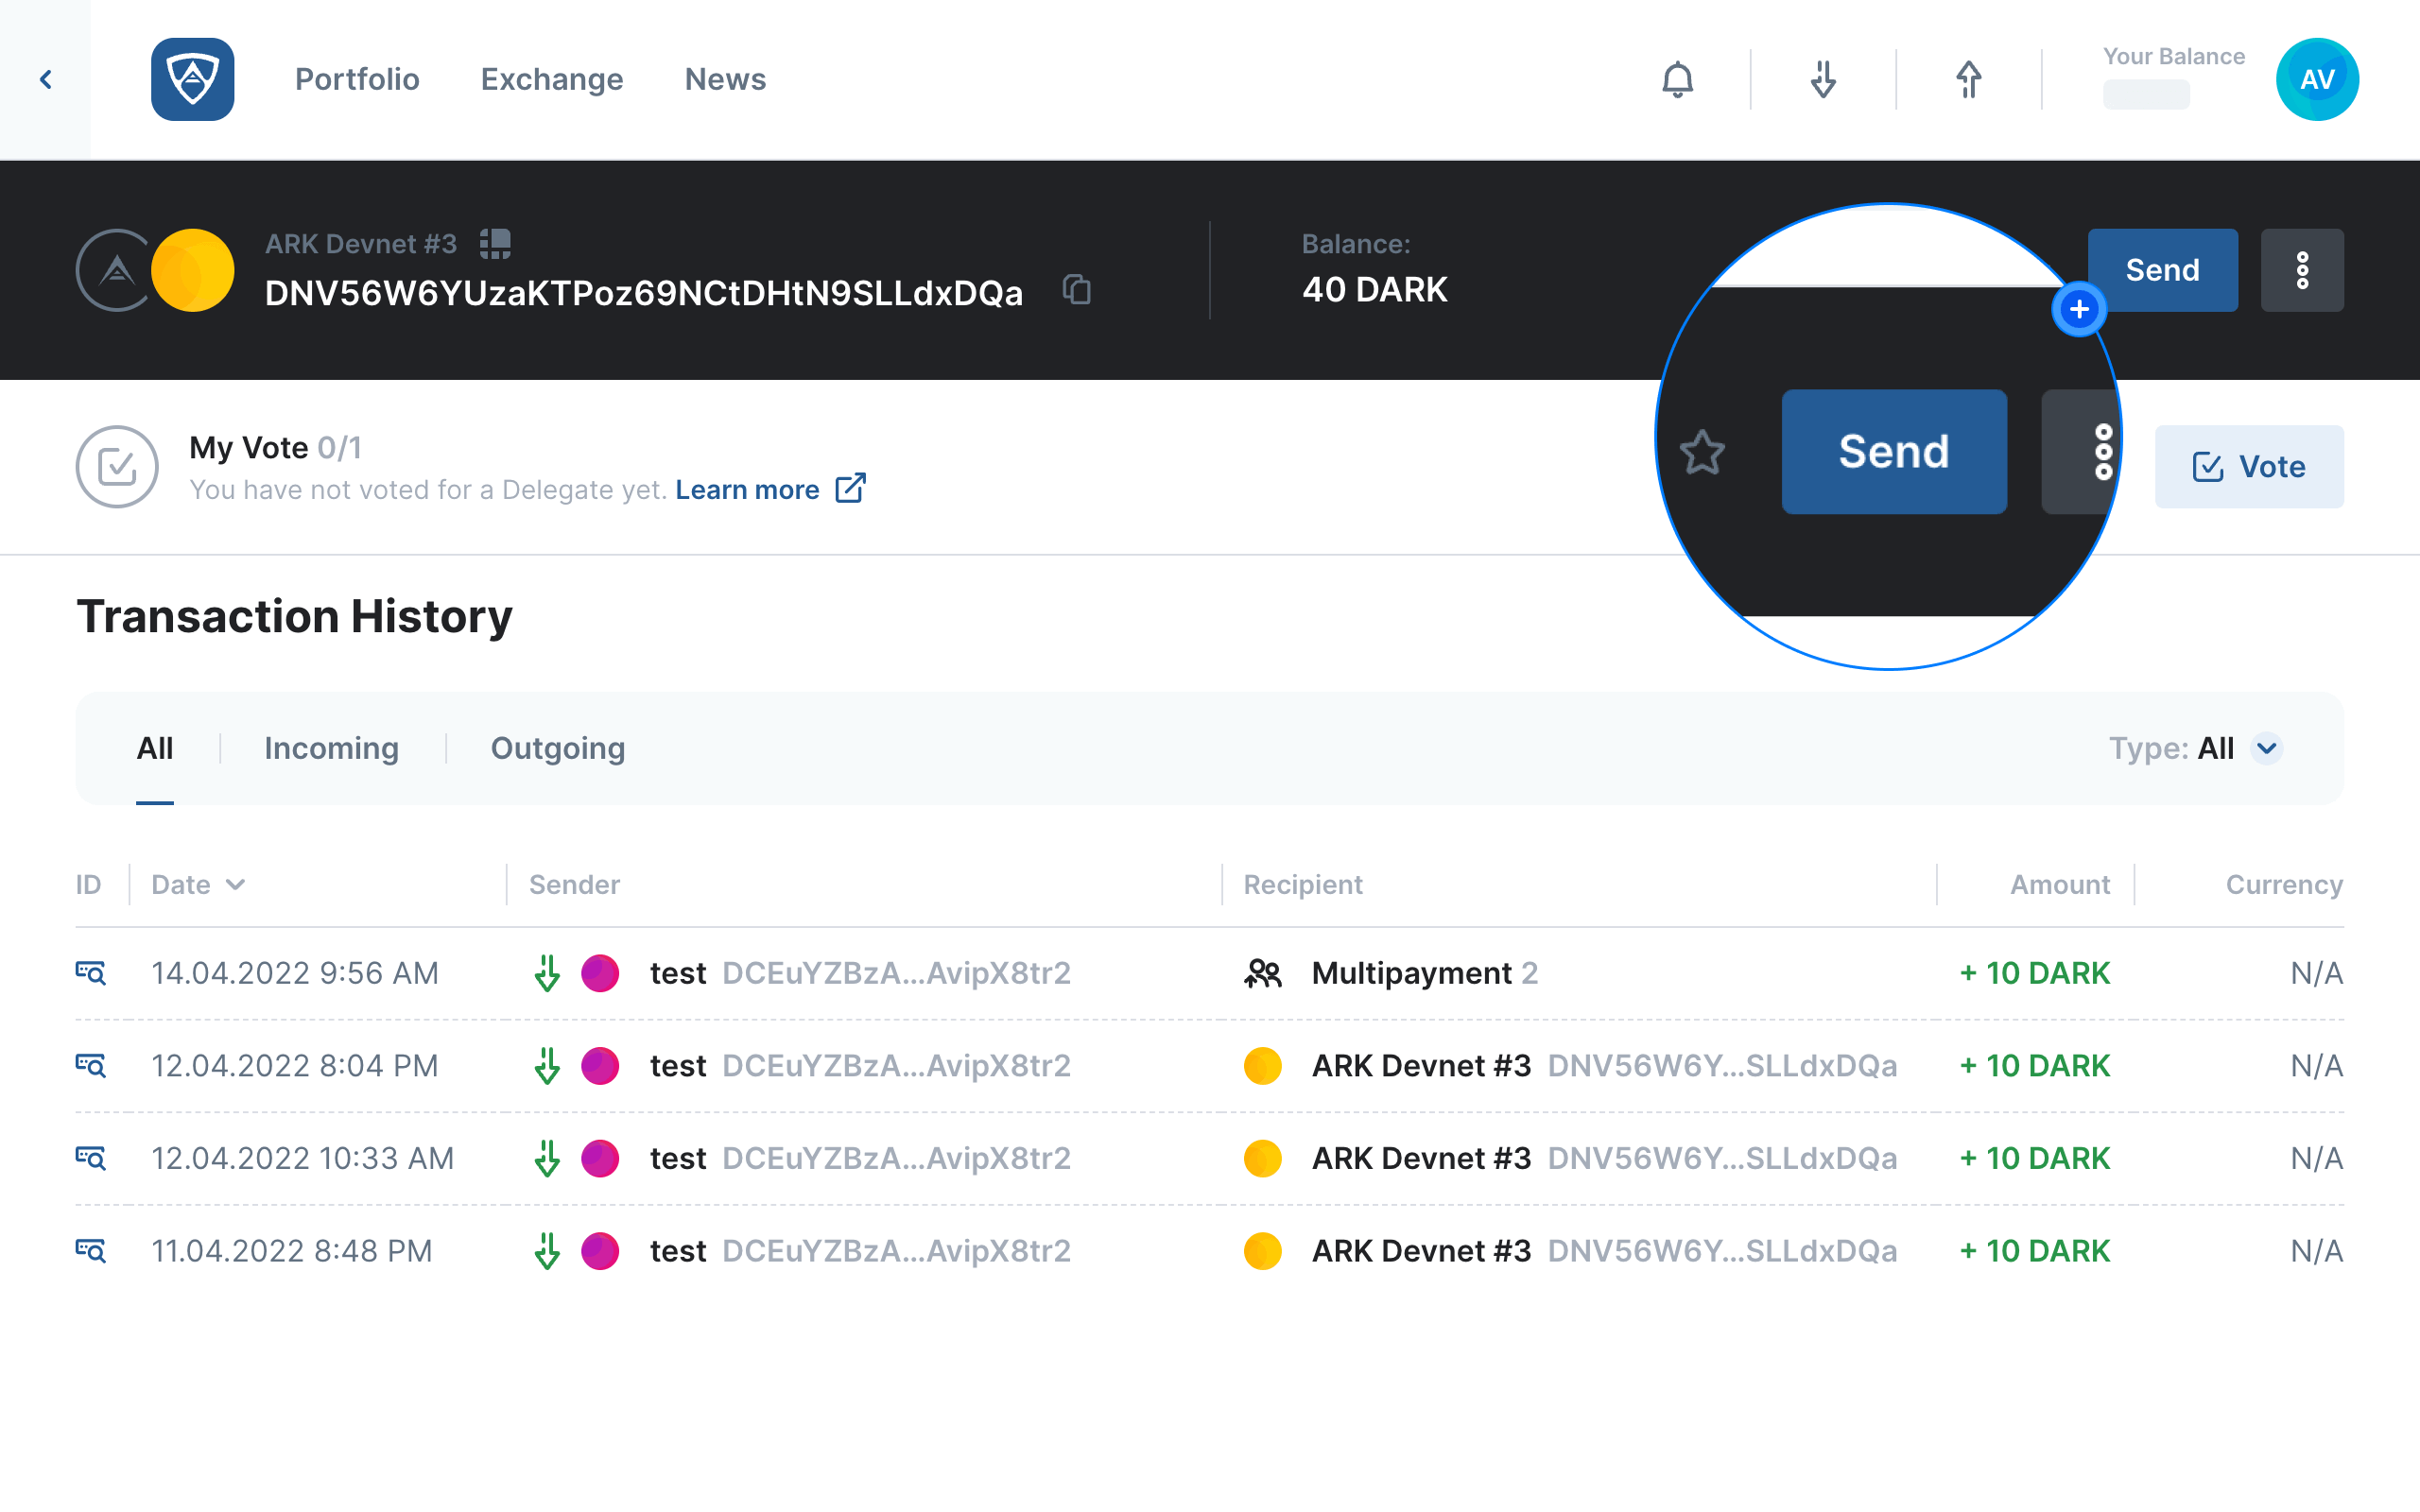
While viewing a Ledger-imported ARK wallet, create a supported transaction as required. In this case, you can create a standard transaction by clicking the Send button located in the upper right corner of ARKVault.
Attention
Any other application or software (such as Ledger Live ) that can connect to your Ledger should remain closed while using ARKVault.
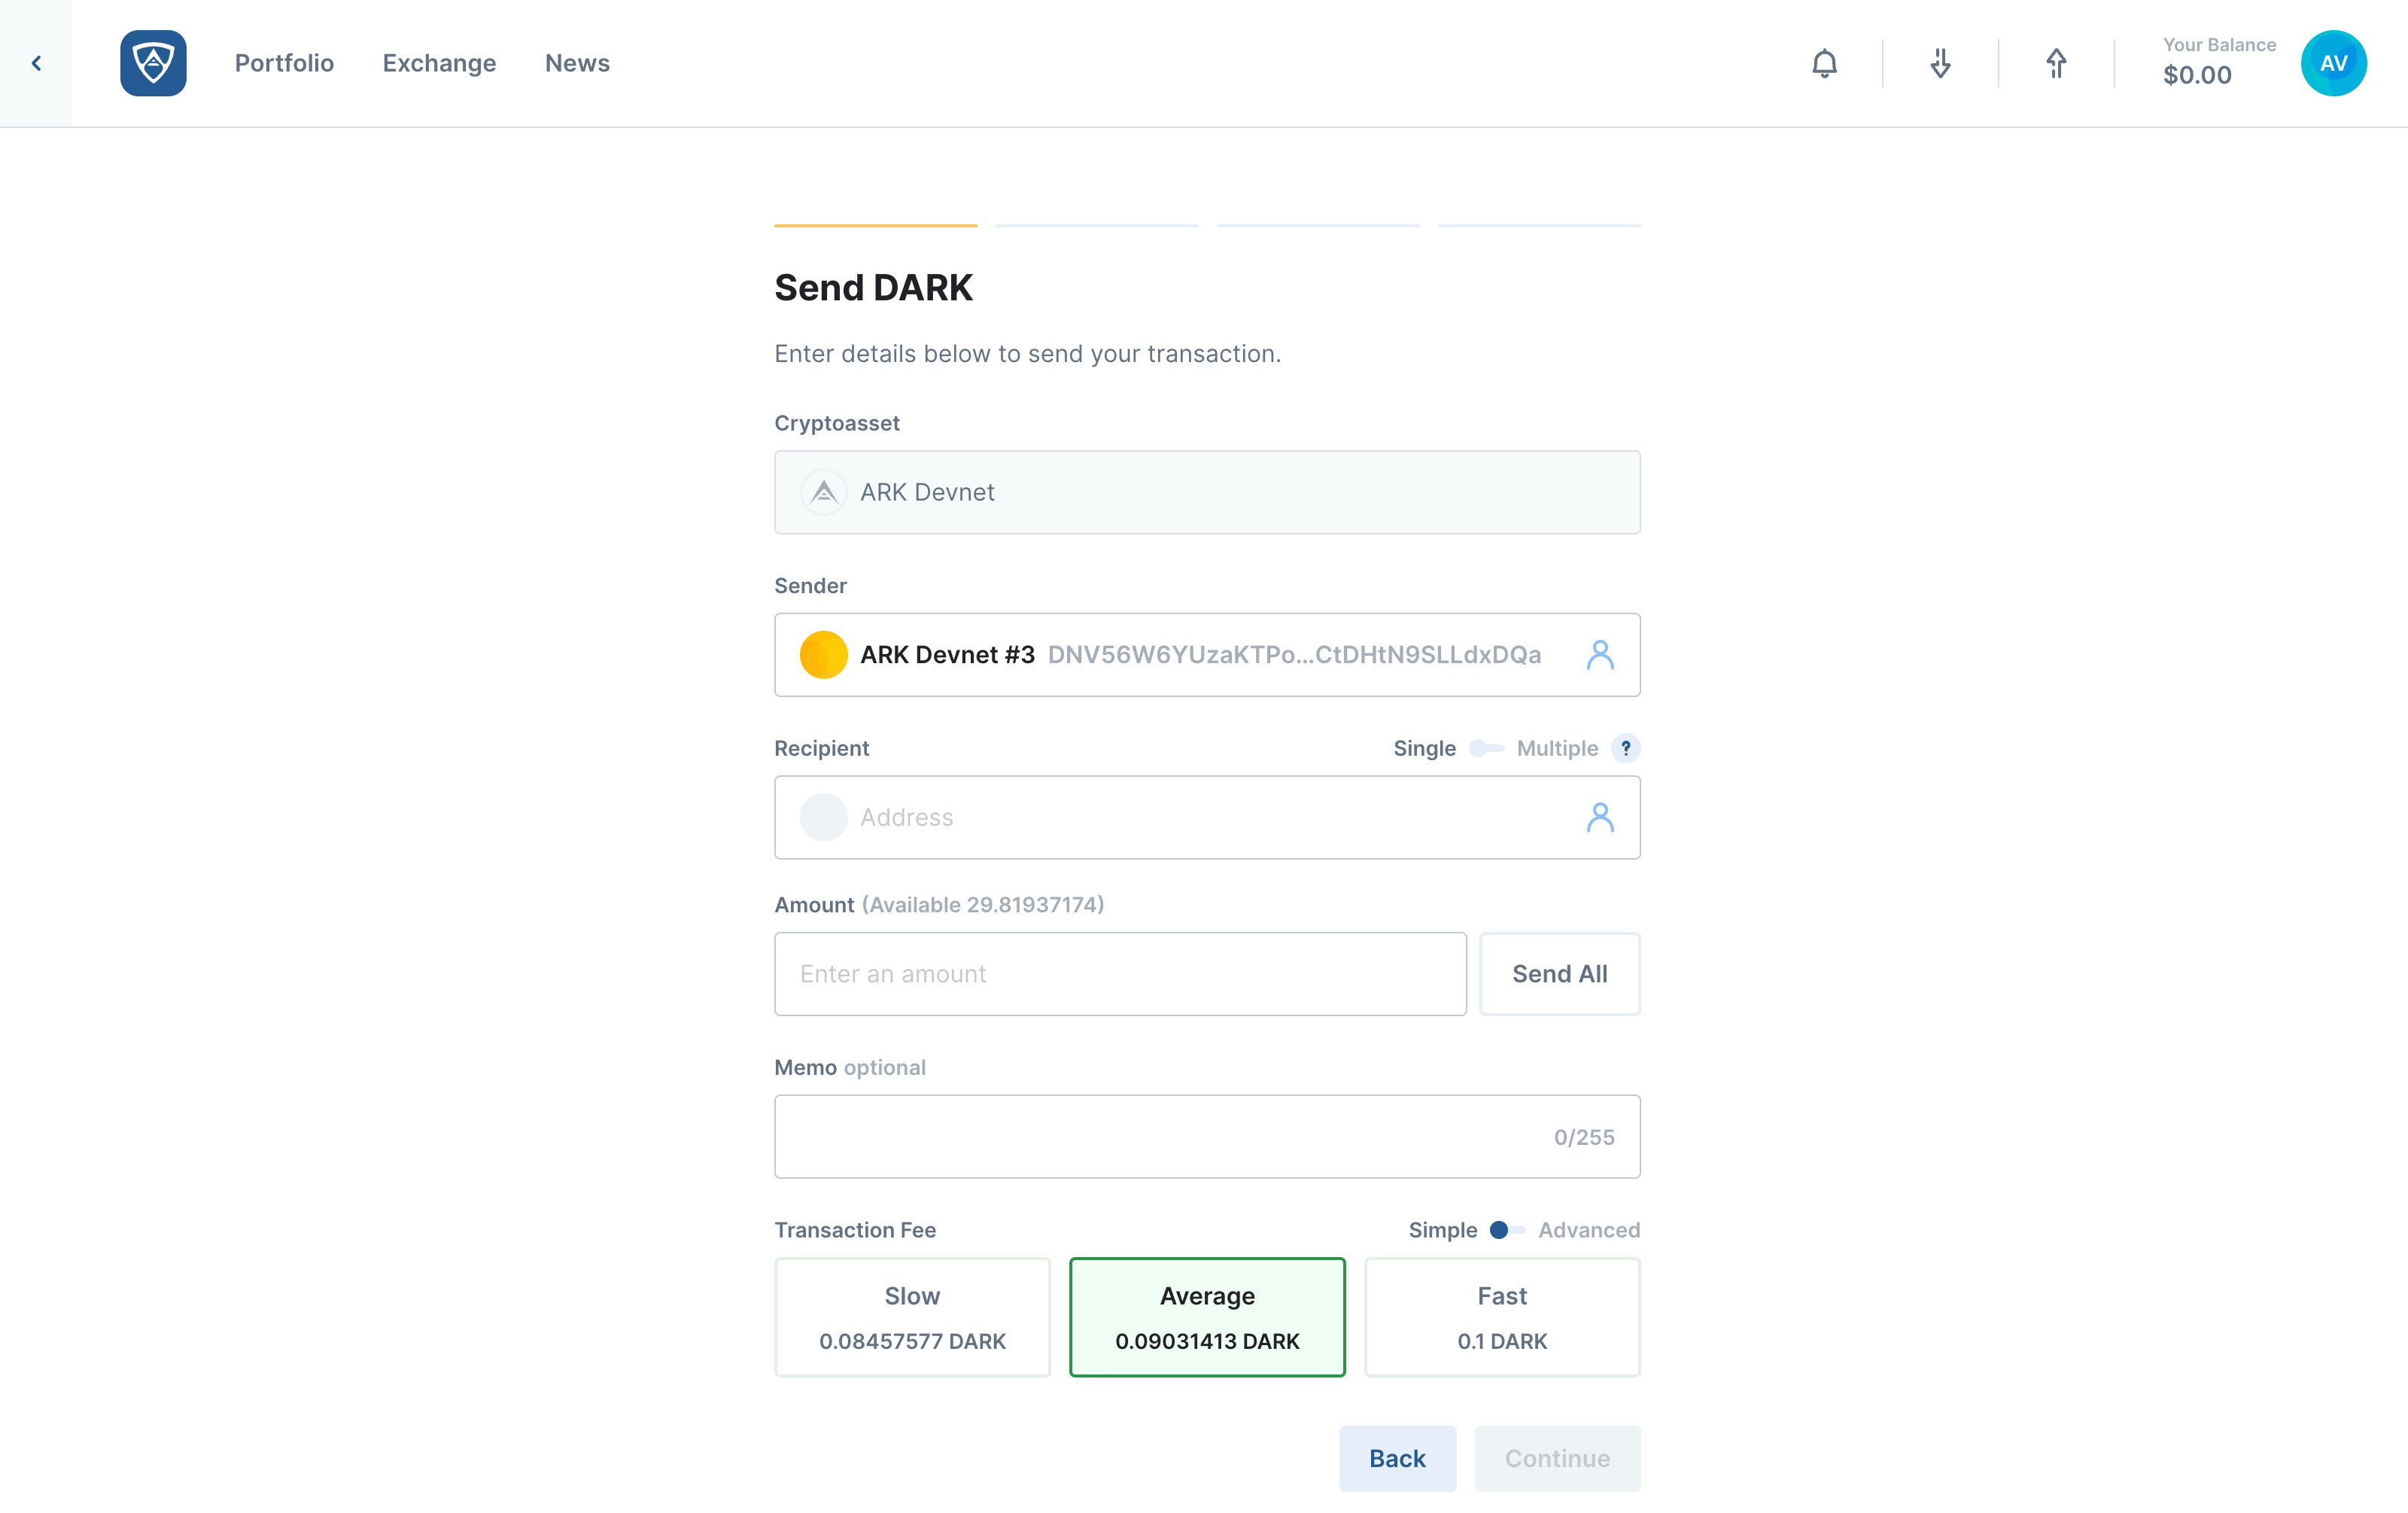
Enter Transaction Details
The Send page will appear. Here you will enter in details and/or select options in order to successfully transfer funds to one or more recipients.
Recipient:
- The destination address to which you wish to transfer funds
- Ensure that you enter or select the correct recipient address as sending to an incorrect address typically means a loss of funds
- You may send to either a single recipient or select up to 64 different recipients
Help
To find out how to transfer funds to multiple recipients, visit the Multi-Payment page.
Amount - The total amount of ARK you wish to transfer.
Memo:
- This is also known as the VendorField
- It is an optional field that permits up to 255 characters
- You may enter a public message here if you so wish
Fee:
- This is the cost of transferring funds and is rewarded to the Delegate who forges your transaction
- You may select a Slow, Average or Fast fee. Alternatively, you may switch to Advanced and enter a custom amount if desired
Help
Learn more about ARK transaction fees by visiting the Fees page.
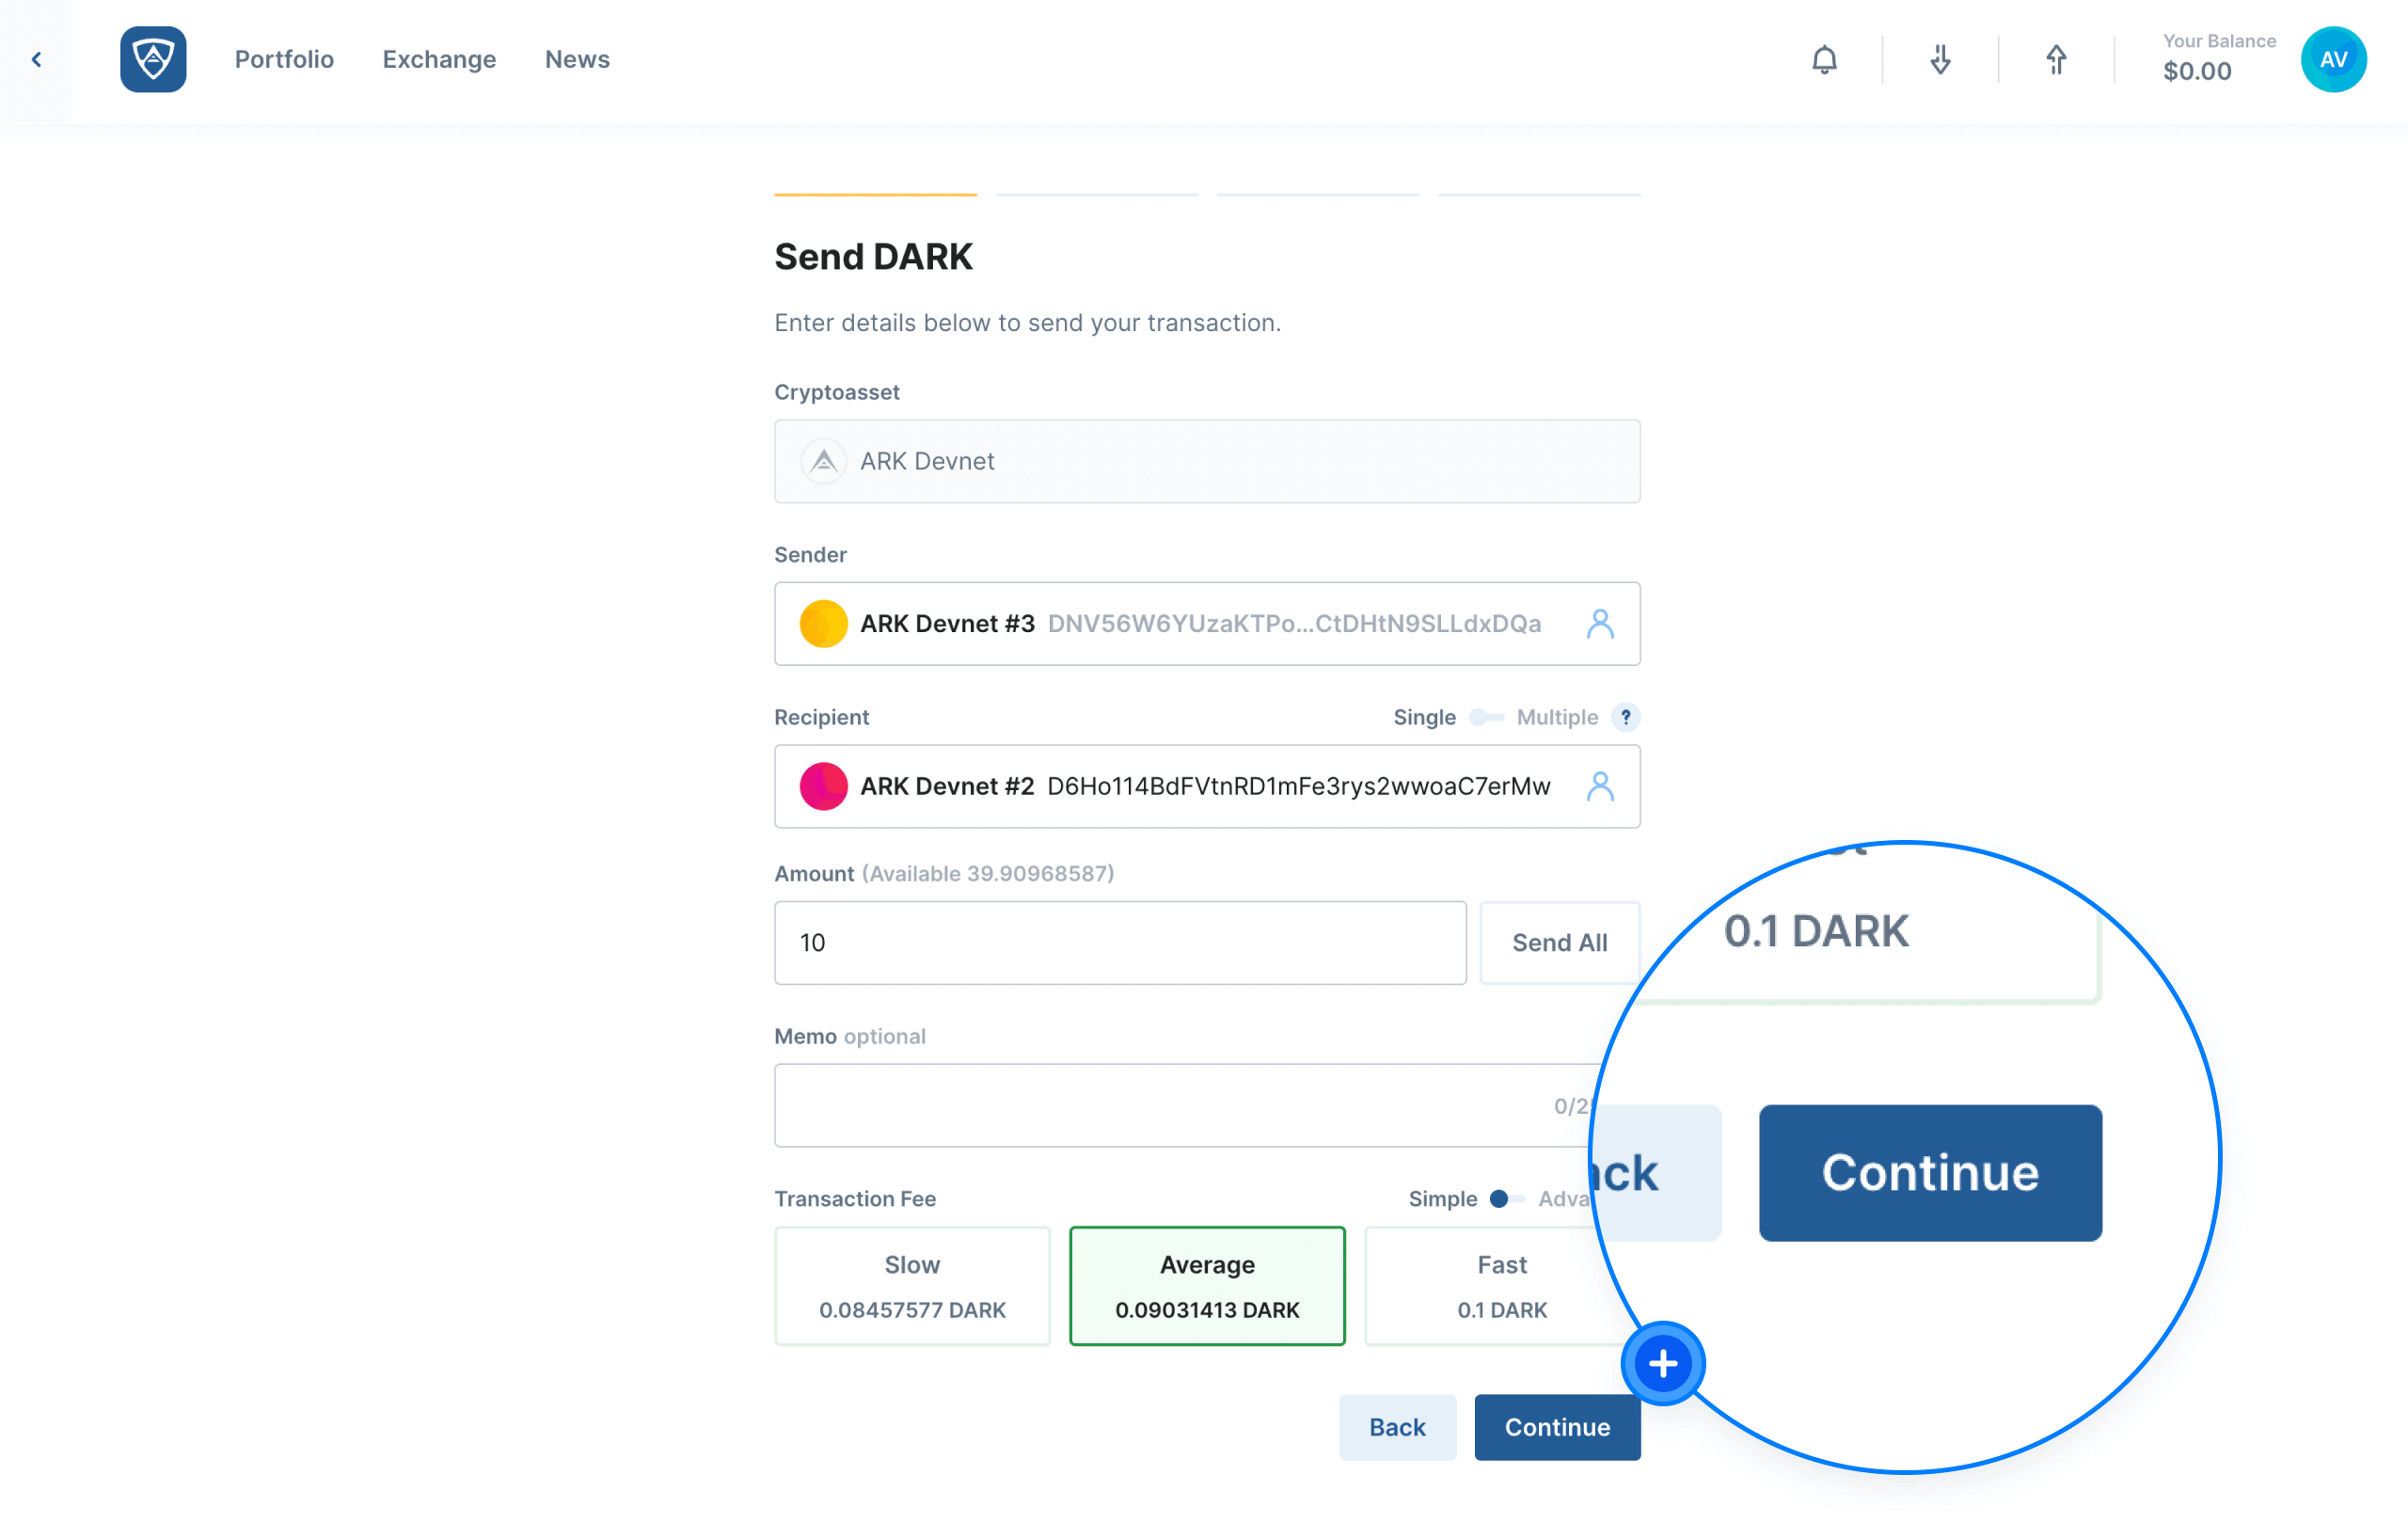
Once you have entered all the necessary details, click the Continue button to proceed. Alternatively, if you still need time to review some details before proceeding, click the Back button.
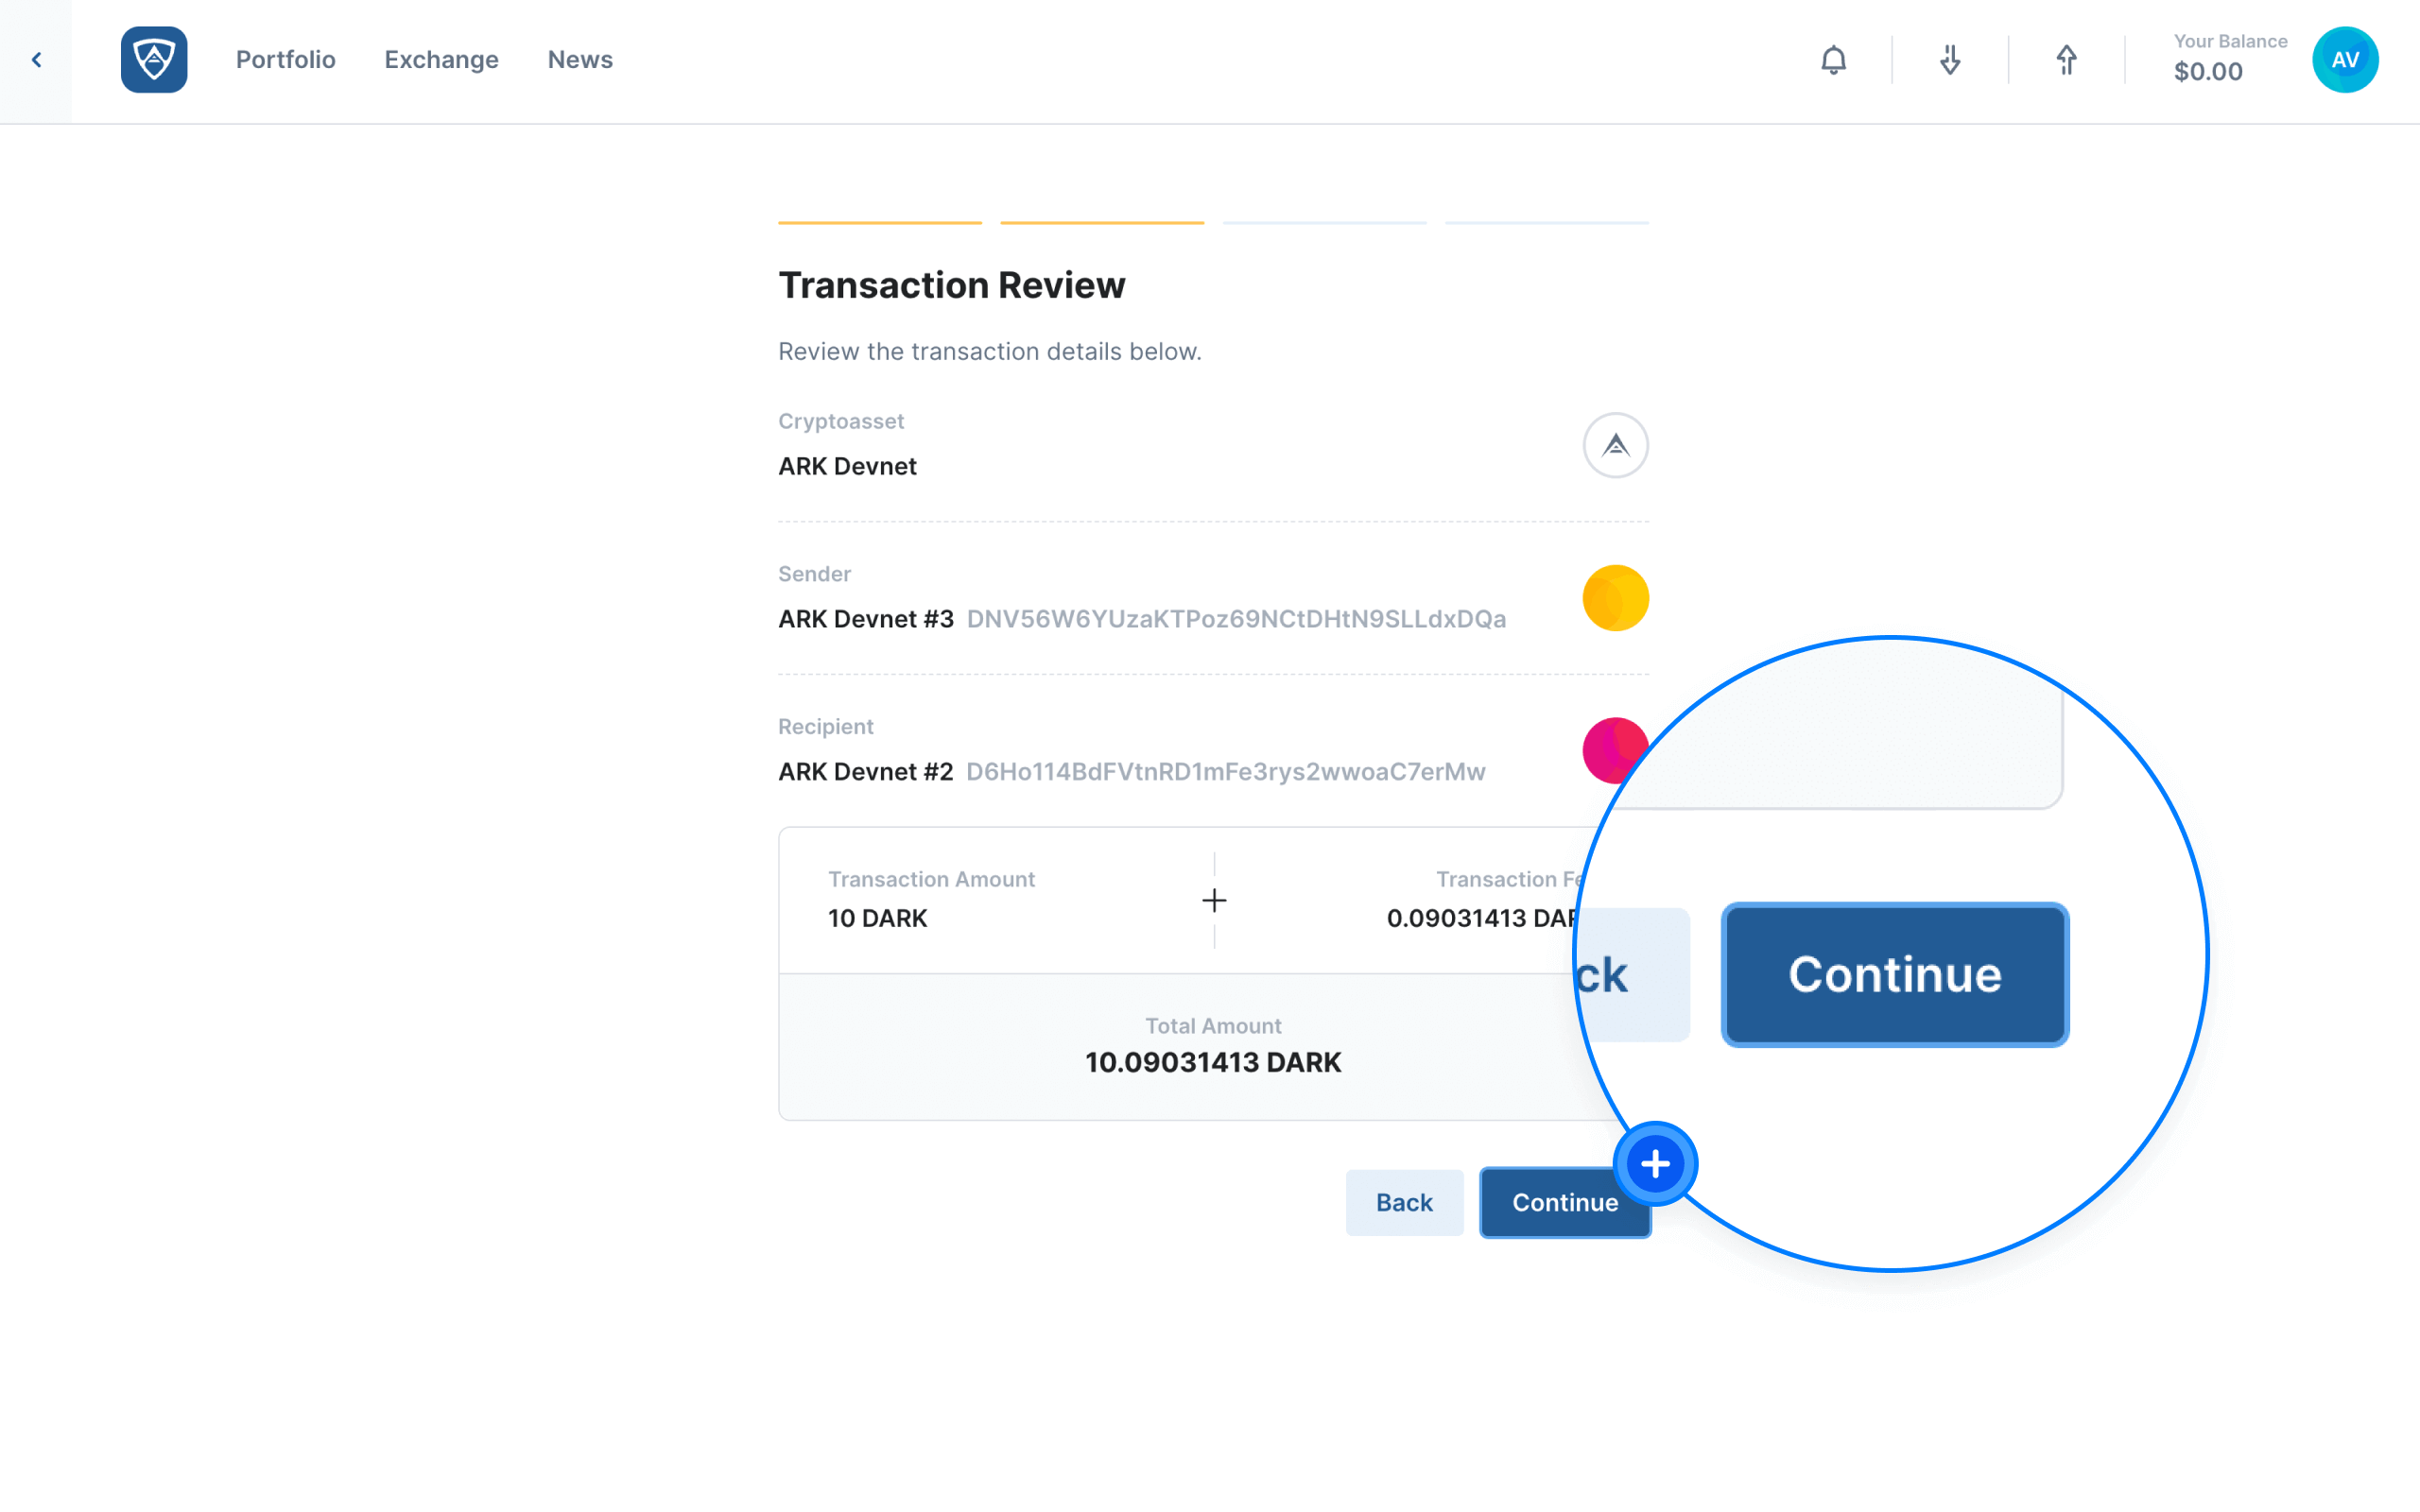
Review the Details
The Transaction Review screen will then appear. Check all the details and ensure that everything is correct. If all is in order, click the Continue button to proceed. Alternatively, if you need to make adjustments, click the Back button.
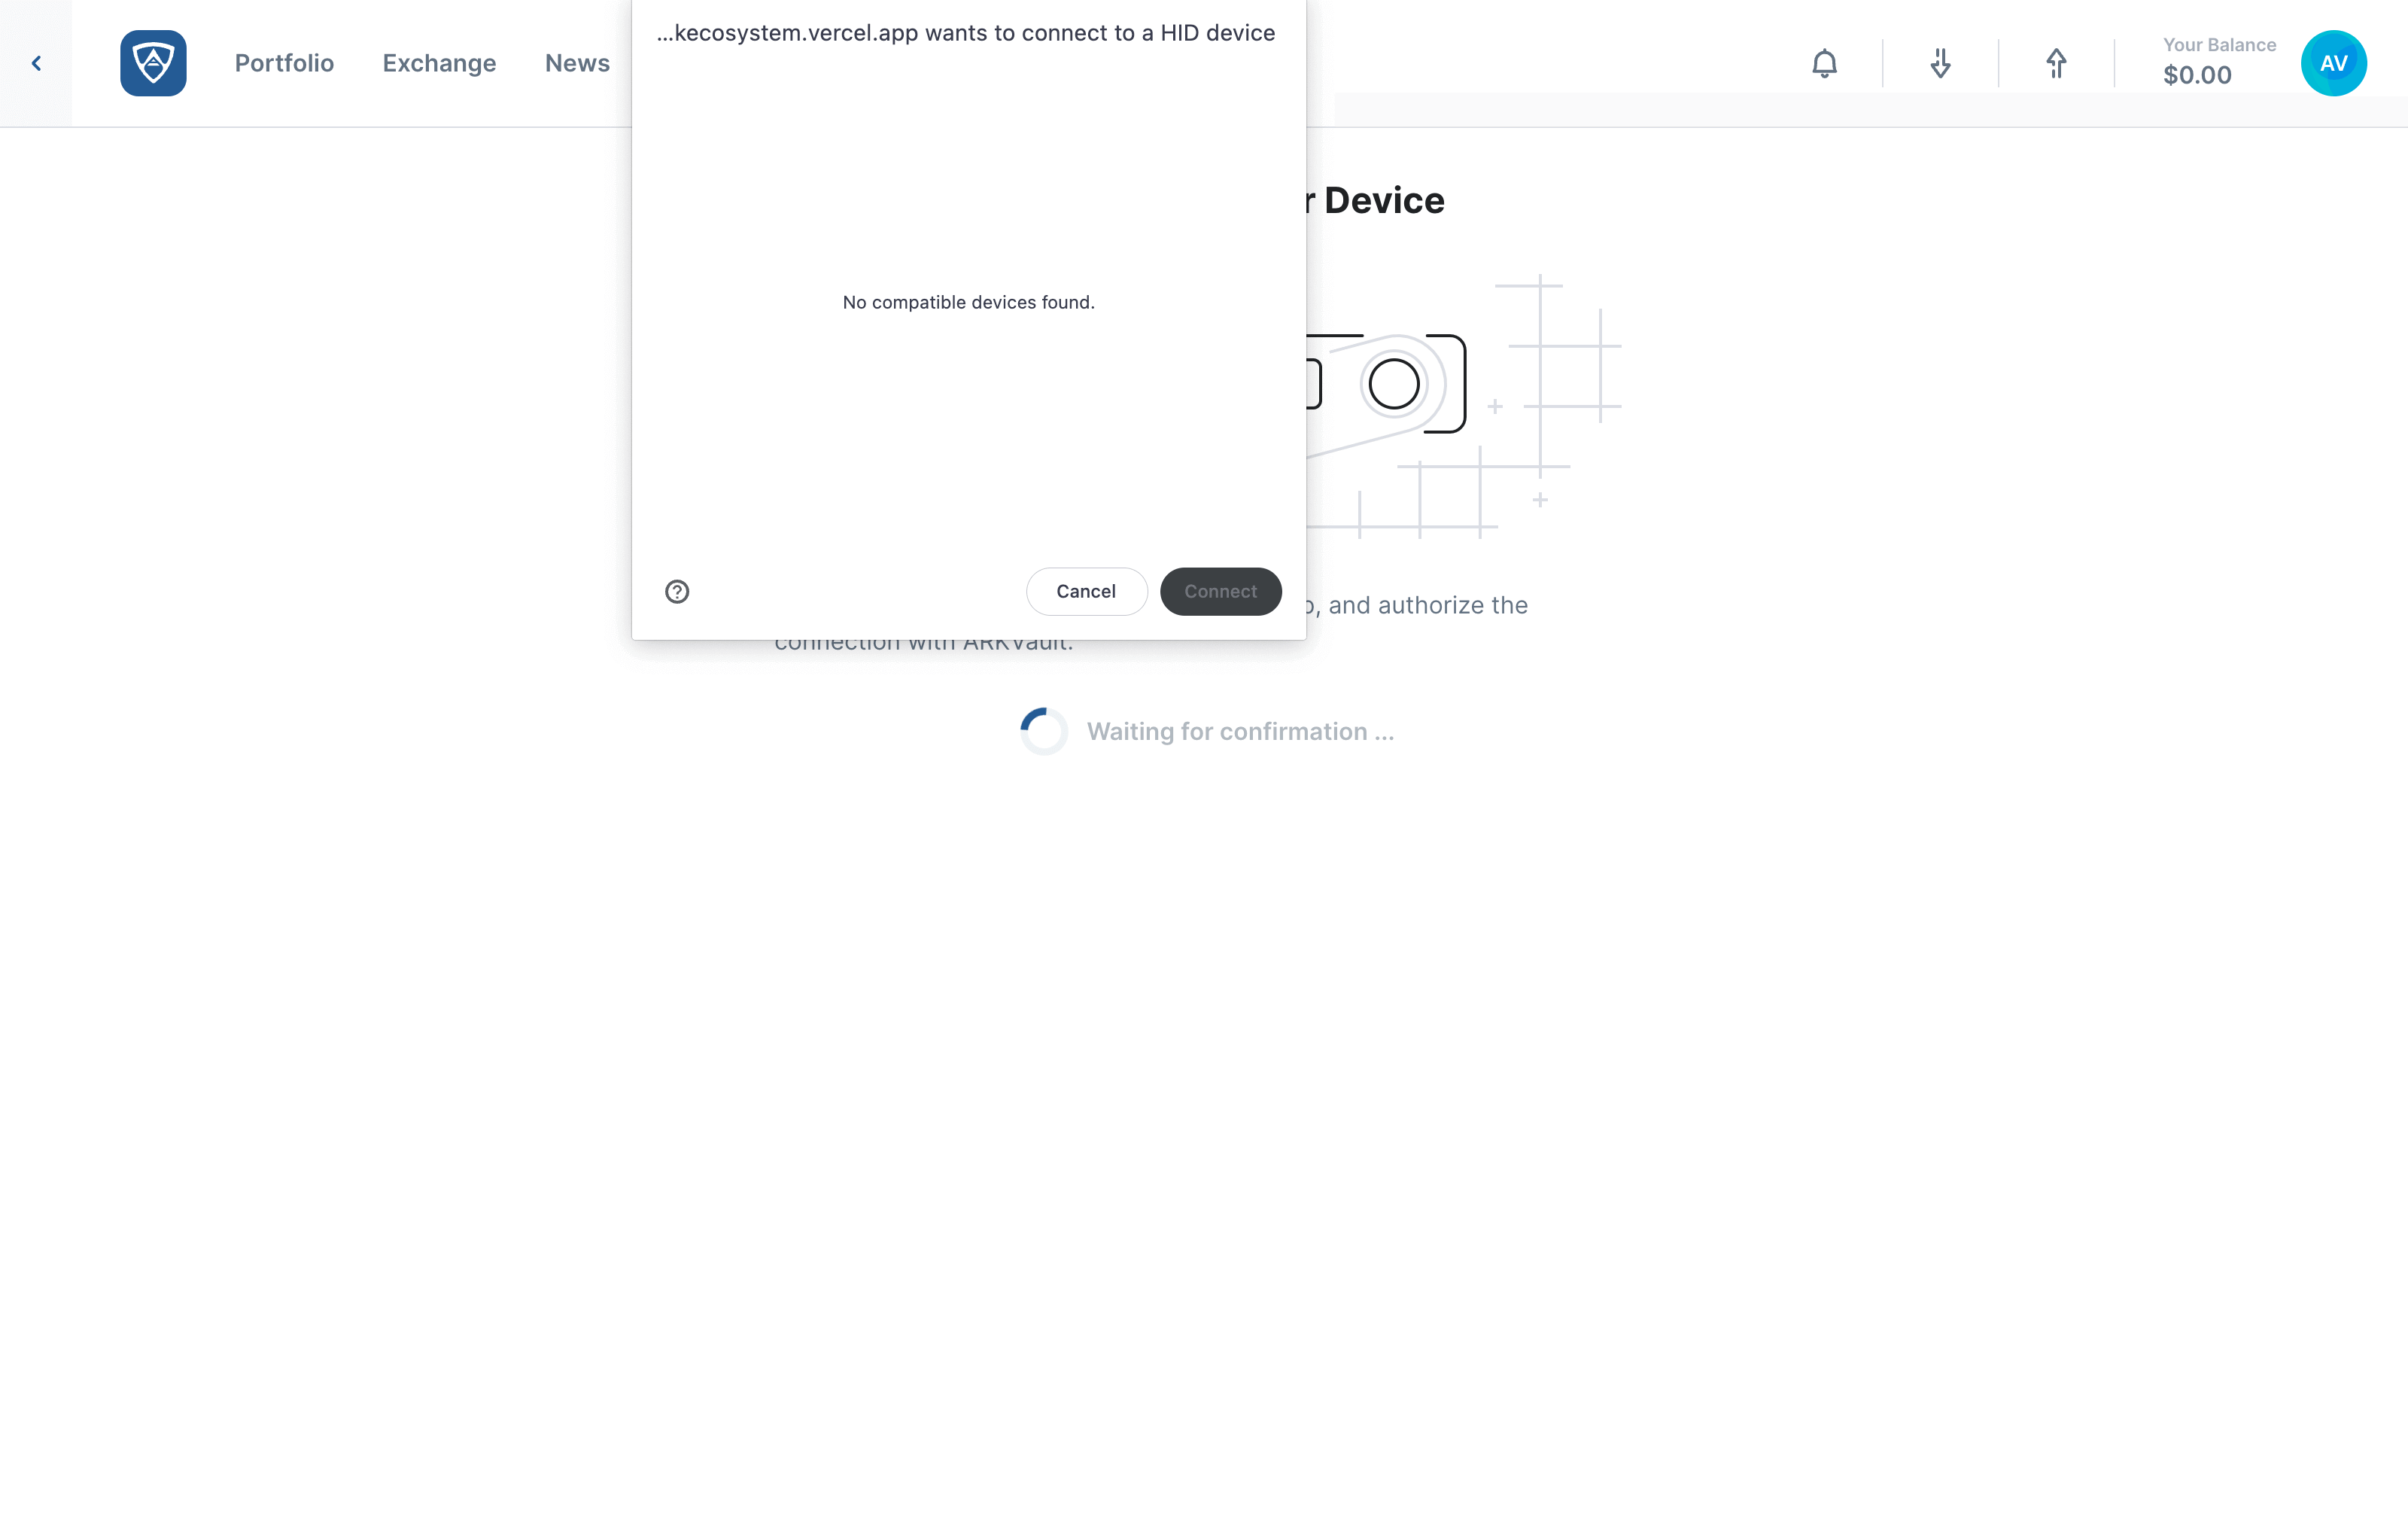
Connect Ledger Device
You will then need to connect your Ledger device to your computer, preferably using the USB cable that was provided along with your device. Depending on your browser, a window may appear stating that (website) wants to connect to a HID device. Upon connecting your device, you will need to unlock it using the unique pin you created when setting it up.
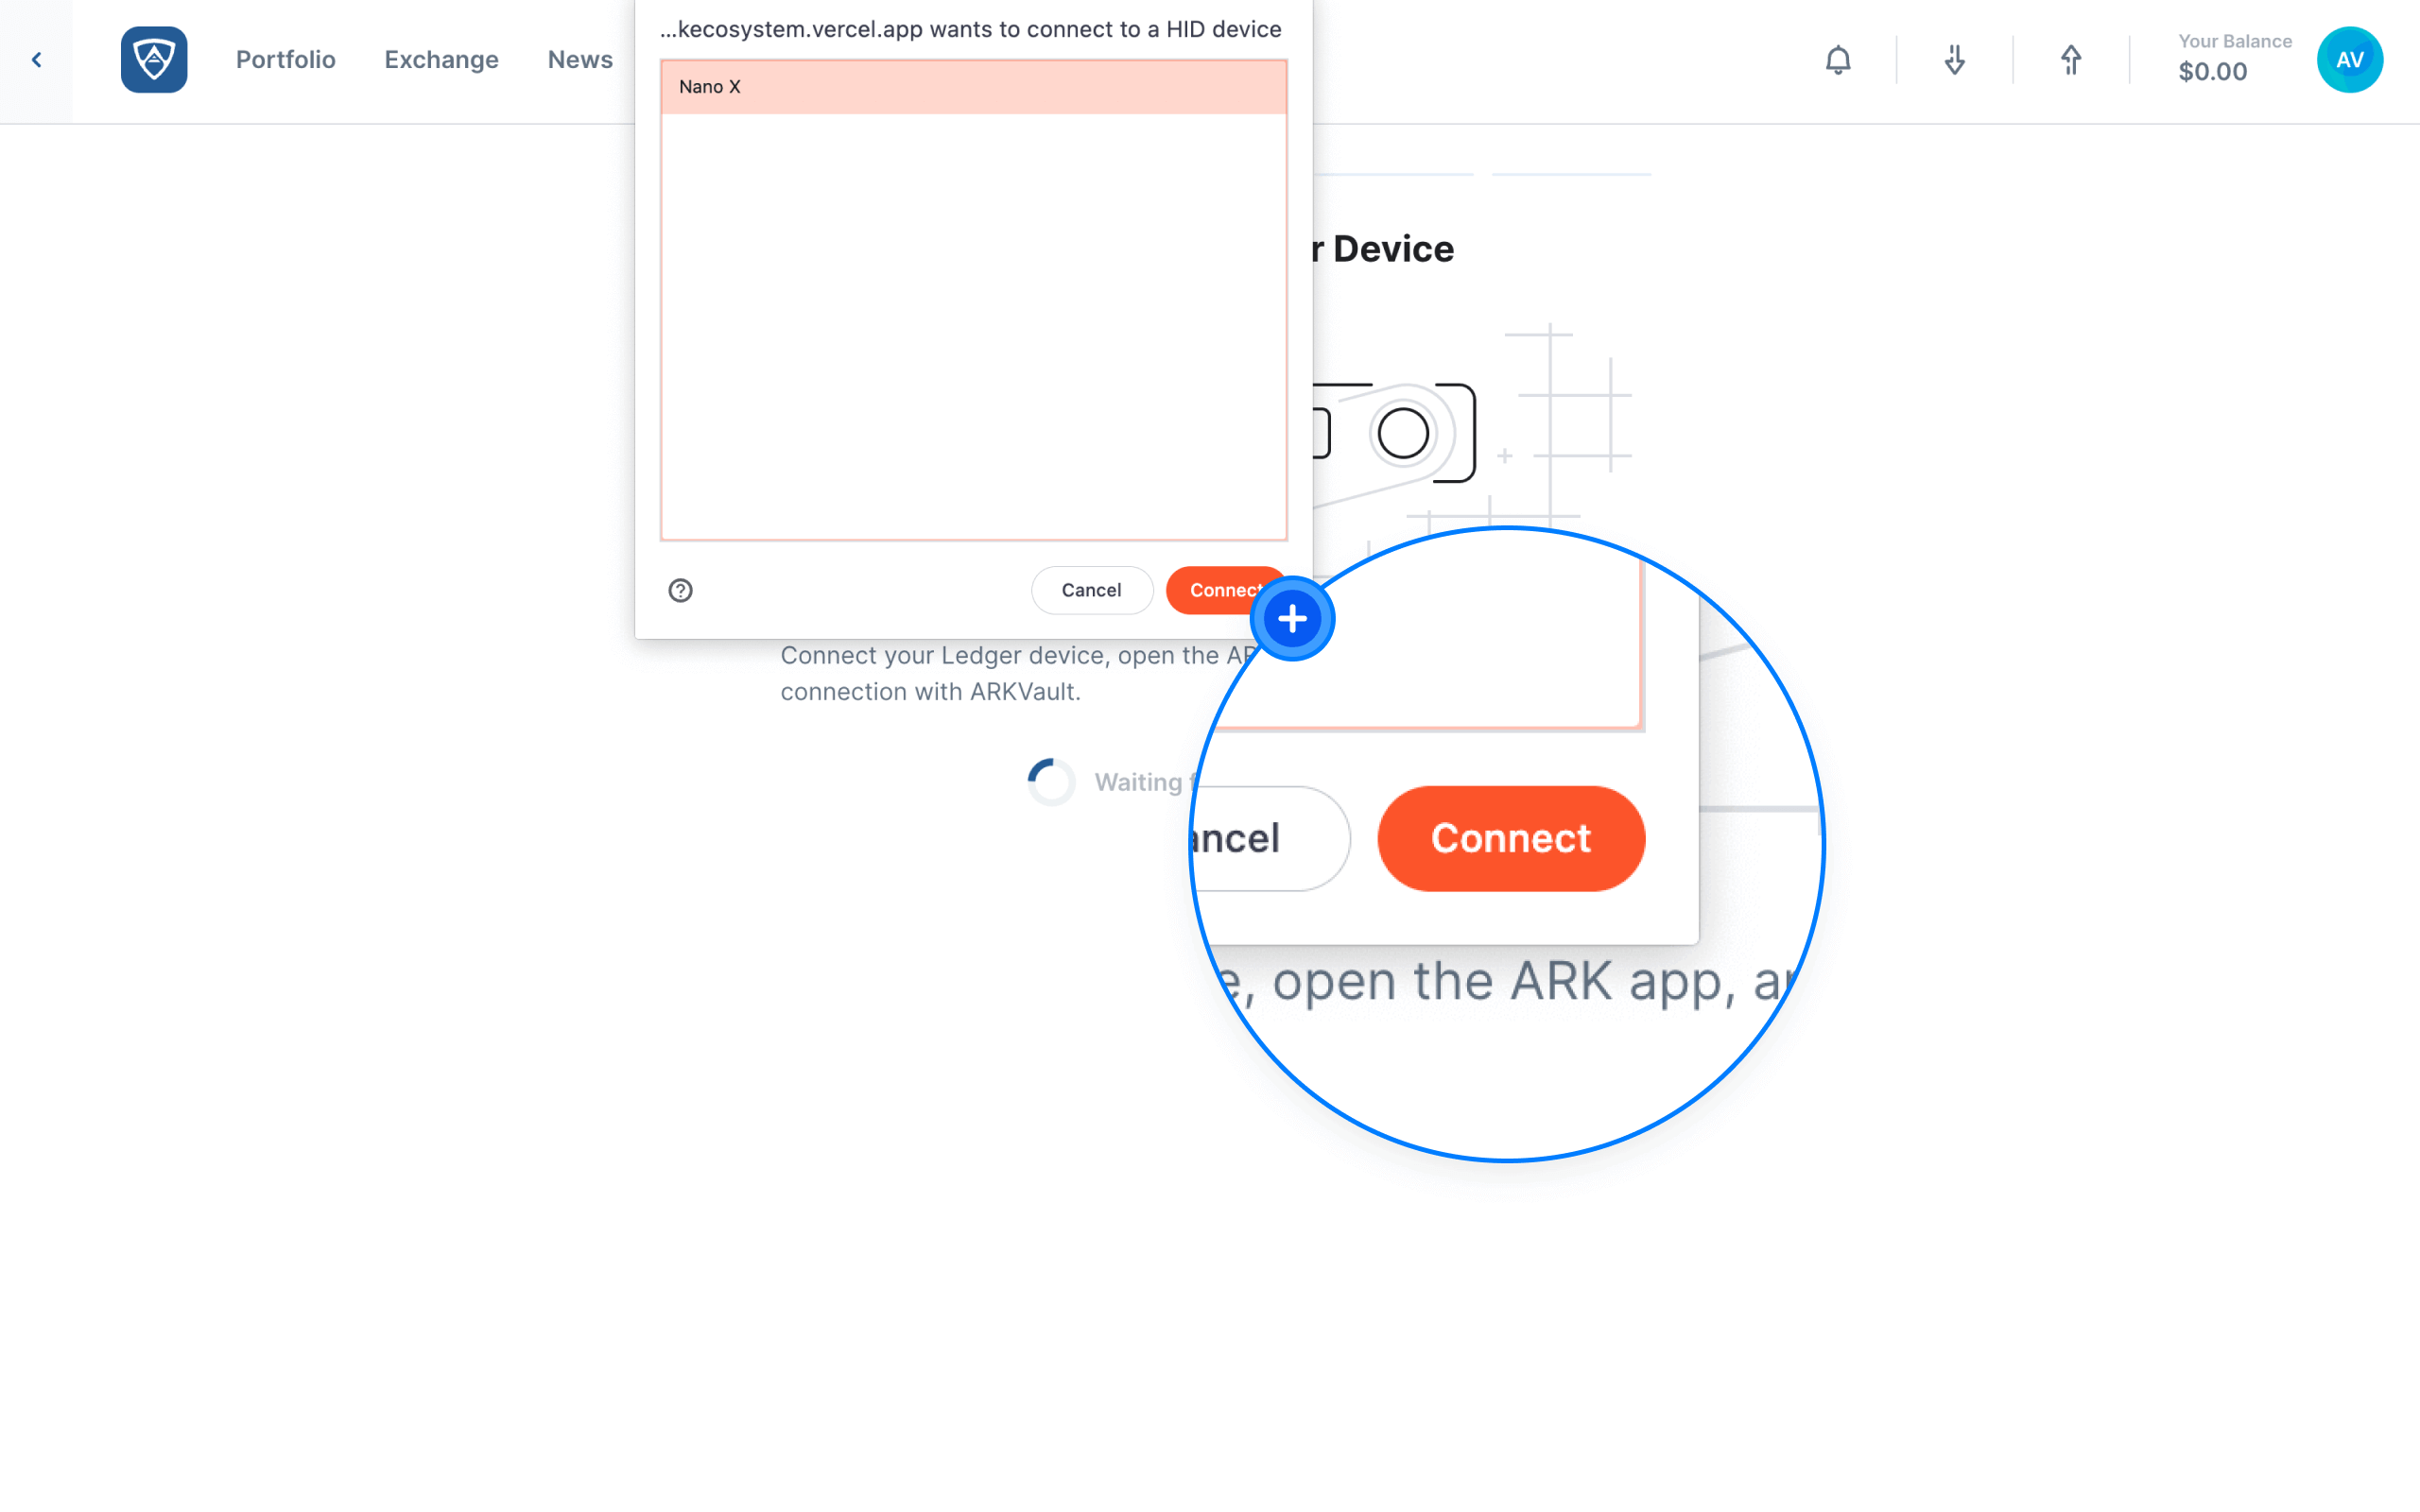
Your device should then appear in the window that refers to the HID device.
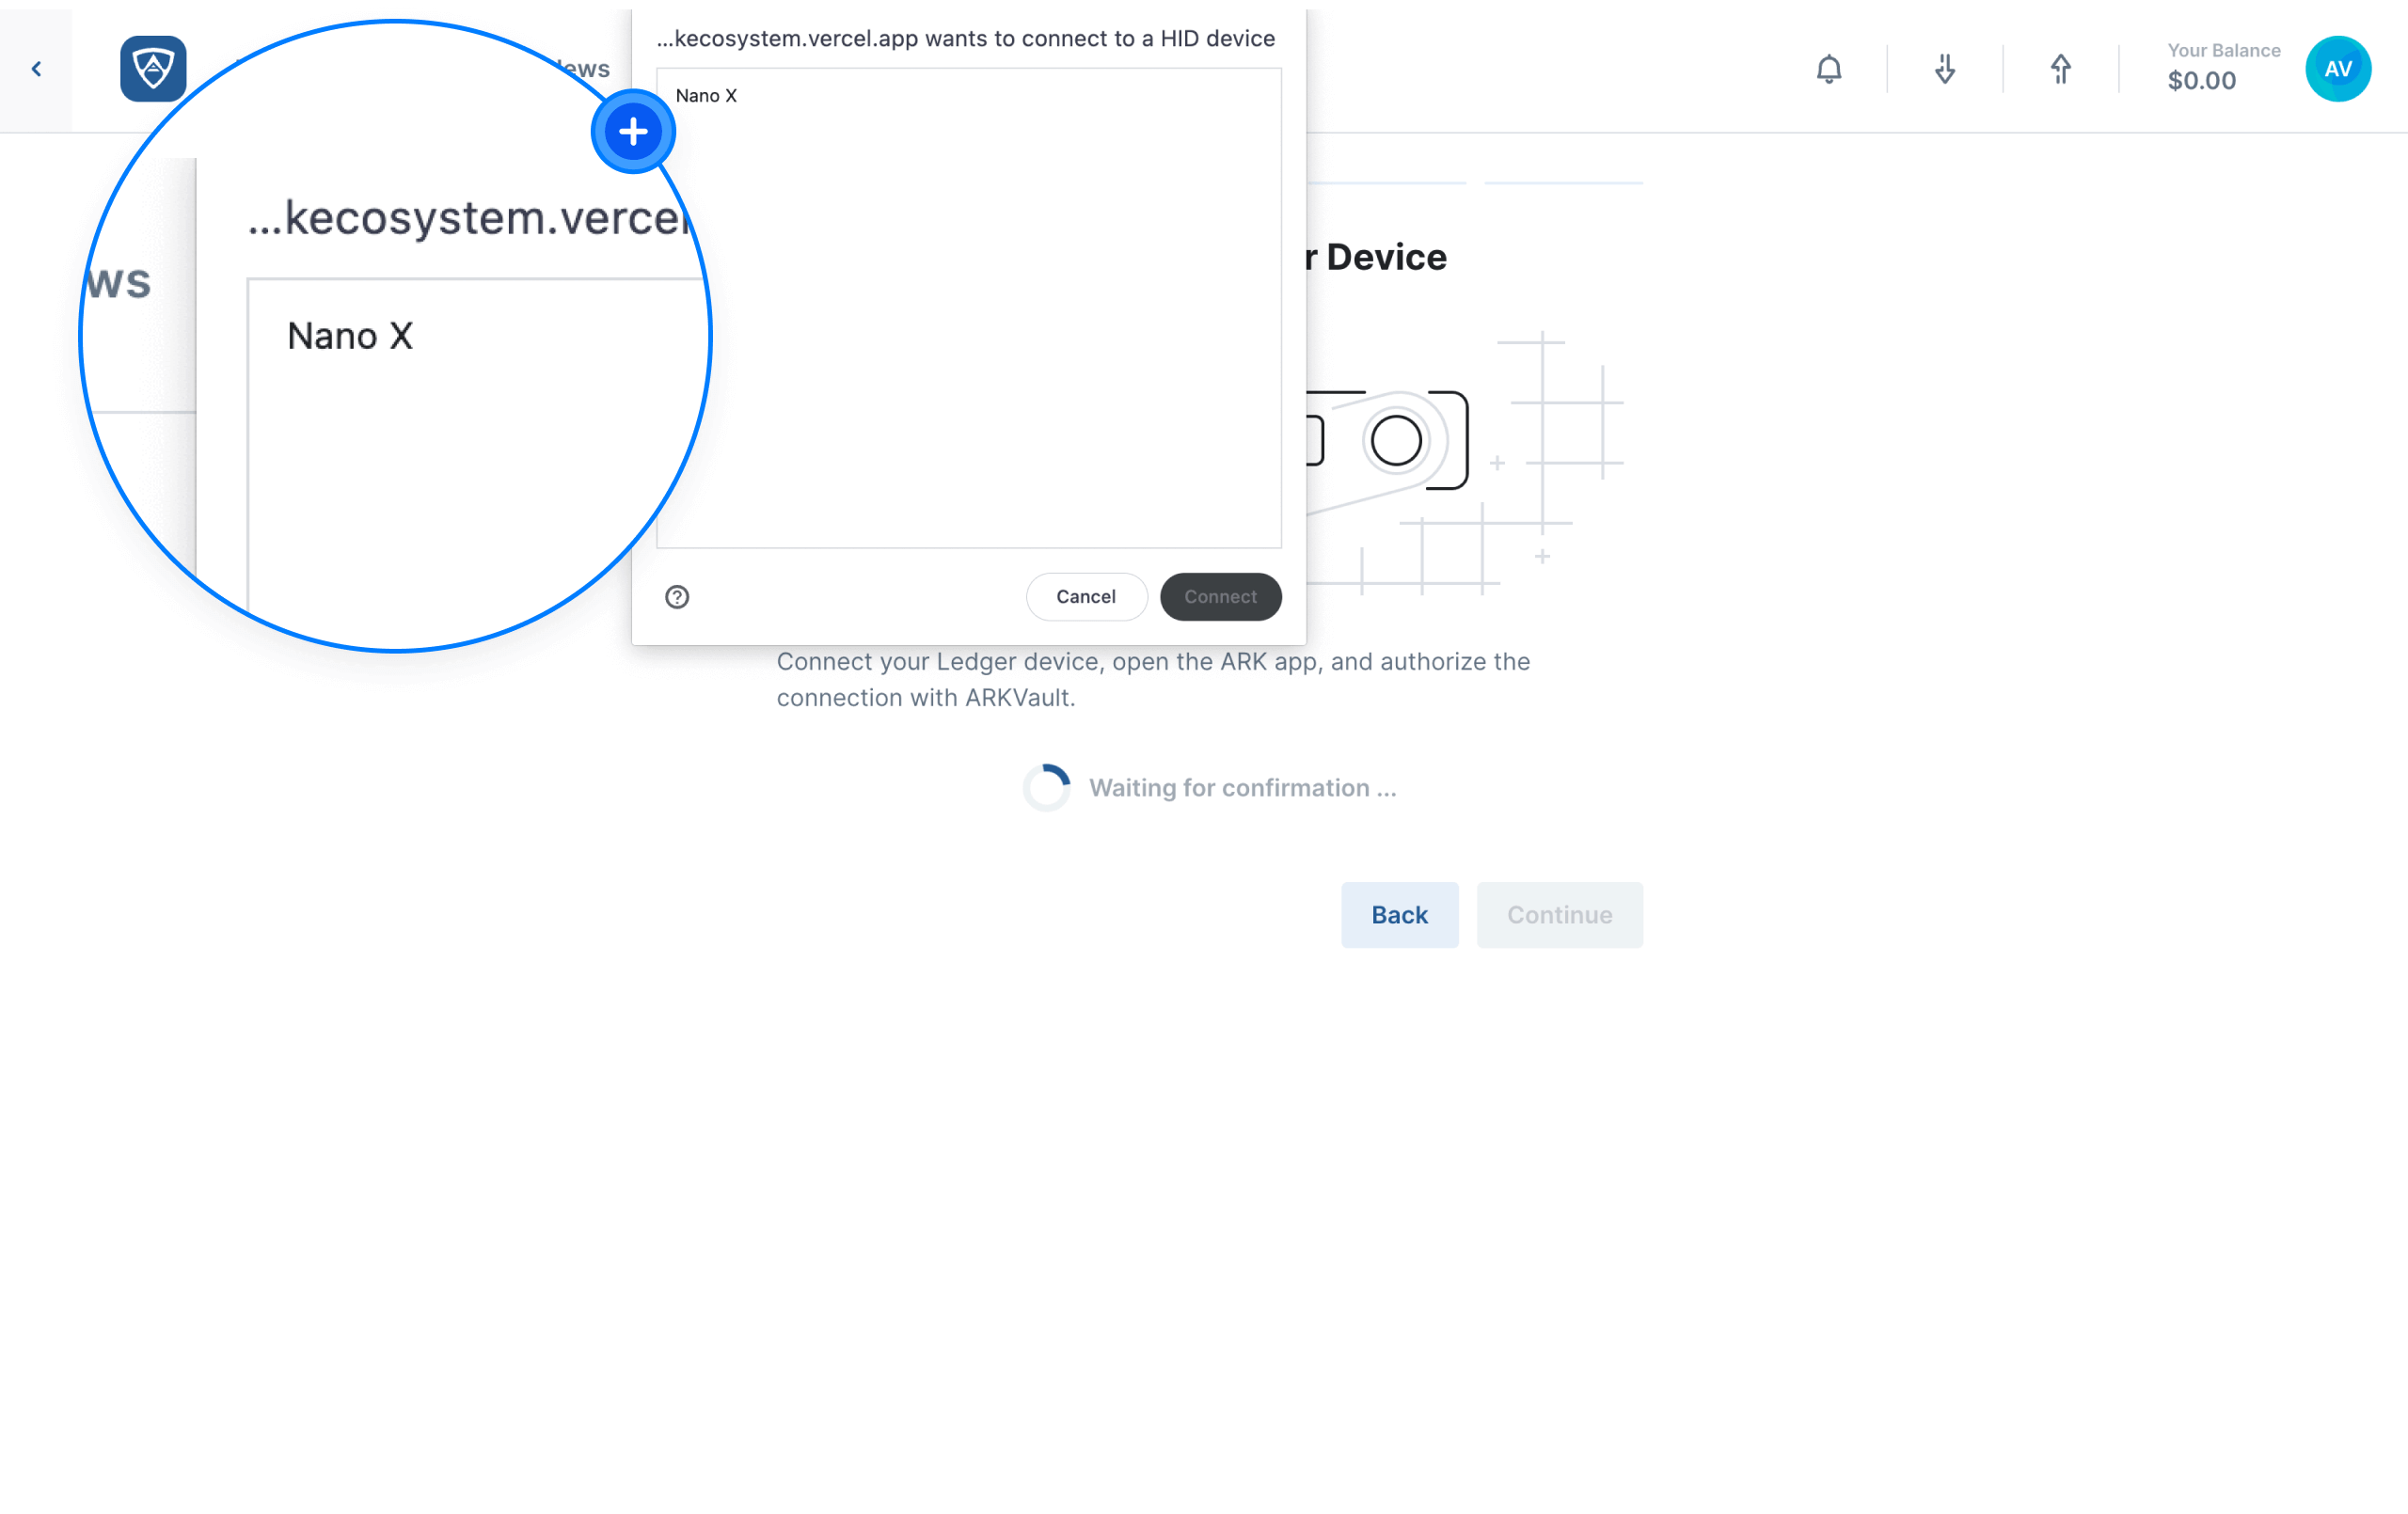
Select your device and click Connect. An automatic redirect should then occur and the next page should appear. If this is not the case, click the Continue button to proceed with the importation process. Alternatively, if you wish to cancel the process for whatever reason, click the Back button.
Confirm the Transaction
The Confirm Your Transaction Screen will appear. Check the details displayed on your Ledger and compare it with what appears in ARKVault. You will then need to use your Ledger’s buttons to scroll to either the Approve or Reject screen. When ready, press both buttons simultaneously on your Ledger to confirm the transaction.
![]()
Attention
Exercise caution when reviewing the details displayed on your Ledger as you ultimately sign what appears on the device’s screen. This key feature of Ledger’s security is integral in keeping your funds safe at all times.
Complete the Ledger Transaction
The Transaction Sent screen will then appear confirming that your Ledger transaction completed successfully. You may then review the details of the transaction before continuing or ending your session accordingly.
![]()
Sign a Message Using a Ledger Wallet
Watch this helpful tutorial video on How to Sign a Message Using a Ledger Wallet in ARKVault
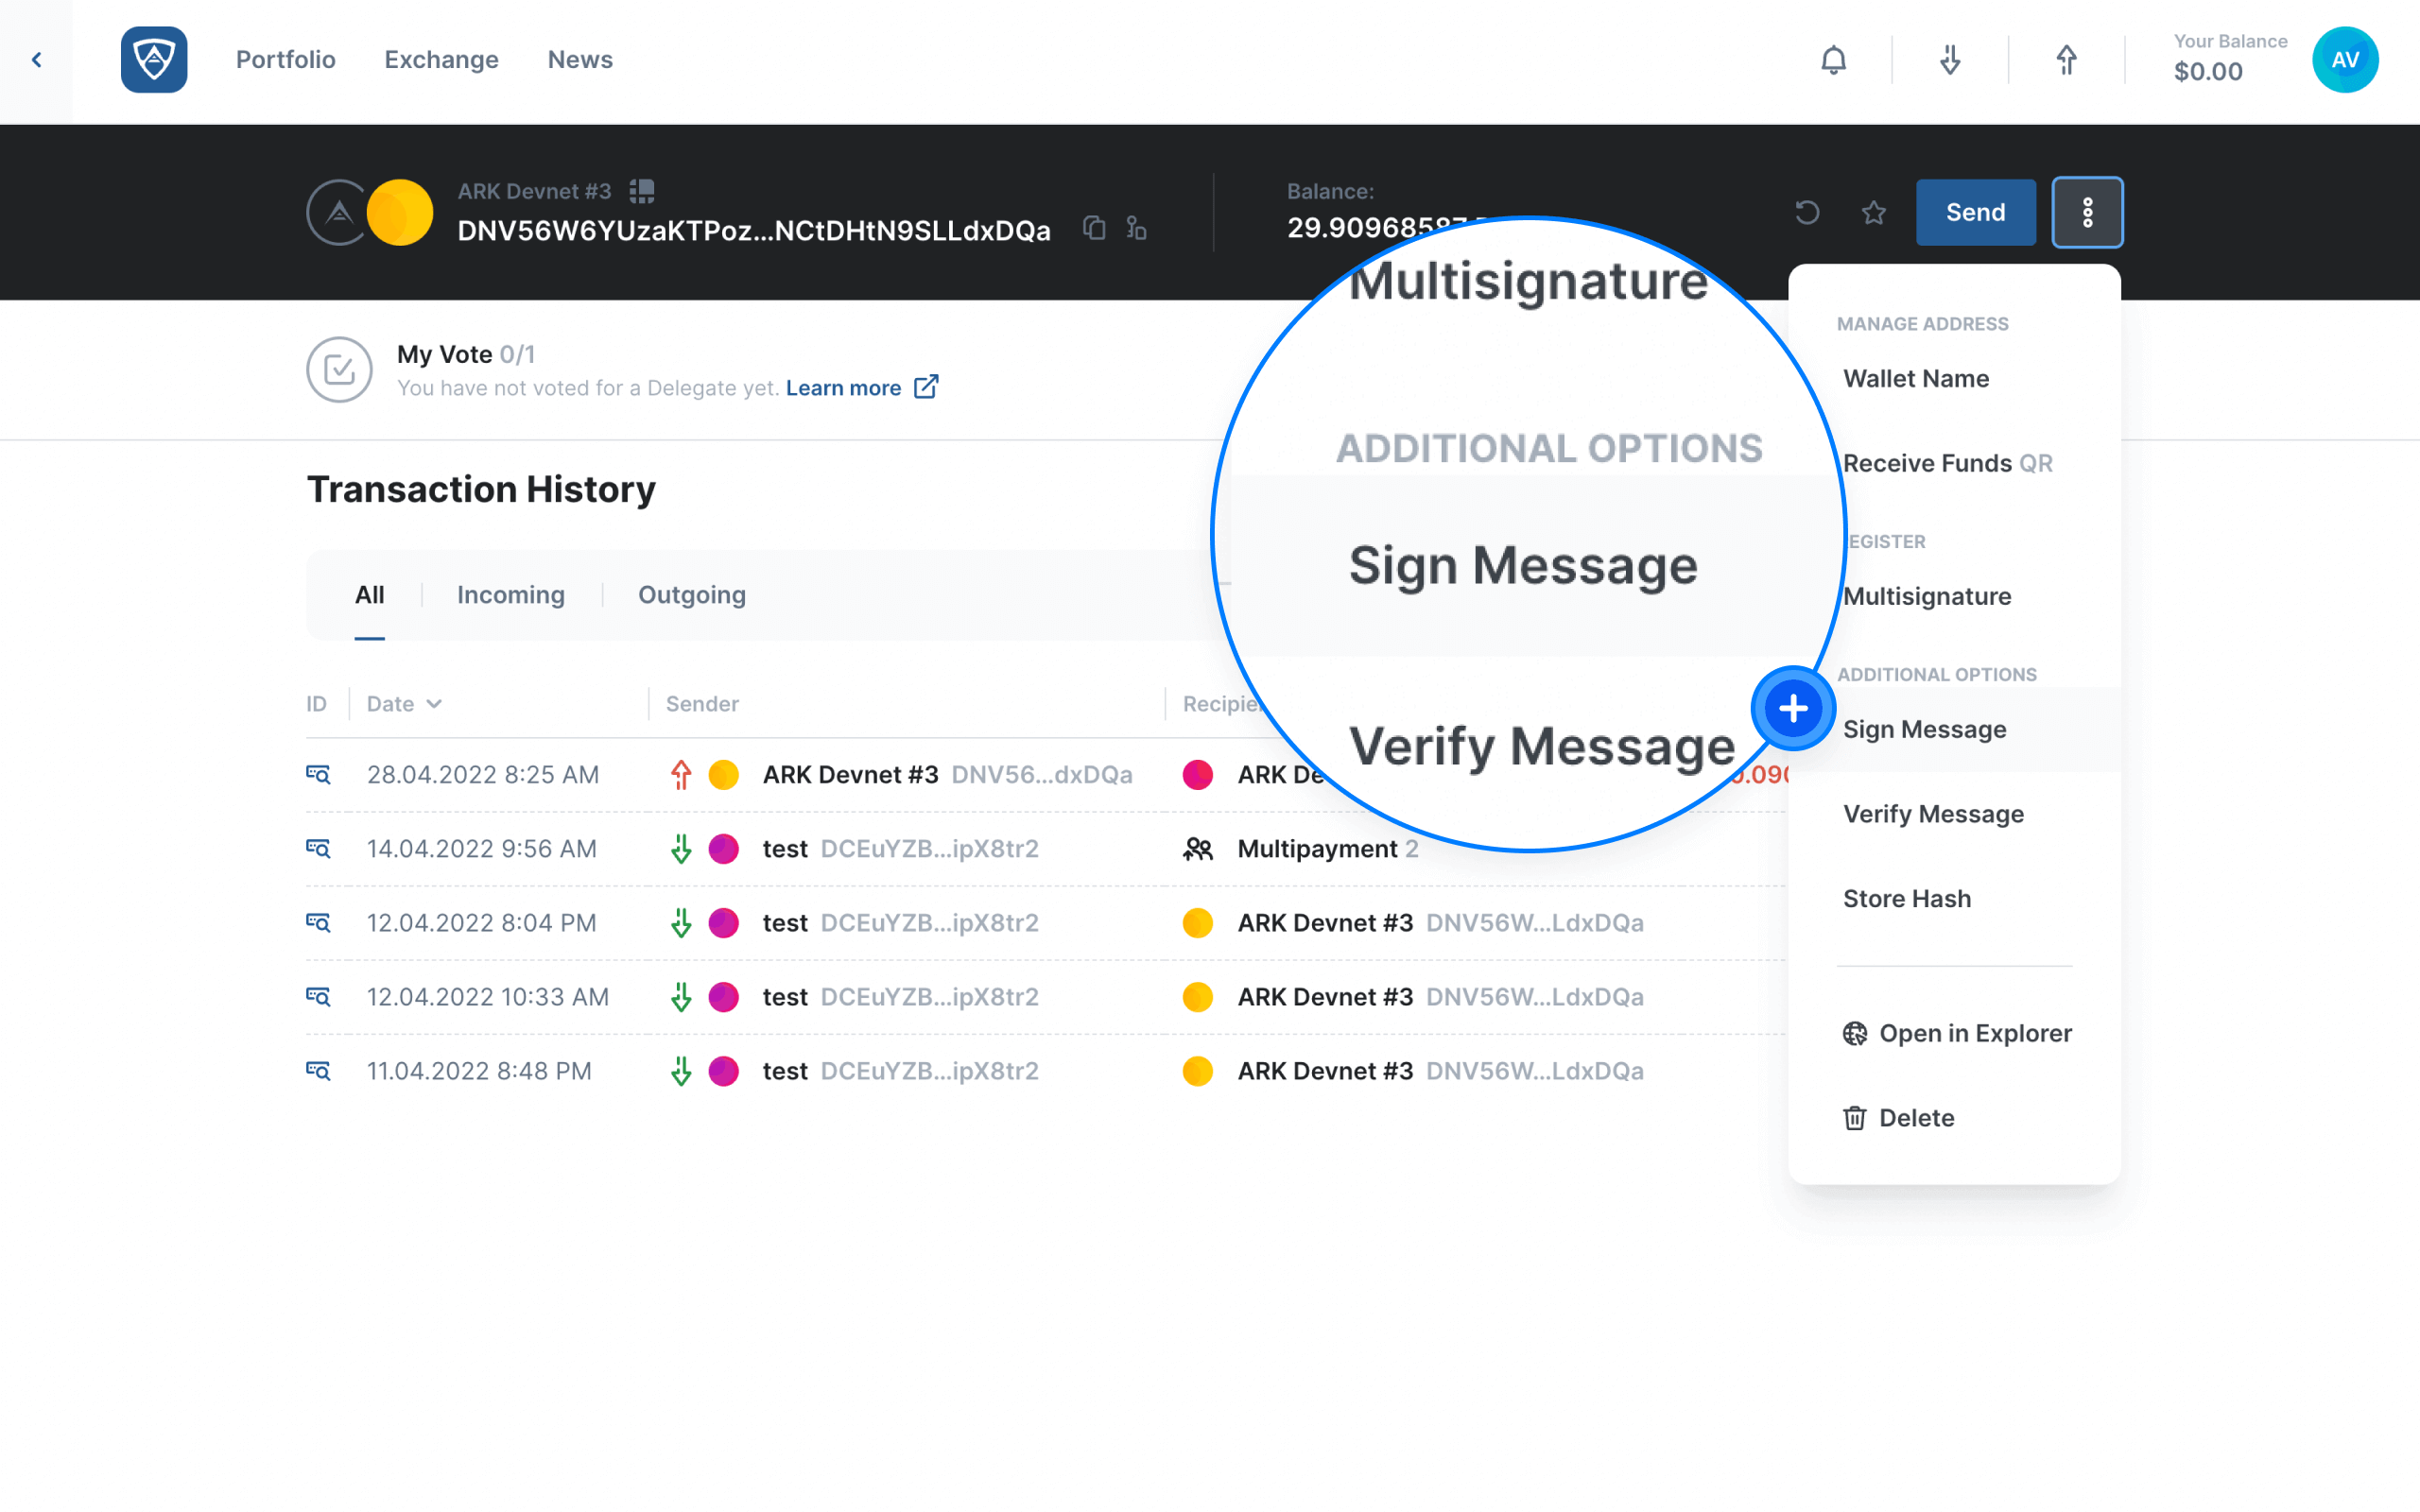
While viewing a Ledger-imported ARK wallet, click the kebab menu (three dots) that appears near the upper right corner of the page and select Sign Message from the dropdown menu.
Information
Signing and verifying messages occurs off-chain, meaning nothing is stored online. As a result, no associated transaction fees arise from either of these actions.
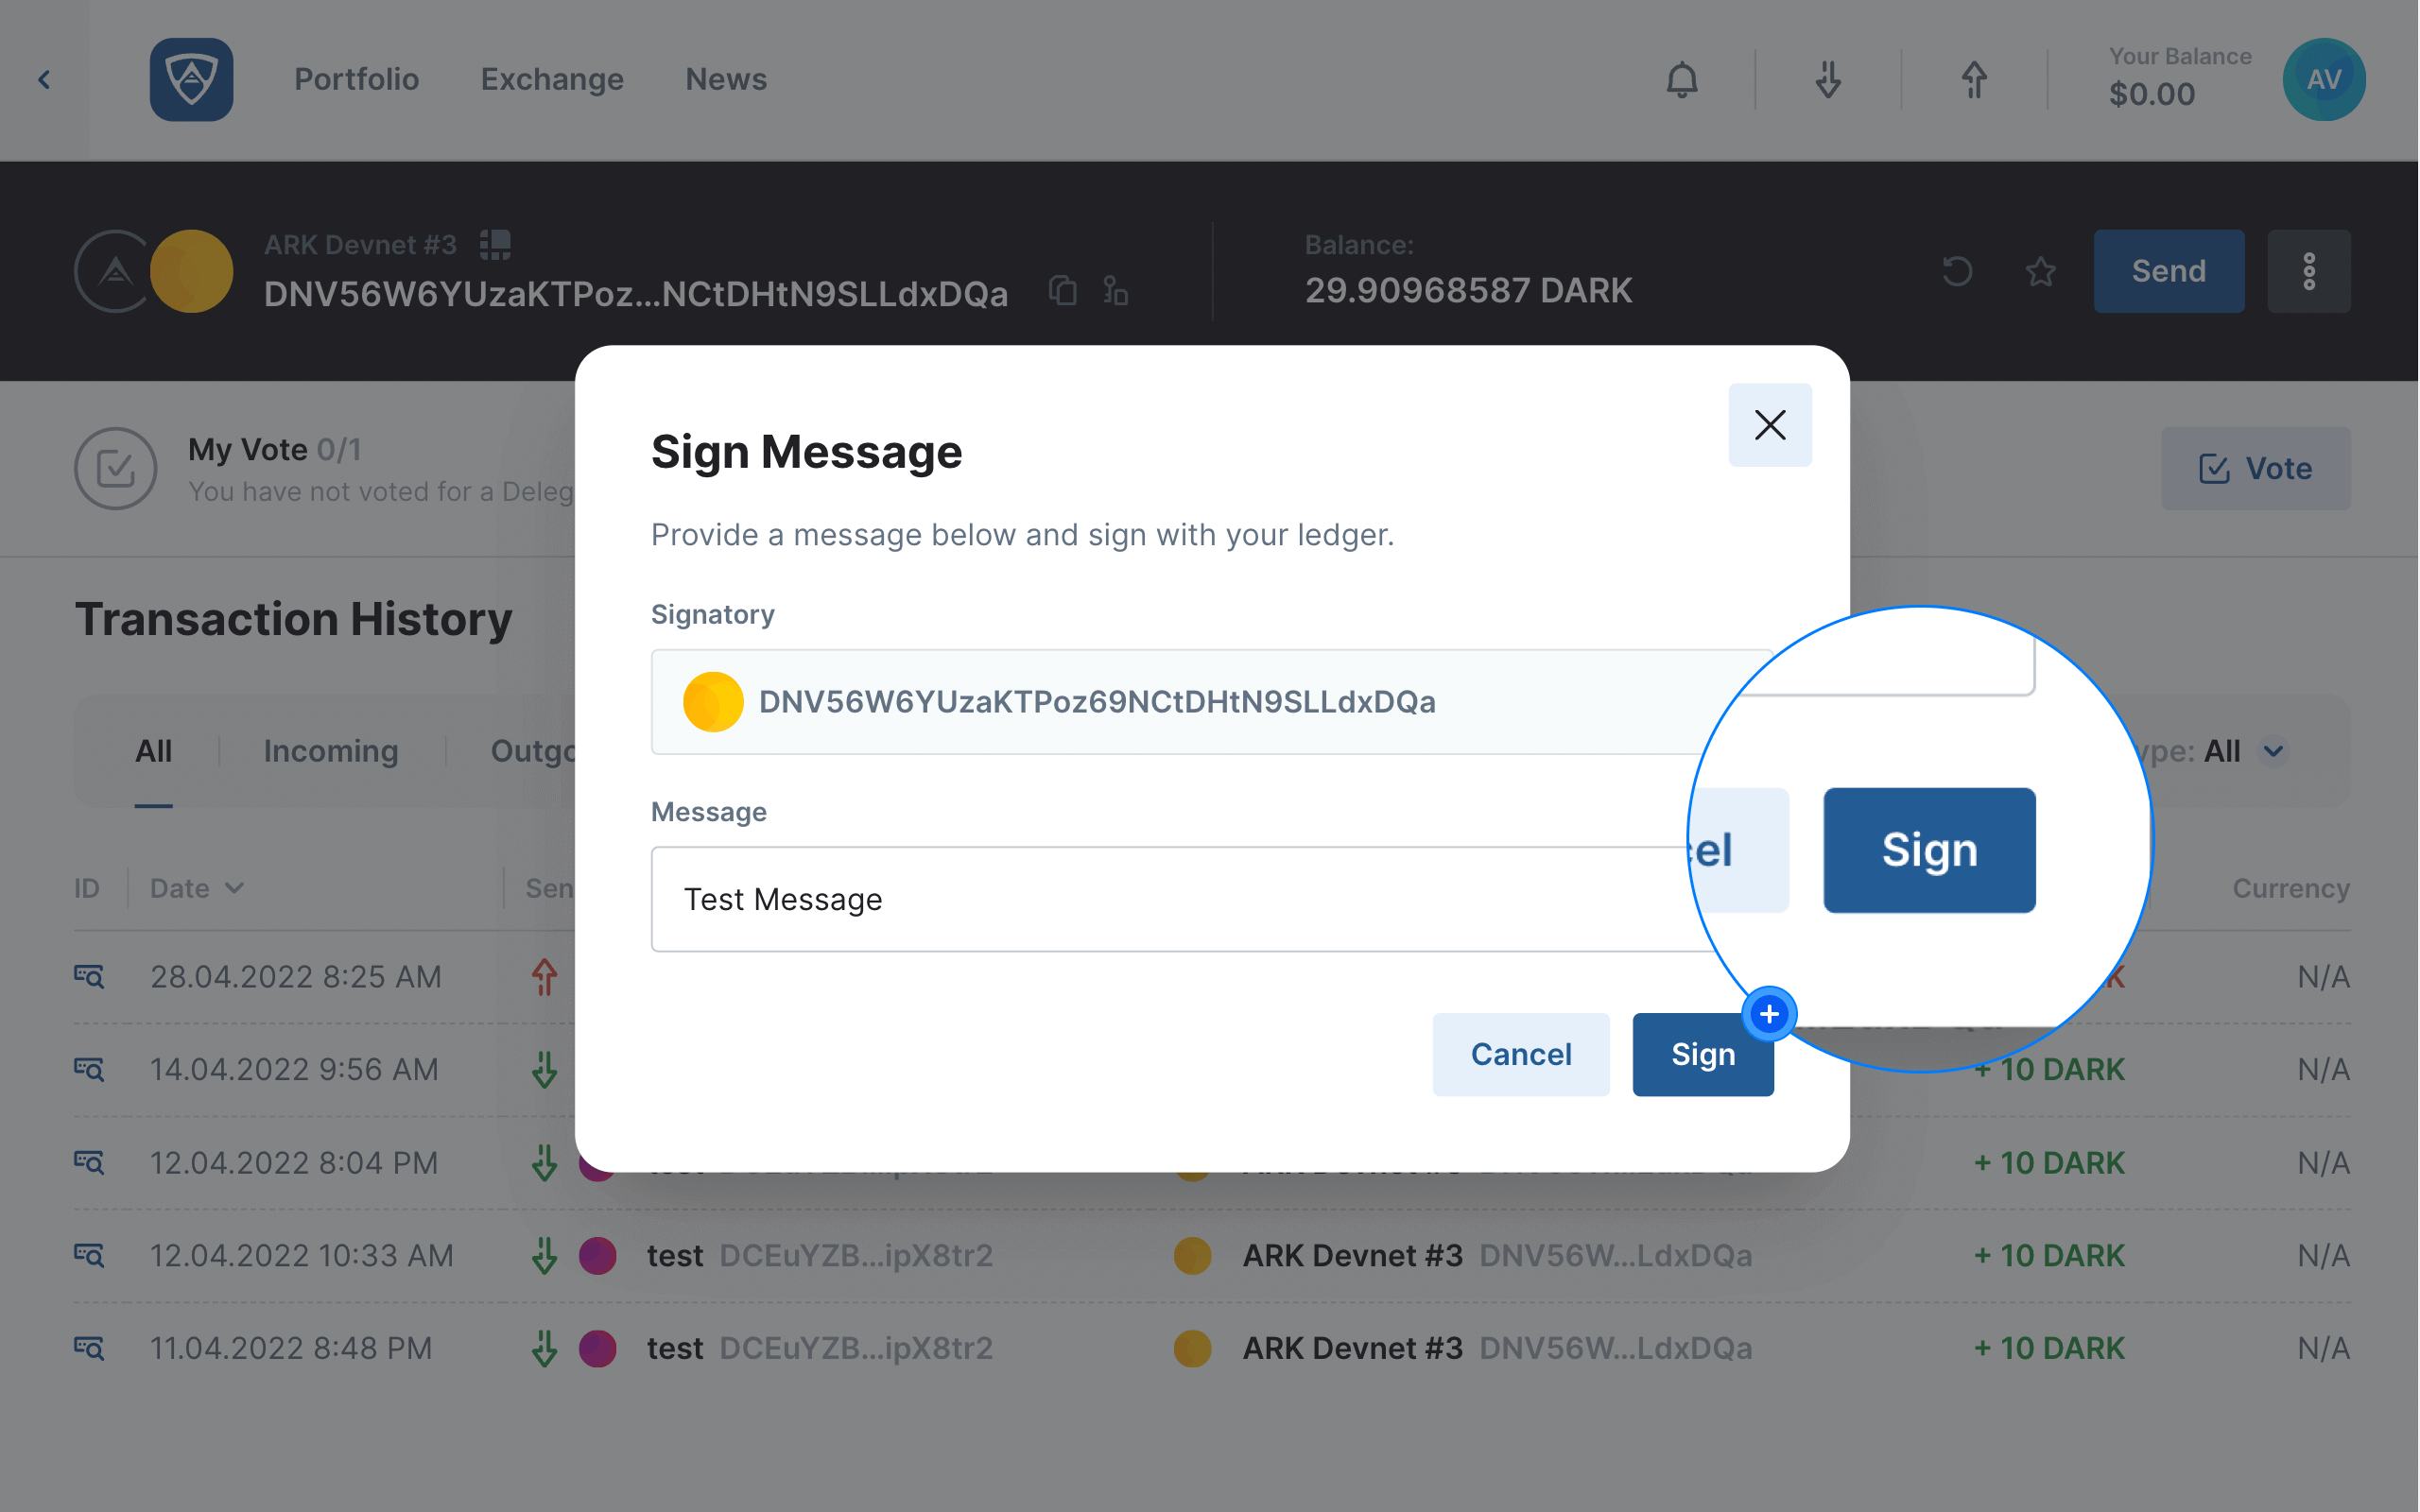
Enter Your Message
The Sign Message modal will appear prompting you to enter your desired text.
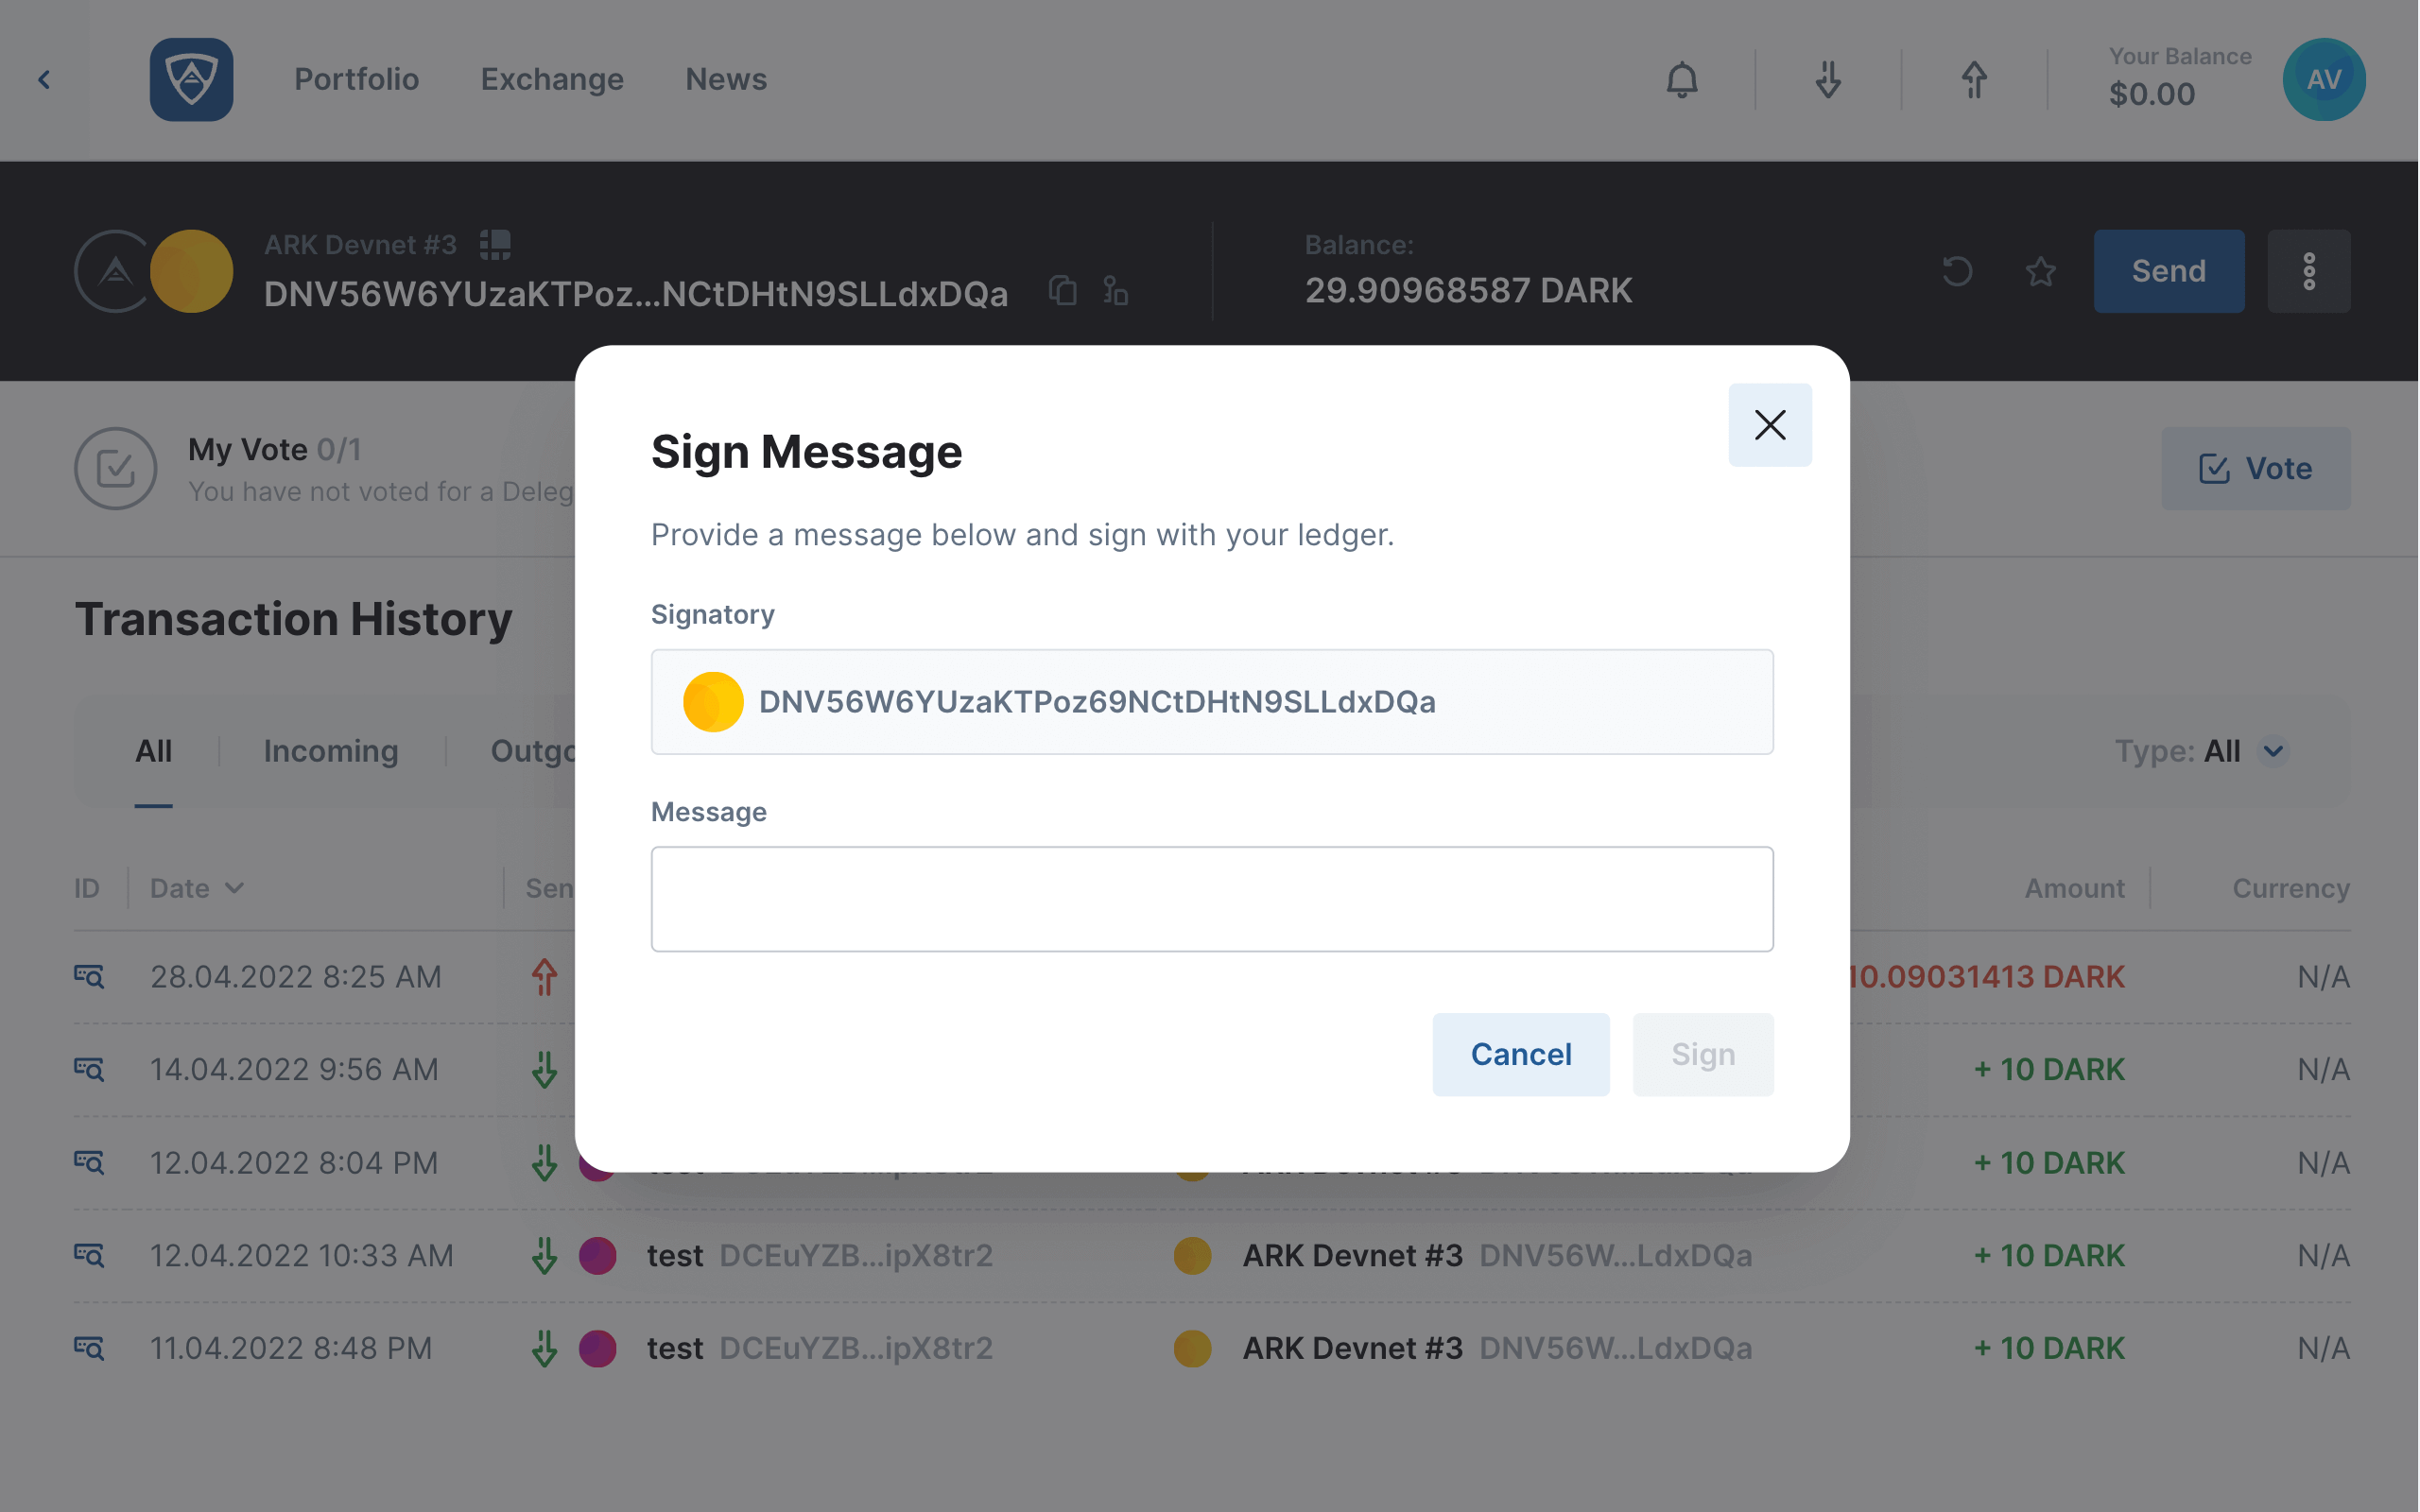
Upon entering the message, click the Sign button to continue. Alternatively, if you wish to make some adjustments or use a different wallet, click the Cancel button.
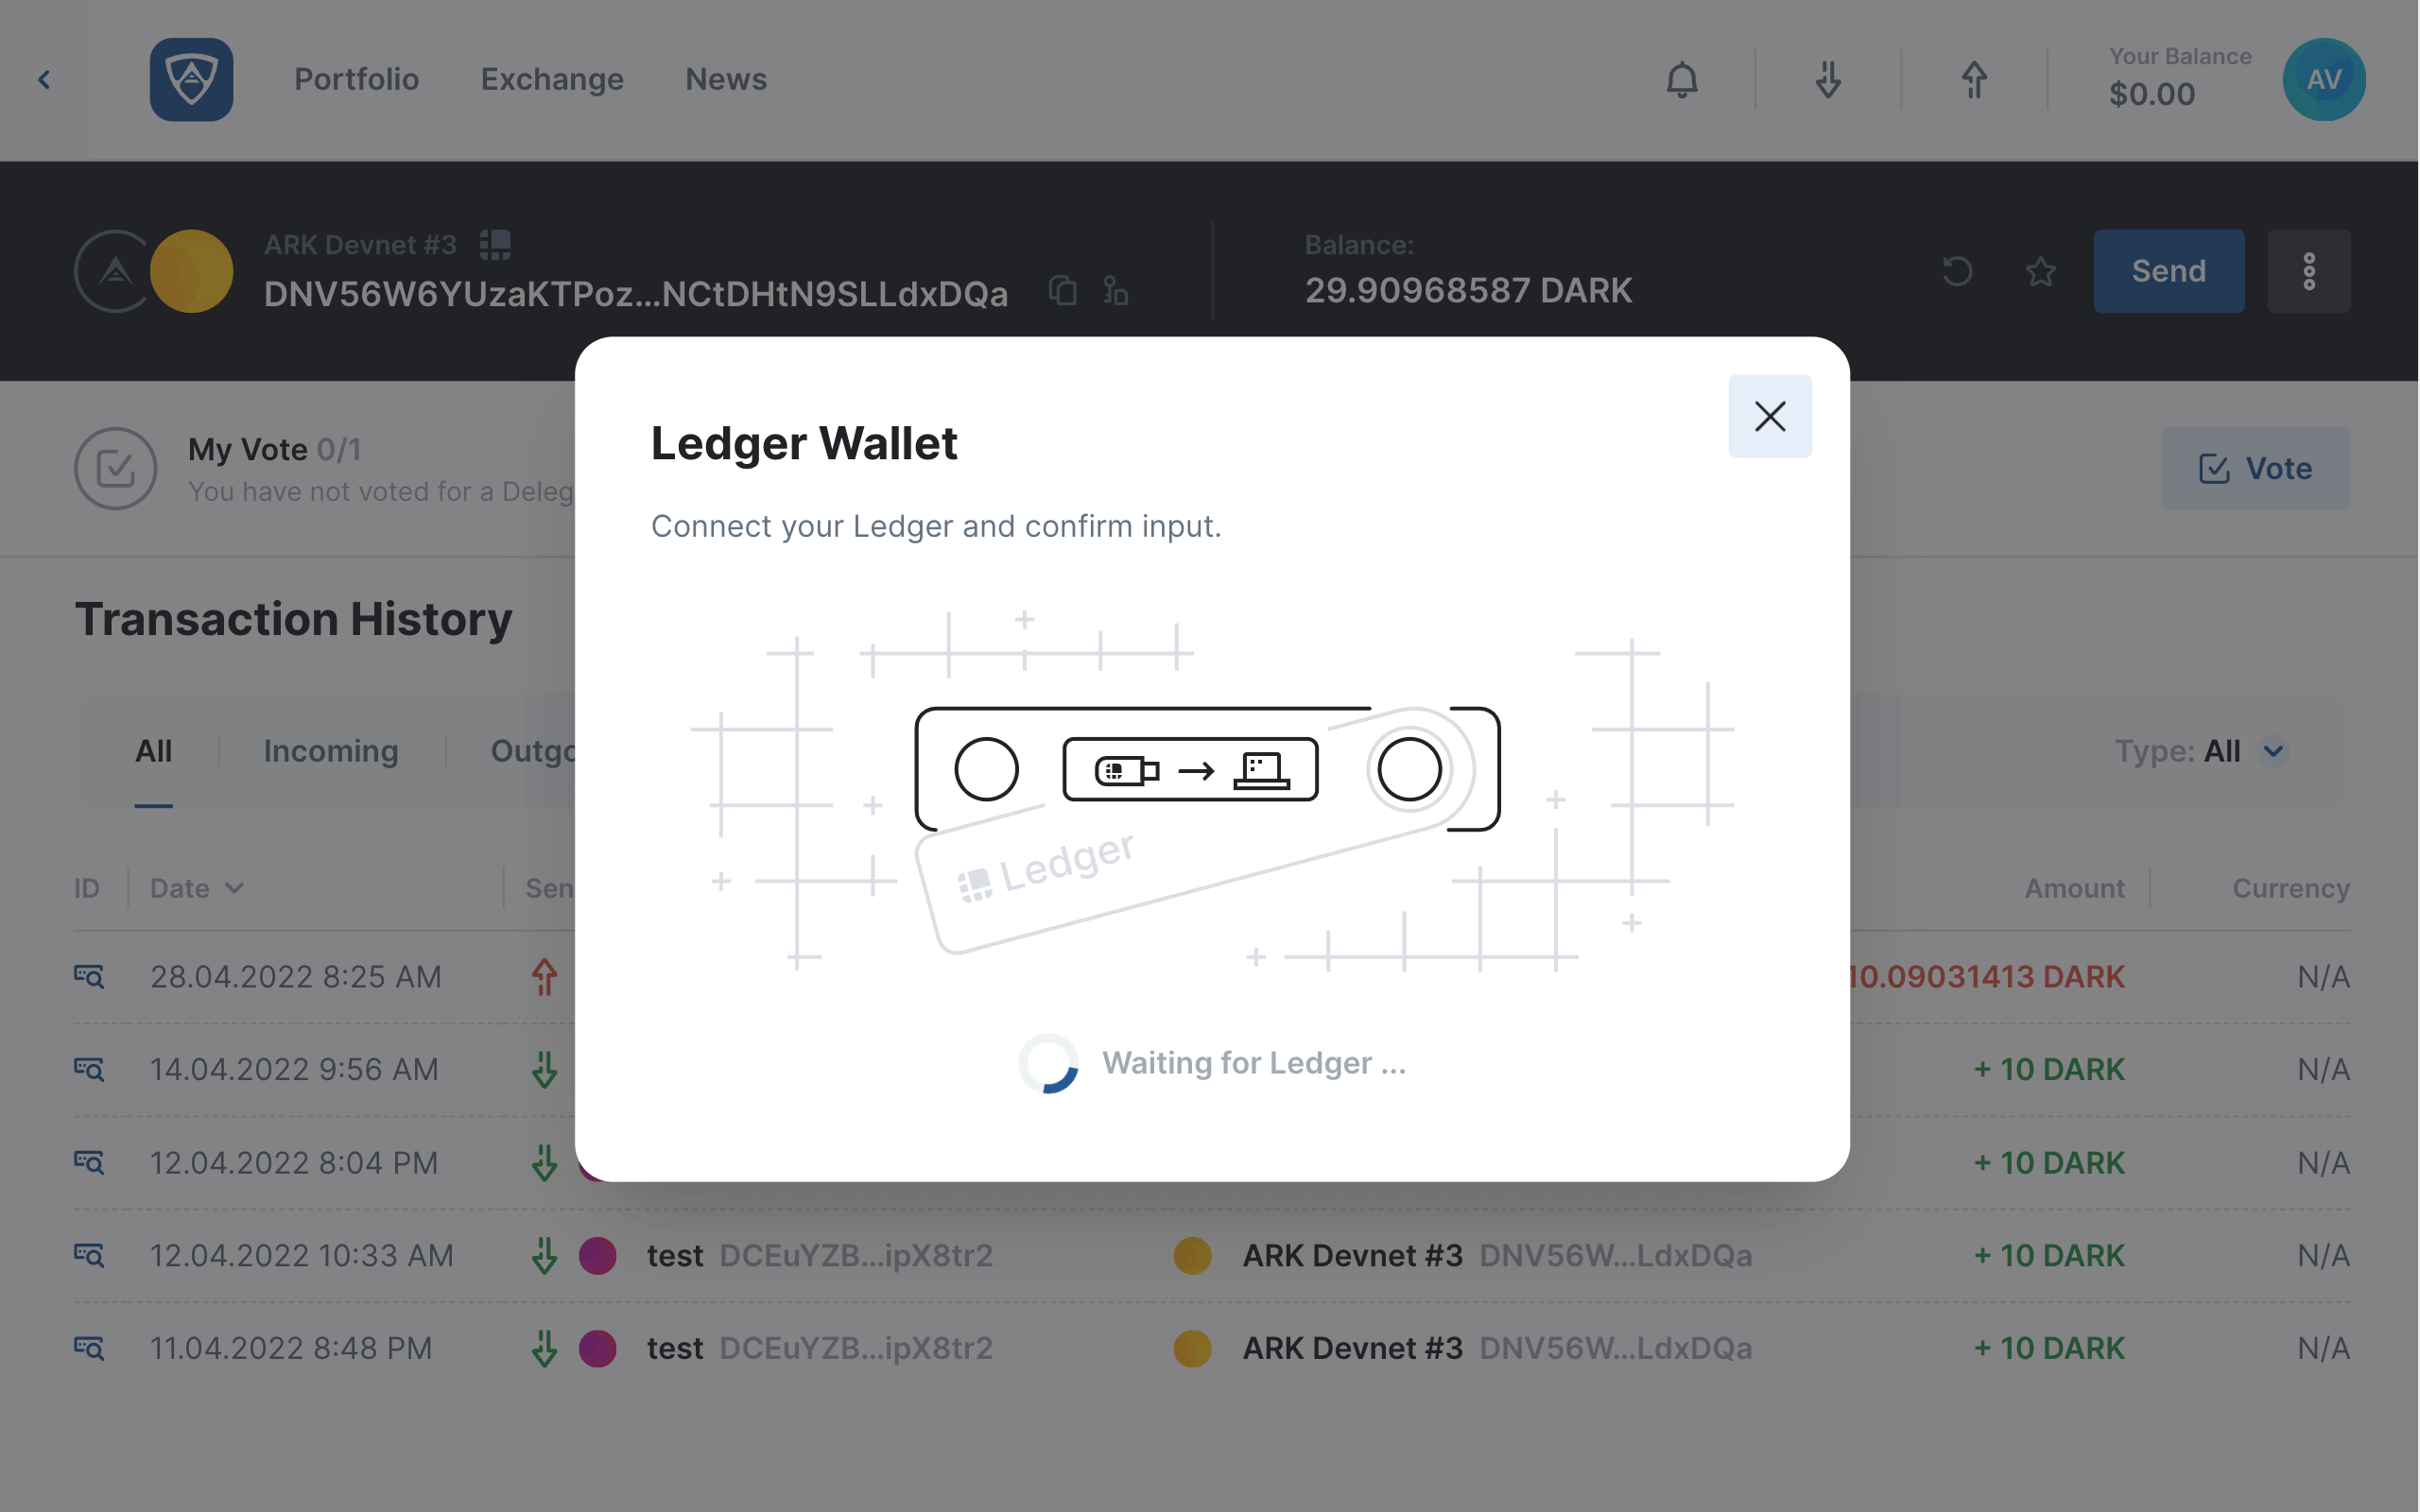
Connect Your Ledger
The Ledger Wallet modal will appear prompting you to connect your Ledger device. Ensure that you connect your Ledger and unlock it so that ARKVault can connect to it as required.
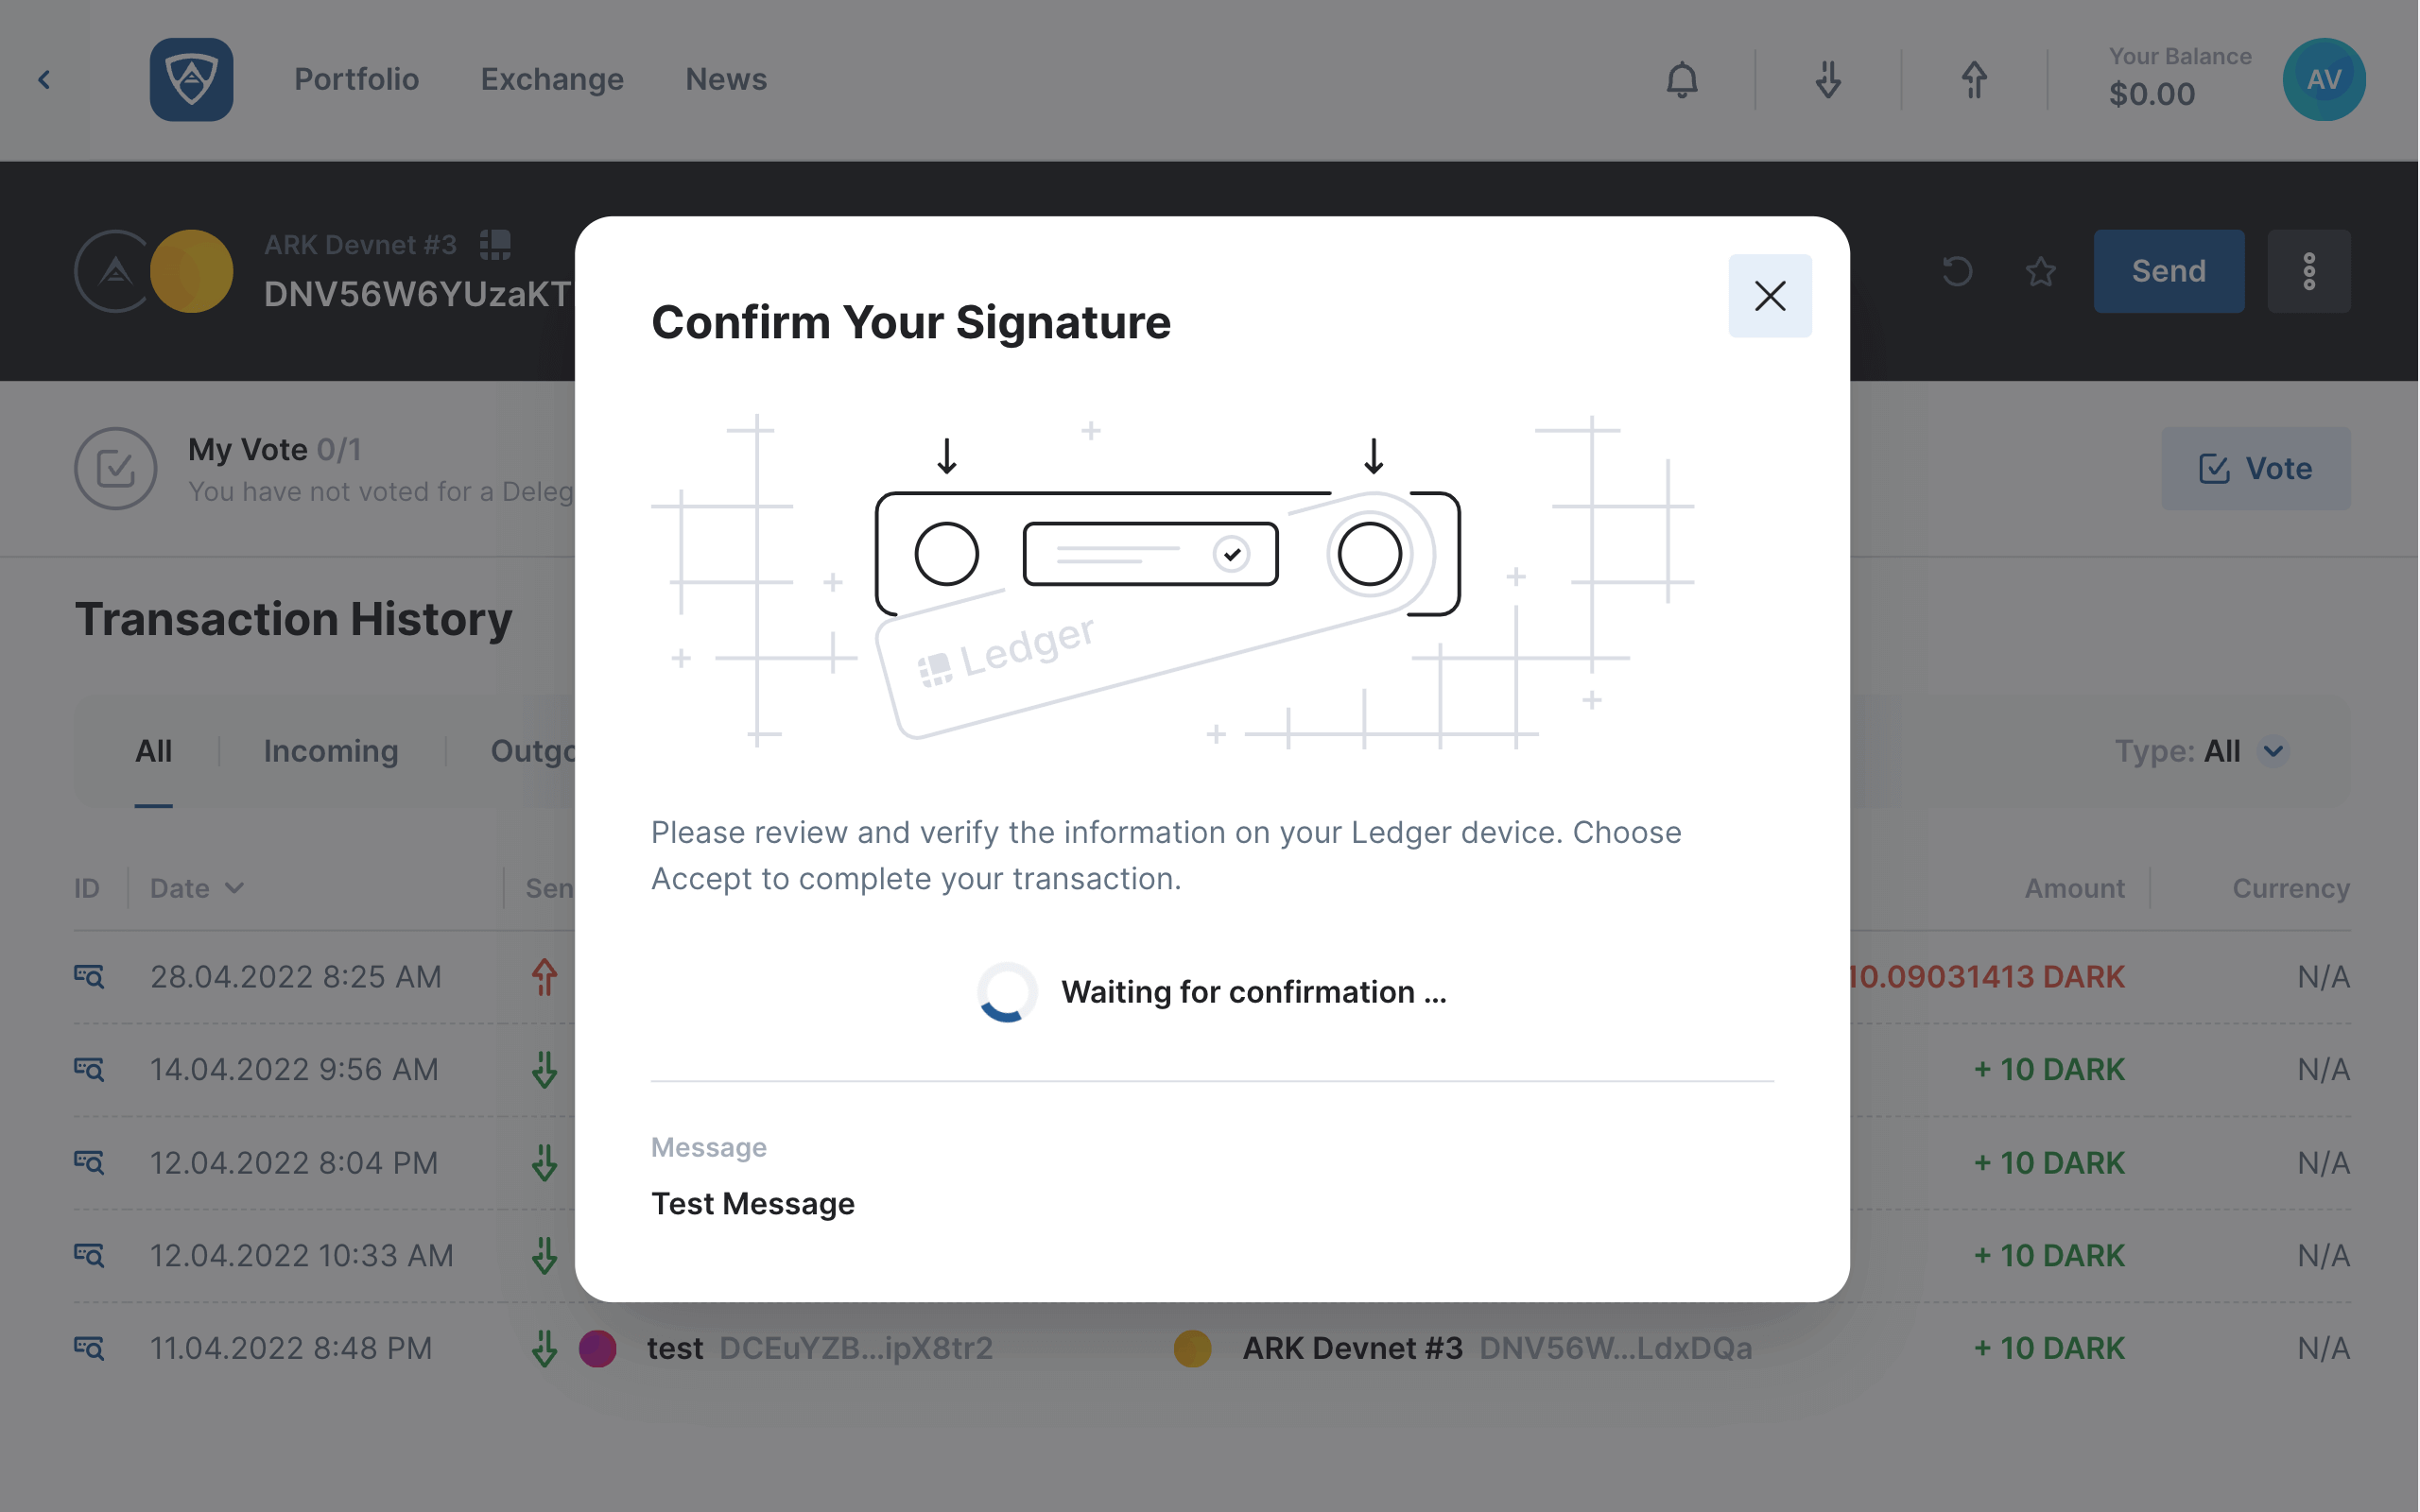
Confirm Your Signature
Upon unlocking your Ledger, the Confirm Your Signature modal will appear. Review the details on your Ledger device and ensure that it contains all the correct details. If satisfied, confirm the message by navigating to the Accept screen and pressing both buttons on your Ledger device simultaneously.
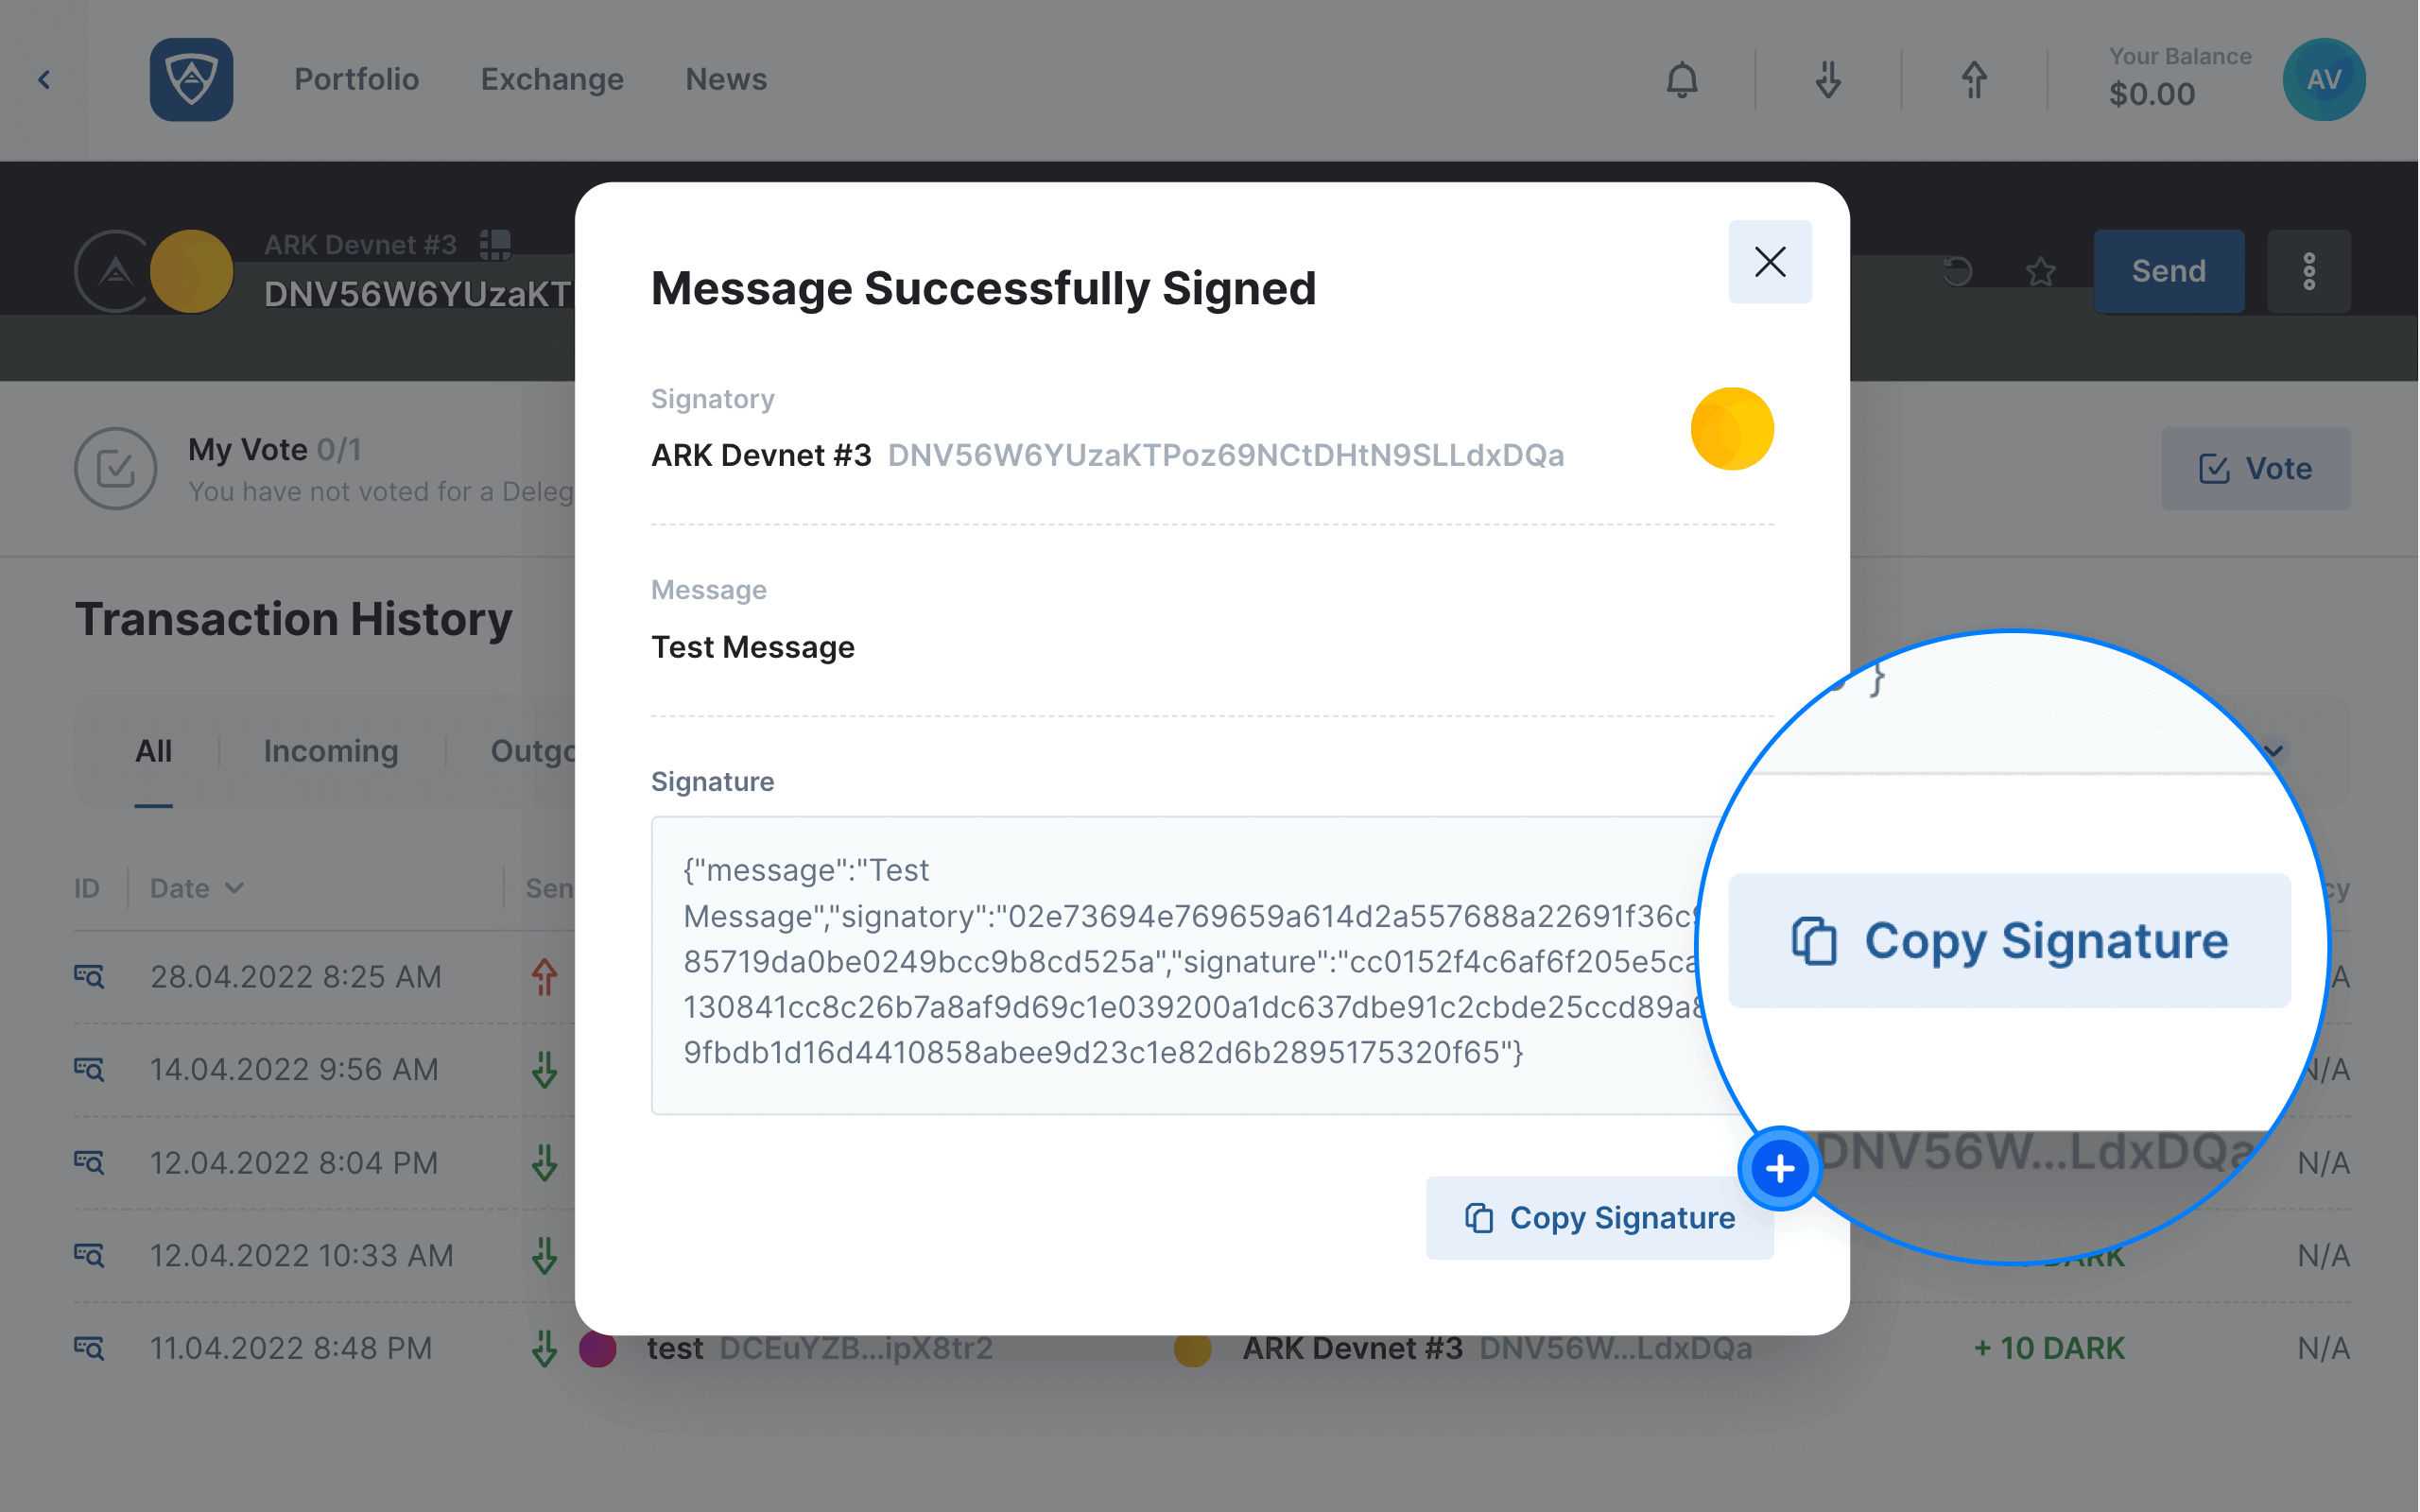
Complete the Message Signing Process
The Message Successfully Signed modal will appear confirming that your message was successfully signed. You may then click the Copy Signature button if you wish to share or store it. Alternatively, click the X in the upper right corner of the modal to close it and continue or terminate your session accordingly.